Formspring.me Q&A Marathon: How Do I Make…This??

So I’ve received a lot of questions in my Formspring.me account asking “How do I make this? with a link to a photo.  Here are my quick analyses of the hotw-tos (and please everyone, chime in in the comments if you’re struck with another way to make these items!):

Hi! How do you sew something like this: http://lookbook.nu/look/392753-i-miss-summer or this? http://lookbook.nu/look/908247-Deserts-eating-Oceans
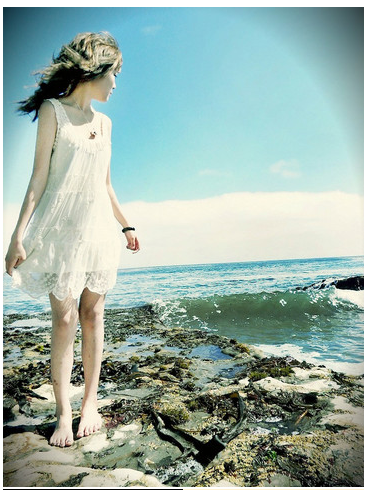
I see lace dresses are on your mind!

The first one doesn’t even look like it is a dress – the edges look completely unsewn and it appears like the person wearing it just added a belt and let the edges flap in the wind.;-)  You could possibly re-create this garment with a piece of lace about a yard or so wide, and literally cut a hole in the center for your neck – and wear half the fabric in the front and half in the back!!  (If it were me, I would allow the sleeves to drape to about the waist, and then sew the skirt part since I wouldn’t be comfortable walking around in a dress that’s kind of like an open toga at the sides…)

The second dress is just a typical tank-style dress; it’s very hard to see the detail on it but it looks like the top has crochet edging along the armscyes and bust; it’s fully lined; and the bottom appears to be gathered tiers of lace.  There may even be little lace rosettes dotted on the bottom tiers but it’s a little hard to tell.  SecretLifeofaBioNerd shared a video on Threadbanger on how to make a sweet lace dress; simply adopt her method for making the skirt (but add a couple more tiers instead of just the one she has), hand-sew the rosettes on there if you like (sourced from the bridal area of your local fabric/notions store), cut and sew a tanktop-style top, and add a crochet applique to the neck area.  Speaking of crochet…


How do you sew this? http://www.easybizchina.com/picture/product/201008/white-cotton-tank-top-with-hand-crochet-507095.JPG Is there a way of cutting the crochet part without it unravelling? Someone told me that if I cut rib knit, it frays, is that true?

Are you trying to re-create this from scratch or are you trying to alter the piece that you have?  If you’re trying to make this from scratch, you will either have to crochet the top embellishment yourself, rip it off of a dress or shirt that already exists, or buy a bridal or crochet applique from the fabric store to use for your piece.  I’ve never seen crochet embellishment like that come on a roll like fabric does; I don’t think you can just go to the fabric store and get a yard of it cut for you to use.  The crochet embellishment would have been made-to-order by the manufacturer’s and even if you can find a big piece; cutting it down to fit the size of your top would just cause the whole thing to unravel (unless you really know what you are doing and snip certain threads and tie them off together etc. as you go…you can certainly try but something like that poses a problem even for experienced crocheters and knitters, so I wouldn’t really recommend it if you can avoid it at all).

Rib knit is an entirely different thing than this crochet piece…if you’re talking about your standard cotton or spandex interlock rib-knit, then it will only fray to the extend that cotton or spandex knit fabric does.  Repeated stretching will cause it to fray more.  In using rib knit, as with any knit, you need to overlock the raw edges to prevent fray and wear and tear.  You can cut it no problem but it will have to be finished if you’re planning on using it in something wearable (especially if that something is washable too!)  But it doesn’t really unravel like crochet or a knitted sweater…unless you find a loose weft thread and yank on it…

If you’re trying to alter this piece that you already have, again, don’t cut the crochet part if you want to retain it at all; just sew on top of it/through it.  (You can add darts or gathers to take up the extra fabric to alter it smaller…to make it bigger I don’t think it’s possible without cutting the crochet, which will have you running into the previous problem.


Hey could you do a tutorial on how to make this kind of structure? http://store.americanapparel.eu/rsatd300.html?cid=139

Ohmygoodness.  Okay, that piece is a huge amount of work.  Not to say that it can’t be done, but if you can buy off-the-rack from American Apparel (still available here BTW!), it will probably be cheaper than all your time and effort going into it.  But if you really want to make a top like that…

Find a rose-embellished mesh fabric and make a basic shirt out of it!!  High-end fabric stores and stores that cater to designers may have exactly this type of fabric, which you can buy in however many yards you need, and then make your shirt out of it.  I did find it online here, but the price is not listed so you’d have to call the company to find out more…and even if you can’t find the fabric as yardage you might be able to re-appropriate something.

I saw this photo on Cruel*Thing of a DIY rose-embellished skirt…made from a pillowcase!  Which is a fabulous idea made even more fabulous by the beautiful pillowcase Diana used.  Bravo!

Do an Ebay search and there’s usually some similar pillowcases available, which you can cut up and use for your shirt.

And if you really want to make every single one of those fabric roses yourself…There’s a great tutorial on Cut Out + Keep, submitted by one of my fave DIY’ers Stacie G. from Stars for Streetlights on making a Fendi-style rose dress, which you can adapt for making a shirt like this.  The shirt you want to make uses flat chiffon cording to make those roses – if you check out the trims section of your local fabric store, you can probably find this similar flat trim.

Good luck!

xoxox

Carly

Ask Me Anything! on Formspring.me

~If you liked this post, please share it!~

Leave Comment
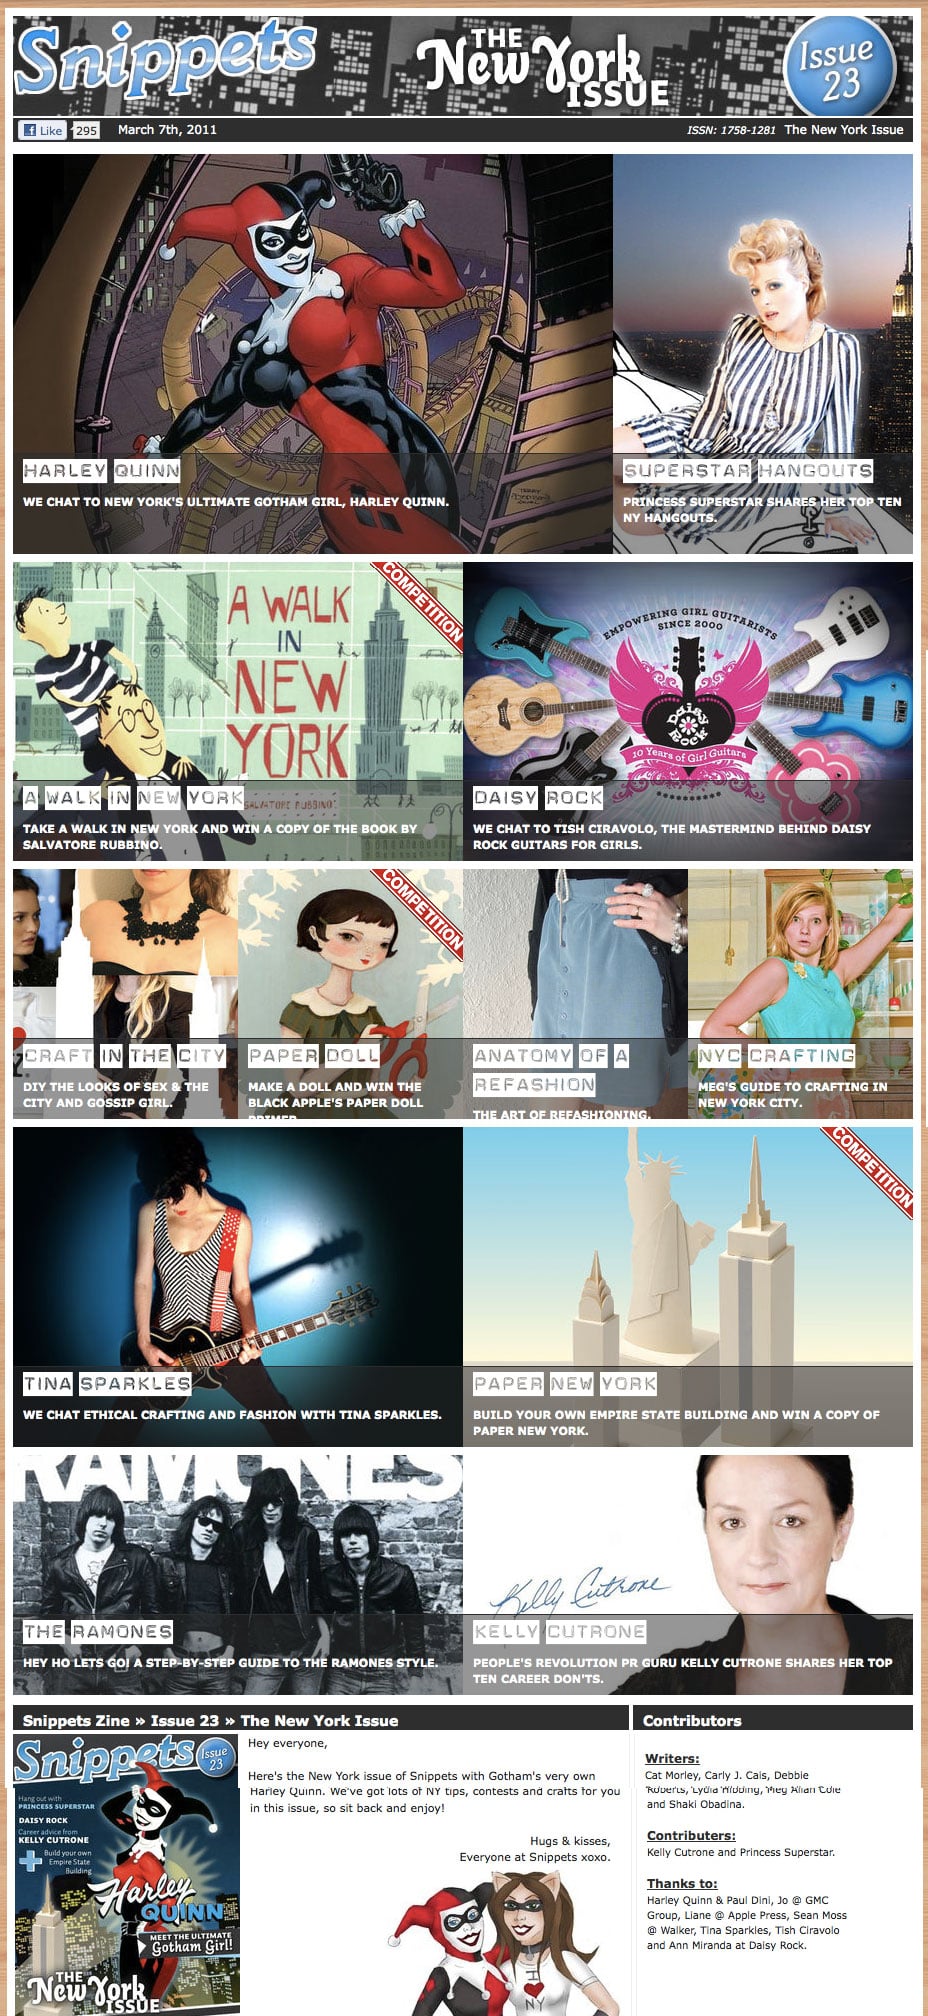
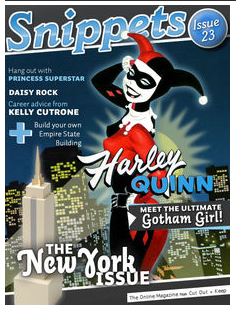
Featured in Cut Out + Keep’s Snippets Magazine: The New York Issue!

There I am – halfway down on the left: “Craft in the City”
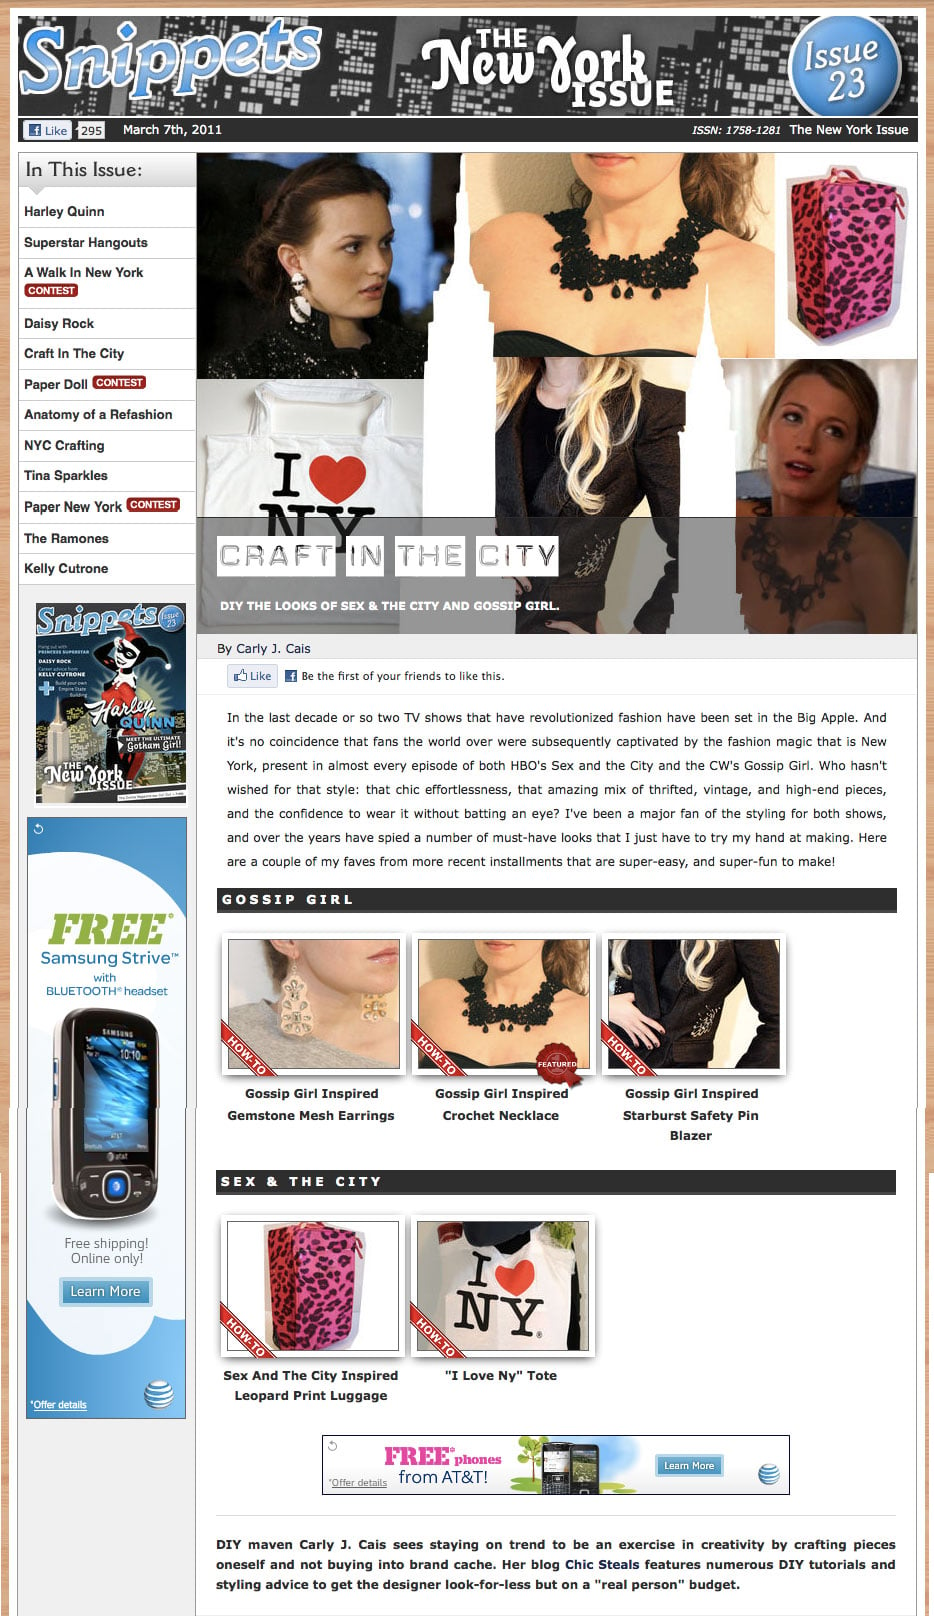
It’s taken me a little while to post this, but I hope you’ll forgive…

I contributed some tutorials to the latest issue (issue #23) of tutorial-sharing site Cut Out + Keep‘s Snippets Magazine!

In The New York Issue I shared projects that are – what else? – New York-inspired…

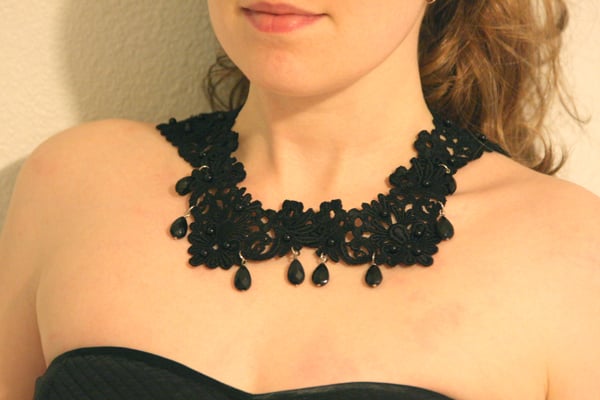
Like these projects inspired by Gossip Girl:
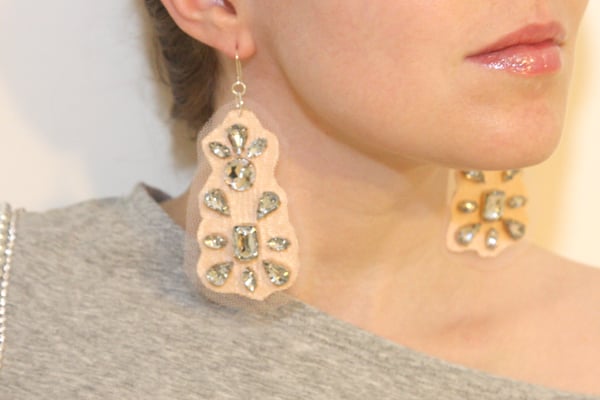
Mesh Rhinestone Earrings

Crochet Necklace

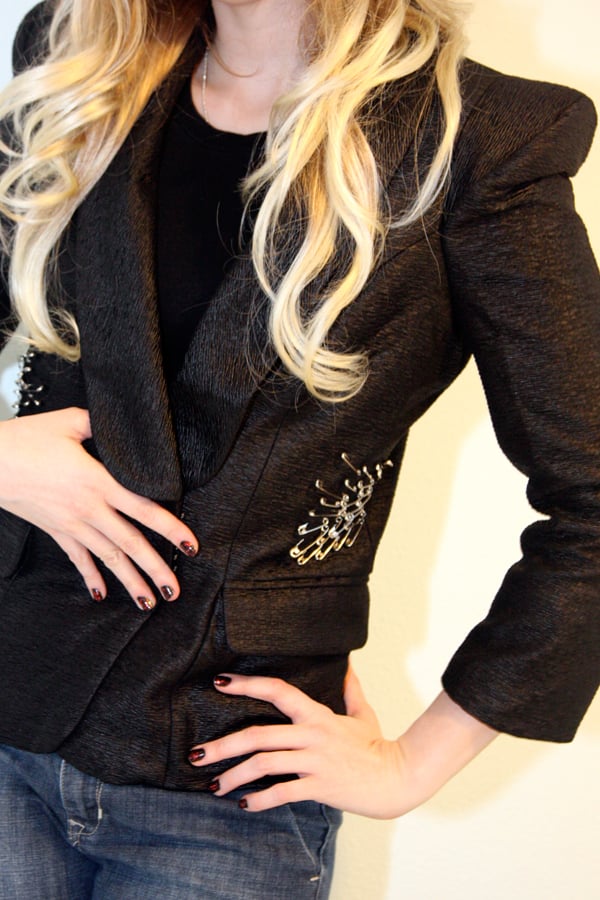
Starburst Safety Pin Blazer

And this project inspired by Sex and the City:

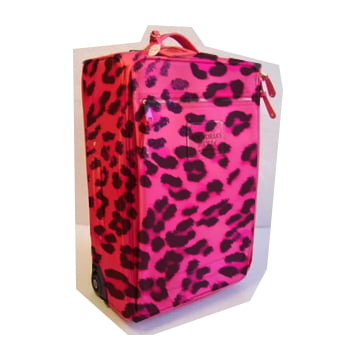
Pink Leopard-Print Luggage

And this project just because I love New York!!

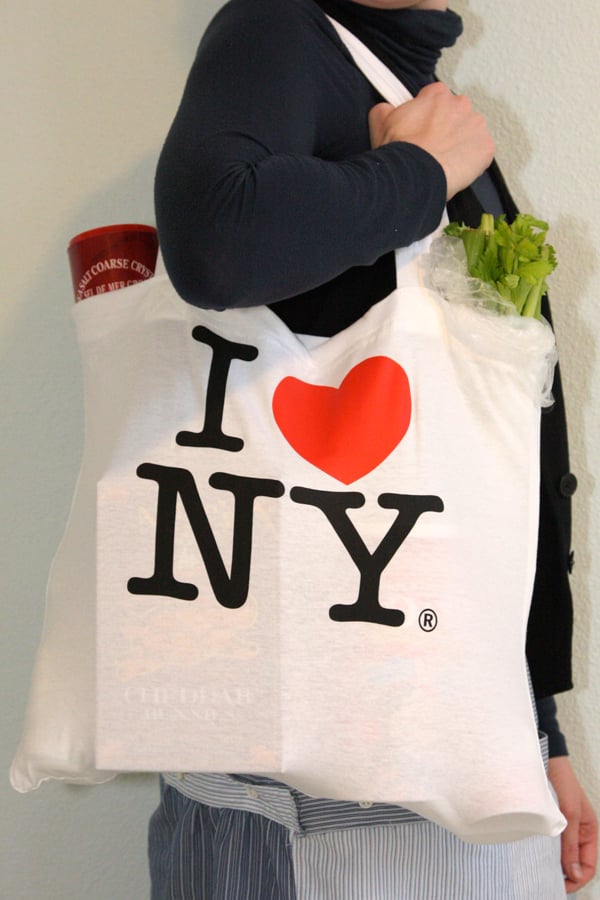
I Love NY Tote Bag

Please check them out and let me know what you think!  And also check out the rest of the issue…it has a great interview with Harley Quinn from “Gotham Girls” (LOL!), Meg (formerly of Threadbanger fame) and her guide to crafting in NYC, and some wonderful tips on refashioning your clothing!

Read the Full Issue Here

Thanks so much to Cat and the team at Cut Out + Keep for the collaboration!  I truly appreciate it!

xoxox
Carly

~If you liked this post, please share it!~


Leave Comment

Outfit 4.11.11 – All in Grey…and All Thrifted

Fuzzy Cropped Sweater: DKNY (thrifted from Goodwill)

Sheer black Blouse: unknown (thrifted from Goodwill)

Silver Cross Necklace: handmade by me

Grey stud-pocket Jeans: Roxy (thrifted from Goodwill)

Padlock Bag: Aldo

Puffball Bag Charm in Brown: my Etsy shop

Multi-Buckle Wedge-Heel Boots: (from Japan)

I haven’t been sharing outfit posts as of late, partially because I haven’t been sure if my readers (youse guys!!!) are actually interested in seeing outfit posts or not.  I’m not sure if I identify with being a Style Blogger exactly…maybe more of a DIY’er and how-to’er?  Er.  Er.  So I’m always unsure of whether to share an outfit or not that really has no elements of DIY in it, because yes sometimes it does feel like I’m saying “Look at me!  Look how stylish I am!  I think I’m so pretty and here’s my photo to prove it!”  On the one hand, it feels kind of vain, on the other hand, I myself like looking at other people’s outfit posts because not only do those photos give me a real sense of who those people are, but I also discover new and lovely items from others’ posts, and am awash with new ideas for styling and incorporating different elements into my daily wardrobe.

So anyway, for better or for worse, just to throw it out there…here’s what I wore yesterday.

(more…)

Leave Comment

Interview with Tiffany Gong of Six Six Sick

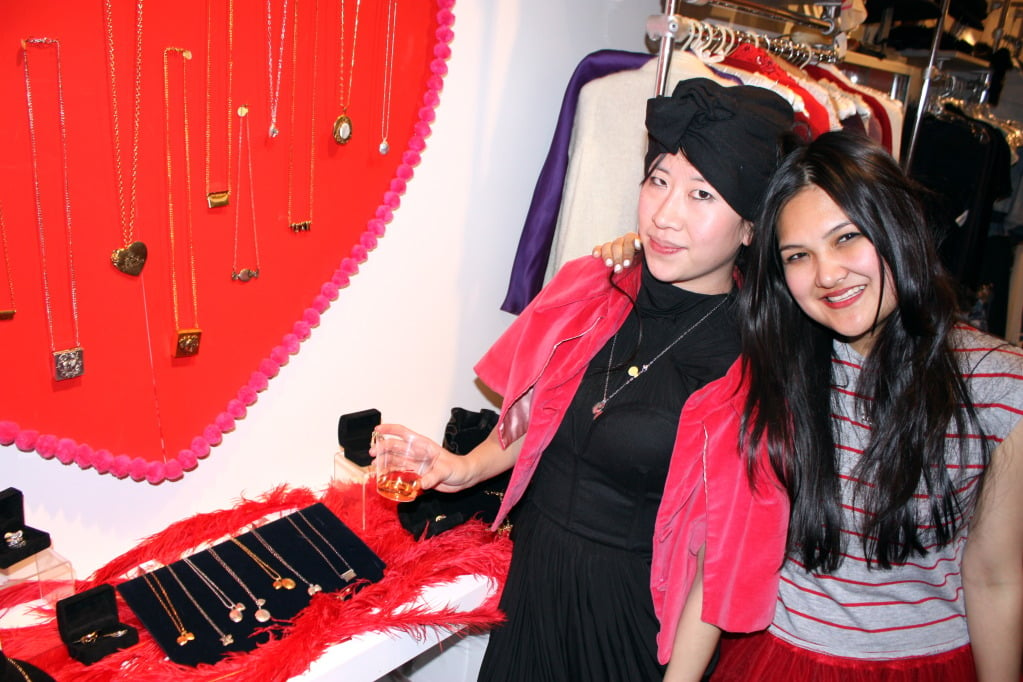
It’s been awhile since I’ve had the pleasure of interviewing a well-known DIY diva…and the other day I was able to hook up with Tiffany Gong from the popular Six Six Sick blog (and group of the same name).  Back when I started my own blog, this one was one I was constantly checking – one of the authorities when it came to DIY, fashion, and fun.  Online since 2008, Tiffany and her good friend Christina Rodriguez first launched the blog to showcase their amazing Six Six Sick parties (which won PAPER 2007 Best New Party at the Nightlife Awards), high-fashion DIY’s, and to provide a window into a whirlwind world of New York nightlife, DJ’ing gigs, creativity, and droolworthy indie designer pieces.  The designers launched their jewelry line Triskaidekaphobia together last year, and continue to share their inspirations, ideas, and creations on their blog.

Could you give some background to both of you?  Did you both go to school for Fashion Design?

I actually went to Swarthmore College and studied Art History. After deciding I wanted to change careers and become a jewelry designer, I went back and got an Associates Degree in Jewelry Design at F.I.T.  Christina studied fashion design in college.

When and how did you two meet?

Christina and I met as interns at Anna Sui, and become quick friends from there!

How did Six Six Sick come about?  What were your goals with it?

It’s a very long story, but to be brief, it started as a party at Happy Endings a few years ago that my friends and I threw. We used to make our matching outfits every week for the party, and after a while I thought it would be fun to document the process, and our other DIY projects, so I started the blog. Along the way, it’s become a place to write about our jewelry line Triskaidekaphobia, or whatever I’m passionate about in fashion at the moment, and a place where I can support all my talented designer friends.

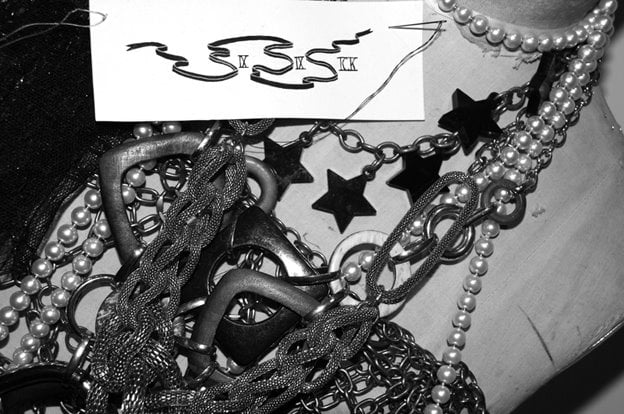
Triskaidekaphobia Saw Teeth and Human Teeth Double necklace, available here

You now have a line called Triskaidekaphobia, seen on celebrities and sold at retailers such as Kabiri, Revolve Clothing, and Screaming Mimi’s.  What goes into the design process?

A lot of different things go into the design process, but we start by going to the library and doing research on a theme that we’ve chosen, and then make an inspiration board filled with images surrounding that theme. After that, we start sketching and making the models for the jewelry, which are designed and developed as we go along.

I understand Christina used to have a line called Arms & Armory…could you tell me a little more about it?

Christina still designs the Arms & Armory line separately with her boyfriend James. You can see the collection on her website, www.armsandarmoryjewelry.com.
Mary Katrantzou Spring/Summer 2011 Collection Dress

You also showcase a number of independent and emerging designers on your blog.  Any favorites in particular?

I have too many favorites to name, but my two ongoing obsessions are Mary Katrantzou and Rodarte. Also, I have plenty of love for all of my super-talented designer friends, who I will always go out my way to feature on the blog.

Are there certain techniques or details you love in fashion – or replicating in DIY?

As a jewelry designer, I feel like 95% of costume jewelry out there is DIYable and easy to replicate.  DIY clothing projects require a little more time, knowledge and experience to get it done properly. I prefer to do DIYs of things that I know how to replicate proficiently, like knitwear.

How would you describe your style(s)?

I don’t know if I would describe my style in any particular way, except that it is always inspired by whatever I feel particularly into at the moment.  Slightly off-kilter, never perfect.

DIY Gareth Pugh Boots

What camera are you shooting with?

Canon EOS Digtal.

What would be a “typical day” for you?

Since I work for myself, my day and my schedule vary depending on what needs to get done. Typically I meet up with Christina in the afternoon and we work, and then I get my blogging done in the evening. During the week, there are also press events, and of course our own parties that happen at night, and this usually occupies about 3-4 nights a week.

Has blogging helped accomplish things or opened doors that you might not have found otherwise?

While blogging has definitely opened doors and introduced opportunities that probably wouldn’t have been available otherwise, I think the most incredible thing that’s come out of blogging is meeting so many incredible people–particularly other bloggers.  I feel very lucky to be part of a community of like-minded individuals, and have developed some great friendships.


Thanks so much for the interview, Tiffany!

Please check out the Six Six Sick blog if you’d like to know more about up-and-coming designers, visit a number of showrooms and drool at the covetable pieces within, follow Christina and Tiffany to the events and parties they attend, stay abreast of developments in their line Triskaidekaphobia, and devour posts on the most amazing DIYs that they share!

xoxox

Carly

All photos from the Six Six Sick blog and used with permission.

~If you liked this post, please share it!~

Leave Comment

DIY: 3 Men’s Shirts to Convertible Skirt

Get This Tutorial As a PDF

7 DIY Men's Shirt Makeovers ebook

This tutorial has been updated, and is now available as a full step-by-step with photos in my new book 7 DIY Men’s Shirt Makeovers, part of the DIY Men’s Shirt Makeovers System.

Well, it’s high time I shared another men’s shirt refashion, no?:-)  Spring is in the air and I’m looking at lighter layers and breezy fabrics.

I last wore this piece on Day 15 in my 30 Days of Outfits Challenge back in November of 2010.

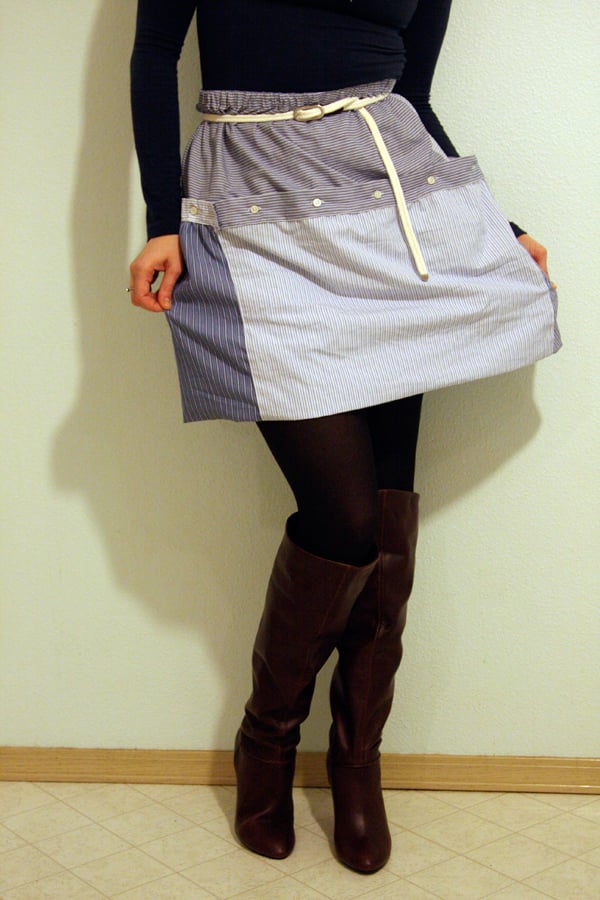
This particular project uses 3 men’s button-down shirts…which may seem like a huge waste, but if you do have a bunch of old shirts laying around, or have shirts where the arms/collars are damaged and no one can wear them anymore, or if you are buying items at 80 cents a pound from the Goodwill Outlet…then it may seem like a useful repurposing.  (I used the back of a shirt I had leftover from a previous DIY, and one shirt we were getting rid of since the cuffs were frayed, and one I bought from Goodwill.)  And you can obviously use black shirts or differently-patterned shirts so you can create a piece that’s more your own style or works better in your closet than a blue pinstriped piece (which is what I chose to make).

In any case, these shirts can be made into a cute little puff-bottom skirt, whose buttons can be unbuttoned so you can wear it as a puff tube top, OR a midi-length long skirt, OR even a tube-top dress for when the weather gets warmer.  Here’s how to do it:

Project Difficulty:  (intermediate)

You Need:

3 men’s button-down woven shirts (only 2 are pictured above…since I first tried to create this skirt using only 2 shirts – which I found impossible.  My shirts are size XL.)  /  1/2″-wide knitted waistband elastic (don’t get the roll-resistant type; I did and found it “catches” on the lightweight shirt fabric too much when threading it through the casing, making what should be a very simple process extremely difficult)

Tools:

scissors  /  tape measure  /  marking chalk  /  pins  /  safety pin  /  matching thread  /  sewing machine  /  needle for light- medium-weight wovens  /  iron & ironing board  /  about 2 yd. elastic cord (not pictured; you’ll be removing it from the final piece anyway)

How To:

Make the Top Piece

1. Open two of your shirts and lay them with the right-hand sides flat.  Measure a piece 9″ wide (including the button placket) by as high as you can get to make a rectangle shape on each right-hand side.

2. Cut out each rectangular piece.  Also cut straight across the bottom edges to perfect the rectangle – which I haven’t shown above.

3. Sew the short ends of the button-side of the 2 front pieces together to make a circle.  This will be the Top Piece of your skirt.

Make the Main Piece

4. Fold the back of one of your shirts in half (vertically), and measure 9″ from the fold, in a straight line at the bottom of the shirt.  Mark that line.

5. Draw straight upwards from the end of the line, as far as you can to the top of the back part, then draw another horizontal line heading back to the center fold.  Cut – and you now have a large rectangle 18″ wide and as long as you can salvage from the back of the shirt.

6. Repeat this for the back pieces from your remaining 2 shirts.  You should now have 3 large rectangles – all 18″ wide and as long as you could get from the shirts.  If your fabric is super-wrinkly, now would be a good time to iron all those pieces flat.

7. Sew the 3 rectangular shirt-back pieces together along their long ends using a French seam.

Not sure what a French seam is?  To put it simply, you place the fabric pieces wrong-sides-together and sew the seam.  (So the seam allowances are on the outside of your project.)  Then you flatten the seam allowances to the left, and then fold the allowances + fabric underneath them to the right, and topstitch the seam to conceal the raw edges.  (You can see the fold at the top of the photo above, and my raw edges which I’m concealing as I go at the bottom.)  By creating French seams, this allows the skirt bottom piece to be finished completely on the wrong side as well – so it will look perfect when you flip it to the outside for the puffy bottom to the skirt.  You can get the illustrated how-to instructions for sewing a French seam here.

Attach the Skirt Pieces Together

8. To size the skirt Main Piece to fit with the Top Piece (which isn’t quite as wide), zigzag-stitch over a piece of elastic cording (with one end knotted) – onto the underside top edge of the skirt Main Piece.  Keep the stitches loose and make sure they go over the cord and don’t catch any part of the cord in the needle.

9. Pull the cord to gather the fabric of the skirt Main Piece.  Pull the cord until the circumference of this piece is about the same as the circumference of the skirt Top Piece.

10. Pin the skirt Top Piece over the Main Piece – overlapping enough so you can stitch above the buttons and catch the skirt Main Piece beneath. Stitch, following the seam of the button placket (but not through the elastic cord at all).  Remove the elastic cord by pulling backwards on the knotted end.

Create the Hem of the Skirt

11. Cut off the left-hand buttonhole placket from 2 of your shirts.

12. So you now have 2 buttonhole plackets.  Take the two buttonhole plackets you cut off…

13. And sew them together, end to end, to make a circle, using French seams.

14. Re-use the piece of elastic cord you used in Step 8), and zigzag-stitch over it at the bottom raw edge of the skirt.  Pull on it to gather the bottom hem of the skirt so it is the same size as the buttonhole placket circle piece.

15. Pin the bottom raw edge over the buttonhole placket circle piece.  (Don’t worry about lining up the buttonholes to the buttons at the junction of the Top Piece and Main Piece of the skirt…they won’t line up perfectly, and that creates a bit of a “puffy” shape to this skirt anyway.)

16. Topstich the buttonhole placket on top of the raw edge hem of the skirt (do not stitch through the elastic cord).  Again, I followed the line of topstitching of the placket that already existed.

17. Remove the elastic cord by pulling on the knotted end and slipping it out from under the zigzag stitches.

Create the Skirt Waistband

18. To make skirt casing for the waistband elastic, fold the top part of the skirt under about 1/4″, and then under again about 5/8.” Stitch to create casing. (If holding down the double fold is too tricky, you can always fold down 1/4″ and stitch, and then fold down 5/8″ to be really precise and neat.) Leave about 1″ unsewn so the elastic can be added.

19. Measure your elastic by place it at your waist, and cutting it where the ends meet.  (You’ll be overlapping the ends about 1/2″ when sewing, which will create enough tension to keep the waistband in place once finished.)  Attach a safety pin to the end of your elastic piece, and thread through the casing from the 1″ opening you left in the previous step.

20. Overlap the ends of your elastic by 1/2″, and stitch over them, making a rectangle with an X through the center for strength.

21. Slip the elastic ends inside the casing, and topstitch the 1″ gap to close.

And You’re Done!

Though technically I think it’s really meant to be a little puff-bottom A-line skirt, with the buttonhole placket on the hem folded up and buttoned onto the buttons on the top piece of the skirt…

You could also wear it as a tube top dress with the waistband pulled over your chest, and the buttons undone.  The Top Piece creates a nice little “shelf” at the bodice – which looks sweet and summery when belted…

And you could also wear it as a longer midi-length skirt (with the buttons unbuttoned), though I found it’s a kinda difficult length to pull off…

And when I tried to style it as a tube top (with the buttons buttoned and the waistband worn over my chest), I realized I looked like I was in maternity wear. (*’0’*)

In retrospect I should have ironed this piece again before I took more pictures – it had been squashed in my closet awhile.;-)

In any event, I know I’ll be able to find a lot of use for it as a skirt – especially when I want to add some pattern to an outfit that is in desperate need of breaking up the solid blocks of color I always default to.;-)

Happy DIY’ing!
xo
Carly

Get This Tutorial As a PDF

7 DIY Men's Shirt Makeovers ebook

This tutorial has been updated, and is now available as a full step-by-step with photos in my new book 7 DIY Men’s Shirt Makeovers, part of the DIY Men’s Shirt Makeovers System.

Leave Comment

Pin It on Pinterest