Jan 17, 2011 | Blogging
It’s my 3-year blogiversary! I can’t believe Chic Steals is now 3 years old. It’s been an amazing journey, and I’m hoping the best is still yet to come! Thank you all for being on this journey with me – your readership and support has been invaluable as I’ve found my voice and discovered what it is I can contribute to that great wide (virtual) world.
So changes are now in the air! After many years on Blogspot I’ve finally decided to take the plunge and move this blog over to WordPress. I have no idea how long this will take me, though I’m going to try to get it done this week. As a result, there may be times when you try to access my site and find it down, with broken links, or the RSS feed doesn’t show up. Please bear with me…I will get it fixed eventually!
So thanks for an amazing 3 years…and here’s to 3…13…30…more!!
xoxox
Carly
~If you liked this post, please share it!~
Leave Comment
Jan 16, 2011 | Life, Score!
If you want $50 to spend on any of the amazing designer pieces featured on Wardrobe Ave, don’t forget to enter the giveaway! Entry period ends tonight at 11:59 PM PST, so get those entries in while you still can!
xoxox
Carly
~If you liked this post, please share it!~
Leave Comment
Jan 16, 2011 | DIY
I spied this in the store the other day and promptly snapped up 2 to try!
I’ve bought the Nail Rocks nail sheets (that need to be set with the heat of a dryer, which I haven’t experimented with just yet), and tried out the Incoco-brand Color Enamel Strips in the past, which I enjoyed but were a bit tough to apply.
Look at all the beautiful colors and patterns the Salon Effects come in!
The Sally Hansen version of this idea takes the difficult application inherent with other brands and makes it super-easy, with an orange stick and nail file included in each set. And what I haven’t seen before with these stick-on nailpolish sheets is the amazing range of colors: Sally Hansen is offering glitter, photo-realistic effects, fun patterns, and bright colors. And they’re super-easy to use!
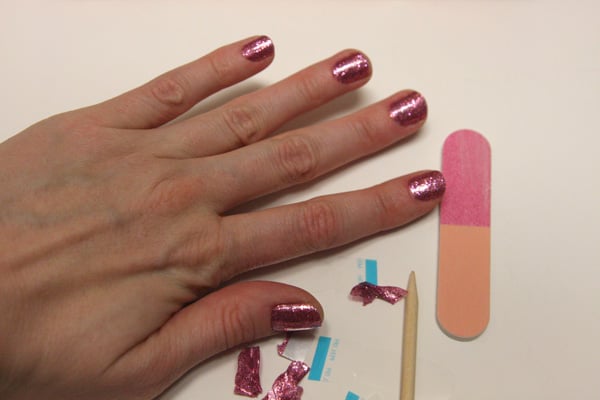
There are 16 sheets in a packet (and though you could probably use a single sheet for 2 nails if you were super-careful and enterprising); they’re meant to be used one sticker = one nail. You need to find stickers that approximate the shape of your nail bed, peel off the protective coat, peel off the back, snap off the paper tip (I found it easier to do the last two steps in reverse order), and place onto your nail.
You use an orange stick (included in the set) to press down the edges, and then the included nail file to crease the sticker sharply at the nail tip, and the sticker rips off.
Pros: Easy to use, fast (once you get the hang of it), brilliant colors and effects, long-lasting (I hope – the package says 10 days!), no drying time required, no need for other things to buy to do your manicure (topcoat, base coat, etc), no bumpiness to the glitter; DBP, toluene and formaldehyde-free.
Cons: A little smelly (like real nailpolish), packs come vacuum-sealed so they’re kind of hard to rip into, stickers prone to ripping if you press too hard with the orange stick, difficulty in finding a shape match to your nail bed, waste of sticker part that you rip off, a little pricey.
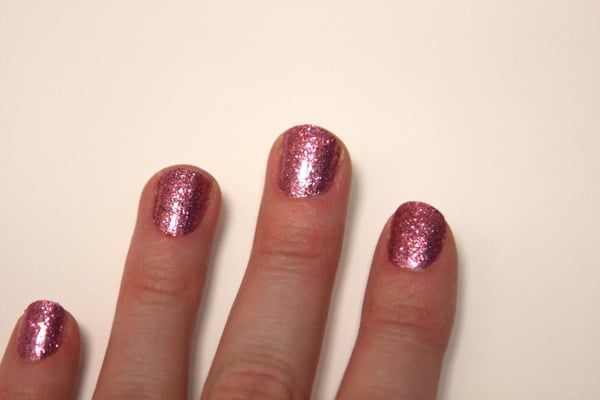
At about $9.99 a pack they’re a little more expensive than your average nailpolish, and they’re only single-use, so once they’re done, they’re done. But the effects are amazingly bright, pure color, with a streak-free and consistent finish, and the tops are smooth without the need for a topcoat!
Right now I’m trying out the pink glitter (“Bling It On”) and the blue glitter (“Blue Ice”) is next on my list!
Already in stores like Walgreen, Target, and CVS, this product is supposed to be available throughout drugstores in the U.S. by February 2011.
What do you guys think? Something cool you’d like to try? Or a little too pricey and bothersome to mess around with?
xoxox
Carly
~If you liked this post, please share it!~
Save
Leave Comment
Jan 14, 2011 | By Carly J. Cais, Media
Etsy user TaMuidBeo featured my Rose and Lava Bead Jumble Necklace in her Etsy Treasury Hot Lava (top row, 2nd from right in photo). I’m loving all the other lava pieces…it’s such a fun, organic material to work with! Thanks TMuidBeo!!
xoxox
Carly
~If you liked this post, please share it!~
Leave Comment
Jan 14, 2011 | DIY
Seen on the runway in John Galliano’s Christian Dior Fall 2010 RTW Collection were whimsical, feminine knitwear pieces with satin ribbons woven and braided throughout.
Photos: Monica Feudi, GoRunway.com
Within weeks of appearing on the runway, many Japanese clothing brands picked up on the design, re-interpreting the idea and selling them en masse to a demanding public, creating a micro-trend stat.
In the U.S. I haven’t seen any clothing brands create their own version of this – which is just begging to be DIY’d! (Check out Outsapop and A Pair and a Spare for their coverage of this idea; and The Hearabouts’ DIY version.) It’s amazingly simple, and the best part is that next year when fashion marches on…you can just pull out the ribbon, fluff out the yarns in your sweater, and nothing’s the worse for wear. The only thing that’s better than a DIY is a DIY that is only permanent as long as you need it to be!
Difficulty: (Easy/Beginner)
You Need:
*chunky-knit sweater (I chose one with cabling, from YesStyle.com. If you can find something with mohair or angora blended in, it adds a soft femininity to the piece.)
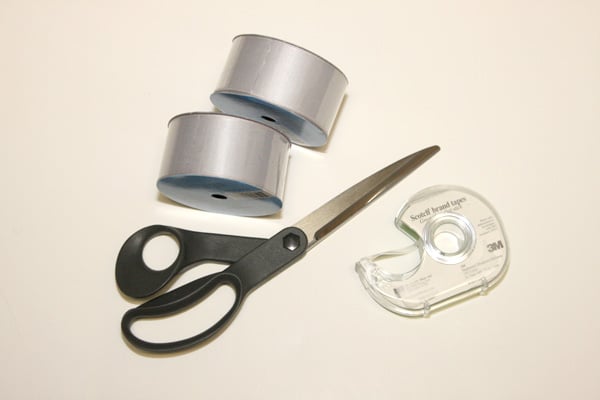
*double-face satin ribbon (I chose 1.5″ wide)
*tape
And…
*scissors
*measuring tape
*hand-sewing needle & matching thread (not pictured)
How To:
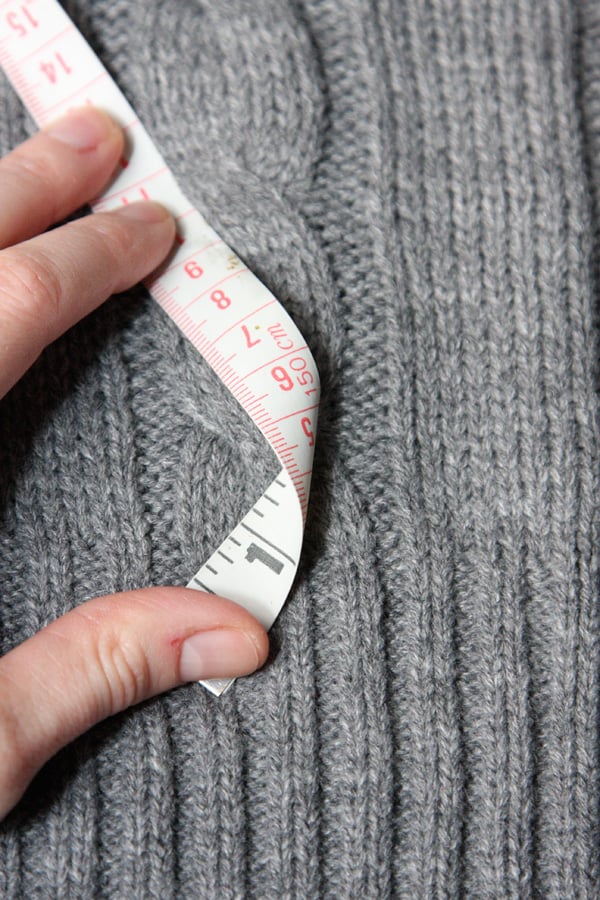
1. First, even before buying your ribbon, you need to measure your sweater to find out how much you will need. Use a flexible measuring tape and, starting at the bottom of the sweater, start measuring upwards, zigzagging the tape back and forth to mimic how the ribbon will cross over once woven.
At the top of the track of weaving, note the measurement on the tape. Double it to get the full length of ribbon for the weaving part.
If you are going to create bows at the bottom of the weaving track, create a bow in the measuring tape and add that length to the total length of the track. That is the entire length of ribbon you will need for one woven area. I chose 2 areas of ribbon; thus I doubled the measurement for the total amount of ribbon I needed to buy. (But since I’ll be doing two rows, I’ll need 2 continuous lengths for each track – something to keep in mind when you’re doing your calculations.)
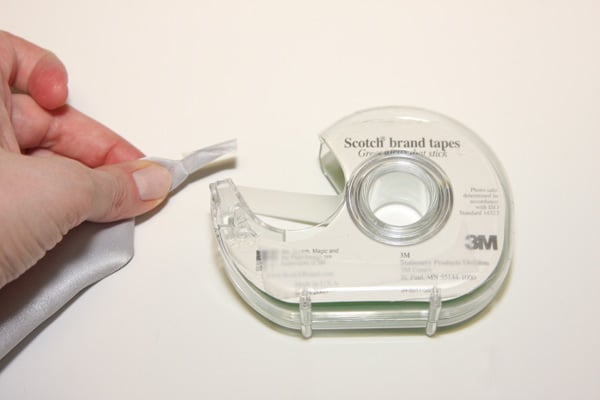
2. Cut your ribbon into the length you need for one row of weaving (+ a little more if you can). Wrap a piece of tape around both cut ends tightly, into a cone shape. This should work in place of a needle for your ribbon (though you can use a large-eye needle, yarn needle, or a safety-pin for your ribbon if you want).
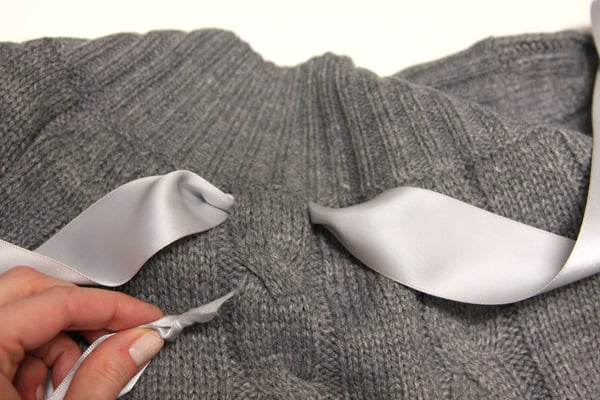
3. Start at the top of the woven row, in the center of one of the cables, from the back of the sweater. Poke a small hole between the knit on either side of the cable, and bring the ends of the ribbon to the front of the sweater.
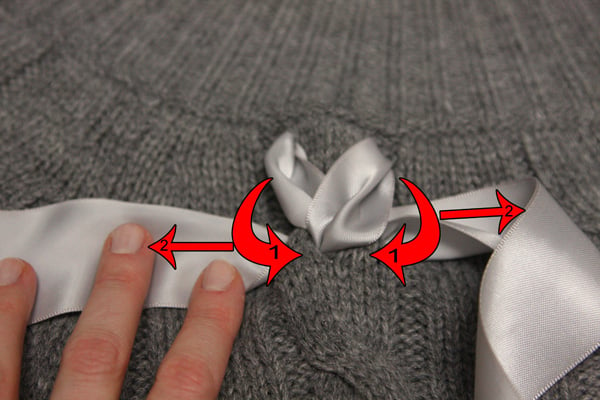
4. Poke a small hole at the bottom of the first cable knot, in the center. Bring both the ribbon ends into the hole and to the inside of the sweater.
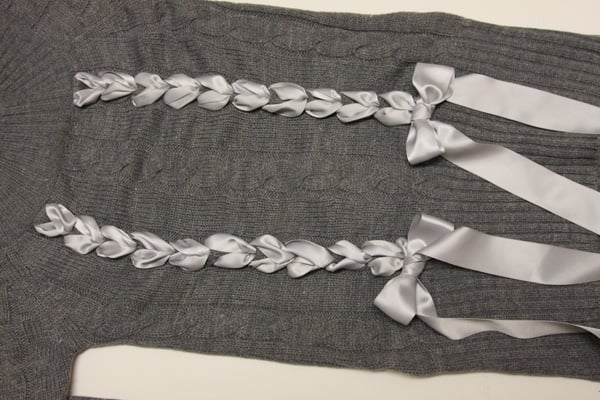
5. Repeat to create a ladder of “V’s”, made in ribbon, down the front of the sweater. As you go, fluff out the ribbon that shows on the front periodically, and flatten the sweater so that you aren’t “scrunching” the cable too much.
6. At the bottom of the row, tie ribbon into a bow.
7. Repeat for the other side.
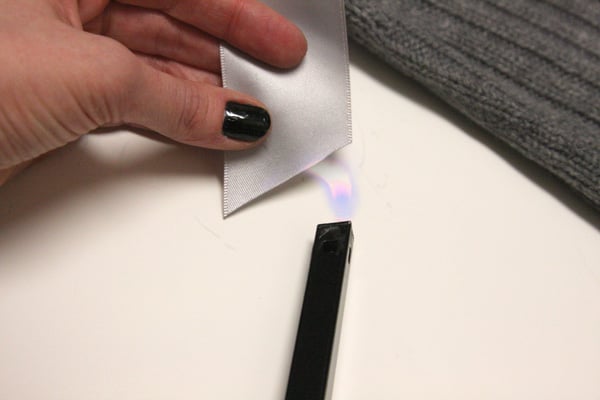
8. Try your piece on, and eyeball where you want the ribbon ends to fall. Cut, and then seal the cut ends with a flame.
9. To make the bows more permanent, hand-sew a couple stitches into the backs of the bows so they don’t loosen on you as you wear it. Hand-wash and lay flat to dry when it’s time for the laundry.;-)
Pretty easy, right?
Let me know if you try this out…I’d love to see your version!
Happy DIY’ing!
xoxox
Carly
~If you liked this post, please share it!~
Leave Comment