Dec 22, 2010 | DIY
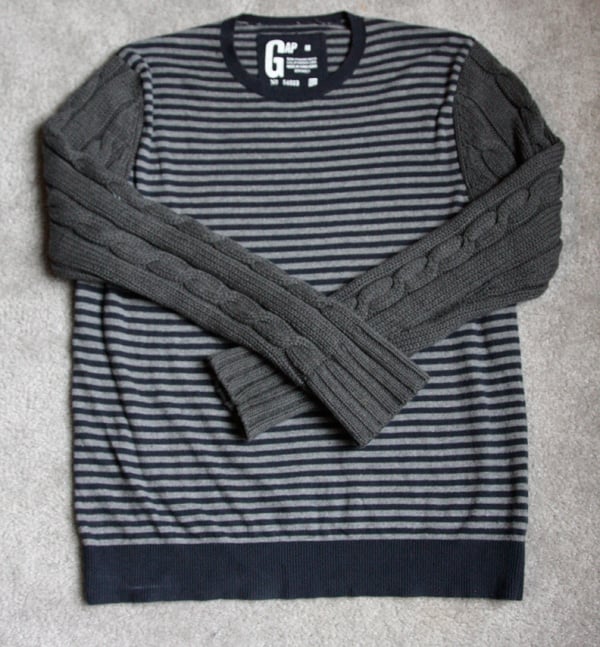
After seeing this post on one of my new favorite blogs, A Pair and a Spare, I decided to make my own sweater by combining two that had coordinating colors. I loved the combination of striped and chunky cable-knit sleeves!
I wore my finished creation for Day 23 in my 30 Days of Outfits Challenge last month. So here’s how to make your own:
Difficulty: (Medium)
You Need:
*2 sweaters in coordinating colors (I think one of mine is men’s – it honestly doesn’t matter as long as you can fit into both)
*thread matching sweaters
And…
*seam ripper
*pins
*sewing machine ( if you do not have a sewing machine, this can also be sewn by hand, though it will take a little longer)
*machine needle (for knits or wovens; it doesn’t matter)
How-To:
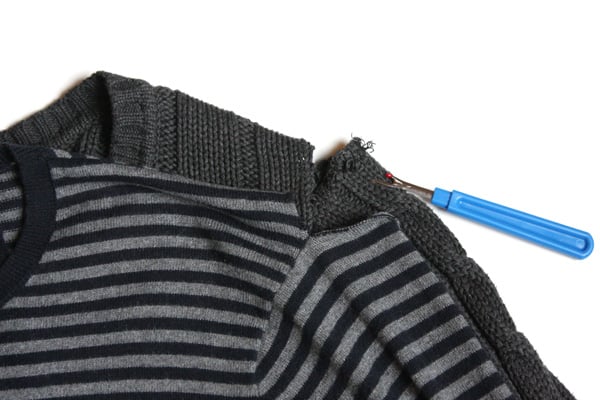
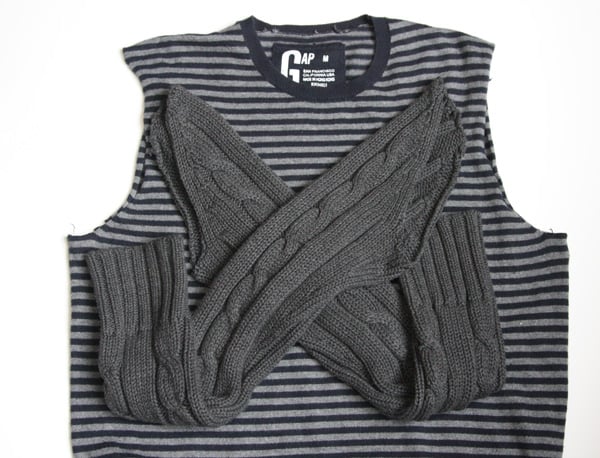
1. Separate the sleeves from each sweater. You need to find the thread that binds the sleeve to the armscye, and cut it with the seam ripper, opening up the seam a little.
Then, working from the center of the seam, try to pull the thread from in-between the sleeve and the armscye. If you get it just at the right area where the thread end is in-between the two (it’s a little tricky), you can pull the thread and the whole seam will come apart – zzzzzpth!! (*that’s my sleeve-coming-apart sound effect*). It’s a lot easier than going all the way around the seam on the outside, picking and ripping each stitch as you go.
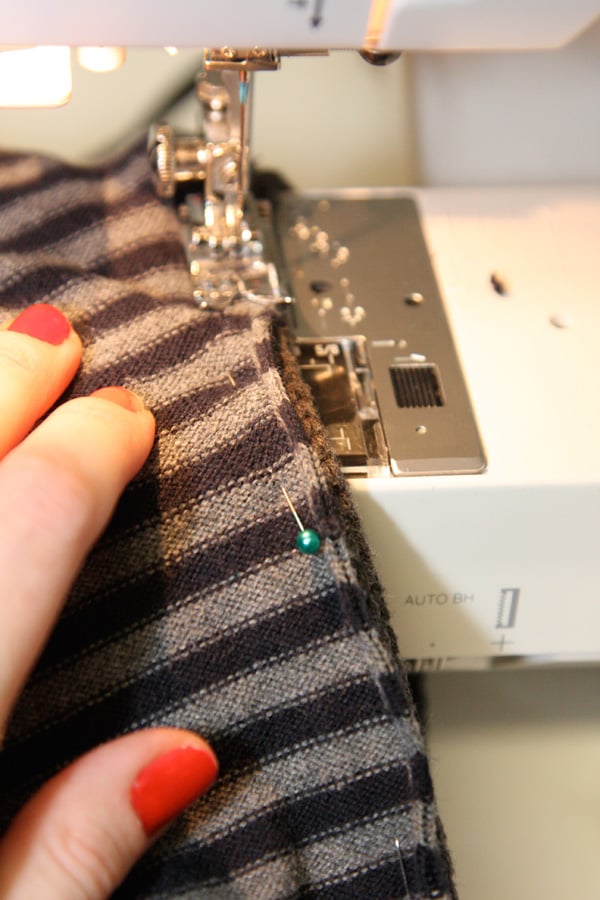
2. Pin the sleeves from one sweater to the armscyes of the other sweater, matching the side seams, and easing any fullness (sweaters are stretchy, so easing is…well, easy!). Pin from the inside, with sleeve inside the body of the sweater, right sides together.
3. Stitch on your machine around the armscyes, using a shorter stitch. If you like, going over the edges again with a zigzag stitch or overcast stitch will add extra strength.
If you’ve sewn close to the edges, the new seam will be virtually indistinguishable from the outside.
4. Wear and enjoy! Don’t forget to dry flat whenever you wash your piece – you don’t want undue stress on the arm seams ripping your new arms off! (although that visual makes me a little squeamish…;-)
Happy DIY’ing!
xoxox
Carly
~If you liked this post, please share it!~
Leave Comment
Dec 20, 2010 | DIY
Since I’ve posted a how-to for a cheap n easy Easter Wreath and a similar one for a Fall Wreath, I thought a Winter Holiday Wreath was in order. Though you don’t have to buy your bits and bobs at the Dollar Tree per se, I found that they had such a variety of items I could just mix and match add-ons to their pre-fab wreaths…which alone, looked a little sad and like you bought it at the Dollar Store. And we want something a little more fabulous, no?
(Everything except the tiny ornaments I bought at the Dollar Tree…and the ornaments were in the $1 bin at Target near the entrance of the store!) Though the method is a little self-explanatory, I figured why not do something easy when everything’s all caught up in that last-minute countdown to Christmas?
You Need:
*evergreen wreath base
*4 assorted decor sprays (mine had pine needle sprays, pinecones, tiny horns, wrapped packages, and plastic fruit, already affixed!)
*large red velour bow
*pack of tiny ornament balls
And…
*hot glue gun & gluesticks
*wire cutters
How-To:
1. Trim the ends of the decor sprays so they won’t stick out from your wreath. Also: Fluff out the pieces of “evergreen” towards the outside so the wreath looks a little fuller – we’ll be angling all the stuff we’re sticking on towards the inside to create the illusion of a nice, full wreath.
2. Attach the bow at the bottom of the wreath base – mine had a pipe cleaner attached to the back for easy-affixment.
3. Hot-glue the decor sprays around the wreath.
4. Add the tiny ornaments, hot-glued in-between. (I chose ones that were within the same color scheme of my other decorations: red/gold.)
Done!
Okay, that took 5 minutes. Now on to the million batches of cookies I still have to bake!
Did You Know? The familiar stick-on 8-point ribbon bows that so many of us use on our holiday gifts are actually called “German Christmas Stars” (among many other names). There is a great step-by-step illustrated tutorial here for those of you who want to try folding your own (just don’t flatten down the points to get that “present bow” look).
Happy DIY’ing! (And if you’re looking to jazz up this wreath a little bit, do so with my Super-Easy $5 Holiday Wreath Tutorial…coming up shortly!)
xoxox
Carly
~If you liked this post, please share it!~
Leave Comment
Dec 18, 2010 | Life, Score!
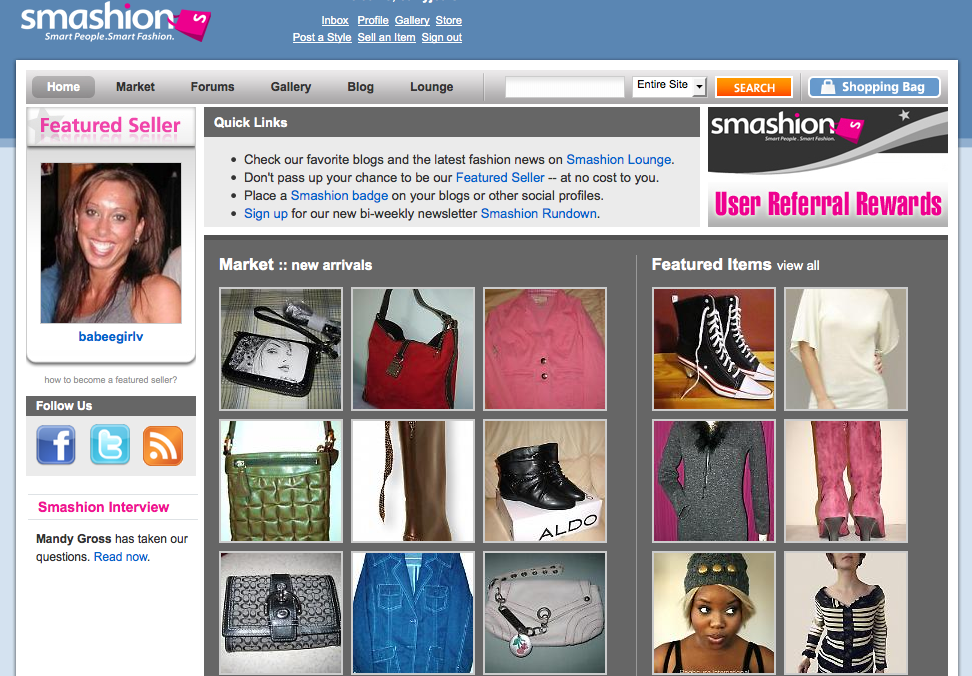
Win $25 in credits to Smashion.com – the world’s first FEE-FREE fashion marketplace!
Giveaway period is open until 11:59 PM P.S.T. tonight…so
xoxox
Carly
~If you liked this post, please share it!~
Leave Comment
Dec 17, 2010 | DIY
So sorry for the slowdown in posts as of late. I have been consumed by doing the Christmas shopping, putting together boxes of gifts, making goodies and cookies, writing Christmas and New Year’s cards, and standing around at the Post Office that this holiday brings. I think I have things a little more under control now, but there’s still an overwhelming amount of things to do and get and wrap before next Saturday.
In the meantime, if anyone has any free time and would like to make some jewelry and accessory pieces (maybe as a last-minute gift?), here are some Free Projects from Michael’s:
And some Free Project Downloads from Interweave (require E-mail mailing list signup, but just unsubscribe after you’ve received your freebies if you’re not interested):
Also: Free E-Book on the power of making things by hand to get you inspired:
You can never have enough techniques for DIY’ing in your trick-bag…and the more you know, the more you can apply that knowledge to problem-solving in many different areas.
Enjoy!
xoxox
Carly
~If you liked this post, please share it!~
Leave Comment
Dec 15, 2010 | DIY, Fashion
How goeth the holiday shopping? I am terribly behind and having mini panic-attacks in-between braving the crowds at the mall and waiting in a line that stretches 3 times around the Post Office just to use the Automatic Mailing Machine. Hopefully everyone else has it under control – but if not and you’d like some ideas for that person who prefers to do everything themselves – and who has more than just a little craftiness up their sleeves – look no further and check out these DIY-themed gifts, all available online: (all under $50* – except for one* very important gift!!)
1. The Big-Ass Book of Crafts, $19.95
2. Beginner Studding Kit, $23
3. Wood DIY Gnome, $4.99 (sale)
4. Charmed Knits: Projects for Fans of Harry Potter , $10.19
5. Kenmore Drop-In Bobbin Sewing Machine, $141.99*
(This is, BTW, the exact same machine I use – Hub gave it to me for my birthday 3 years ago. It is by far the best machine I have ever used – glides through EVERYTHING, even leather up to 3/4″ thick (six layers of sueded split top leather at 1/8″ thick a layer), and it’s never broken or given me any grief. It has 90 stitches on it (not that And I’ve never sent it in for maintenance, oiling, or anything. It’s pretty fabulous and I can’t say enough good things about it!)
6. Gingerbread Train Kit , $19.95
7. Mayan Magic Chocolate-Making Kit, $24.99
8. Urawaza: Tips & Tricks from Japan, $15.95
9. Felt Whole Cakes Pattern Set, $5
10. Black & Decker 14V Drill with Stud Finder, $34.99 (sale)
If you know anyone who wants to get into studding their clothing, shoes, handbags, and accessories, the studding kit will set them on their way to spiky fabulousness – or for the DIY gourmet, make-your-own-chocolate or a sweet gingerbread train that will have to be safeguarded against prying little fingers until after the holidays.;-) And no serious DIY’er should ever be without a power drill – I use mine to drill holes in pendants, sand and buff metal jewelry, distress denim…and of course, make holes in walls! (and your drill doesn’t have to be pink for it to be perfect for you, despite what the hardware store guys may think:-)
xoxox
Carly
~If you liked this post, please share it!~
Leave Comment