Jul 7, 2010 | DIY
After a fairly uneventful flight (no passing out in the aisle this time; the only thing that happened was the entire left side of the plane from row 35 back had no armrest power – so no light, no attendant call button, no radio, and no sound to the overhead movies, which made passing the 10 hours on the plane pretty much like pulling teeth)…I have finally arrived in Japan. It’s like wall-to-wall humidity that plasters your hair to your face and has mosquitoes swarming on you the moment you step out the door. Lil Tot has, amazingly, suddenly become incredibly talkative and can actually carry on an intelligent, logical conversation in the 2 weeks he’s been here. His comprehension, vocabulary, and maturity skyrockets whenever he spends time here.
Anyway, I wanted to share with you what I made before I left Oregon.
I was playing around on the computer the other day and made these.
I’ve had a pack (a measly 3 sheets for $10!!) of printable inkjet tattoo paper for awhile and had been undecided on what to make. (I’m not really a tattoo person – I’ve always felt that since I have freckles I really don’t need any more marks on my body;-) …But once in awhile I’ve liked wearing a stick-on tattoo, just to change things up.) 
Collage from Fashiontribes.com
Since the Fall ’09 Chanel Couture Runway show, I’ve been coveting those pearl necklace and chain bracelet tattoos…but there’s no way I’m going to blow $75 on the set now available at retail.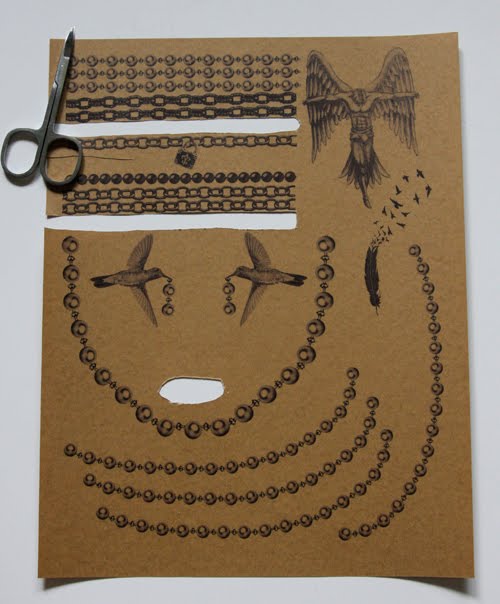 So… (surprise, surprise) I decided to make my own with the printable tattoo paper. I found some tattoo images online here at Inkwear Tattoos, and collaged them together with other images from the Inkwear catalog.
I was sooooo psyched since the final printed product looked pretty awesome. But my good mood ended when I cut out the tattoos and tried to apply them.
I always thought that if I ever did decide to get a tattoo, I would have the word *lifeline* tattooed on my right wrist. My hands are the source of all my creativity!
They’re stickers. No matter how closely you trim the tattoo, it’s made up of this clear film that’s extremely obvious and tacky. (Also visible in any gaps in the image.) White spaces will of course, not print. You do not apply with water – you just peel and stick – which means that they will come of the next time you take a shower. Oh, and you can’t get any water or moisture on the image because, since it’s inkjet ink, it will just smudge.
You can see the edges lifting up already.
What a junky product! As I wore throughout the day, the stickers just got increasingly wrinkled and lifted up at the edges, snagging in my clothing and hair.
What a disappointment. By the end of the day, I peeled some of them off before I took a bath, but the wrist tattoos I decided to remove as per the instructions: soap and water. BIG MISTAKE. They dry tattoos peeled off fine, but once I used soap and water, the tattoos when wet became a gluey, sticky, smudgy, runny mess, and my skin got really red where I had to rub to abrade them off.
Utterly sad. I would definitely NOT recommend these Cre8 Ink Jet Tattoo Sheets at all.
I did find online there are some e-stores that will print temporary tattoos for you – though I wonder if they’re the same, single-use stickers? (From the online description is appears they are not.) Does anyone have any experience with this?
(And if you are wanting to purchase from Inkwear Tattoos to get the original images I used, they deliver worldwide, so you could potentially buy some sets from them and get them delivered to you instead of going the DIY route!)
xoxox
Carly
Save
Leave Comment
Jul 6, 2010 | Life, Score!
Entry # 28: Kyko♥B¡rd^v^ !
That’s one happy signature! I’ve contacted the winner to get shipping information. Thanks to all who entered!
Congratulations Kyko Bird
xoxo
Carly
Leave Comment
Jul 5, 2010 | Life
I’m heading to Tokyo today to spend the remaining 2 weeks of our vacation with my family and the in-laws. I’ll continue to update sporadically while I’m there and answer formspring.me questions. Hope you guys have a great July – I’ll be back in a couple weeks!
Enjoy your summers!
xoxox
Carly
Leave Comment
Jul 3, 2010 | DIY
I guess with summer in full swing everyone’s out and about, and not so able to get projects together. I had hoped that this time we’d have even more projects to share with one another, but this time there were only 11.:-(
But in any case, I had a great time visiting all your blogs and checking out your pieces. You’re all so creative! Here are the top 3, as measured by user clicks:’
I swear, it looks JUST like ready-to-wear. What a fabulous, chic job!
My first thought was “turtles?” Then I see they’re the pendants at the bottom. Very cool.
and, for the top slot,
This is super-cute and I love the Victor/Victoria vibe. She could totally sell these and rake in the cash!
Thank you so much for sharing, and please enter any other projects you have in my next DIY roundup!
If your project has been featured above, feel free to grab the button below.
xoxo
Carly
Leave Comment
Jul 3, 2010 | DIY, From You
from formspring.me:
hey carly! any advice on how to diy this dress? http://lookbook.nu/look/813921-Romantic-floral-dress-and-Balenciaga Thanks!
Hi there!
I’m having a lot of trouble seeing the dress up close from the photo. It looks like a simple tube dress – but could it be constructed from multiple tiers of fabric? If you are wanting to create those tiers (i.e., likely a single piece of fabric with horizontal pleats) this is an extremely time-consuming piece. You could do this one of three ways:
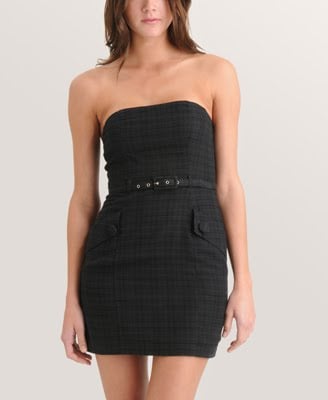
1) [USING A BASE DRESS] Take a similar, well-fitting, cheap woven tube dress, like something from Forever 21, (like this plaid dress, above) and use it as the basis for your pattern. Rub off the shape for the front piece and the shape for the back piece onto a piece of paper. Then cut your paper horizontally in to 1″ increments. Add 1″ in-between, taping in more paper. Add the proper shape of the seam allowance to the edges to allow for the under/overlap of the pleats. Do the same for front and back pieces. Trace onto floral fabric, marking the bottom of each of your original 1″ cuts. Then pleat at those marks, pressing with an iron to set the pleats. Sew fabric pieces onto your Forever 21 dress.
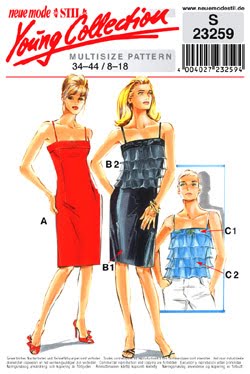
2) [FROM SCRATCH] Alter a store-bought pattern in the same way as above to the outer pieces, cutting horizontally, adding paper, fixing the seam allowances, tracing onto your outer fabric, cutting, pleating, and pressing. You would make the inner (if there is one) exactly as in the pattern, and join the outer to the inner.
3) [NO PLEATING] Or, alternatively to not use a single piece of fabric, you could take a piece of that floral print, and cut it into 3″ horizontal strips (you’d need at least 28 strips, judging by the photo, and you’d have to adjust accordingly to how long you want your dress). Then you’d have to fold each strip in half vertically, and press that crease flat. Then you’d have to sew each piece onto your cheap Forever 21 base dress, starting at the bottom, going all the way around, and overlapping the strips vertically by 1/2″. Where they meet in the center back you’d have to leave about 1/2″ unsewn to either side of CB, trim and fold the sides of your strips under themselves, and then topstitch to the CB, and to either side of the zipper once you get to that point.
However you do it, you’re looking at hours of tedious precision work. The best fit will be accomplished by option 3).
If you just want a floral tube dress and don’t care about the tiers, you can just cut up a similar store-bought floral dress and anchor the top with elastic to keep it up. Or you could make one from scratch with a store-bought pattern.
Hope that helps!
xoxo
Carly


 , $9.99, Amazon.com.