Jun 3, 2010 | DIY
Pillowcases come in a variety of prints that work just as well for pieces clothing. Plus, they have just enough fabric (and are roughly the same shape) as a cute little A-line mini-skirt – and can be transformed easily, with just a couple seams. (You can of course also transform them into dresses and skirts for small children.) And now there’s no need to worry when you have a lone pillowcase and can’t find its mate.
Take Exhibit A, a dot-printed piece that I pulled out of my 48-lb. haul of clothing I sourced at my local Goodwill Outlet. I was drawn to it because of the fabulous print – and I could only find one of them, so I had no intention of using it as a pillowcase…thus I thought it would work great as a skirt! The whole process took me maybe 30 minutes – a quick-sew project to be sure!
How to Make an Elastic-Banded Mini-Skirt from a Pillowcase
You Need:
*a standard-size (or larger!) pillowcase
*2″ wide piece of black elastic
*tape measure
*marking chalk
*pins
*fabric scissors
*thread and machine needle for wovens
*iron & ironing board
How To:
1. Turn pillowcase inside out and cut off all the sewn seams, leaving two large rectangles.
2. Turn rectangles sideways and fold in half. Cut edge on a slight A-line angle to the top. (I know in the photo above the fabric isn’t folded in half – but you should probably do that to ensure the right and left sides of each piece are at exactly the same angle.)
3. Unfold your pieces. Measure 1/2″ in from the angled edges of one of the pieces, and cut. This piece will become the back of the skirt.
4. Pin back to front of the skirt at the angled sides, and sew together.
5. Wrap piece of elastic at your natural waist (or where you want to wear the skirt). Make sure it is taut on your waist – not so tight you can’t breathe – but fairly tight. Overlap ends by 1/2″ and cut.
6. Sew piece of elastic in a circle on your machine with a 1/2″ seam allowance. (I used a straight stitch, then flattened each end and zigzagged over it to further secure it.)
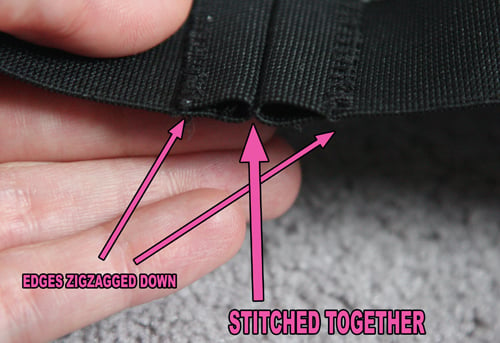 7. Place elastic band over pillowcase top, overlapping about 1/2″. Match pillowcase skirt center front to center of elastic band, and skirt center back to the seam you sewed in Step 6). Pin the two sides as well.
8. Sew pillowcase to elastic band using a stretch stitch on your machine, with the elastic on the top and the fabric below being thread through by the machine’s feed dogs. Stretch the elastic between the pins so the pillowcase “gathers” naturally to the elastic.
 9. Try on the skirt, mark where you want your hem to fall, and turn the hem (about 1″). Sew a 3/4″ hem on the bottom.
10. Iron to set the hem and remove any creases.
 And that’s it! And the great thing is, the waist is elastic, so you can wear it belted higher up with a wide belt…or wear it lower near your hips for a different look. Hope you have as much fun making yours as I did mine!
 Happy DIY’ing!
xoxo
Carly
~If you liked this post, please share it!~
Save
Leave Comment
Jun 1, 2010 | DIY
You gals have dresses on the brain, as evidenced by my formspring.me inbox.
Okay, first to the reader who is looking for more men’s shirt dresses:
I’m sure you’ve already seen mine but in case you had missed any I’ve relinked them above. All were made by repurposing men’s shirts.
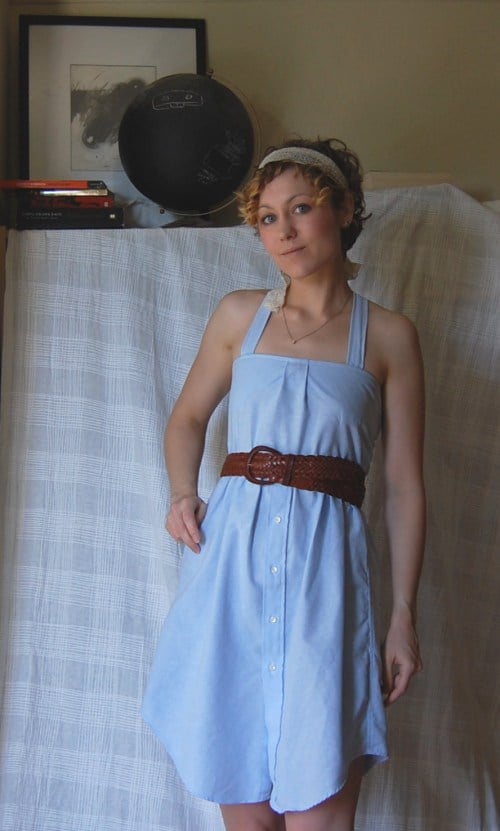
I’m also working on another tutorial for you guys for the dress above, made from a men’s long-sleeved shirt.
Here are a couple others I’ve noticed around the web:
midnightintern‘s FABULOUS Rockstar Sack Dress. Have I mentioned it’s fabulous?? (And I’m making a similar one in cobalt blue right now!)
Adventures in Dressmaking posted a tutorial about turning a blouse (men’s shirt will work just as well) into a dress by adding the bottom skirt. Also, read back through her archives to see other tutorials and transformations, as well as a great tute for turning a man’s shirt into a skirt.
Rachel at Transient Expression linked her Shirtdress tutorial in the comments – which I had seen awhile ago and forgot to add in! Thank goodness she caught it – because her chambray pinafore-style dress is just perfect for 2010!
Though it’s in French, km17 has posted the finished results of some men’s shirt refashioning that she did following the instructions from a Japanese pattern book. [I do think those Japanese refashioning books are really cute and innovative (and they can really makeover your man’s shirts!! But then again, I’m biased.;-)] She hasn’t posted the how-to, but you can probably figure out how she did it by looking closely at the finished pieces.
And Wardrobe Refashion, CraftStylish, Craftster.org, CutOutandKeep.net, and Threadbanger are all great resources for refashions!
Thanks for your questions, as always:-)
xoxox
Carly
Ask me anything
Save
Leave Comment
May 28, 2010 | DIY
 These sunglasses (a dupe of the Alexander Wang for Linda Farrow zipper sunglasses) are a bit fiddly to make, but the results are totally impressive! My tutorial was featured in Free Magazine, the official magazine of Club 18-30.
 Those of us stateside may not be familiar with Club 18-30, but for our friends across the pond it’s sort of known as Europe’s version of Club Med (except catering to a younger clientele, hence the name).
My DIY Alexander Wang Sunglasses have been featured in the Summer 2010 issue, which is available in all Club 18-30 destinations from May – October. (Available in 10 countries, including Bulgaria, Crete, Cyprus, Turkey, and Ibiza.)
Unfortunately they spelled my name wrong (there’s no U in it) – but ohwell! A feature’s a feature!
Since I submitted this in February, in the meantime Style Hurricane also DIY’ed her own version using a real zipper around the edge of the sunglasses.
My version is a lot more labor-intensive, but I was going for as exact a copy as possible.:-) Whichever way you go, now these fabulous designer-style sunnies can be yours at a fraction of the price!
Happy DIY’ing!
xoxox
Carly
Leave Comment
May 27, 2010 | Fashion, Score!
Many of you may have already heard of maurices, a low-priced chain of stores offering fashion-forward, on-trend clothing, accessories, and footwear. Founded in 1931, the chain has grown to an amazing 700 stores over 48 states, carrying everything from jewelry to denim, shapewear to sublimated tops, sweet little dresses to sandals (and plus sizes too!)
They are running a special promotion for Memorial Day Weekend starting today – for every $60 you spend you’ll receive your choice of either a cute tote bag or chic pair of sunglasses! (You get to choose from 9 different totes and 31 different shades – up to 10 free items if you spend $600!!) Here are a couple of stylish pairings I found:
Since I have nothing else to do this Memorial Day Weekend ( no barbecues planned, no hitting the beach etc.) – I’m going shopping and heading down to my local maurices to see what deals I can scoop up!
xoxox
Carly
Leave Comment
May 26, 2010 | Fashion
Whatever you do, there will always be detractors from it.
Whatever you say, there will always be disagreements with it.
More often than not, positive reinforcement comes less often than negativity.
Do not let that bring you down. (May times, you are your most vicious critic!)
Though you may not always hear it, there will be people who appreciate what you say.
Though you may not always know it, there will be someone who benefits from what you do.
Do not give up. Do not let self-doubt lead you to believe no one cares. Do not believe your writing, posting, sharing falls on deaf ears.
They do not. You are a contributor. You are valued. It is the journey that many share, each and every day.
To all those whose blogs I read but have never commented on, to all those whose thoughts I benefit from, whose words remain with me, whose art inspires me. To all those whom I have never expressed my gratitude.
Thank you.
xoxxo
Carly
all images via ffffound! except last img from here
Leave Comment