Apr 15, 2010 | Fashion, Media
I rarely, if ever, cover editorials – and usually not those in men’s magazines…but these advance photos from VMAN (hitting the newsstands on April 20) caught my eye. Blending a fashion-forward photoshoot with 3D animated characters? Me liking this advertising gimmick!
From the press release:
“SHREK OF A GUY” by VMAN
This summer, Green is back in fashion. And with the US release of Shrek Forever After on May 21, everyone’s getting in on the act.
Photographer: Ellen von Unwerth
Styling: Nicola Formichetti (Lady Gaga’s stylist)
I am a bit confused as to what, if anything, the Shrek characters have to do with the editorial…but who cares. It’s amusing.
What do you guys think? Complete silliness?
xoxox
Carly
Leave Comment
Apr 14, 2010 | DIY
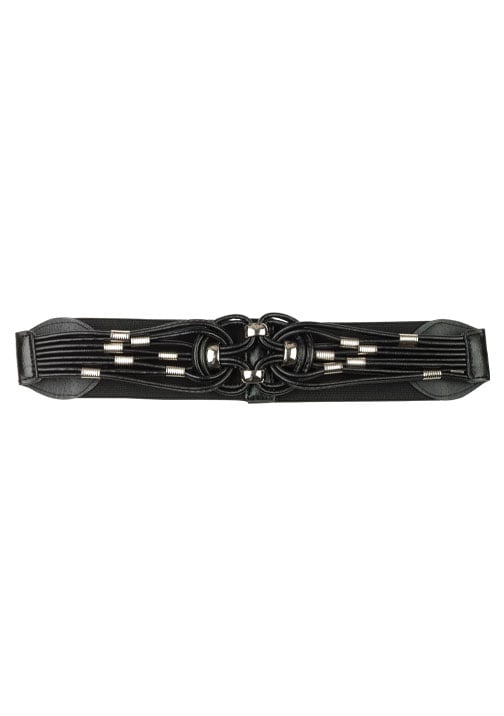
Summer is almost upon is, and style inspired by ancient cultures is in. Bold prints, bright colors, beads, and lacing: we’re seeing it on the runways and on fashionable girls on the street.
Create the above knotted belt out of satin cord and add jewelry findings for a fashion-forward Celtic infusion of style! (The lacing may look tricky, but once you get the hang of that, it’s a piece of cake!)
How to Make a Bohemian Macrame-Style Knotted Cord Elastic Belt
Materials You Need:
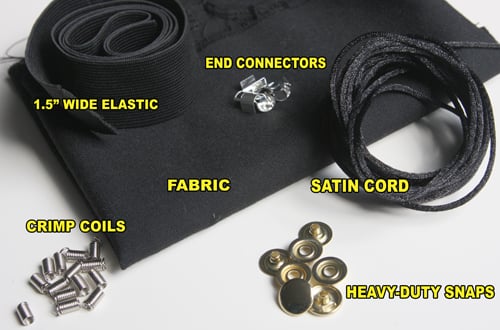
5 yd of satin cord (about 2.5 – 3 mm thick) *small amount of scrap fabric // 14 large crimp coil necklace ends (silver-tone) // 4 large silver-tone necklace end connectors // 1.5″ wide black elastic, cut to your waist circumference (we’ll be cutting it shorter below) // 2 snap fasteners
Tools You Need:
tape // scissors // wire-cutting pliers // sewing machine // regular to heavy-duty needle // thread matching belt color // snap-setting pliers or die & hammer // iron & ironing board
How To:
Prep Your Parts
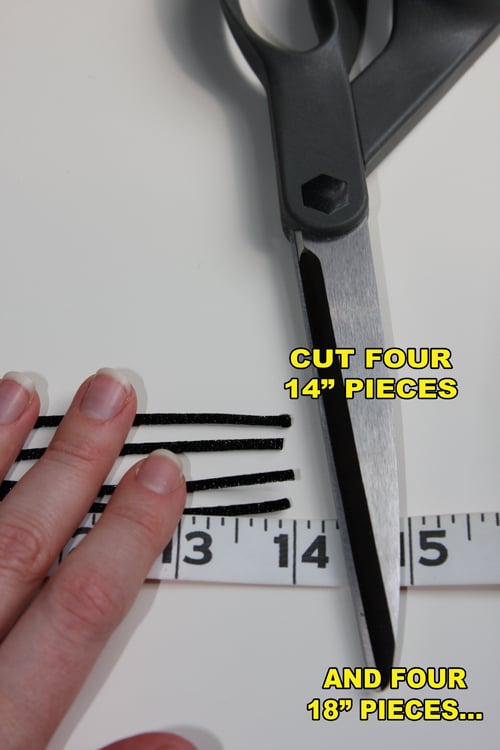
1. Cut satin cord into the following pieces:
*FOUR pieces 14″ long (to make outer loop)
*FOUR pieces 18″ long (to make center knot)
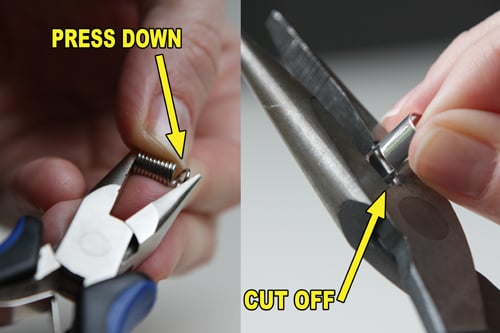
2. Use pliers to press down the end coils of the crimp ends. Cut off the hang-loops of the end connectors.
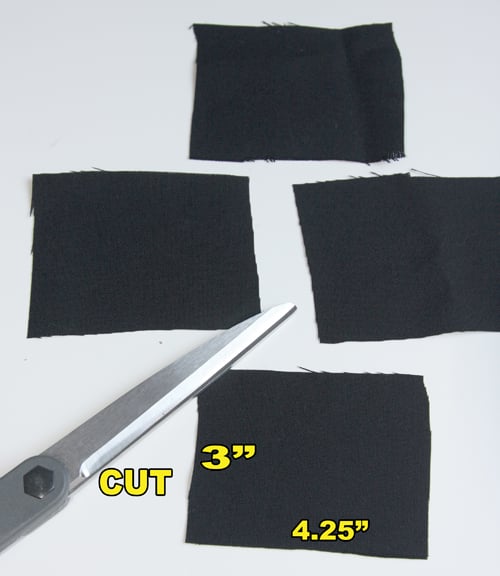
3. Cut 4 pieces from your fabric, measuring 4.25″ wide by 3″ high. We’ll come back to those fabric pieces later.
Start Weaving: Outer Loop First
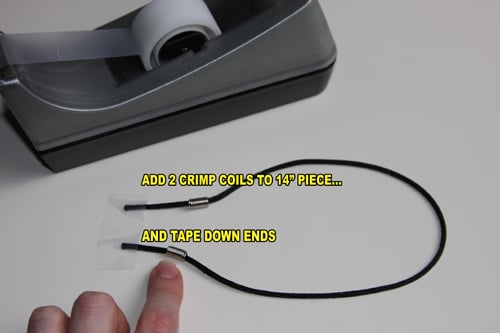
4. Thread 2 crimp ends onto a 14″ piece of cord. Loop it over and tape down the ends.
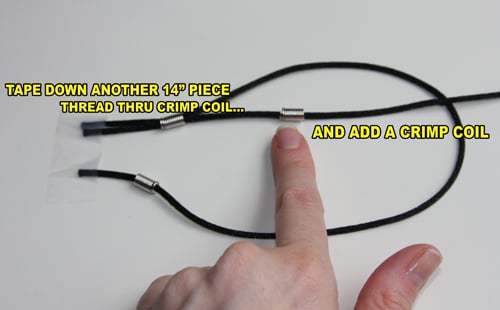
5. Tape down another 14″ piece of cord. Thread it through the crimp coil from the previous piece of cord…and add a crimp coil onto the cord.
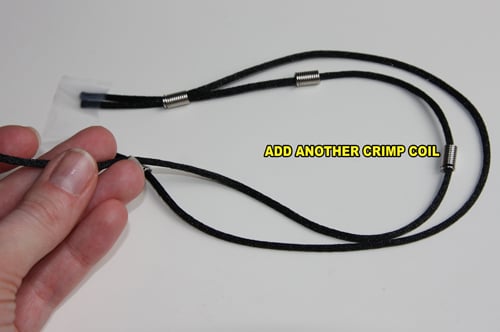
6. Add another crimp coil, and loop it around.
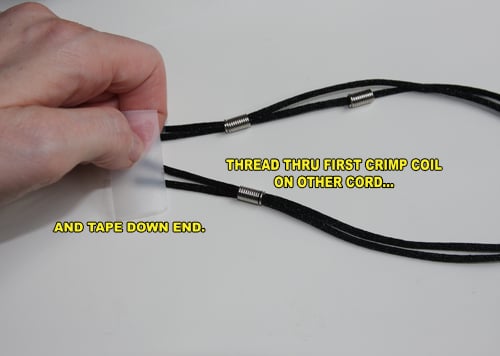
7. Thread it back through the remaining crimp coil on the first cord. Tape down the end.
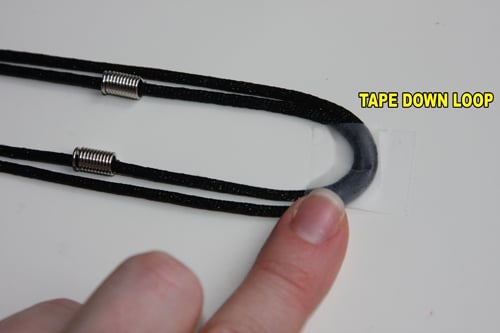
8. Secure the loop you just made with a piece of tape.
Keep Going: Inner Loop-and-Knot

9. Put a crimp coil on one of the 18″ cord pieces and tape down the end, placing it in the center and directly below the cord from the previous step.
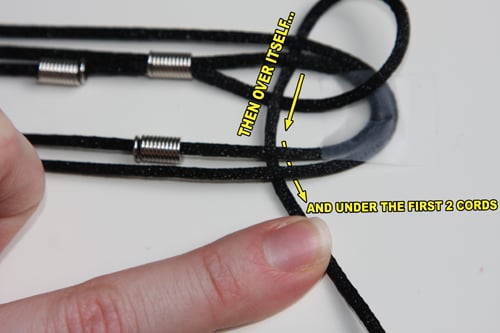
10. Thread it through the crimp coil on the adjacent cord and loop it around to the right, then back under the first two cords, heading downwards.

11. Thread it over itself, then downwards under the first two cords again.
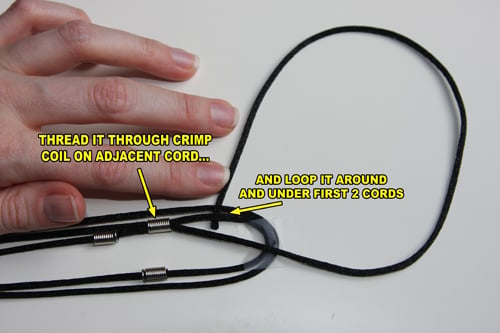
12. Loop it to the right, back over the first two cords, and then to the left under itself again.
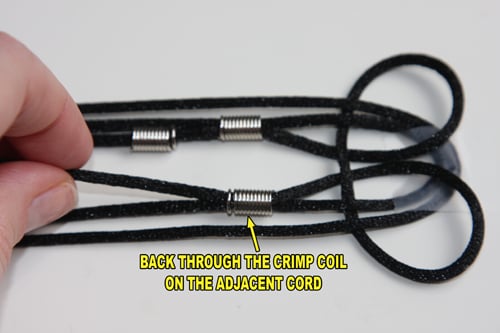
13. Thread it back through the crimp coil on the adjacent cord.

14. Add another crimp coil, and tack down the end with tape.
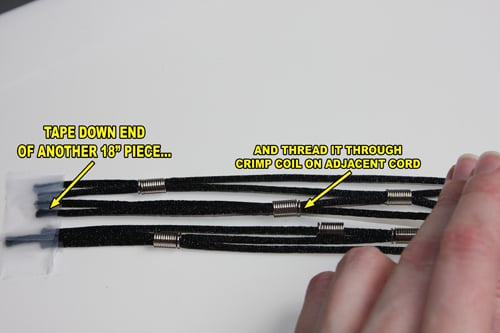
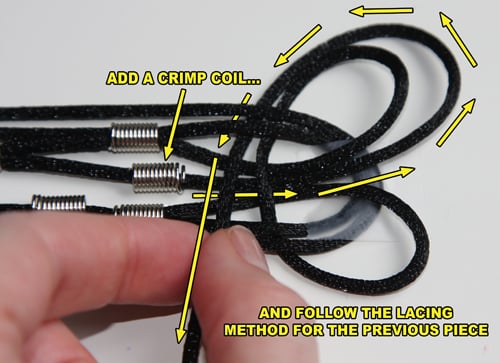
15. Time for the final cord! Tape down the end of another 18″ piece of cord, and thread it to the right and through through crimp coil on the adjacent cord.
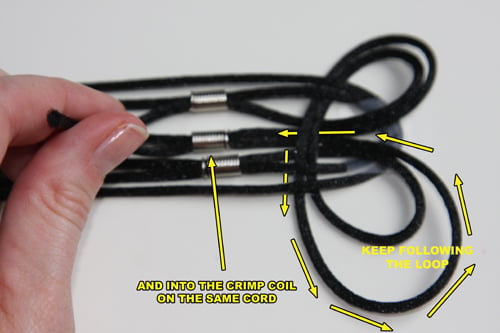
16. Add a crimp coil, and weave the cord around the center loop in the same manner as the previous piece. (It will be to the outside of the previous cord. Go under the previous piece, to the right, over the taped-down outer loop, up and around, under the outer loop cords, over the center loop cords and down…)
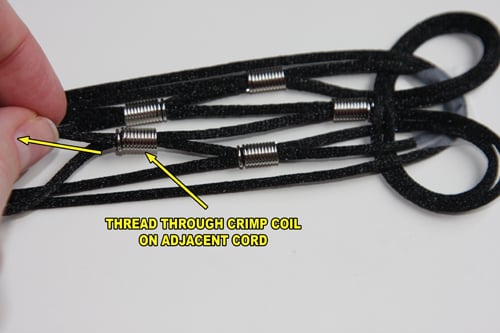
17. Keep following the center loop of the previous cord. (Around and to the right, over the taped-down center loop, back to the left, under itself…) And finally, thread it back into the crimp coil you added to it in Step 15).
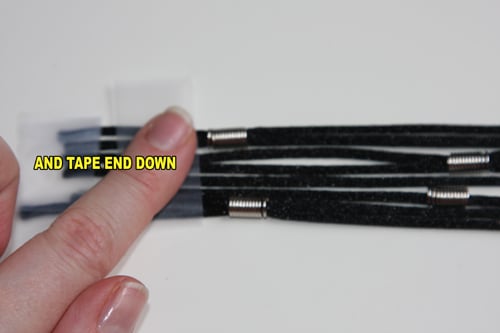
18. Then tape its end down.
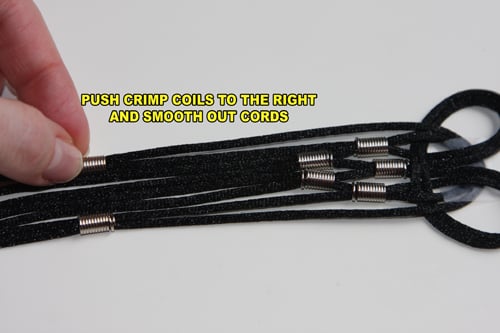
19. Shift the ends of all your cords together, re-tape, and push the crimp coils further to the right, closer to your center loop-and-knot.
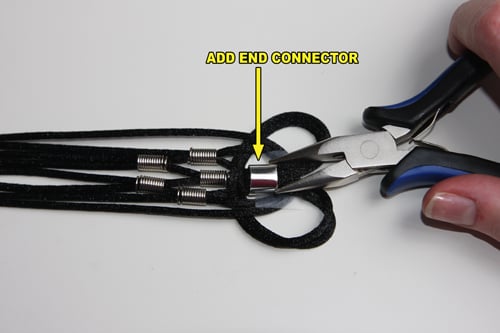
20. Use pliers to add an end connector to the center cords just to the left of the taped-down loop. Smooth out your cords – and congratulate yourself on a job well done!
Other Side & Finish Lacing
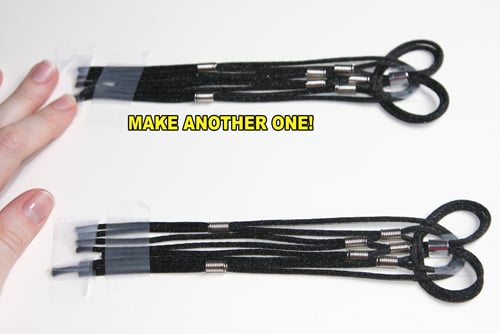
21. Make one more group of looped cords in exactly the same manner. (See Steps 4) – 20)]
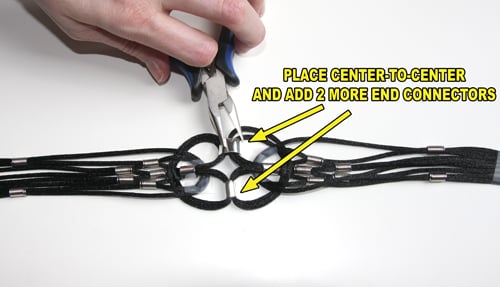
22. Place the two groups of cord side-by-side, matching up the centers. Add 2 more end connectors to the center loops to connect one side to the other. Now you’re finished with all that lacing – which probably feels fabulous!
Make the Belt
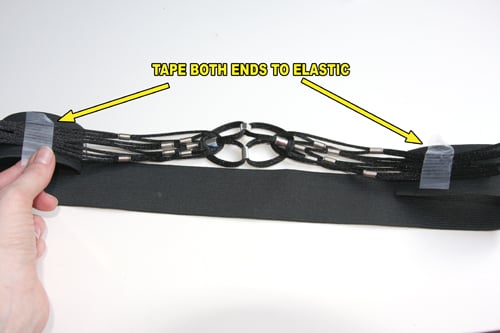
23. Tape both ends of the cord group on top of the ends of your piece of elastic. Make sure your cords are centered and each side overlaps the elastic the same amount.
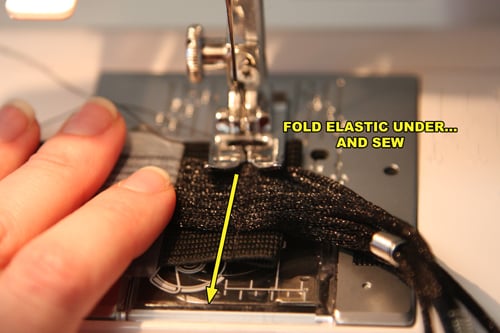
24. Fold the elastic under itself, about 3/8″, and stitch the cords down on top. (I went over the same area twice with a straight stitch, then zigzagged down it for strength.) Stitch down both sides to the elastic.
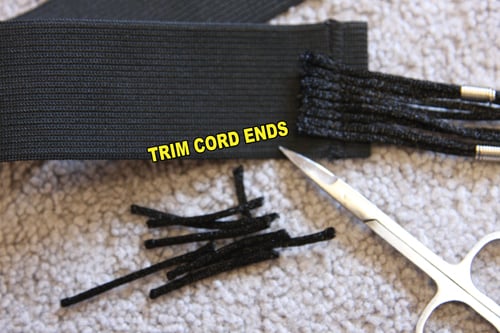
25. Trim off the cord ends on the other side of your stitching.
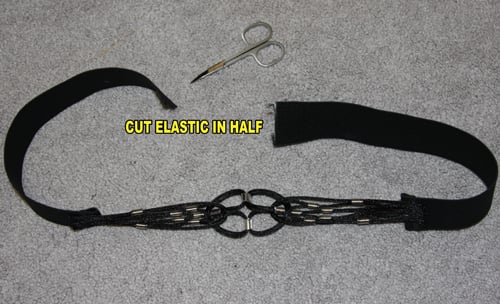
26. Cut your elastic piece in half.
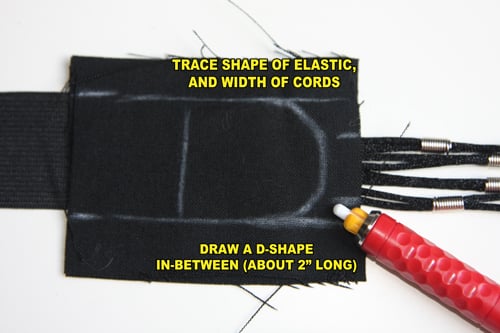
27. Place 2 fabric pieces right sides together, on top of where you’ve stitched the cords to the elastic. Trace the width of the elastic, and mark the width of the cords. Then draw a “D” shape between the elastic piece, about 2″ long.
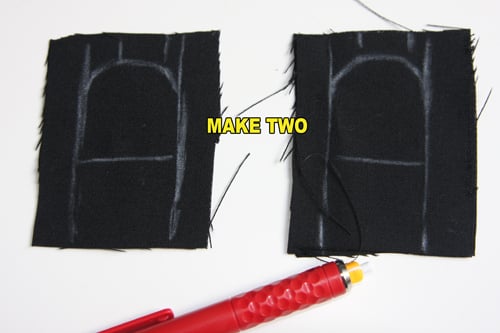
28. Do the same for the other 2 pieces of fabric.
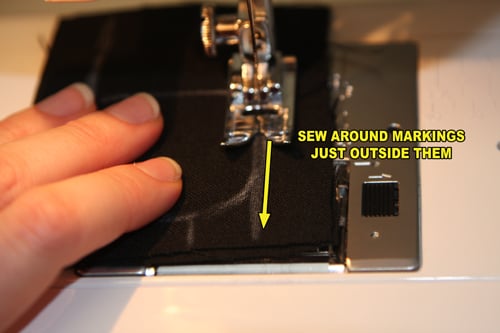
29. Sew around the “D” on each pair of fabric pieces, just outside you markings. Leave a small area unsewn on the flat side in order to turn them right-side-out.
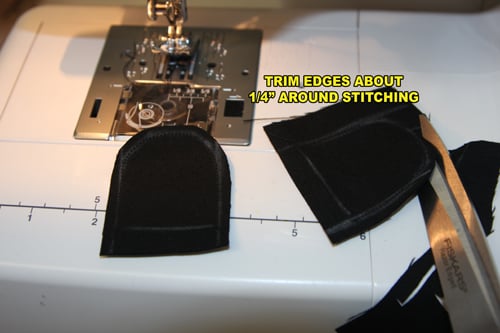
30. Trim fabric around the sewing at about 1/4″.
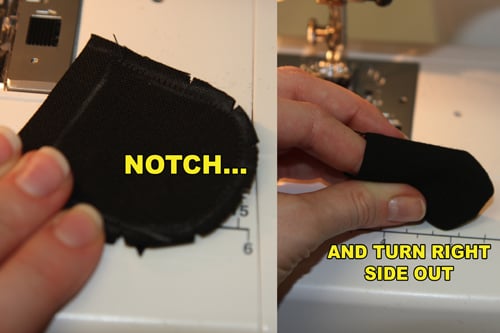
Notch, then turn the pieces right side out. Tuck the unsewn areas’ raw edges to the inside. Press both pieces with an iron to flatten.
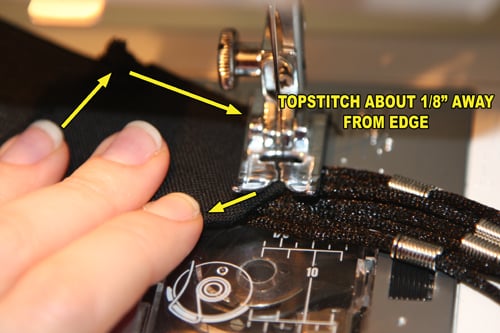
31. Place one D piece over where the cords are sewn to the elastic, in order to cover them. (Rounded edge of D needs to cover the cords but hang off the edge of the elastic.) Topstitch around edge of D, about 1/8″ from edge, to secure it to the elastic and the cords.
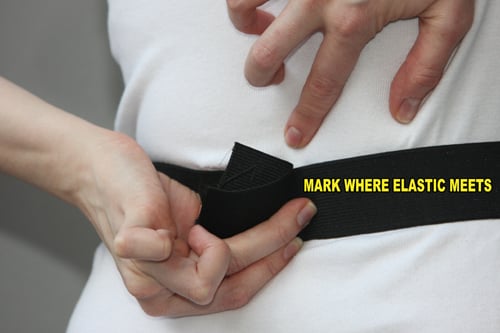
32. Try on belt, and center the knotted cord at your center front. Mark where the elastic meets at your center back. Cut elastic at that measurement.
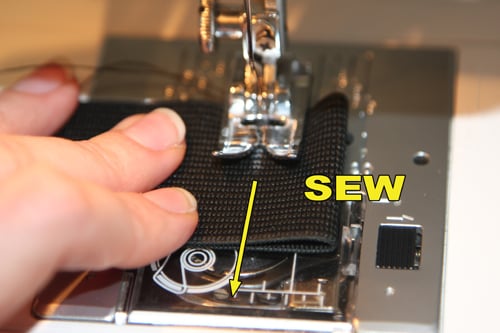
33. Fold each end of elastic under about 3/4″. Sew down about 1/2″ from edge.
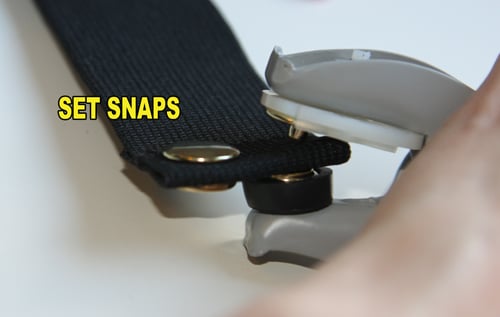
34. Set two sets of snaps in the elastic ends according to the instructions on your snap-setting pliers or die set.
Ta da! This tutorial looks complex, but doing it is incredibly rewarding – and the whole process is a lot faster than it looks!
Tip: If you want to make more of a statement piece, use thicker cord or rope, and thread it through large-hole beads instead of jewelry findings. You could even wrap strips of embossing metal around the cords instead of threading them through beads at all!
Have fun and go tribal:-)
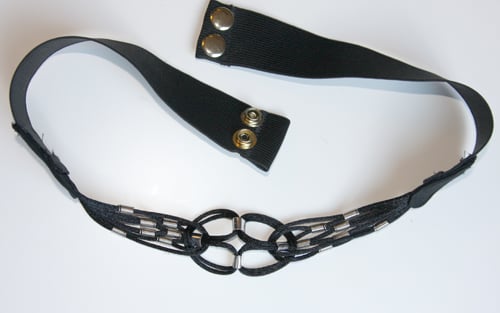
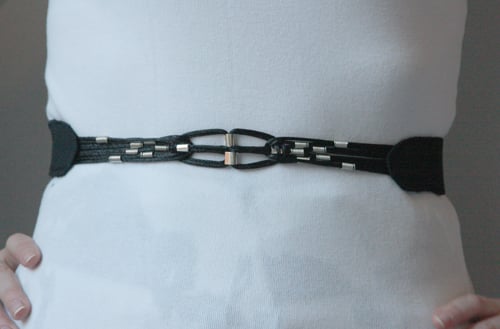
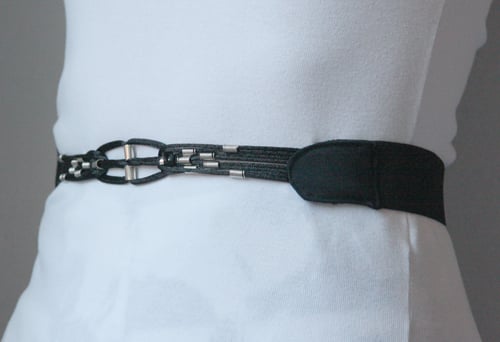
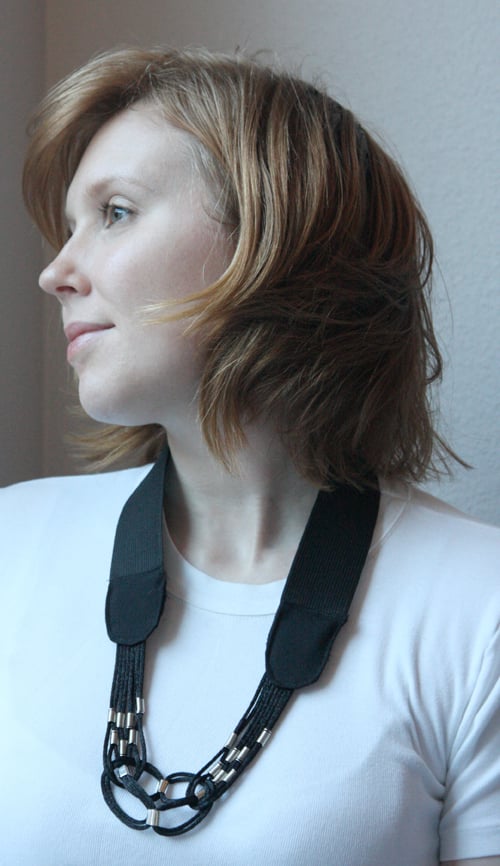
It also doubles as a cute necklace at this size!

xo
Carly
as originally posted on Threadbanger.com
Save
Save
Save
Save
Save
Save
Leave Comment
Apr 13, 2010 | Fashion
Pink-lined angle sunglasses: from the Buffalo Exchange
Chain n rhinestone jumble necklace: Forever 21 (not on website, but here is something similar)
Bird pendant necklace: Walmart…?
Studded wide fabric ring: DIY
Convertible cashmere wrap: Arden B. (similar here)
Pink suede belt: Old Navy
Pleat-front crepe trousers: Thrifted and altered to pegged and tapered
Snakeskin-print slingback platform heels: Metro7 (Walmart)
photo above from the Lavender Tea House website
The other day we visited the Lavender Tea House in Sherwood, OR – a little, out-of-the-way wannabe English tea house. (I’ve never been to an authentic one in England…or at least I don’t remember it since I’ve only been to England once when I was 10.) When I was a kid in NJ, there was the most wonderful, very-close-to-authentic English tea room called Sally Lunn’s Tea Room in Chester, NJ near where I grew up. I would beg my mother to take me there, though we only were able to go a few times in all the years we lived nearby. It was lovely- beautiful antiques on the walls, handmade pies from scratch, 20 different types of tea, and of course, the scones. (The best invention known to man…or at least sweet-lovers like myself!) Later they exapanded to a Princeton, NJ location, not far from the University. I haven’t been in years – I think the last time I went was in 2004 – but it was lovely…I had the Ploughman’s Lunch there (a huge hunk of cheese, handmade pickle, rustic bread…and of course, a scone.) If you’re ever near one of their locations, I urge you to visit. The website is above and menu is here if you are interested.
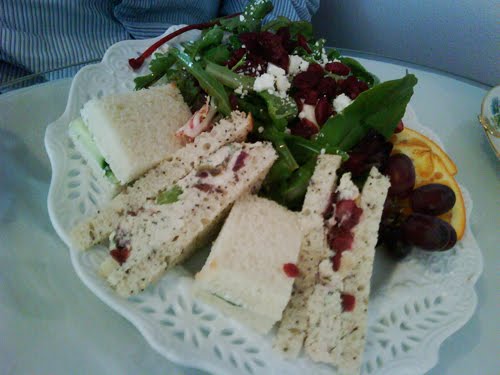
Back to the Lavender Tea House. Not quite such an experience – though they are quite established here, they haven’t gone all out on the antique decor or expanded their menu much. I’m not really a “tea connoisseur” either so their vast menus of teas makes little impression on me. (Hub noted that it is an “old lady’s restaurant” and that he was the only male every time we’ve ever been!)
But the scones – with strawberry preserves and clotted cream – are wonderful!
Lil Tot had a kid’s lunch that had cheese finger sandwiches, some with sprinkles pressed on them!! (That I found a little strange.)
Anyway, the scones were the most delicious.
So here’s what I wore: I have been wanting a bird-printed chiffon dress or romper for a long time since I saw them on the Miss Selfridges website…I hadn’t wanted to go through the whole rigmarole of ordering through them (I’d had some problems in the past), and endeavored to find some bird-printed chiffon at the fabric store, or maybe a Korean knock-off dress on Ebay or Storets. No such luck…so I eventually ordered from Miss Selfridge…ran into a problem…had to reorder after an annoying phone call to them…and eventually got my package more than 2 weeks later. Ugh. They really have to get their customer service and ordering process up to par with places like ASOS.com!! Anyway.
So I love this little bird-dress – it’s a bit short, and today I am wearing it as a top, tucked in to my pants. I didn’t tuck it in all the way, and thought it looked nicer like that.
The cashmere wrap below is apparently convertible and tie-able in alot of different ways, but I usually don’t bother. I always think of New York Fashion Week when I wear it since I was wearing it for my very first NYFW and spilled hot cocoa on the sleeve running to get to a show in the slushy snow!
These glasses are so cool – the insides are pink – found at the Buffalo Exchange for $8. (Though I could get a similar pair for $5.80 from Forever 21! Tho they’re not pink on the insides…)
The Atlas Ring (on my left hand, barely visible oops) is the engagement ring I gave to Hub some…oh, 6 years ago. He never wears it since he only wears his wedding ring, so he gave it to me awhile back.
I thought the bird necklace was appropriate to go with the top!
I love this jumbled-up rhinestone-and-chain necklace from Forever 21 too! (In my case…Forever 31??? LOL)
Hope you guys had a great weekend too!
xoxox
Carly
Leave Comment