Nov 16, 2009 | DIY

 I became obsessed with making myself a Panja [i.e., back-of-the-hand jewelry piece] since seeing the above in Vogue October 2009. For all it’s highbrow designer, impossible-to-make-yourself fashion spreads, once in awhile the magazine showcases an idea that’s just mindblowingly awesome. How cool is this rhinestone-and-chain Alyssa Norton piece that the model above is wearing? (All her jewelry is really eclectic and covetable…to sum it up to its lowest common denominator, she likes wrapping silk thread around rhinestone chains; making rhinestones “cast” in metal and set into jewelry as if precious stones; barettes with dangling cords and rhinestones; and chain mail. Def. check out her site if you get a chance!)

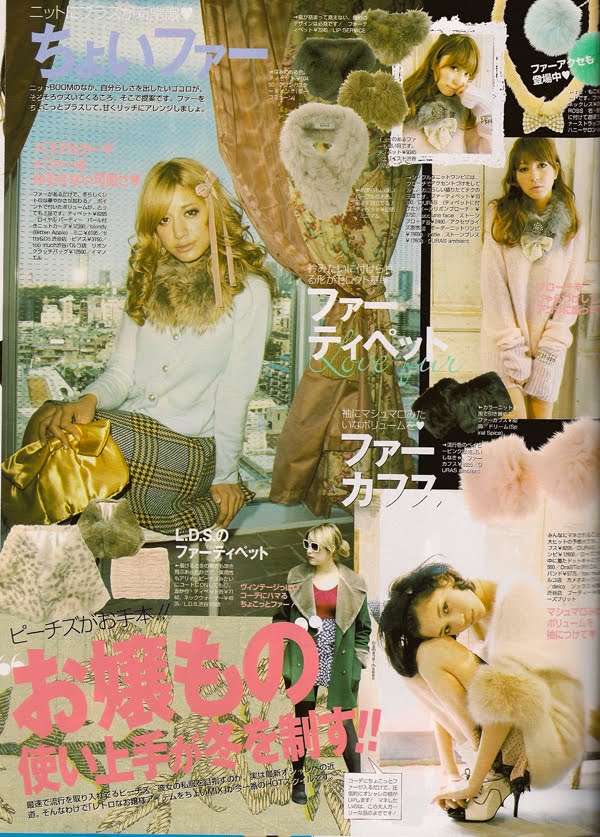
But I’ve had Panjas on the brain since about 2005, when I saw the above Hahn An Su (sp?) design in a Vivi Magazine. I didn’t know what they were called then, but I definitely wanted one!

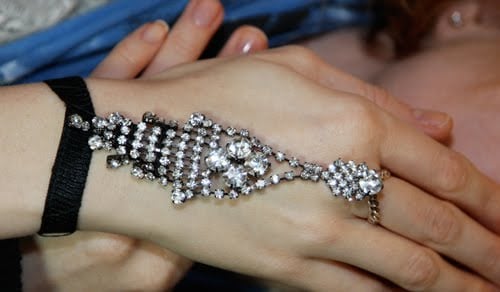
And then recently I saw this photo posted at Maverick Malone. She’s such a cool girl – and has great style – she just wrapped this broken necklace around her hand and wrist and called it a day. Love.
I don’t really know much about Panjas, so I am unable to educate anyone about them (and if they have religious significance I’m very sorry for my desecration and sacrilege) but….
Perhaps you can feel a DIY coming on?? LOL
I’m not paying $805 for the Alyssa Norton piece! So here’s the DIY:
How to Make a Panja [Back-of the Hand Jewelry]
You Need:*1 post rhinestone earring, pictured above (I used these earrings I got from Forever21 for $9.80)
*2″ flat silver curb chain
*1 small silver jumpring
*1.5″ wide x 8″ long piece of black fusible stretch mesh interfacing
*1 pair sew-on snaps
*needle + black thread (doesn’t have to be silk but can be if you like)
*pliers
*sewing machine
*iron
How-To:
1. Push the earring post through the center link in your chain piece. Using pliers, bend down and around the chain so the earring is secured and there’s no scratchy post end sticking out.
2. Wrap the chain around your index finger – cut to size. Secure with a jumpring.
3. Fold both long sides of mesh interfacing in towards center. Fold again in the center so you have a long rectangular strip with all raw edges enclosed. Iron flat – the heat of the iron will fuse the mesh together.
4. Sew along long edge of mesh to secure the folds you made.
5. Fold each shorter end over and secure with hand-stitching.
6. Place earring flat and stitch bottom rhinestone dangle to center of black mesh. This is the tricky part – you just need to weave in and out of the rhinestones with your needle, securing them both together and down. You don’t want the rhinestone dangles to move too freely across the back of your hand – so sew together inbetween the settings, and be carefuly of the thread catching on the rhinestone prongs.
7. Wrap the thread around the black mesh for a textural effect. (Here, to make it exactly like the Alyssa Norton piece, you can smudge silver fabric paint at intervals onto the black mesh, and decorate with rhinestones. I chose not to because I wanted more simplicity.
8. Hand-stitch a snap and its counterpart to each end of the black mesh.
You’re done! Super-easy, right???
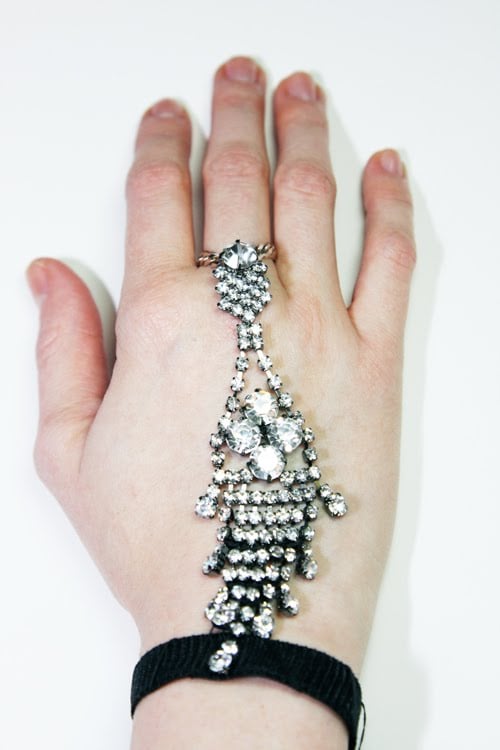
Feeling the backs of my hands are sad and naked now without my Panja….
Happy DIY’ing!
xoxo
Carly
Save
Leave Comment
Nov 15, 2009 | Fashion
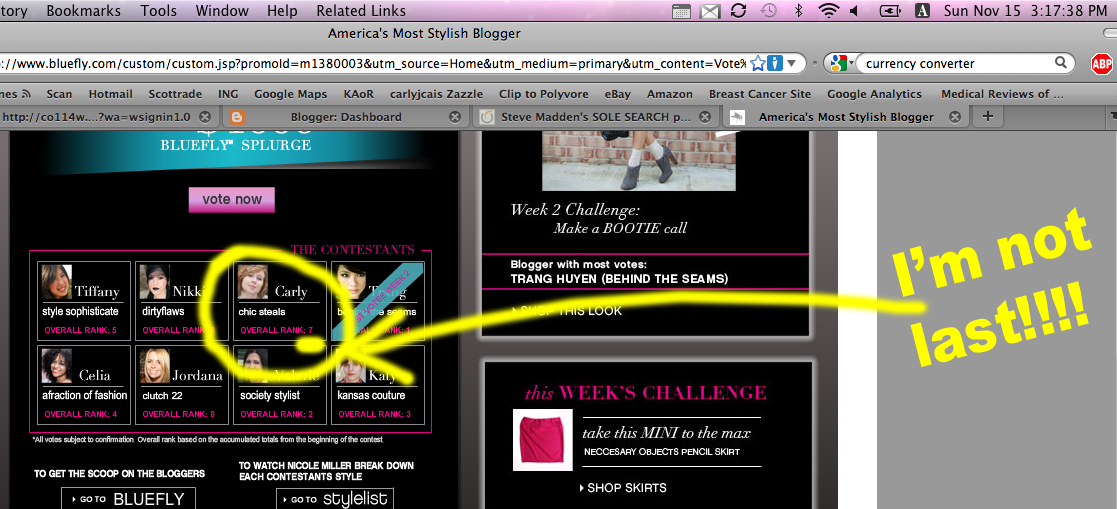 There’s nothing like a popularity contest to prove just how unpopular you really are.
I’ve been completely bummed out about how I’ve been ranking in America’s Most Stylish Blogger Competition. But TODAY, FINALLY….I’m not dead-completely-utterly-indescribably…LAST. I’m SECOND-TO-LAST!!!!:-) Totally made my day! *dances around room now that I don’t suck the most out of everybody for once* I’m RANKED 7 OUT OF 8!!!
Yippeeeeeee!
(And if you haven’t voted yet today…do you think we can shoot for #6 out of 8??? 😉
Leave Comment
Nov 15, 2009 | DIY, Fashion, Media

I’ve written before about how much I adore Vivi [a monthly Japanese women’s Magazine published by Kodansha]. It’s so jam-packed with trendy, opulent items – the styling is always spot-on – the girls are gorgeous…AND many of the pieces featured start my styling and DIY wheels a -spinning.
 Case in point: this studded black cardigan! Totally DIY-able…just pick yourself up some heat-set square studs from Kandi Corp (or your local craft store if they sell that kind of stuff…FYI Jo-Ann’s and Michael’s DON’T!) and jazz up the button plackets and front pockets with a line of studding. But this was from the November issue of Vivi…so let’s move on to the December one.
 How cute is this? Jazz up a plan black sweatshirt or sweater rolling around in your closet with sweet little bows in every color of the rainbow.
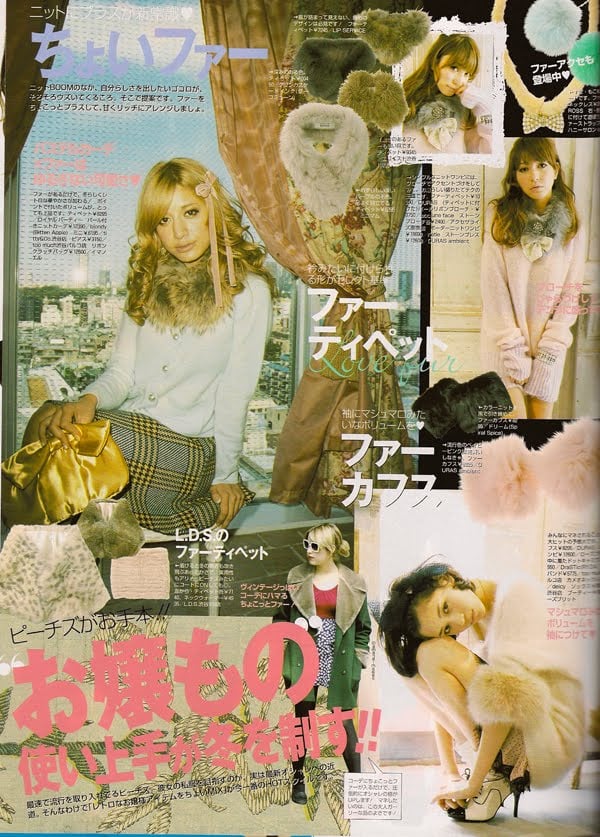 For winter, try adding a bit of fur [faux!] to an outfit – like with a ribbon-tied collar or puffy removable cuffs. Boudoir-feminine.

How cool is the
chain-adorned jacket on the top right? Totally DIY it!
 I DIED when I saw this spread: 5 items [print tee, leopard scarf, studded cardi, lace gilet, slick leggings] on sale from 10/23 for 10,500 yen!! [About $110.] From Spiral Girl, one of my favorite brands. *sigh* Will likely be sold out by now – and I totally would have rocked this every day as my go-to outfit this winter. Curse those fools who wait an entire MONTH before shipping Vivi to the U.S.!!! Would that I had knooooo–o-ww-wwwn!
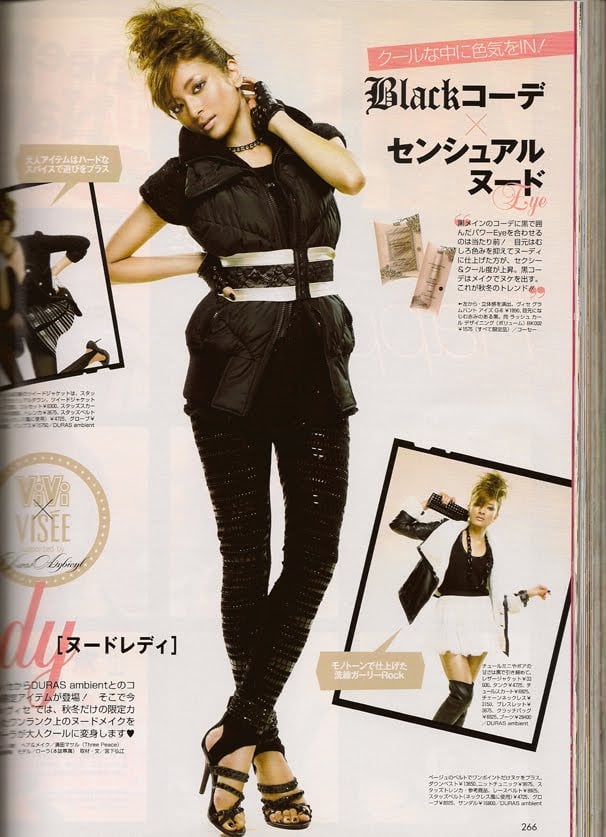
I’ve never seen anyone wear
a corset belt over a ski parka…but she looks undeniably chic
…and not at all bulky here.
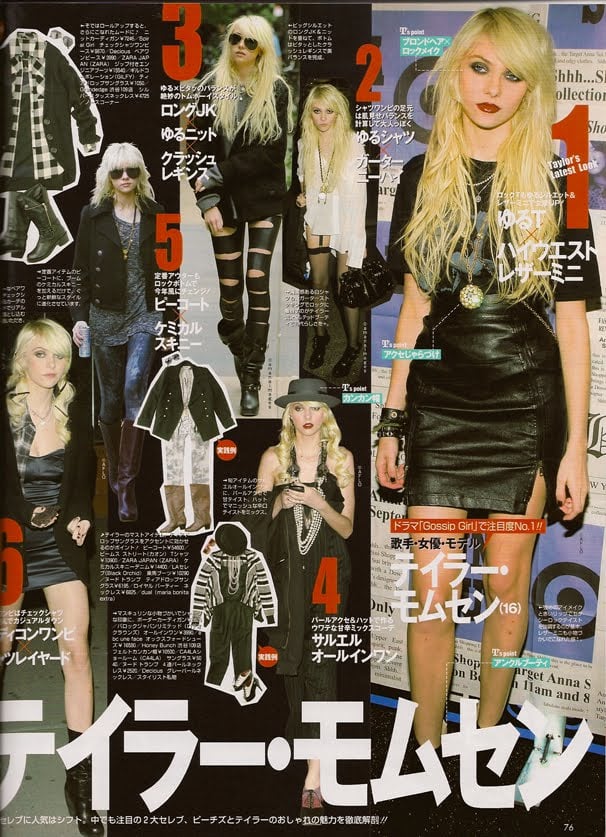
This was a spread where they showcased Taylor Momsen’s style and Peaches Geldorf’s style. Taylor’s looking pretty fierce and fabulous. (We’ll skip Peaches hahahaha.)

This
little striped shirt under a poufy black dress with bow at the back + red beret [upper right] screams Parisian-chic to me. Maybe I’ll just start with the red beret.
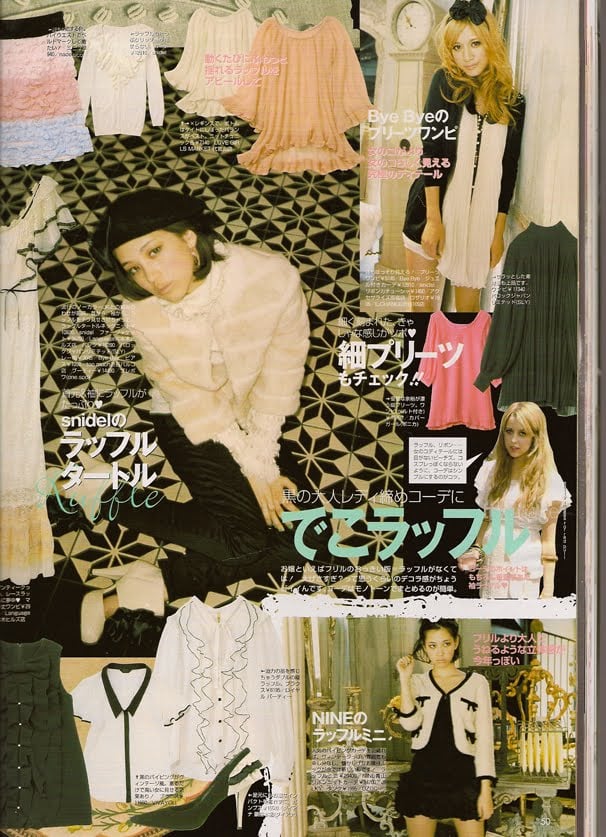
Girly, ruffly, chiffon-y finds.
Love.
 Fabulous
 idea: a removable, ribbon-tied,
embellished collar.
Slip over a tee to jazz up a basic outfit. Totally DIY-able.
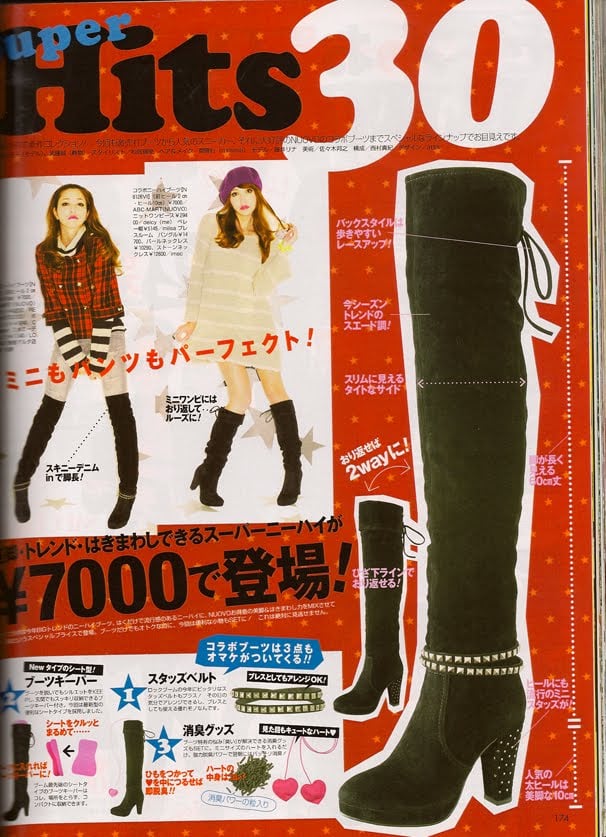 I’m in love with these shoes. Suede, over-the-knee, cuffable, and with removable studded ankle belts and chunky studded heel for 7000 yen [$78]?? Me WANT!
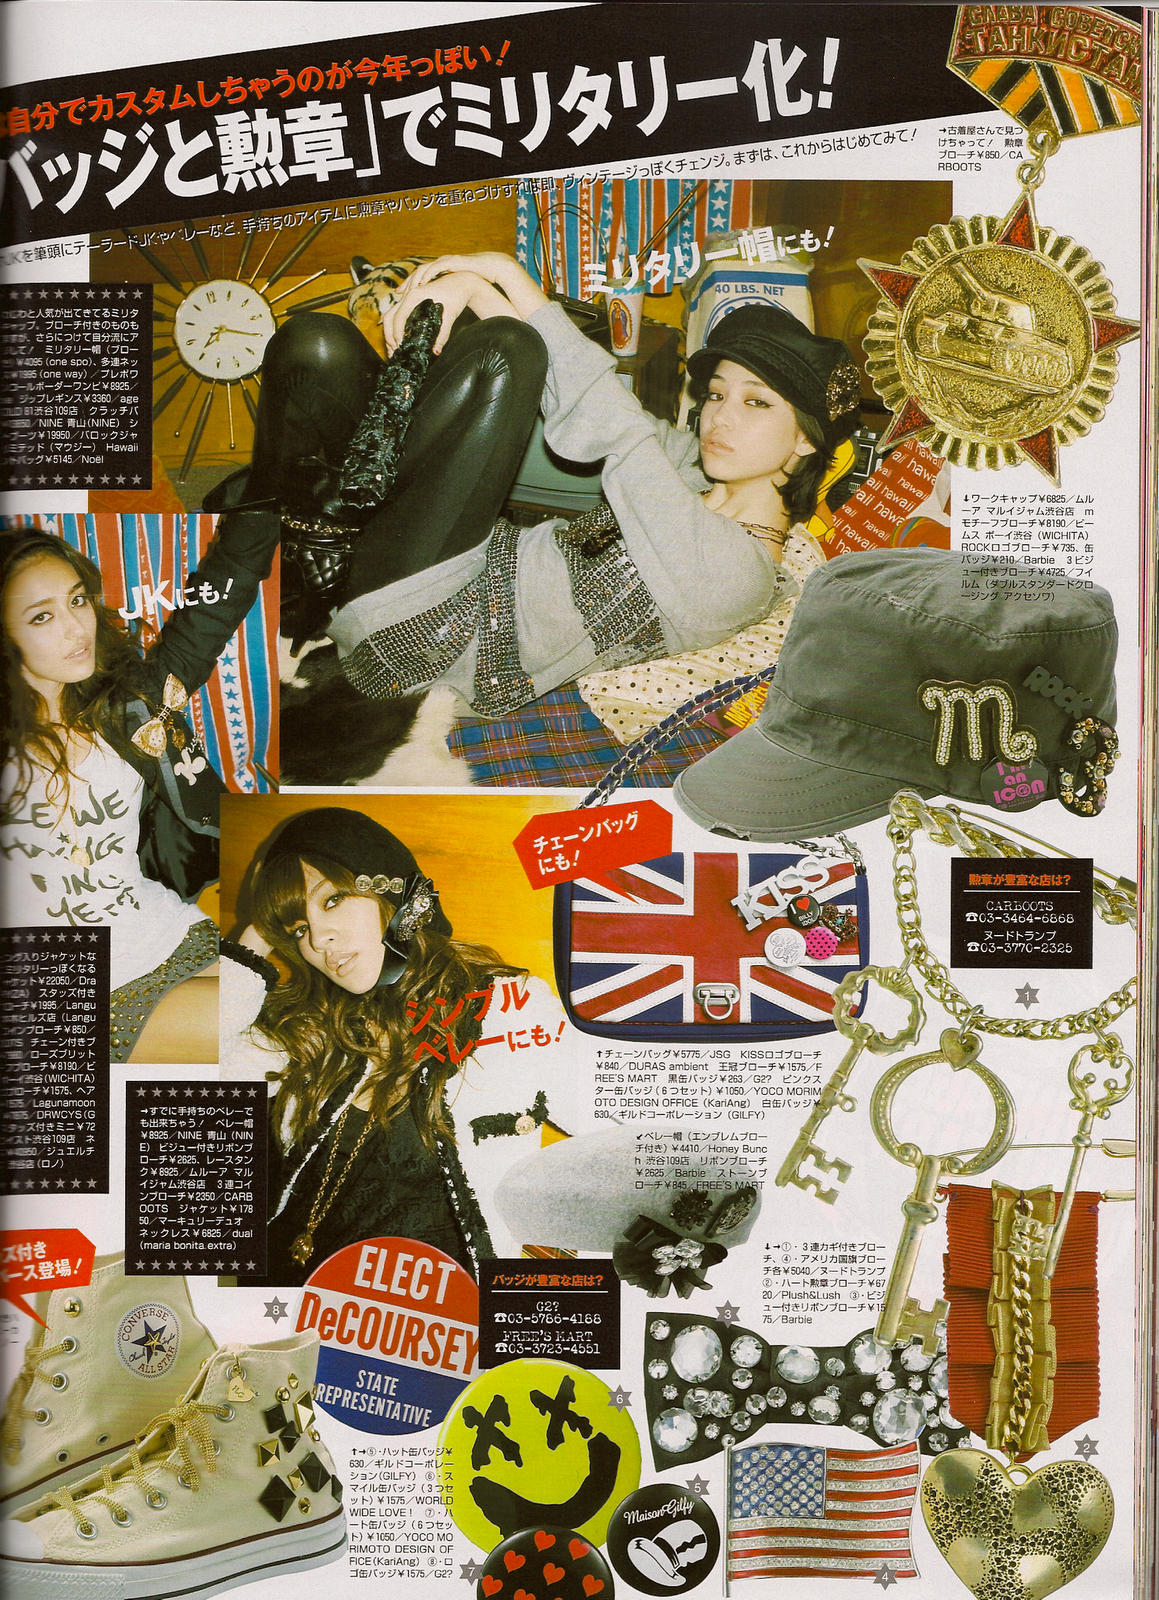 Studded Converse
? Check. Cute
military accessories? Check.
Rhinestoned-bowtie? Check, check, and CHECK!
Hope this has given you some ideas!
To see more from this issue check their homepage out here. (Rollover the Table of Contents page and you’ll see clickable items where you can click and view the pages if you can’t read Japanese.)
Happy DIY’ing!
xoxo
Carly
Leave Comment
Nov 13, 2009 | DIY
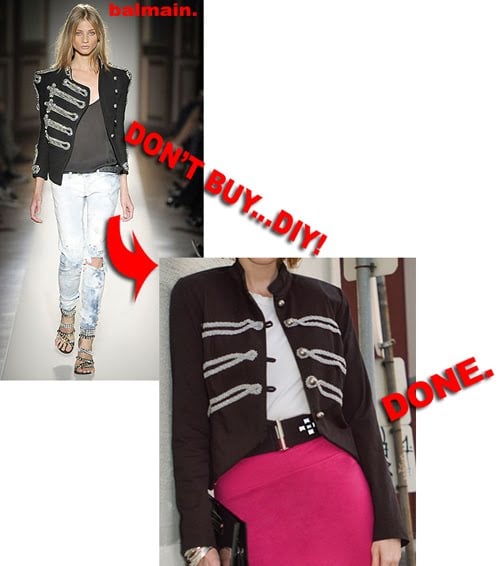
As you may have seen in my most recent entry for America’s Most Stylish Blogger Competition (I’m getting a little tired of writing that by now;-) All the shameless self-promotion is wearing me down!), I styled the hot pink miniskirt with a DIY band jacket that I made from a jacket I already had in my closet.
No joke! Here’s the DIY:
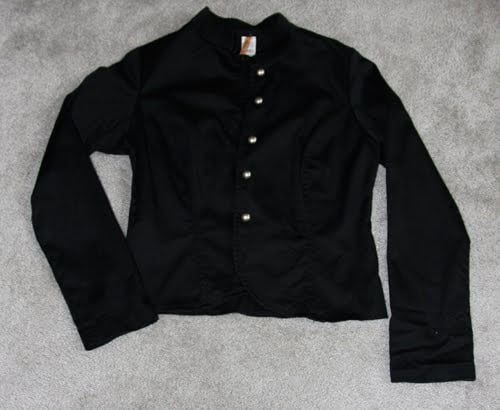

1. Use a jacket that is a shorter length with a little mandarin collar or similar collar to what you want your final jacket. (A boxy shape and flimsy material for the jacket is best!)
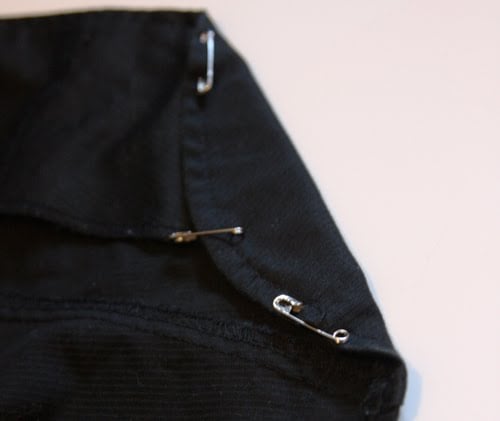 The underside of the pinned edge.
2. Pin under your hemline, using safety pins, to create that cutaway band jacket shape. Iron if you want to create a crisp, sharp edge.
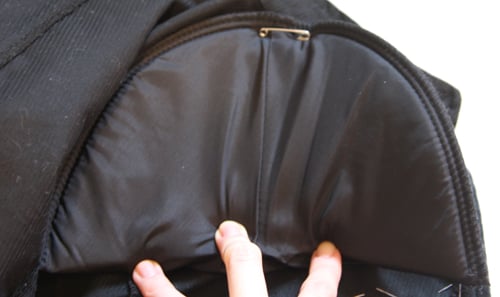 3. Pin shoulder pads inside the shoulders, using safety pins. (I used foam Dritz ones in Large that I got at my local Jo-Anns. Alternatively, you can rip them out of a jacket you already have – but you need them big to create that strong structured shoulder, so double them up if you can!)
4. Sew decorative trim onto the front of you jacket in scalloped curliques. (I just used matching thread and long basting stitches. This took awhile, but wasn’t very difficult.)
The inside of the jacket showing my basting stitches.
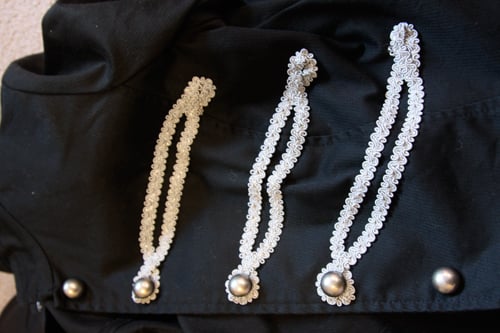
The trim on the outside encircling the buttons.
5. Optional: If you want, to create more of a “couture-looking” line below the shoulder, take in the sleeve in the upper arm area a little. (By sewing a line inside the sleeve seam line in the upper arm area.) This will make your shoulder pads “pop out” and give it that Balmain-look. Ideally speaking.:-)

PLUS, once you get tired of the look, remove your safety pins and shoulder pads, cut your basting stitches, re-iron your hem and your jacket is back to the way it was! *sigh* Multiple options in the same garment are just so, so lovely.
Happy DIY’ing!
xoxox
Carly Multifunctional Cais
Save
Leave Comment
Nov 12, 2009 | Score!
There’s about a hundred sales/specials emails in my inbox right now…
Just wanted to share with you guys:
——————
WET SEAL
Take an Additional
30% Off Clearance at
Wetseal.com;
Buy 1 Get 1 50% Off in Sweaters and Jackets
——————-
Get a jump on all that holiday shopping, perhaps? 😉
-Carly J. Cais
Leave Comment


 I became obsessed with making myself a Panja [i.e., back-of-the-hand jewelry piece] since seeing the above in Vogue October 2009. For all it’s highbrow designer, impossible-to-make-yourself fashion spreads, once in awhile the magazine showcases an idea that’s just mindblowingly awesome. How cool is this rhinestone-and-chain Alyssa Norton piece that the model above is wearing? (All her jewelry is really eclectic and covetable…to sum it up to its lowest common denominator, she likes wrapping silk thread around rhinestone chains; making rhinestones “cast” in metal and set into jewelry as if precious stones; barettes with dangling cords and rhinestones; and chain mail. Def. check out her site if you get a chance!)