Nov 6, 2014 | Fashion

Welcome to another installment of
Chic for the Week, where I share a couple shopping picks that have been on my mind lately.
Hope everyone survived (and enjoyed…?) Halloween! Now with Thanksgiving just around the corner, I’m thinking of warm Fall hues of red and brown, and a little bit dressy of an outfit for a special holiday gathering with family and friends. Here are a few things with which I’d like to pad my closet:
1. It’s now sweater weather, and this retro-style Warehouse 60’s V-Block Sweater is tennis-with-the-girls-meets-prep-with-a-twist. Wear with a pair of slim blue jeans tucked into brown boots and a camel-colored coat for the perfect Fall outfit.
2. These look like a lower-priced Valentino to me, but a pair of these Wild Diva Lounge Adora 55 Red Studded T-Strap Pointed Heels will add a dose of sophistication and edge to your T-day ensemble. (Plus they do double-duty with a prim sheath dress for work, or with a bodycon dress for a night on the town.)
3. This Red Jacquard Skater Skirt would look holiday festive with the proper pair of tights, or be the standalone star of a sparkly party outfit.
4. This Critter-cal Mass Bag in Fox is the most adorable thing I’ve ever seen! Of course you could opt for a plain foldover clutch to complete the outfit – but why not go for this sweet little critter as a foil to those super-sexy shoes?
Hope everyone is having a great week so far!
xo
Carly
Leave Comment
Oct 30, 2014 | Fashion
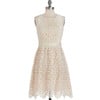
The coming Winter chills mean layering is a must in colder climbs – and Modcloth has you covered when it comes to cute (and sophisticated!) layers. Inspired by the unrelenting recent Portland rains, I put together a Polyvore board featuring items from Modcloth that you can layer together to bundle up against the weather and still look fantastic.
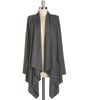
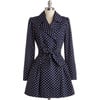
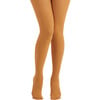
Pairing mustard and burgundy looks high-end and polished for work, and pops of navy and blue make it fun. Add a bit of pattern for interest (polka dots) – pair with a lightweight Summer lace dress (for versatility and texture), and pop on a pair of mustard tights to tie the whole look together. Burgundy accessories complete the look – and, if it’s extremely frigid, you can add a soft cardigan underneath, and a jaunty beret and short wool gloves to keep even warmer.
This look works on a variety of body types and ages – just add an umbrella if you live in the Pacific Northwest. 😉
See Modcloth’s other great cardigan selections and outerwear to complete your Fall layering looks!
Stay warm this season!
xo
Carly
Leave Comment
Oct 29, 2014 | Fashion, Life
 I’m a budget-shopper, you’re a budget shopper. But no one wants to actually look like they’re wearing a $4.99 blazer, no? They key to looking well-dressed is making sure you’re choosing excellent items for their value, that you can spice up with a bit of budget-friendly DIY prowess. Here are 7 ways you can look like a million bucks on a budget (even if you only spent $20!): (more…)
Leave Comment
Oct 28, 2014 | DIY
 I LOVE me some freeform, rough-hewn, organic-looking ROCKS lying about the house as home decor (and I’ve been a rockhound for as long as I can remember!). Now it’s particularly fashionable to have some large geode chunk or quartz piece sitting on one’s desk or bookshelf (which looks extremely high-end and chic…just ask Mitchell Gold + Bob Williams). But unfortunately these large hunks of rock just cost so darn much, they’re more an investment piece than something you can just get your hands on easily. I decided to go the DIY route, and make my own version of this ubiquitous geode decor – and use it as my own freeform paperweight for my desk. Plus, it’s waaaaaay cheaper than you might think! (Especially when you have some leftover quartz from other projects, like my DIY Free People Quartz Wrapped Bangle and DIY Free People Gold-Dipped Quartz Necklace.)
  Here’s how to make your own:
Materials:

polished quartz chunks (get yours from a rock shop in bulk…I got mine from Ed’s House of Gems in NE Portland) / plastic lid with a lip / Weldbond Adhesive (or other glue for rocks) / clear beach glass (found in the floral section at the craft store – it’s used as vase filler) / gold gilding liquid and brush (optional) / rubber bands (optional)
How To:
 1. Start by placing your beach glass pieces and favorite quartz pieces into your lid to create the base of the piece. Fit as many as you can so that they are stable on the lid. It’s best to vary the shape and size of the pieces, and mix the polished quartz in with the matte beach glass.

2. Once you’re satisfied with the arrangement, pick every other piece up and carefully add some generous glue along the edges where it touches the other pieces. Some you’ll pick up, others you won’t, but in the end you want all the pieces to have glue along their touching edges. Allow the base to dry.

3. Once the base is sturdy, spread a large amount of glue in all the crevices and gaps [the glue I chose dries clear]. Press stones into the gaps to fill out, paying attention to the overall shape and making it rough and organic-looking like a real geode would be.
4. Allow to dry. You may have to repeat this process a few times until you have built up the top of the piece, since each layer may get too heavy with rocks and they start sliding off before the glue has dried. Finish with a top layer mostly of quartz piece and allow to dry.
5. (not pictured) To make it look like a true rough-hewn geode piece, once dried flip the piece over and glue rocks to the bottom of the base so the base isn’t so perfectly round and the shape of the lid itself. Rubber bands can hold these pieces of rock onto the base until everything is dry.
6. (not pictured) If you so desire, you can give the bottom of the paperweight a layer of liquid gilding…I totally would have, except the lid to my gilding was fused closed and no amount of wrenching would get it off. So I decided the finished paperweight was better without the gold!!

And that’s it! Even though it’s technically just glass and quartz glued together…one would be very hard-pressed to actually figure out that it wasn’t just some cool-looking rock formation. 
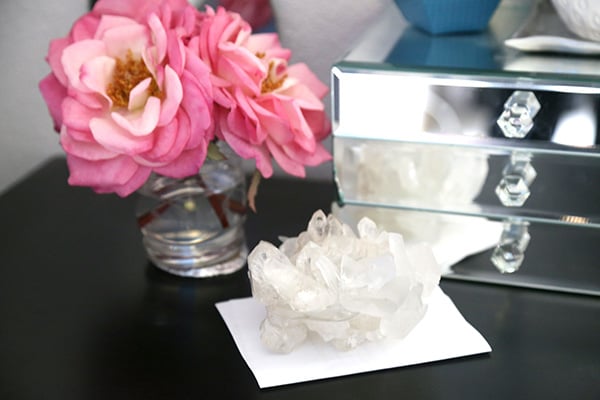
(P.S. – the beautiful tea roses in the vase are actually one of my favorite Joss & Main purchases! I love their faux florals; these ones are the soft-petaled super-realistic ones.) Plus, the whole project cost me a total of $12.99 ($9 for the bag of quartz, which I had already used for other DIY’s…and $3.99 for the beach glass from Michael’s). I already had the Weldbond at home!
That sounds like a super-bargain, no?!
Hope your office or shelf looks snazzy and lovely with this chic and cheap upgrade. Happy DIY’ing!
xo
Carly
Save
Leave Comment


 : Forever 21 (on SALE today for $12 OFF!!). Cat-print blouse: Gap (look on Ebay for this piece popping up here and there!). Striped Kristel convertible clutch: c/o Free Endearment. The Ginger wide-leg jean: 7 for All Mankind. Short rainboots: Dizzy. Rings: Gorjana thin stacking rings, mocha, unknown, and Shashi solitaire ring.
 Funnily enough, every day I actually am pretty dressed up since I have to work in the mornings at Studio 3. (more…)