Apr 20, 2020 | Fashion

This post contains affiliate links – and I receive a small commission on sales from readers clicking through these links. My full
Disclosure Policy is here.
So many fashion trends were on the Spring & Summer 2020 runways that seem recycled from past years. Well, that’s pretty much to be expected with fashion – what goes around, comes around! Though I’m not suggesting you indulge in ALL these trends ALL at once (then you would be a slave to the Fashion Industry’s whims)…you might find inspiration to pull out of your own closet, give a dust-off, and enjoy again.
The weather is warming up, the birds and insects are coming out of hiding, flowers are blooming, the world is in lockdown. Let’s look at some pretty things to lift our spirits, shall we?
8 Fashion Trends for Spring & Summer 2020
1. The Crochet Dress
Seen on the Spring runways at Marni, Fendi, and Jil Sander (just to name a few!) this 70’s revival received a modern update this year. Pretty, airy, and feminine, these can display a little – or a lot! – of skin to the warm breezes of Summer.
Recommended: Navy Blue Mesh Panel 3D Floral Lace Double Layer Midi Dress, $40.99
2. The Bra Top
Underwear as outerwear showed up at Dior, Givenchy, and Giambattista Valli. Channel the high-end designers by sporting a demure bikini top or bra that looks less like lingerie and more like a cool lounge top. Even if you’re naturally shy, you can still pull off this fashion trends for spring & summer 2020 by layering under a blazer or lightweight Spring coat.
Recommended: Padded Lace Longline Bralette, $13
3. Yellow Neon
I’ve always loved this color and certainly don’t need the latest crop of designers telling me to go wear it! Though Courreges, Marni, and Balenciaga got with the program this year, neon yellow will always be a neutral in my mind – and something that is cheerful and sunny even on cloudy days.
Recommended: Candidly low heel sandal with tubular strap in yellow , $60
, $60
4. Ruffled Tiers
Prairie-style for days, these ruffled tiers are super-sweet volumes of indulgence at the Christopher Kane, Roksanda, and Alexander McQueen shows. I feel lighter and happier when covered in ruffles (seriously, can you EVER have too many??) and this is truly a welcome trend.
Recommended: DIY Babydoll Dress from 3 Men’s Shirts, $0 if you own 2 button-down shirts already!
5. Bermuda Shorts
Kind of an update on the cropped clamdigger-length pants that were everywhere last year and you had to have model proportions to pull off well >: ( …the longer-length shorts that hit around the knee are a new iteration. Bottega Veneta, Chloe, and Altuzarra offered their interpretations…and paired with a cute color-coordinating blazer these shirts give off a cool, laid-back 2020 vibe.
Recommended: Board Short in Black, $40
6. Polka Dots
Another graphic print I just adore – they almost act as another neutral when paired with a more busy print, and help a color POP when layered together. Dries Van Noten, Sacai, and Maison Margiela shared their pretty Spring versions of this sophisticated classic.
Recommended: 80’s Vintage Polka Dot Smock Top in White, $39.90
7. Vests
Vests are already a wardrobe staple for me and I’ve been wearing them for years – so happy to see them back in fashion! Something tailored, fitting, and chic is the name of the game – at Celine, Max Mara, Gucci, and Rag & Bone.
Recommended: Jersey Cropped Suit Vest,$29
8. 1960’s Wallpaper Prints
I’m personally not a huge fan of 60’s wallpaper prints…which showed up in the Prada, Marc Jacobs, and Gucci collections…but I DO love a tropical oversized print! Nothing says Summer so much as large flowers and palm trees! (Evidenced by my DIY Printed Flat-Bottom Zip Samudra-Style Pouch tutorial using my Palm Tree Print Fabric, available on Spoonflower.)
Recommended: Tropical Print Paperbag Waist Belted Shorts, $8.95 (!)
The nice thing is – if you DO want to purchase any of the above – they ALL can be bought online – and all delivered to your home. Except of course the DIY Babydoll Dress – which you can make yourself from 2 button-down shirts on hand!
xo
Carly
Leave Comment
Dec 29, 2017 | DIY

It’s officially Party Season (TM) – and that means glittery, festive, fun, loud, joyful celebrations!
 I really love making my own party hats (or putting children to work making party hats 😉 ) because they’re easy, cheap, and I can make them to completely coordinate with the party theme. Plus I can make them from scraps lying around! Perhaps you’ve never tried making your own, maybe because you don’t have time or it seems like a pain. But you may find that once you get [that party] started…you can’t stop! Now, let’s all hum that tune as we head on down to the how to…
How to Make a DIY Party Hat from Cardstock and Ribbon
You Need:
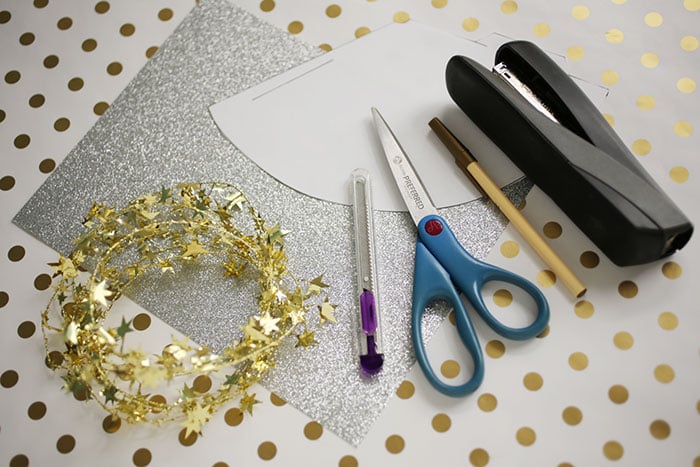
8.5″ x 11″ cardstock // Party Hat Template (click to download the PDF) // tinsel garland (I found this star version at Michael’s) // ribbon (not pictured – I used silver curling foil wrapping ribbon) // pen // scissors // stapler // box cutter // tape (not pictured)
How To Make a DIY Shooting Stars Party Hat:

1. Trace Party Hat Template onto the back of your cardstock.
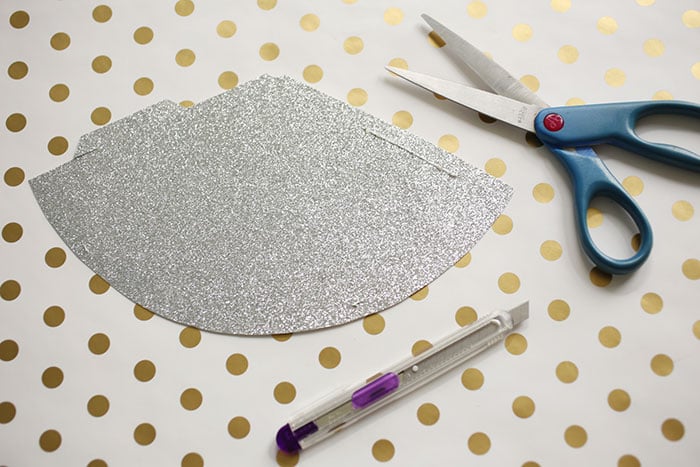
2. Cut out the template from the cardstock. Use the box cutter to slice where indicated.
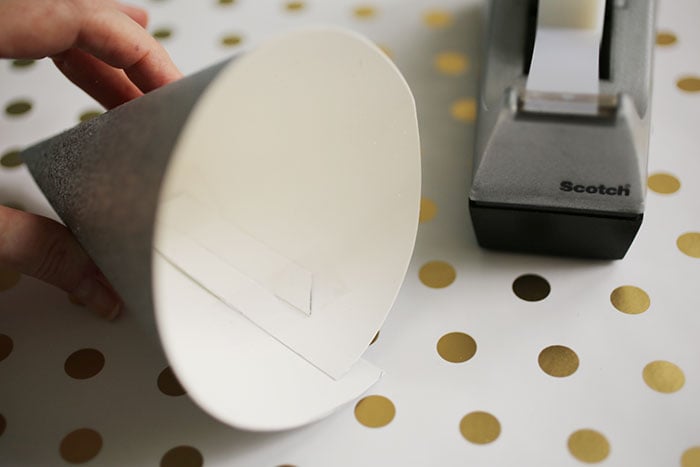
3. Curl the cardstock into a cone shape, and slip the edge tab into the slit you cut. Secure with some tape on the inside.
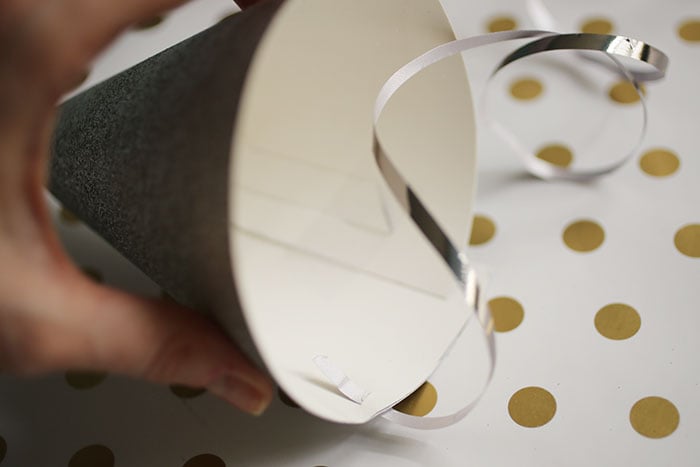
4. Thread one end of the ribbon into one of the small slits at the base of the hat.
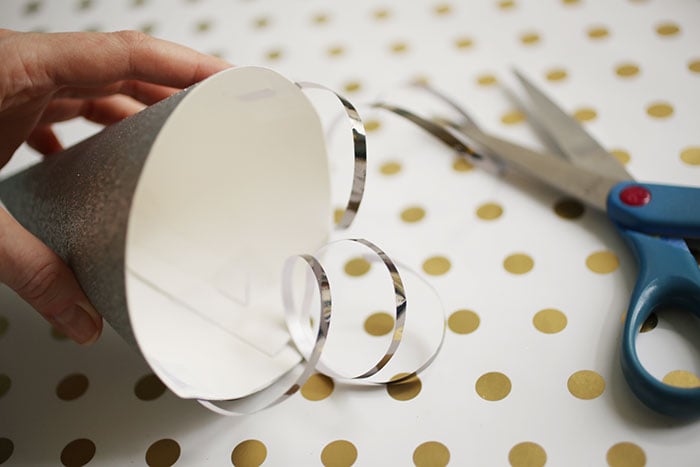
5. Secure with tape, and then cut to desired length. (Make sure that it’s long enough to tie under your chin!) Do the same for another piece of ribbon and the other side of the hat.
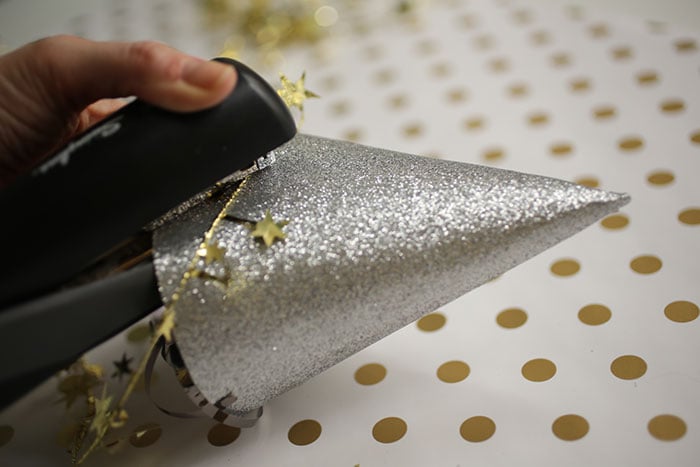
6. Now the fun part: decoration! Staple the garland to the bottom of the hat.
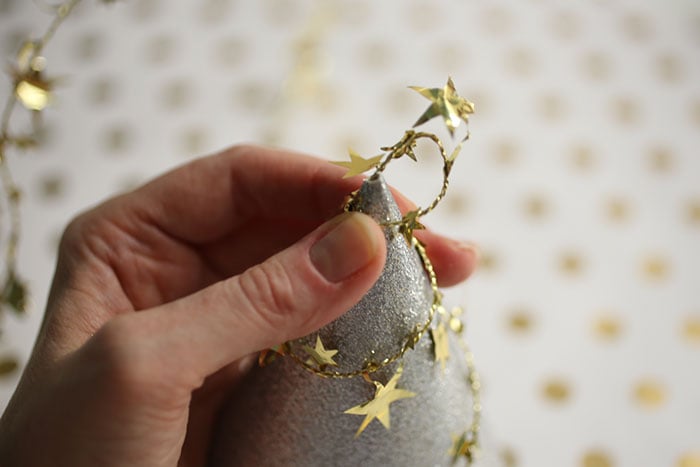
7. Twirl the garland around the cone hat, securing with staples if necessary. At the top, twist downwards and tuck into the hole at the top of the hat. Secure with more tape on the inside.

And that’s it! It will take you less than 5 minutes tops – with a fun and unique party hat!
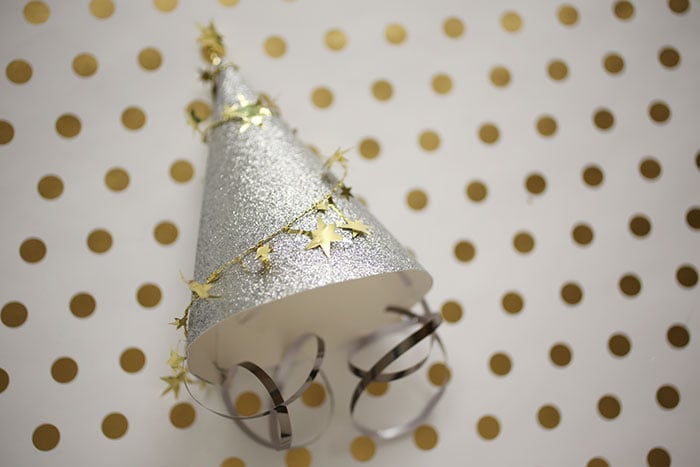
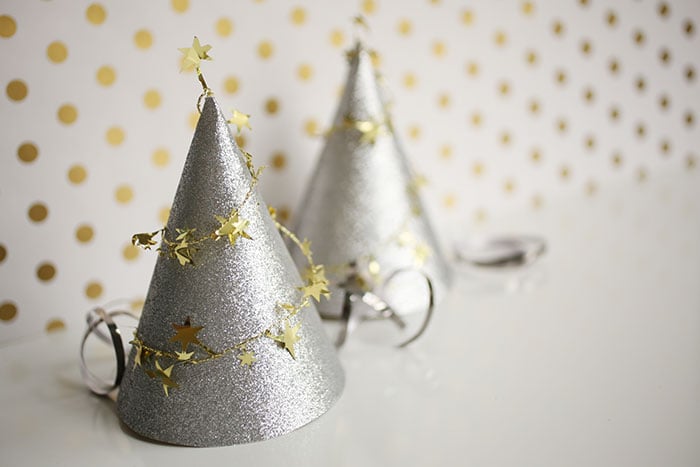
Have a Happy New Year’s, everyone! I just love a glittery beginning!
xo
Carly
Leave Comment
Dec 29, 2017 | DIY

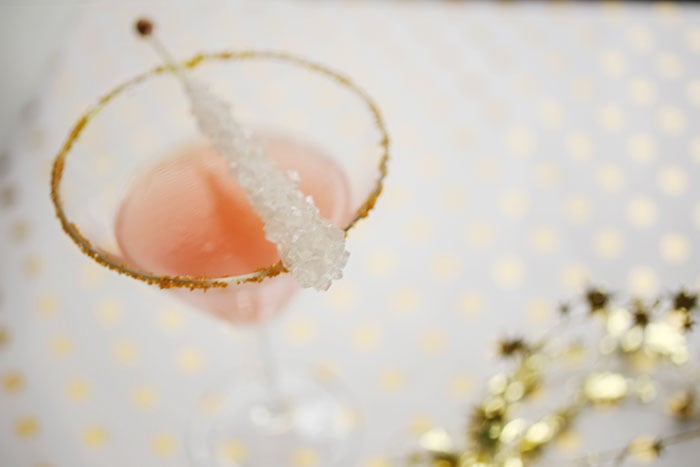
Interesting fact about me: I don’t drink alcohol. Period. I have many reasons why, though one of the simplest to explain is that I hate the taste. I think the last time I even tried a tiny sip of alcohol was back in 2012 (peer pressure: not wanting to disappoint a neighbor who was begging me to try some saké she had just bought and I just didn’t feel comfortable saying no). But it’s just not something that I enjoy, and as a result I have to be super-picky at parties when there are alcoholic beverages around. So I’ve started playing with my own versions of alcoholic drinks – mocktails so to speak – to see if I could come up with some fun, festive nonalcoholic drinks that are just as delish (and I would argue even more so) than their alcoholic counterparts.
What is a Mocktail?
A mocktail is a “mock” cocktail – i.e., a cocktail without the alcohol. Perfect for those who don’t or can’t drink (and kids too!) it’s a great way to celebrate special occasions without feeling “left out.”
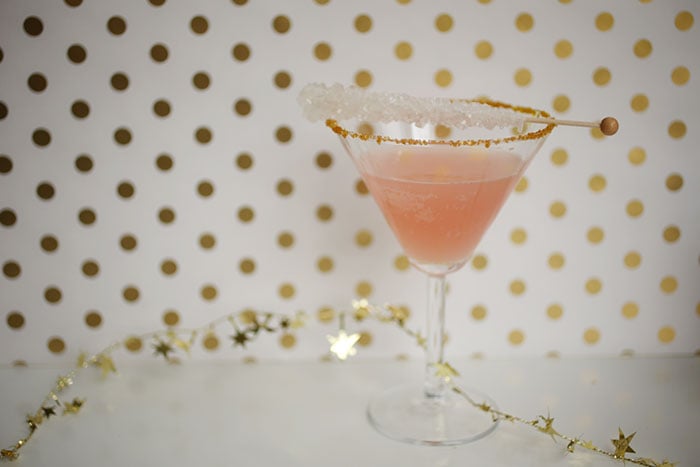

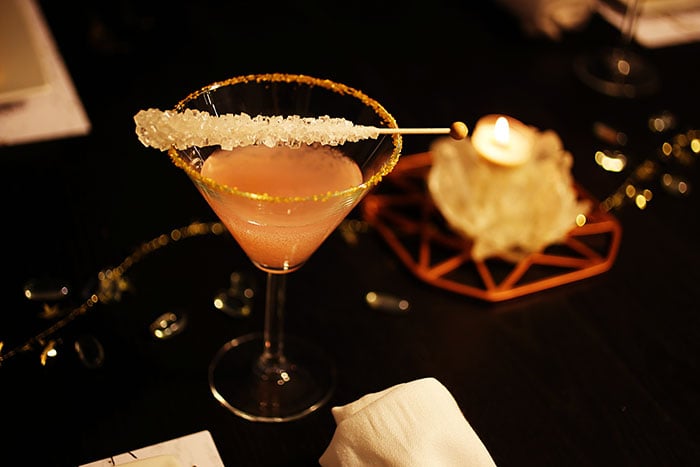
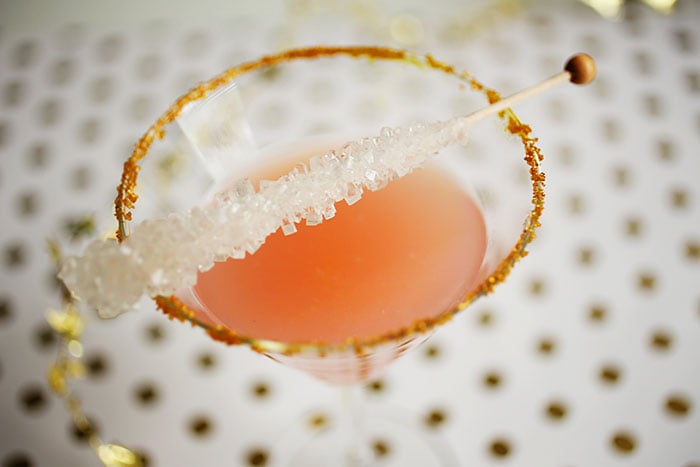
This particular mocktail takes a cue from a Fuzzy Navel (which I’ve never had) – but instead of orange juice it uses guava juice for sugary sweetness, tempered by lemon-lime soda to add some sour depth. The kids will love this drink because the presentation of it will make them feel oh-so-grownup…and the mocktail I staged for all these photos was promptly snapped up by my 12-year-old son the moment I was done (whose mouth was watering the whole time as he watched!).
Recipe for Nonalcoholic Sparkling Mocktail Holiday Drink
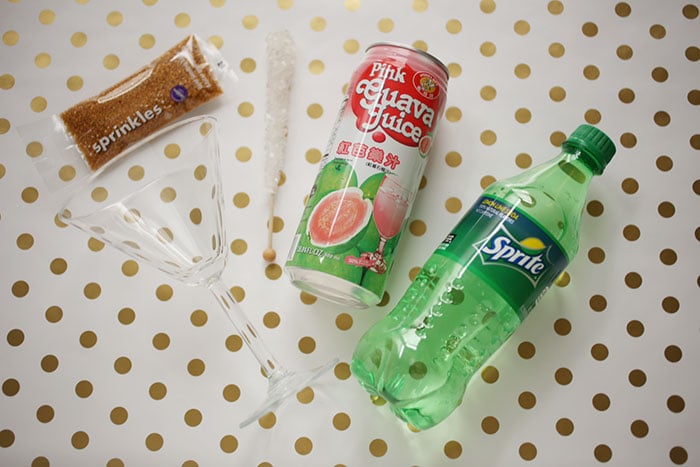
How to make the sparkling mocktail:
1. Pour colored sprinkles onto a plate wider than the rim of your glass.
2. Wet a paper towel generously, and wipe around the rim of the glass to moisten. Make sure you wipe up any water drips before the next step.
3. Turn the glass upside-down onto the plate, coating the rim with sprinkles. Turn right-side-up again and shake gently to get rid of any sprinkles that aren’t attached to the rim.
4. Use a measuring cup to mix the Sprite and guava juice in the right ratio. It may fizz a lot – and you may need to taste test to make sure you like the mix! More guava = sweeter, more Sprite = tangy-er.
5. Place a stirrer stick on top of the glass as a festive topper. (The kids will also like dunking it in the glass and licking the sweet juice off it!)
Celebrate your special occasion in sparkling, nonalcoholic style!
xo
Carly
Leave Comment
Dec 28, 2017 | Media
Hi friends, tomorrow I’m going to be a guest on KATU’s Afternoon Live show again!
Back in February I shared a project for making your own DIY Gemstone-Topped Jewelry Boxes (for Valentine’s Day, pretty home decor, or any other special occasion!).
Tomorrow I’ll be sharing some affordable ways to creating a sparkling, crystal-inspired holiday table (for New Year’s Eve or other holidays)- this time with a number of great DIY projects that I hope we’ll have time for! Here’s a sneak preview of some of the projects I’ll be sharing (or try to, if time allows):
DIY Shooting Star Holiday Party Hats
DIY Sparkling Holiday Mocktail
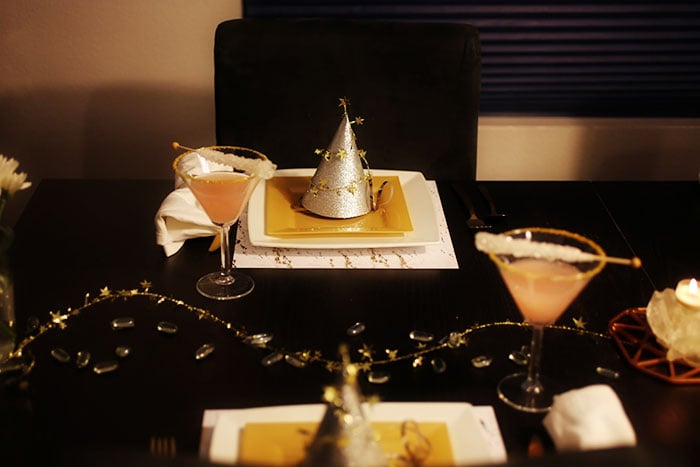
DIY Sparkling Holiday Table Decor on the Cheap
If you’re in Oregon you can watch it on Channel 2 (or 16, depending on your cable provider). If you aren’t in Oregon or don’t have cable you can catch it live here:
Watch on Thursday, December 28 from 3PM-4PM PST for my 5-minute segment and see how to make your own chic sparkling holiday table! (Tune in at around 3:45PM PST or so for my segment)
xo
Carly
Leave Comment











