Dec 20, 2013 | DIY, Life
 With the holidays in full swing, it’s that time of year when holiday sweaters abound. Goodwill has partnered with Ad Council to produce a couple of cool tools to help celebrate that sweater-y time with a bit of tongue-in-cheek humor about the (sometimes) questionable and ubiquitous HIDEOUS CHRISTMAS SWEATER.
Using their Sweater Yourself App, you can upload a photo of yourself through your Facebook account, selecting an avatar with accessories and hideous sweater of your choice, and send to all of your friends as a fun little holiday card. (Bonus: It also helps support and increase awareness for Goodwill’s mission to provide job training and community services to people in need.)
Sweater Yourself Now
In addition, they’ve also created a fun little guide for throwing your own hideous DIY Holiday Sweater Party on Snapguide. Browse through to get some inspiration and ideas for making this season fun and festive, and when all the celebrations are over, consider donating what you don’t need any more to Goodwill to help provide people with jobs, training, youth mentoring, and education. (I wrote a post awhile ago covering the life cycle of a garment donated to Goodwill…which may surprise you in the ingenious lengths the organization goes to in order to ensure that every piece of clothing has a final use (instead of just landfill). Seriously – if you haven’t yet…go read it!)
Check out How to Throw a Festive Sweater Holiday Party by Goodwill Industries International on Snapguide.
What could be more chic than paring down what you don’t need and helping others in the process? (And having fun while doing it 😉
xo
Carly
Leave Comment
Dec 19, 2013 | Media
 Hello all!
I just wanted to announce I’ve been featured in a little interview over on Rakuten Linkshare‘s blog. I’ve been an advertiser with Rakuten Linkshare for about 4 years now, and I always highly recommend their platform as one of the best out there in affiliate marketing. Check out the interview below and thanks so much for the team over there for the feature!
xo
Carly
Leave Comment
Dec 18, 2013 | DIY
 Anthropologie, season after season, comes up with the most fabulous items in their stores – and so many of them look homemade and crafty: the perfect fodder for DIY.
  I noticed this beaded ladder tassel necklace during early Fall (part of Anthro’s Bijouterie necklace collection), and after clipping the photo and hunting for supplies, I finally sat down and made a DIY version. It was a bit fiddly, but incredibly rewarding to find the finished necklace looked just as amazing as the original in the catalog. (And at an $8 investment, pretty affordable too!) Here’s how to make your own:
You Need: (more…)
Leave Comment
Dec 17, 2013 | DIY
 Hello lovelies!
Today I am over on We Heart This, posting my DIY tutorial for how to make your own Mercedes Salazar-inspired DIY Friendship Bangle Bracelets. They are a super-chic adult update to the typical friendship bracelet – and look fabulous stacked together on your wrist! (A last-minute holiday gift, anyone?) Click on over to see the full tutorial!
xo
Carly
Save
Leave Comment
Dec 15, 2013 | DIY, Life
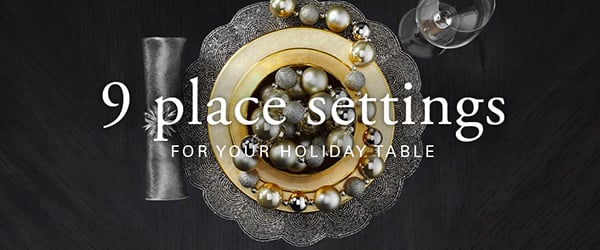 The holidays are upon us – and it’s time to think about dressing up one’s festive table: pairing dishes, napkins, glasses, and accessories to create the perfect backdrop for your feast. Though I LOVE Z Gallerie as an amazing source of inspiration for the holiday table, most of the time I’m willing to plunk down my money for a little more affordable. Take some inspiration from these dressed-up table settings, and DIY your way to the perfect set-up for your entertaining this season:
No. 1: Layer a bronze beaded placemat under a red charger (a cheap plastic one is fine!), followed by a gold plate and bowl (Dollar Tree has some great ones!). Add a gold ball ornament inside the bowl, and a DIY Gold Starburst napkin ring onto a tan chiffon napkin (just get a length of chiffon cut at the fabric store, and hem). A DIY Gold Etched Champagne Glass completes the set.
No. 2: This time make your DIY Starburst napkin ring with silver spray paint, paired with a pewter chiffon napkin. Use 2 white octagonal plates and 1 bowl, stacked above silver ball ornaments ringing the setting. A disco ball ornament (can be DIY’d with CDs if you can’t find a good one) in the center and a glass with a silver stem (spray-painted with Krylon Chrome Spray Paint makes the setting perfect.
No. 3: Use Tulip Shimmer Sheets to apply a gold foiling to a plain white square placemat. Stack 2 gold plates and a gold bowl on top of each other, adding a DIY Pearl Ornament covered in pearl and gold beads to the center. A piece of stemware can be co-ordinated with a bit of gold spraypaint in the center of the stem, and add a gold faux poinsettia to a hair elastic to tie a crimson satin napkin (extra points for adding some gold beading to the edges!)

No. 4: Use a square silver beaded placemat on the bottom, stacked with 3 silver square plates atop. Add a sprayed-on chrome bottom to the glasses as in No. 2, a string of silver ball ornaments in the center, and use a silver tassel from the upholstery section in the craft store to tie around plain white napkins.
No. 5: Use a flower-shaped placemat on the bottom (paint with a nickel-colored fabric paint if it’s not quite the right color), and stack 2 gold plates and a gold bowl in the center, filled with gold-colored ball ornaments. Use plain stemware, silver chiffon napkins, and a beaded napkin ring (using barrel-shaped clear glass beads on silver ball-end headpins).
No. 6: From bottom to top: a gold beaded square placemat, 2 silver square plates, 1 crystal flower-shaped tealight candleholder + telight candle. Add stemware with the centers painted gold (as in No. 3), a silver chiffon napkin, and a spiky-looking napkin ring DIY’d with gold seed beeds strung on to short lengths of jewelry wire that are twisted together in the center.

No. 7: Use a red charger, 2 white octagonal plates, and an octagonal bowl. Add some crimson plums, pomegranates, and/or berries (faux is fine too!), gold-painted stemware, a crimson satin napkin with gold beading at the edges, and a simple gold-and-crimson napkin ring (which you could DIY by spray-painting curtain rings).
No. 8: Gold sequined placemats could be made just by cutting up a piece of sequin fabric and hemming with stick-on hem tape if necessary ($18 a yard will get you more placemats than the $119.80 at Z Gallerie will!). Then add 3 square silver plates, a faux white grape cluster (spray paint something from the craft store floral section if you can’t find the right kind), stemware with the centers painted silver, and a silver pleated satin napkin (you can buy pre-pleated fabric from the fabric store, usually in the formal-wear section). A plain gold-and-white napkin ring finishes everything off.
No. 9: Use a faux white alligator placemat (like textured scrapbooking paper cut into a square, glued onto a piece of cardboard). Top it off with 3 white octagonal plates and 1 bowl, with a green disco ball ornament in the center. Add a green goblet and a green satin napkin with gold beading at the edges, along with a gold-and-white napkin ring.
Here’s to a Happy Holiday Table!
xo
Carly
Images source
Leave Comment











