Aug 23, 2012 | DIY
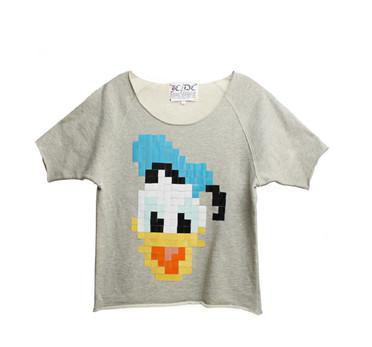 I feel like I’m regressing. Suddenly interested in character tees (perhaps fueled by my recent trip to Disneyland in early August), this (Topshop I think?) sweatshirt caught my eye while scrolling through all the pretty goodies on Fashiolista. (Follow me there! I have neat unique finds from Japanese shopping sites in my profile too!!)
But back to this shirt: totally DIY’able…just choose your favorite character’s face (Sailor Moon!)…or celeb’s photo (Marilyn Monroe!)…or random image (a flying seagull!)…which you can convert to squares by eyeballing it. Or super-accurately using Photoshop. Or try the online version of The Pixelator and download your creation for reference. Then apply the cut fabric squares using the Heat-n-Bond applique technique I shared here. (Or even trace your image onto your shirt and color in with Fabric Paint!)
However you do it, I think it would be pretty cool…and a great way to use up scrap fabrics!
Happy DIY’ing!
xoxox
Carly
Leave Comment
Aug 21, 2012 | Fashion

Having spent the last 4 days in Tucson, Arizona visiting my brother and his wife, I’ve returned this week feeling pretty tired out from a trip filled with sightseeing and walking around. It was super-hot; very dry heat; with tons of prickly things and creepy-crawly things all over the place to add to the ambiance. Here are some photos I took along the trip: (more…)
Leave Comment
Aug 17, 2012 | Fashion, Life

It was Springtime in Tokyo and the cherry blossoms were in bloom whilst I was there.
As many of you know, my family and I traveled to Tokyo, Japan in April of this year to take care of my mother who suffered a spinal stroke. (Who lives in Tokyo for her job.) Though I didn’t have much time to take photos in the beginning of my trip, near the end my mother’s condition had improved, so I was able to do some activities with my family and take some pictures.
You can see Part 1 of my travel photo diary here. Here are the rest of the photos I took during my trip: (more…)
Leave Comment
Aug 15, 2012 | DIY
 photo source
Ever wanted to get started making your own clothing and accessories, but not sure where to start? Sure, some of the projects I post are pretty advanced, but there are plenty of easy projects that have maximum impact out there. Here are a couple to start with and get your feet wet (or your hands dirty?;-) DIY’ing:
1. Painting Rhinestone Jewelry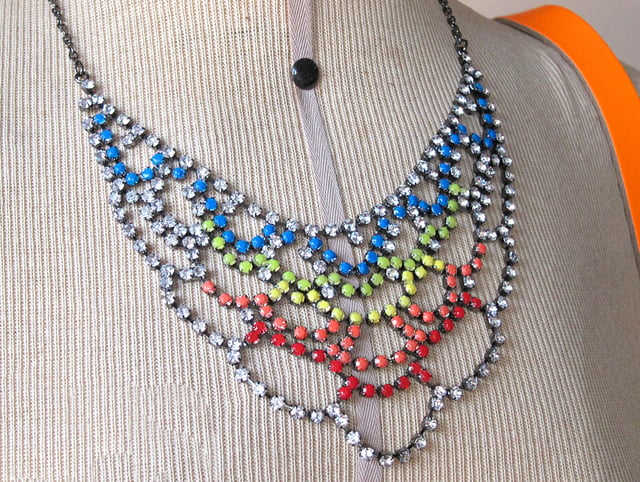
photo source: ?
A nail polish brush is super-easy to use, and a tool most of us girls are already quite familiar with. Using some bright nail polishes to paint over a crystal rhinestone necklace is a great way to get started customizing your jewelry. You can even use brown and black Sharpies, like The Glamourai, spray paint like A Pair and A Spare, or dab the nail polish on with a sponge, like Youtuber AndreasChoice. Genius, but oh so simple.
2. Studding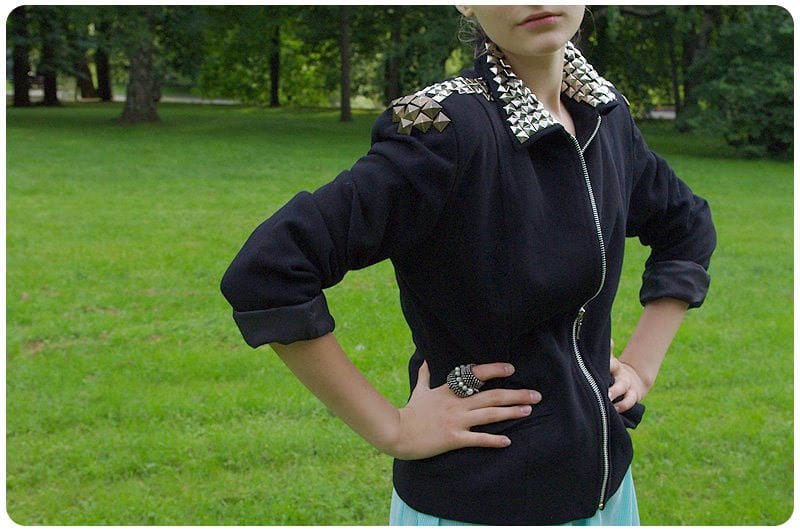
photo source: Style Hurricane
Though studs can be a little hard to come by from your local sewing store (hint: try M&J Trimming or StudsandSpikes.com for all your studding needs!), they’re extremely easy to work with. Just the addition of a few pyramid studs onto a jacket or a bag can create a totally new look for you in minutes flat. If the material is soft enough, you can just push the stud’s prongs through by hand; if it’s thicker leather you might need to make holes (recommended: using an awl) first. Don’t ever cut slits to match the shape of those prongs! Small holes only, and when you push the stud in it will stretch out the fabric to the necessary shape.
3. Tie-Dyeing
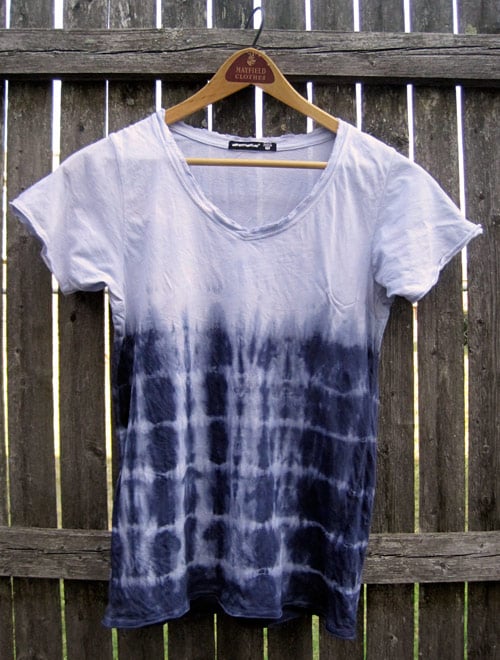
photo source: Short of Something
Though dip-dye or ombre-dyeing is currently very trendy, it can be a pain to accomplish, and difficult to accomplish well. A technique that’s super-easy (and no-fail) is tie-dyeing, where you wrap your project with rubber bands and submerge in a hot dyebath. Even easier? Using Simply Spray’s Soft Fabric Paint to spray onto your project instead…no hot water, dyebath, mixing, or submerging necessary.
4. Iron-On Applique
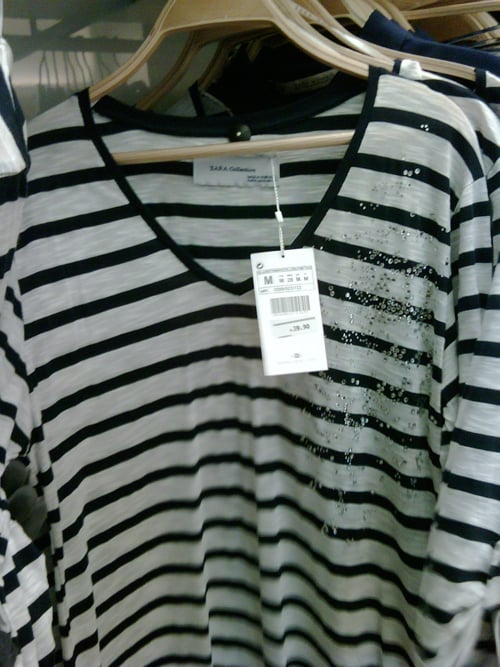
top from Zara, my own photo
If you can wield an iron, you can do this! Appliques strategically-placed on a piece of clothing or a bag can elevate a piece from ho-hum to whoa! very quickly. Though the variety of appliques sold at sewing stores has improved slightly of late, choose wisely…lest you end up looking like an over-appliqued granny. (Hot-fix rhinestone designs are available too!) You can also easily make your own applique by fusing Heat n Bond to the underside of a piece of fabric you want to stick on, like in my tutorial for a DIY Floral Applique Cardigan. Or even iron-on details from plastic bags like at Filth Wizardry!
5. Bracelet Makeovers

DIY Shambala bracelet, from guest post by Make It and Fake It
Probably the reason why bracelet posts always go viral is that they are very easy and perfect for beginners. Honestly, WTF is probably the queen of DIY bracelet tutorials, but you can also go old-school and make your own friendship bracelet from scratch with embroidery thread. Or even buy pre-made friendship bracelets and go wild with the studding and decorating!
Happy DIY’ing everyone!
xoxox
Carly
Leave Comment
Aug 10, 2012 | DIY
 Simply Spray is a non-toxic, non-flammable aerosol fabric spray paint, available in a range of colors and easy to use.
  The company sent me a 3-can kit of Simply Spray Soft Fabric Paint and Simply Spray Stencil Spray Summer Love Kit to try out in a project, so I decided to take the opportunity to jazz up a boring white scarf I had. (I’d always wanted to try an
Alexander McQueen-inspired skull scarf!) Here’s how to do the same…
You Need:
stencil (or, if you want to create your own stencil like I did, you need: digital image for stenciling / Sharpie / adhesive stencil film / cutting blade / cutting surface) / painter’s or masking tape / item for stenciling (mine is a plain white lightweight Summer scarf from Target) / Simply Spray Stencil Paint / old newspapers or something to protect your surface / paper towels
How To: (more…)
Leave Comment











