Jul 17, 2012 | DIY
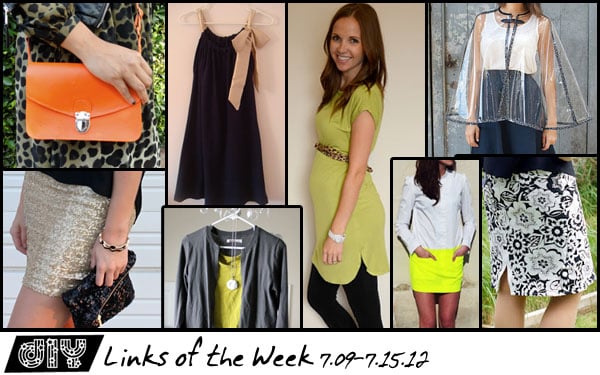 It’s getting super-hot out here in Portland, and I’ve graduated to as little clothing as possible during these sweltering afternoons. T-shirts? Check. Short-shorts? Check. Drapey dresses? Check. And fun accessories? In abundance! Here are a couple tutorials that have been on my radar this week, that can all help add to your Summer wardrobe: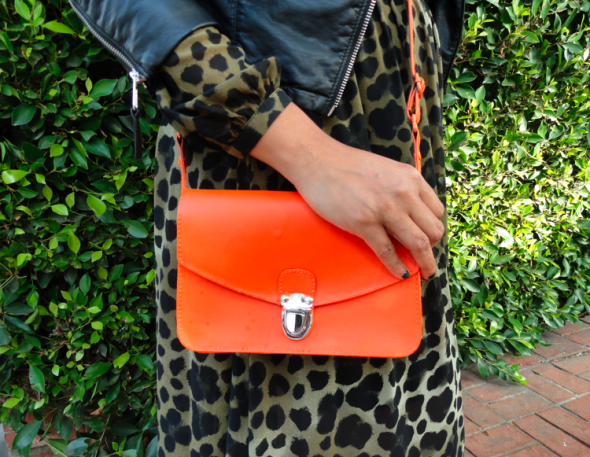
About time someone DIY’d that Neon Cambridge Satchel that’s been making the street style photo rounds! Tutorial from Glitter ‘N Glue, and boy is bright, fun, and perfect for Summer!
And speaking of neon, try out this Neon Shirt Dress by The Fuji Files. It’s a great way to upcycle a boring old button-down blouse!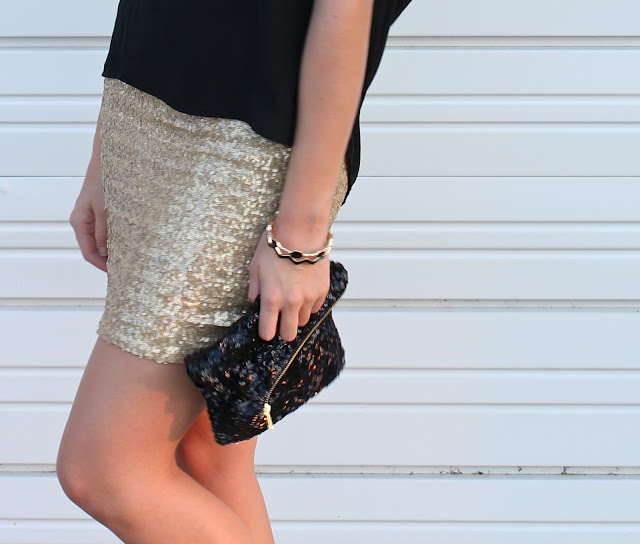
Sweet Verbena has a beautifully-photographed tutorial for a DIY Sequin Mini Skirt. So disco fab!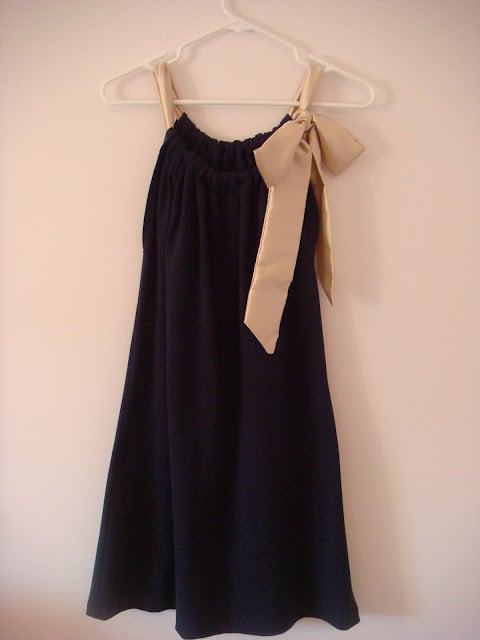
Looks Like Spilt Milk also posted her version of a Knit Jersey Dress with Satin Tie (from an original tutorial by Sweet Verbena). It looks so easy but beautifully chic!
For more lovely dresses, try this Side Tulip Hemline Tunic Tutorial by Merrick’s Art. Drafted from a shirt you may already have in your closet, this is a great go-to for days you want to be comfy but look a little polished, too.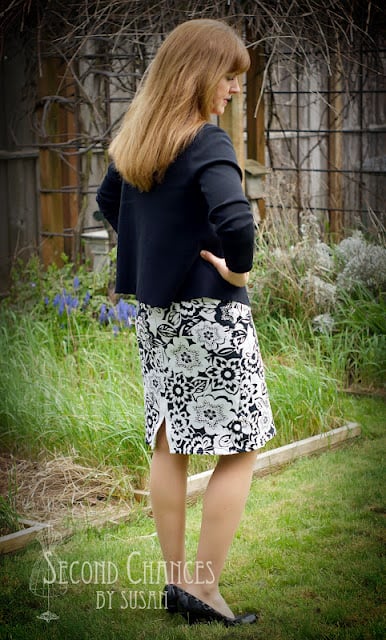
Turn a polo shirt into a chic little skirt with this T-Shirt to Skirt Refashion tutorial by Second Chances by Susan. What an ingenious idea, to turn the shirt upside-down and use the neckline for the back slit!
DIY 10 Minute Cardigan from Sweater by Vanilla Joy is a great little project using hem tape for a quick finished cardigan upgrade to an old sweater.
Looking for something to keep you dry during those sudden Summer showers? Look no further than A Pair & A Spare‘s DIY Transparent Cape! How cool is that project (made with the help of Scotch Duct Tape)? And check out all the other Scotch tape DIYs on their website as well while you’re at it!
If your project was featured above, feel free to grab a button and share the DIY!

<a href=”https://chiccreativelife.com/category/links-of-the-week”><img src=”https://chiccreativelife.com/wp-content/uploads/2012/07/diylotwfeaturedbutton-2.png” /></a>
If you have a DIY how-to or tutorial that you’d like to see featured on Chic Steals, please email me at carlyjcais at chic-steals dot com – and I’ll try to squeeze it in to one of my Links of the Week posts! (Tutorials/how-to’s with steps and photos included please! So everyone can share in the DIY goodness:-)
xoxox
Carly
-all photos copyright their respective authors; photo array by me-
~If you liked this post, please share it!~
Leave Comment
Jul 15, 2012 | DIY

A few of you asked for the instructions for making the milk carton bird feeder I featured in this post, so I scanned the original instructions from Parents Magazine to share with all of you.
How to Make a DIY Bird Feeder Out of an Upcycled Milk Carton

{click on photo to enlarge}
Tips They Didn’t Include:
*Although it doesn’t mention this in the instructions, it is extremely difficult to paint over a milk carton with acrylic paint. It took me 5 coats to even get to the opacity shown above!! (I swear, I studied that photo for near to 15 minutes trying to figure out how they got it that opaque-looking.) I’d highly recommend either lightly sanding the surface, or ideally, applying a coat of primer first and then doing your acrylic paint. That way it should be much easier to get a solid color to the feeder.
*Although this isn’t mentioned in the instructions either, since this bird feeder is probably going to be used outside (right?) a good coating of spray sealant is highly recommended. Once my sprinklers hit it that acrylic paint cracked up completely.
How to Get Birds to Come to Your DIY Milk Carton Bird Feeder:
*place it slightly at or above (an adult’s) eye level, in a sheltered area
*place it away from squirrels, cats, or other predators that may scare away the birds
*make the opening only large enough for the type of bird you’re looking to feed (not large enough for squirrels or crows, etc)
*essentially it’s not the color of the feeder that attracts the birds, it’s more the location, accessibility, and food. (Except for hummingbirds, who are attracted to the color red.)
*place something shiny, like a piece of metal, on the feeder. Birds love shiny objects!
Source
Hope that works for you guys! It’s a super-fun craft to do with your kids (or even by yourself for your garden, deck, or patio!) – so definitely try it out. Ours is drawing a number of birds to it every morning!
Happy DIY’ing!
xoxox
Carly
~If you liked this craft, please share it!~
Leave Comment
Jul 14, 2012 | Beauty
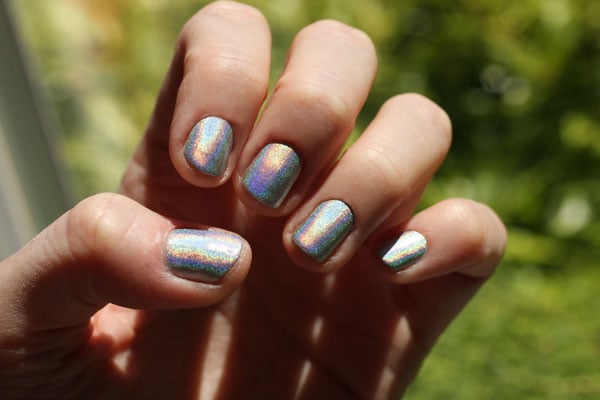 I’ve been on the search for a true-to-form holographic nail polish like a reincarnation straight out of the 80’s… just like those shiny Rainbow Brite stickers or a heavy-duty Trapper Keeper and its accompanying folders. (Are any other children of the 80’s with me on this??!)
But most nail polishes straight out of the bottle fail to perform and look disappointingly monochrome, with none of the oodles of rainbow shimmer that holograms have.
However, I’ve just discovered Nfu Oh!, from a post from awhile ago by Stylorectic.
This is Nfu Oh Victorian Polish Number 061, ordered off the Fabulous Street website. (Yes, the website look is a bit of a deterrent and I for a moment worried that I was forking over my money to something extremely shady and perhaps even related to some sort of adult-video-rental-business…however, everything was on the level and I received an emailed order confirmation, shipping confirmation, and my ordered items at my door in just over a week.) As per Stylorectic’s recommendations, I also ordered the Aqua Base, a base coat that’s apparently necessary for the adhesion of these special holographic polishes. And boy did it make a difference in wear! These polishes are not exactly cheap at $12.50 a bottle (so a $25 investment if you want to get started with holographic polishes), but this color is just so amazing, I almost don’t have the words. Almost;-)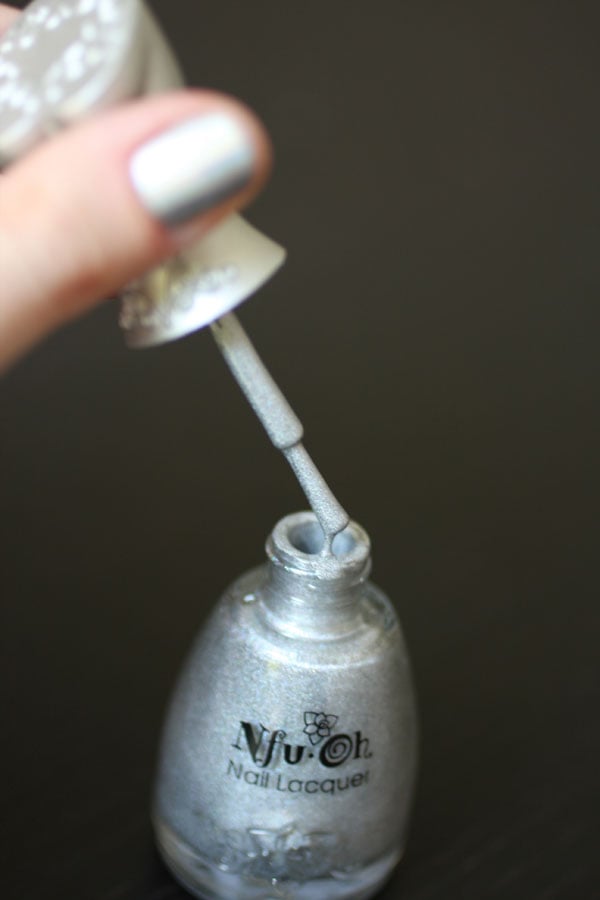
The Number 061 looks like thick granulated silver coming out of the bottle…nothing to get excited about yet, and goes on pretty much the same. However, even with one coat as it dried the rainbows began to form, and once completely dry the perfect shimmer of purple, green, yellow, and orange appeared. It’s gorgeous.

In bright sun.
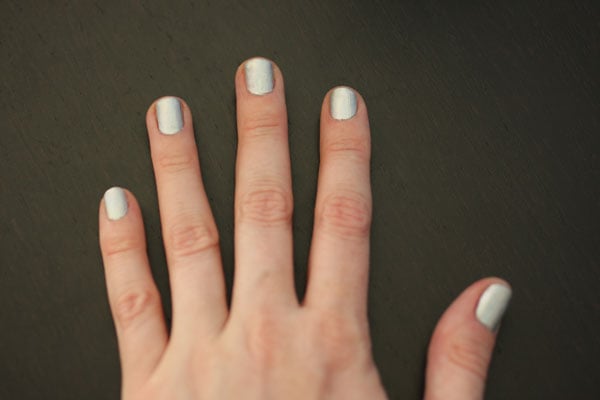
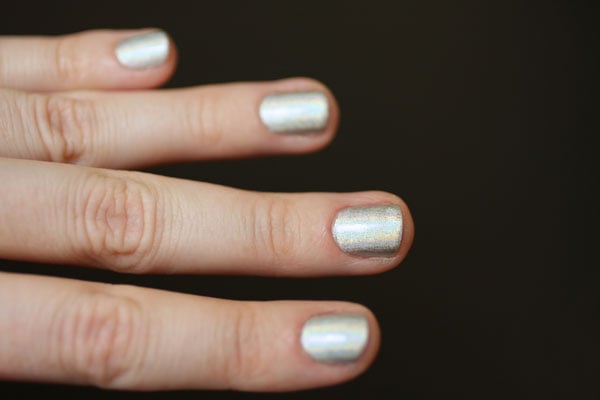
Indoors, no strong direct light.
I would recommend 2 coats here, and even though I put on a topcoat for extended wear I found the topcoat dulled the holographic effect slightly (not so many obvious rainbow ribbons; they became thinner and subtler-colored). However without the topcoat it chips super-quick, so you might have to constantly redo this mani to keep it perfect.
But oh, my is it breathtaking!
xoxox
Carly
~If you liked this post, please share it!~
Leave Comment
Jul 13, 2012 | DIY

I’ve been ogling kitten tees as of late…I’m a total crazy cat lady (except I live with my Hub’s dog…go figure). So the best I can do is a little kitten of my very own..on a T-shirt per se. But being as type-A as I am, I just couldn’t settle on a design I liked. Some were too twee for me, some t-shirts weren’t loose enough, or were too short, or too pink; some had writing on them, some had ugly cats…and wouldn’t ya know it, it is now the middle of Summer and I am still hankering after a watercolor-style kitten t-shirt.
So I decided to DIY!Jul 11, 2012 | DIY
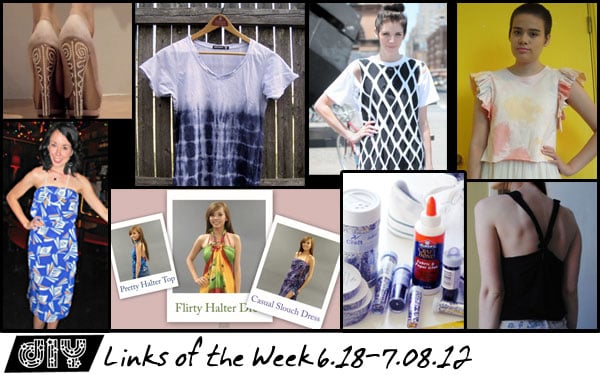 Rolling 3 weeks into 1, what with computer mishaps, being super-busy with work, and school projects seeming to take over my life. But you guys have all been up to some fabulous DIYs, so let’s check them out!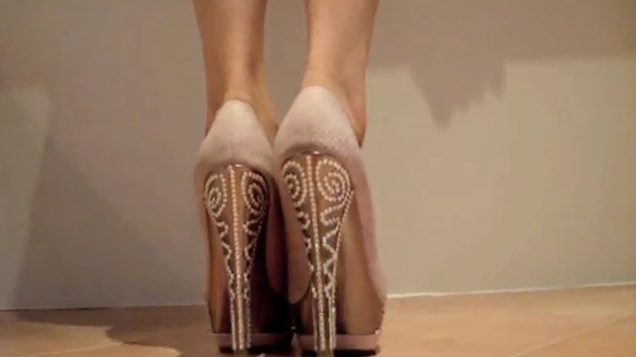
I’m in love with these decked-out DIY Deko heels by Youtube user 01b0o! How snazzy are they – and think of the possibilities of pattern and design with crystals on your shoes!
Though technically not a DIY tutorial blog, ReFashionista has posted daily for 366 days her refashions of ugly thrift store garments (and even – gasp! – her wedding dress). Get some great ideas for refashioning, remaking, and upcycling your own way out of outdated hell. (And for more inspiration, see New Dress a Day, who’s also currently doing the same thing!)
Chictopian Headbandit discusses the DIY Controversy: in short, DIY vs. knockoffs, and how fashion bloggers play who create DIY tutorials deal with it. A must-read!
Did you know? A piece of fabric + a bangle = endless cute dress combinations for Summer! Watch the video by Youtube user DWDShoes here.
Now, to get on with the t-shirt refashions…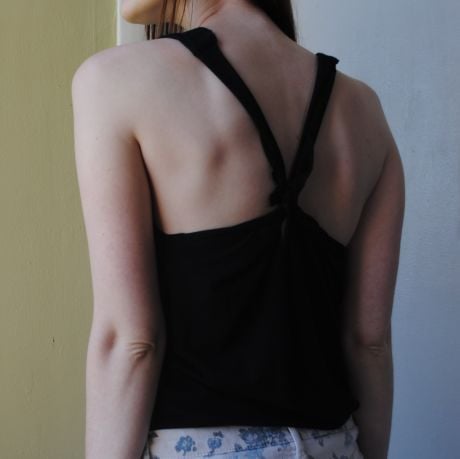
Bust Magazine turns an oversized T into a racerback tank. Reminds me of …love, Maegan‘s DIY Jersey Tank tutorial…hey, great minds, right?!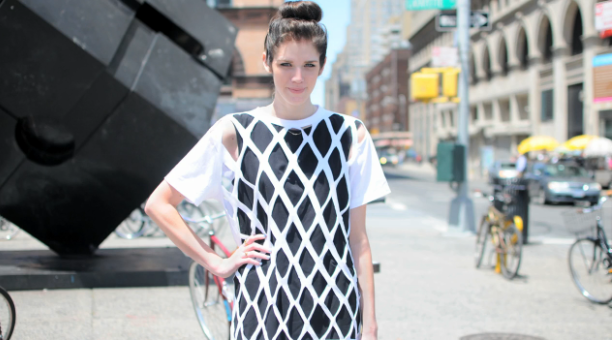
Speaking of DIY’ing your tee, why not try Refinery29‘s take on the DIY Cut-Out T-shirt? Cool, breezy, and a little bit edgy, it looks fab over an outfit or as a beach cover-up…and I love how they offered up some styling possibilities too!
Revamp your basic white tee with Short of Something‘s tutorial on striped tie-dyeing. I love the results – and all you need are binder clips, plastic wrap, and rubber bands! Ingenious.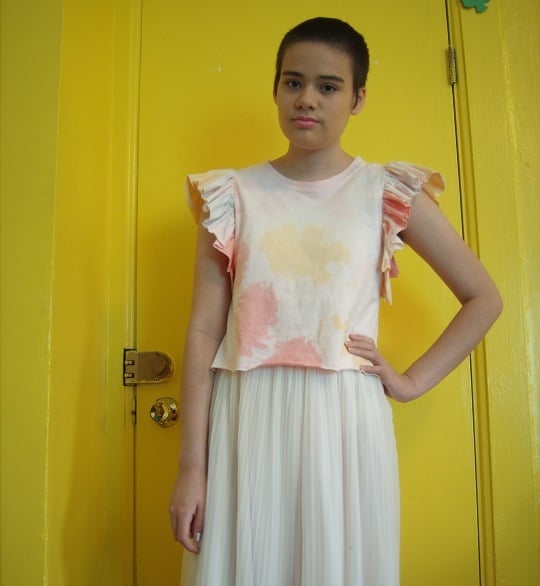
To round up my collection on T-shirt refashioning tutorials (seriously, it’s the Summer of T-shirt Recon!!), Rookie Mag posted their DIY Ruffled Tees tutorial as well. Love the girliness of the finished piece!
If your project was featured above, feel free to grab a button and share the DIY!
<a href=”https://chiccreativelife.com/category/links-of-the-week”><img src=”https://chiccreativelife.com/wp-content/uploads/2012/07/diylotwfeaturedbutton.png” /></a>
If you have a DIY how-to or tutorial that you’d like to see featured on Chic Steals, please email me at carlyjcais at chic-steals dot com – and I’ll try to squeeze it in to one of my Links of the Week posts! (Tutorials/how-to’s with steps and photos included please! So everyone can share in the DIY goodness:-)
xoxox
Carly
-all photos copyright their respective authors; photo array by me-
~If you liked this post, please share it!~
Leave Comment











