Sep 8, 2010 | DIY
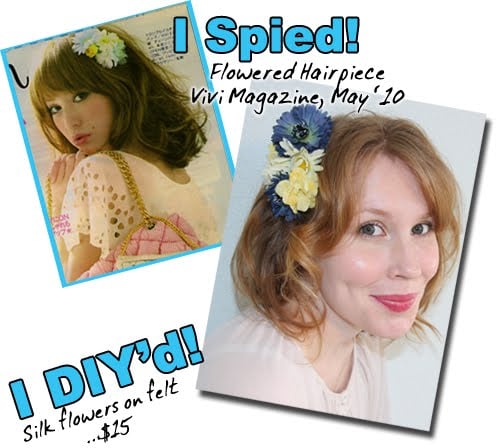
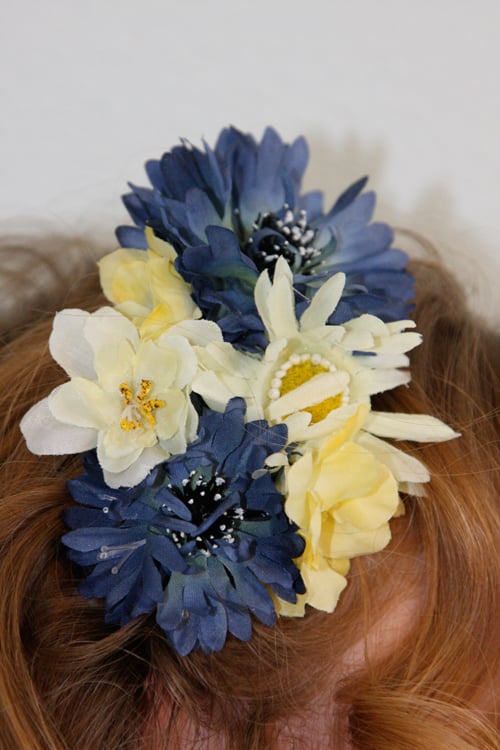
I have such a thing for accessories, and Japanese magazines such as Vivi never fail to supply an endless source of ideas and inspiration. Always torn between whimsically feminine and punky/edgy, I constantly vascillate back and forth in my own outfits…but when it comes to frilly, flowery, and girly pieces Japanese mags always beat the rest. This flowered hair clip (similar to one featured in Vivi May 2010) is super-easy to make, but lends a pretty and feminine vibe to anything you’re wearing.
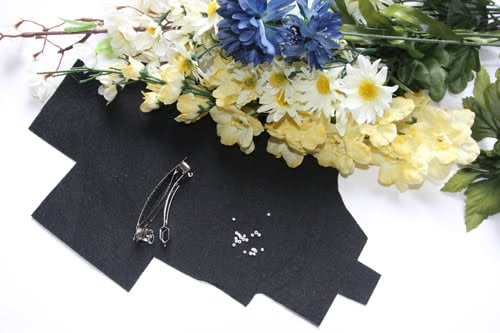
You Need:
*silk flowers (mine were cornflowers, daisies, and forsythia…and a white plum or something but I’m not sure)
*tiny white seed beads
*stiff black felt
*hair clip
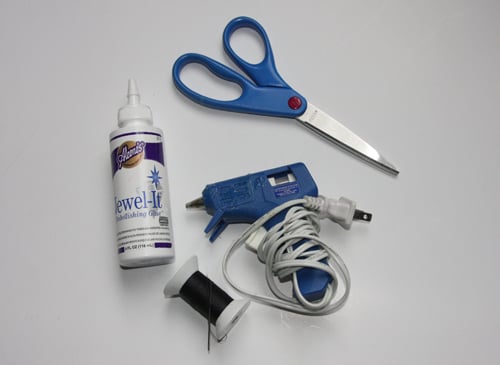
and…
*hot glue gun + glue stick
*hand-sewing needle
*black thread
*scissors
*toothpick
*craft glue
How-To:
1. Separate the silk flowers from their stems.
If the flowers have jutting base stems, cut those off.
2. Cut a small piece of the felt in a oval shape. Mine was about 4″ long by 3″ wide.
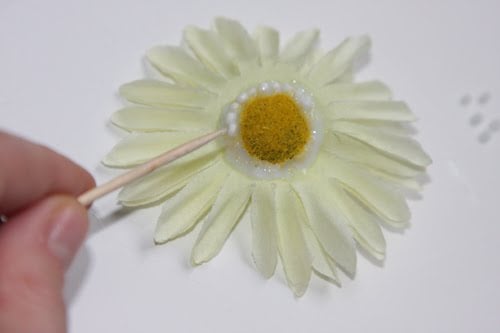
3. Spread a tiny amount of craft glue around the center of the main daisy. Use a toothpick to position the seed beads in a ring around the center. (You could also potentially do this after you’ve glued the daisy to the felt base, but I found it easier to do it first.) Allow to dry.
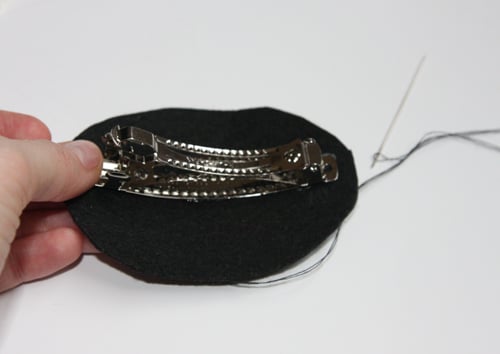
4. Use a needle and thread to anchor the hair clip to the felt oval. (Remove the center prong first and then loop the thread around the clip base.)
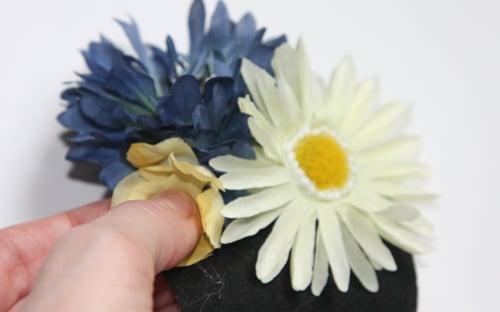
5. Spread some hot glue on the underside of a flower and press onto the felt. Add more flowers, clustering them close together. If the petals begin to separate, add more hot glue in-between the layers of petals.
Use the toothpick to prevent the petals from tangling on one another. 
6. Trim the edges of the felt base so it can’t be seen from the front.
And that’s it! Soft, slightly curled hair works best with this piece – or you could try this in front of a ponytail (again, going for the soft look).
If you want more security, you could also make this attached to a thin headband, or add a pin-back to use it as a corsage pin on a jacket or a bag.
I’d love to see your combination of flowers and colors on this little piece!
Happy DIY’ing!
xoxox
Carly
~If you liked this post, please share it!~
Leave Comment
Sep 7, 2010 | Media
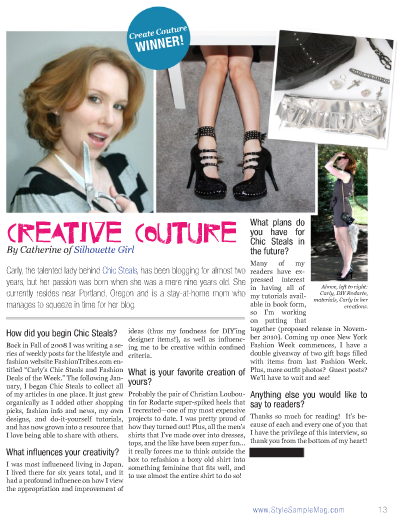
Issue #9 is now out and as a result of winning the Create Couture Challenge, I’ve had a feature interview with Catherine of Silhouette Girl!
Catherine was super-nice and I’m so glad to have found her blog, too – her style is mishmashed vintage with sweet touches, and she has such a covetable variety of cute dresses!
Thank you to Catherine and Style Sample for the feature! I’m so flattered and excited to be in this awesome magazine! Now off to order 50 hard copies so I can send them to every single person I know…;-)
xoxox
Carly
~If you liked this post, please share it!~
Leave Comment
Sep 7, 2010 | Life, Score!
Well, everyone – the Submission Period has now closed, and we’ve had a whopping number of fantastic entries.
156 entries, to be exact!!
That’s absolutely amazing, and the creativity is overwhelming.
In the coming days the judging panel will be reviewing all your submissions in accordance with the Official Rules, and announcing the winners come September 15!
Winners will be announced both on this blog, the UDC homepage, and on the CutOutandKeep.net website, as well as contacted personally through their COAK profiles.
So stay tuned for more announcements to come…and a Meet the Judges feature on the Ultimate DIY Competition homepage!
Thanks so much to everyone who entered – this has been a great success and I hope everyone had fun:-)
xoxox
Carly
~If you liked this post, please share it!~
Leave Comment
Sep 7, 2010 | By Carly J. Cais
Finally I’ve gotten my act together and made some fur tails for my Etsy shop. I currently have both White and Brown-tipped versions, with and without the pewter fox charm. Just like those we’re beginning to see adorning the bags of hipsters, bloggers, and other stylish people (and making their way down the Louis Vuitton Autumn/Winer 2010 RTW runways!), this version is cruelty-free and animal-friendly. I am donating 10% of all sales of this item to the Humane Society (U.S.), who works tirelessly to end the fur trade and educate consumers of fur products. For those of you who expressed interest in these faux fur tails, they are now available here.
I’ve also stocked my Etsy shop with Rock Candy Rings, some more Cross Rings (and a couple new styles added), as well as some Chandelier Earrings and Pendant Necklaces.

I’m still working on some cross-adorned cuffs and trying to source some soft material for some scarves I’ve designed…the cotton gauze I found turned crunchy and evil when washed, so I’ve given up on it. Plus in the coming weeks I’ll be listing many items that you’ve seen my DIY or write tutorials for on this blog, so stay tuned:-)
xoxox
Carly
~If you liked this post, please share it!~
Leave Comment
Sep 6, 2010 | From You, Life
from Formspring.me:
How do you get such nice white backgrounds in your photographs? Truly curious, ShyShirley
Hi ShyShirley!
I assume you mean the white backgrounds in my step-by-step tutorials?
Clear, well-lit photos are a MUST when it comes to sharing your craft or DIY tutorials. And having a background that isn’t white or close to it can be distracting when you’re trying to show a step-by-step process. (Though for photos of the finished product it’s often better to see them in action or in a stylized set-up, not on a pristine sterilized white background.)
Since I don’t have a photographic studio or anything, I fudge my photos using these things:
Photo taken on posterboard, near window in daytime. I haven’t Photoshopped this yet; it’s just to show you the board.
1) A large piece of white posterboard from the craft store. I have to replace it every couple months or so because it gets scratched and gunky.
2) Taking the photos inside near a window, but out of direct sunlight. I’ll always take two shots of the same setup: one using the fill flash attachment to my camera; one without.
Photo taken at night using posterboard, Ott-Lite, and fill flash. The contrast is very stark but colors are super-saturated.
If I absolutely *have* to take photos at nighttime (which I hate doing, but sometimes it’s unavoidable) I’ll use a portable Ott-Lite (which is, FYI a really excellent lighting source; super-bright and gets the colors to show up true – the best light I’ve ever used, hands-down…and I don’t know how I crafted or DIY’ed anything prior to getting it LOL;-)) and the fill flash on my camera. This produces very harsh shadows and I usually can only do this for close-ups and detailed tutorials.
3) Messing around with the Levels in Photoshop until the background goes as white as I can get it without losing detail in the object I’m photographing.
Photo taken against the gray wall. I was very aggressive with the levels in Photoshop and you can see the wall is no longer gray, but the shadows are still fairly harsh.
I also have a light gray wall in my house that sometimes I photograph things against, using the fill flash and aiming a floor lamp at it.
This is all pretty primitive but it seems to work okay (except when I need to get shots of something that’s bigger than my posterboard!:-(
Hope that helps!
xoxxo
Carly
Sep 5, 2010 | DIY
Yes, another project I submitted for Style Sample Magazine and New York Design Shop’s Create Couture Challenge back in early August. I’ll get all of these posted if it kills me!!!
You Need:
*Mocha Suedette Fringe
*Mini Gold Pyramid Studs
*Large Gold Pyramid Studs
Additional Tools/Materials:
*faux suede or leather strappy sandals (American Eagle Tomahawk Beaded Sandals from Payless)
*pliers
*leather glue
*awl (optional)
*moleskin (optional)
[prep: remove any embellishments from shoes first]
How to:
1. Push studs into the straps of the shoes, using pliers to bend the prongs over on the underside. If you have trouble pushing the studs through the shoe material, an awl can be helpful to punch holes first. You can also use small pieces of moleskin on the inside of the shoes if any prongs scratch your feet when you are wearing them.
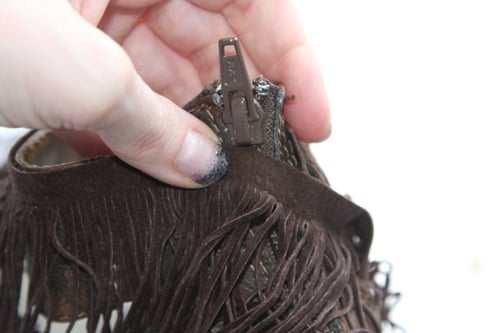
2. Measure length of fringe needed by wrapping it around top of sandals. Cut.
3. Apply a thin strip of leather glue to the tops of the sandals, and press the fringe into it. Allow to dry.
And that’s it!
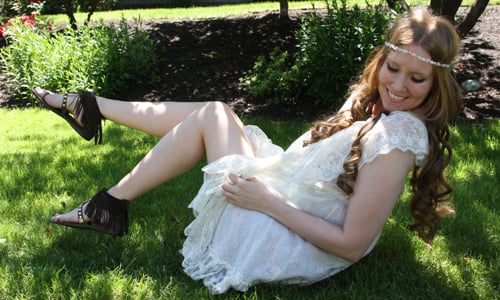
Gladiatrix, boho, SoCal…however you say it, these sandals are FAB!
xoxox
Carly
~If you liked this post, please share it!~
Leave Comment
Sep 4, 2010 | Media
Monica from Grinding Metal Gears was chosen as the winner from among the many Create Couture Challenge commenters. She wrote that she liked my double-fringe necklace tutorial – so I sent her the finished product!
She shared her photo wearing the necklace on her blog (where she has a number of her DIY creations, recipes, and yummy-looking food photos!). I am so glad that she likes the necklace – it compliments her so well – and she looks so lovely in it!
Congrats Monica and I hope you enjoy it!:-)
xoxox
Carly
~If you liked this post, please share it!~
Leave Comment
Sep 3, 2010 | Media
The End of Summer? No! The Beginning of Awesome!
For the past week I’ve been listening to Cee-Lo Green’s fantastic send-off, F@#* You, and little else. At the same time I’ve been reading a lot of the hand-wringing in the press about bloggers and whatever are we going to do about them, along with our responses both here and on our blogs. And the two have combined in my head to form a single determination – bloggers need more swagger. I don’t mean anger, of the you-don’t-respect-us variety, or apologetics, of the we-are-as-legitimate-as-other-media variety. I mean swagger, the kind of swagger that comes from doing something well and knowing you’re good at it. So whatever other themes might knit together this week’s links, they all share that important characteristic – swagger. Step up to the plate, knock it out of the park.
Join us at IFB’s Evolving Influence Fashion Blogger Conference @ NYFW
Links à la Mode: September 2nd
SPONSOR:
New at Shopbop – JNBY – Wildfox Couture – Kirrily Johnston – Graham & Spencer
One of my posts has been included in the IFB’s Links a La Mode above! Thanks so much for linking up!
xoxox
Carly
~If you liked this post, please share it!~
Leave Comment
Sep 3, 2010 | DIY
This is a long one, so hang on for the ride…
We’ll be using one ENTIRE shirt – and leave only the tiniest scraps behind when we’re done. It will take awhile, and this tute is probably not for beginners.
Project Difficulty:  (EXPERT)
You Need:
(more…)
Leave Comment
Sep 2, 2010 | Media, Score!
They even included the following:
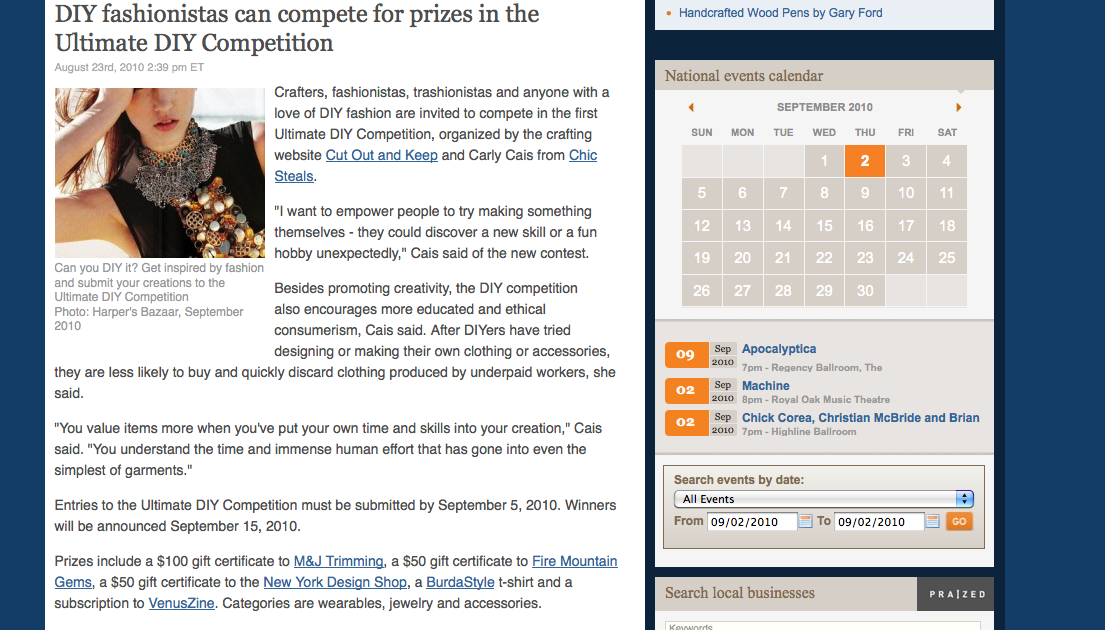
“I want to empower people to try making something themselves – they could discover a new skill or a fun hobby unexpectedly,” Cais said of the new contest.
Besides promoting creativity, the DIY competition also encourages more educated and ethical consumerism, Cais said. After DIYers have tried designing or making their own clothing or accessories, they are less likely to buy and quickly discard clothing produced by underpaid workers, she said.
“You value items more when you’ve put your own time and skills into your creation,” Cais said. “You understand the time and immense human effort that has gone into even the simplest of garments.”
How amazing to be quoted! Thanks so much, Samantha, for featuring this!
xoxox
Carly
~If you liked this post, please share it!~
Leave Comment