Apr 4, 2010 | Fashion
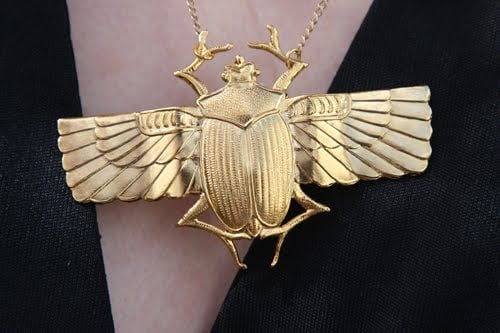
Handmade gold scarab beetle necklace
Flutter-sleeve vintage polyester dress
Gold wood-handle clutch (Accessorize.com; similar here)
Vintage watches, unknown gold cuff bangles
DIY coin bracelet
Gold cage heels (from Target like 5 years ago)
This dress was my mom’s from the 70’s or so. She gave it to me about ten years ago and I rotate it into my outfits now and again. Sometimes I feel the open circle below the bust is just showing too much skin for my liking; other times I’m okay with it. For some reason I keep returning to it since the silhouette is sexy without giving too much away. (except in that little circle 😉
I saw this scarab beetle pendant on Etsy awhile ago. Always being someone to try to make something for less than it costs to buy, I sourced the scarab beetle stamping online, and added a chain I had. I kind of like that it’s loose on the jumprings that slide back and forth on its forearms!
I also saw this coin bracelet by Yochi Design in Lucky magazine in 2003 or something. (sorry I can’t find the original clipping – it’s somewhere; I just don’t feel like going through all my mag clippings right now) I just had to make one of my own – from coin pendants from the bead supply store. (I had to weave thin wire around the coins to accommodate hanging a bead below the coins, since they weren’t double-drilled and I had no way of drilling them at home.) I was pretty pleased with the results.
Feeling disco fever, I tell ya!
xoxox
Carly
On another note, I’ve just finished stuffing all the Easter eggs for Lil Tot, setting up the baskets with goodies, chomping on the carrots we’ve left out for the Easter bunny, and placing an Easter sticker on the note Lil Tot left for our long-awaited visitor (to prove the Bunny dropped by). I’ll be getting up tomorrow morning before the sun is up to hide the eggs all around the backyard. Why go to all this trouble? The simple, sweet look of joy on Lil Tot’s face as he rushes downstairs to see if the Easter Bunny has visited. Such a wonderful moment – truly there is none like it.
(Tho, as a parent, I wonder if, a few years down the line, my elaborate attempts to infuse such a sense of wonder and magic into holidays may make Lil Tot resent me when he finds out the Easter Bunny never existed at all and his mother was just deluding him. I don’t remember realizing when the Easter Bunny/Santa Claus/the Tooth Fairy didn’t exist; so for me, there’s no memory of such a betrayal…but do any of you? Just curious.)
Leave Comment
Apr 3, 2010 | DIY
I meant to post this yesterday so you’d have time to try this before Easter, but I fell asleep early and slacked a little bit. If you decide to make this, I hope it’s still in time! (Sorry about that.)
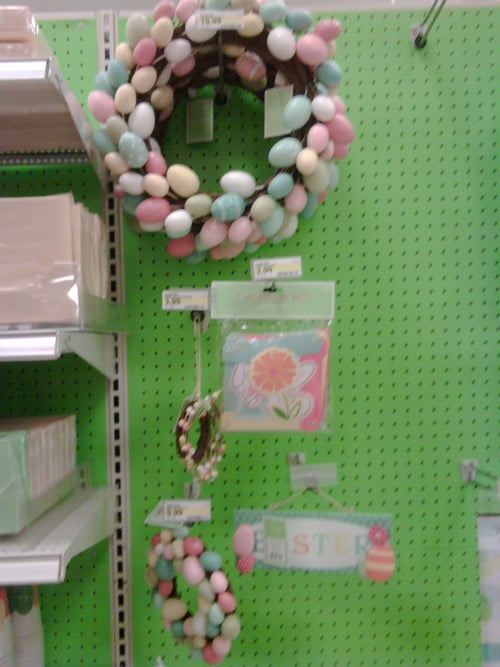
I saw this lovely Easter wreath at Target, but since it was $19.99 (and similar ones were equally-priced at Jo-Ann’s)…you can guess what went through my mind.
DIY it for less!
So a quick trip to the Dollar Tree later, about 10 minutes assembling it at home with Lil Tot, and now I have an Easter decoration I’m really proud of.
How to Make a $4 Easter Wreath
You Need:
*1 pack of Dollar Tree plastic Easter Eggs (I found some pretty pastel speckled ones)
*2 Dollar Tree leafy garlands
*1 Dollar Tree wreath base (I chose a medium size)
*floral wire (or any thin, bendable wire – you may be able to get at the Dollar store, though I didn’t look)
*wire-cutters
*hot glue and glue gun
How-To:
1. Hea t up your glue gun.
2. Using lengths of wire, attach one leafy garland around the perimeter or your wreath base. (I circled the wire around the garland + wreath, and tied the ends like a twist-tie, twisting multiple times until it was secure. Then I folded the cut ends of the wire in-between the wreath wicker pieces so there were no sharp edges sticking out.)
3. Add the second leafy garland around the wreath, paying attention to any bare spots left by the first.
4. Close all the plastic eggs. Squeeze hot glue onto an egg; press egg onto wreath in order to camouflage a wire tie.
5. Continue with all the eggs, paying attention to color, placement, and angle.
You’re done! Hang somewhere and admire.:-)
Since I got the eggs, 2 garlands, and the wreath at the Dollar store (and already had hot glue, wire, and wire cutters on hand), the project cost me a total of 4 DOLLARS.
You could also, if you were particularly enterprising, paint a layer of clear or pastel glitter on your eggs to make them even more like the $19.99 Target/Jo-Ann version.
Bwahahahaha!
Happy DIY’ing!
xoxox
Carly
~If you liked this post, please share it with other crafty people looking for a cheap n easy project for Easter!~
Leave Comment
Apr 1, 2010 | From You
from Formspring.me:
Hi! I`m Nadia can you make dresses for people with a thicker midsection and skinny legs?? I have a very difficult time trying to find dresses that`ll flatter my mid section and give me volume on my lower half. Thanks!!
Hi Nadia!
Are you asking for a tutorial for a flattering dress for your figure?
Leave Comment
Apr 1, 2010 | DIY
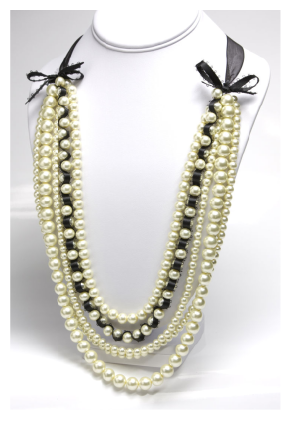
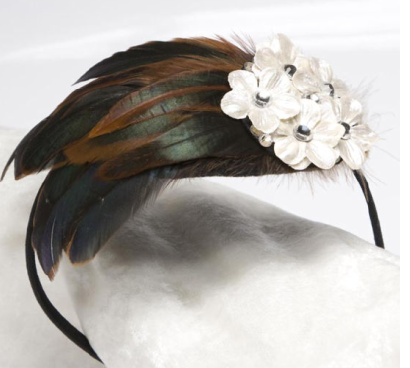 White Flowers and Feathers Fascinator
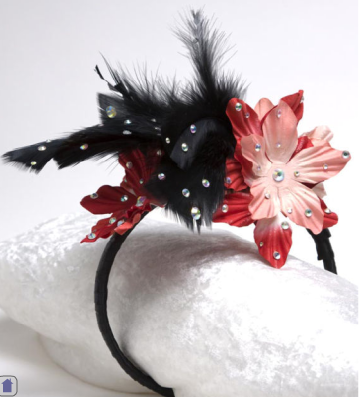 Red/Black party Style Fascinator
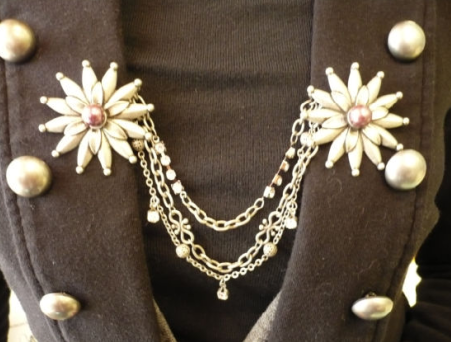 Sweater Clip
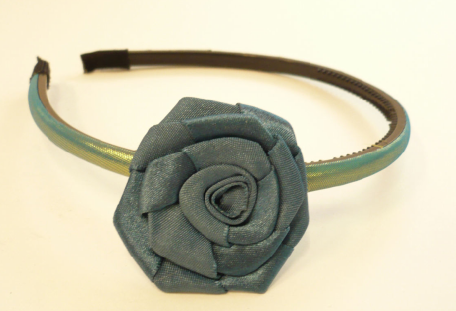 Flower Headband
For all you DIY’ers out there – click on the name of the item for the how-to instructions. Hope you enjoy!
xoxox
Carly
~If you liked this post, please share it!~
Leave Comment
Apr 1, 2010 | DIY
…Relatively healthy, I suppose.
I’ve seen the recipe for a ricotta-based faux cheesecake a couple places – probably starting with the South Beach Diet many years ago. This is my version – and I’m always surprised at how full I feel afterwards…the protein in the ricotta is truly filling and more satisfying than real cheesecake, I feel. (I’m not really a cheesecake-person, to tell the truth – the restaurant version always makes me feel somewhat sick halfway through.)
DIY Healthy Diet Faux Cheesecake (Like-A-Cheesecake) Recipe
(makes 1 serving)
Ingredients:
*2 graham cracker squares (or one long rectangle)
*1/3 cup lowfat ricotta cheese
*1 tsp vanilla extract
*1 1/2 tsp agave nectar (optional)
*1 tsp sugar-free strawberry (or other fruit) preserves (optional)
*sprig of mint
Directions:
1. Place the graham crackers in a bag and smash with a rolling pin until crumbs. Using the back of a spoon, press the crumbs into the bottom of a small dish.
2. Place the ricotta cheese in a bowl and add the vanilla extract. (You don’t need to be exact with the measurements; just mix and taste as you go.) You don’t even have to add the agave nectar if you prefer a “cheesier-tasting” cheesecake. Me, I like my desserts sweet, so I added a little agave nectar.
3. Once mixed, press ricotta cheese onto the top of the graham cracker crumbs. If you prefer a more solid cake, chill in the refrigerator about 30 minutes.
4. Drizzle fruit preserves over the top. (The sugar-free preserves tend to have more water than regular, and thus mimic a light “syrup.”) Garnish with mint and enjoy!
On another note, I am also totally addicted to these:

Okay, I know they’re toddler-snacks (and Lil Tot is technically no longer a toddler)…but I buy them just for me. Maybe I’ll share a few with Lil Tot…maybe.
They’re akin to Astronaut Ice Cream…well, Astronaut Frozen Yogurt (I know this doesn’t exist, at least for purchase by the average consumer, but bear with me). They’re ridiculously low in calories, have no fat, healthy probiotic bacteria, and they slowly melt in your mouth as you suck on them. And they don’t cost $5 (like a tiny little sliver of Astronaut Ice Cream does) – usually they’re 2 packs for $5 at my local supermarket, and a pack lasts quite awhile. They come in Mixed Berries, Strawberry, and Peach.
Yum.
Do any of you have any secret snacks that as an adult you’re technically not supposed to enjoy?
xo
Carly
Leave Comment
Mar 31, 2010 | DIY
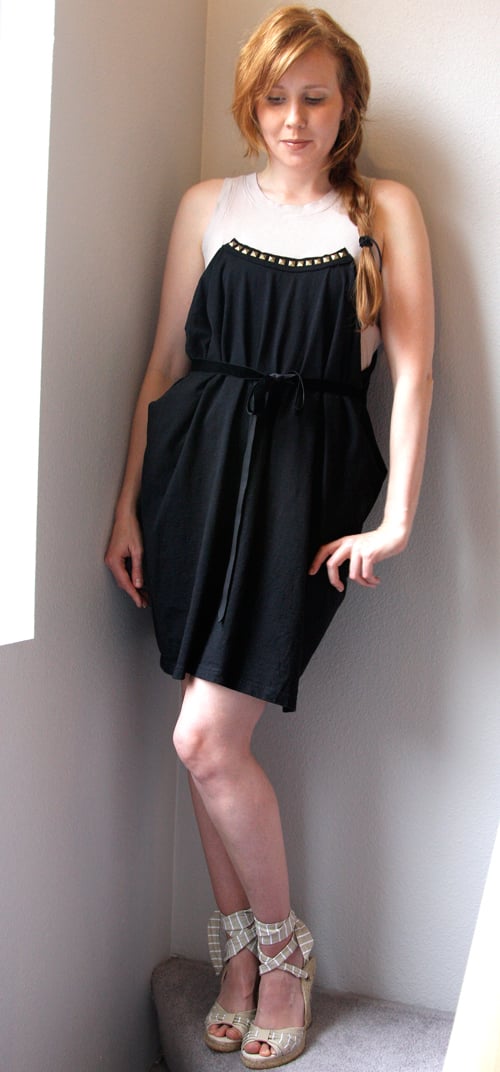
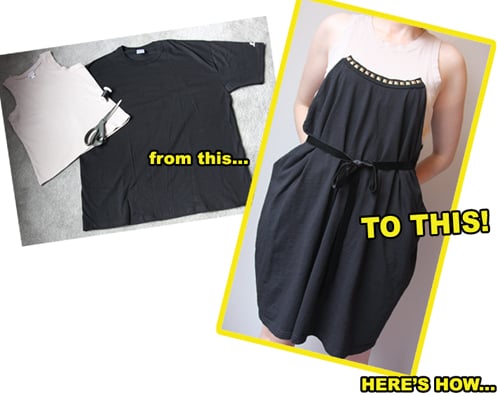
The temperature’s rising, but maybe you’ve tired of the ol’ tanktop-and-jeans ensemble. Maybe you want a go-to summer dress but still want it to be comfortable for when it gets really hot. Revamp a tanktop with the addition of an old men’s tee,** and live in soft-washed cotton comfort all summer.
**I’ve adapted this recon from the book Kakkoii Kuchuuru Rimeiku [“Cool Couture Remake”], by Hiroko Yamase [Bunka Publishing, 2009]. The book is in Japanese, and I’ve converted the sizing to Western sizing, and changed the methodology here and there. Hope you like it!
You Need:
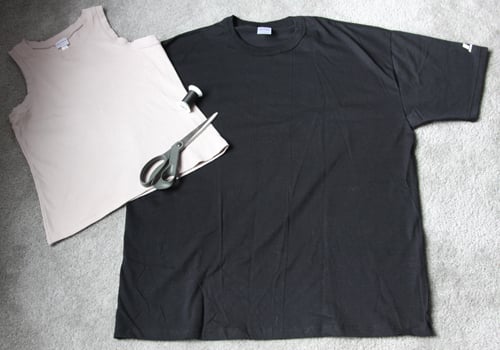
*1 tanktop that fits you well
*1 men’s t-shirt (preferably XL)
*thread matching t-shirt
*fabric scissors
and…
*marking chalk
*pins
*measuring tape

Optional:
*velvet or satin ribbon (1″ – 1.5″ wide)
*pronged studs, sew-on jewels, hotfix nailheads, or fancy trim
How To:
Prep Time
1. Wash and dry both your tanktop and t-shirt if they haven’t been washed before. Turn the t-shirt inside out and cut off the label at the back of the neck. (not pictured) Cut off the shoulder seams all the way to the sleeve seams.
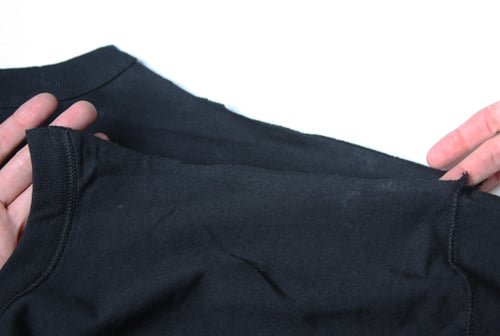
Start Sewing
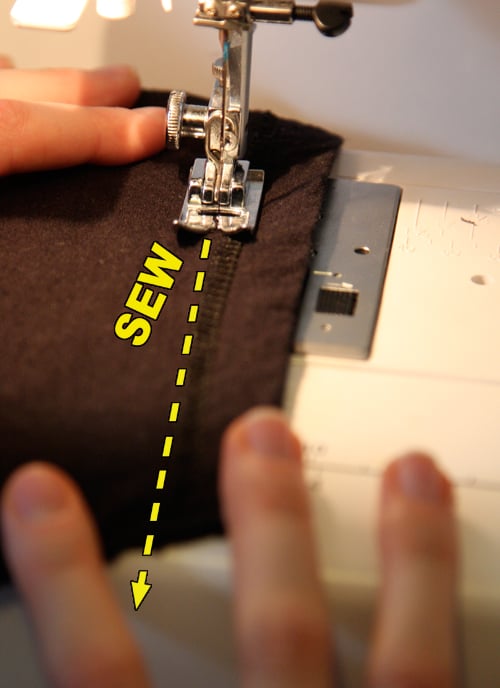
2. Sew the ends of the t-shirt’s sleeves closed, just inside the sleeve cuffs. These will become pockets.
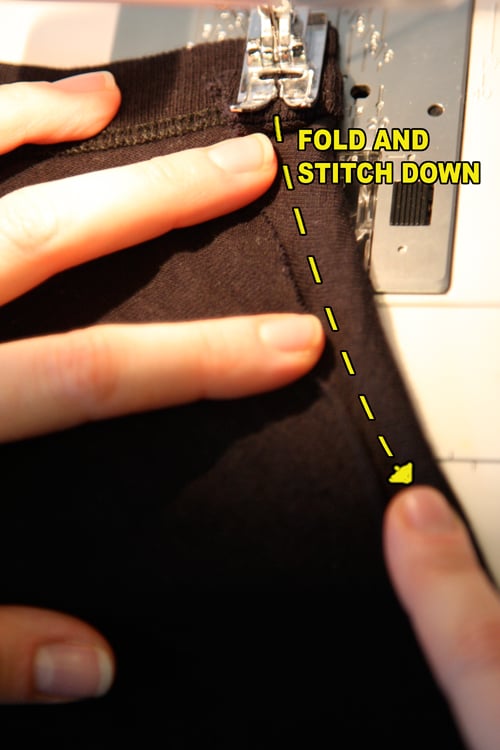
3. Fold down about 1/2″ along the slit shoulders (the raw edges) of the t-shirt, all the way around, front to back, neck ribbing to neck ribbing. Stitch down, creating a 3/8″ hem.
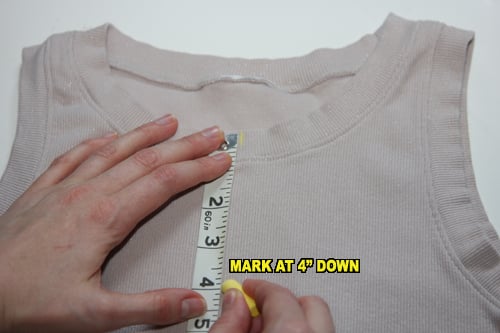
4. Turn the t-shirt right side out, tucking the sewn sleeves inside. Fold in half and mark the center front and center back at the neck ribbing. Do the same with the tanktop.
5. Measure 4″ straight down from the mark you made on both the front and the back of your tanktop. Make another mark at each point.
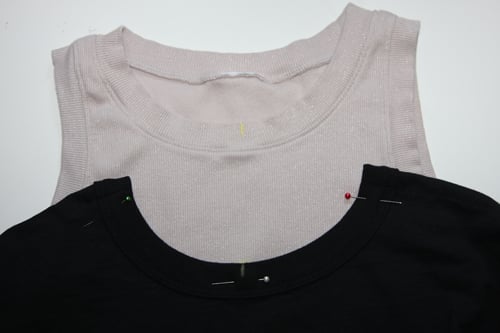
6. Place the tanktop inside the t-shirt. Line up the center front of your t-shirt on top of the mark you made on the center front of the tanktop. Pin in place.
7. Pin the neck ribbing of the t-shirt to the front of the tanktop, following the natural curve of the t-shirt’s neck. (I folded the edges of the t-shirt under about 1/2″ again, since I liked the way that looked.)
8. Repeat Step 6) and Step 7) to pin the back of the t-shirt onto the back of the tanktop.
9. Stitch the t-shirt to the tanktop, following the lines of the neck-ribbing of the t-shirt. Sew TWO lines of stitching to secure: one line at the very top of the neck-ribbing, and one line at the point where the ribbing connects to the t-shirt. Do for both front and back of your piece.
Embellish It! (Optional)
9. Use a piece of ribbon as a tie for the waist, stitching at the back to secure. (not pictured)
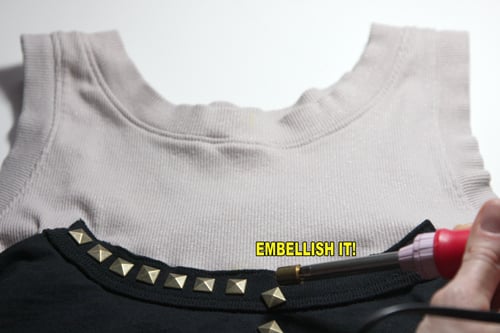
10. Add studs, hotfix embellishments, sew-on jewels, or fancy trim to the the tanktop neck, the t-shirt ribbing, or the hem of the garment to doll your piece up.
You’re finished!
Without the belt, hands in pockets.
Belted with a velvet ribbon.

Tip: If you feel the weight of the t-shirt distorts the tank too much, sewing the sides of the tee to the tank will help eliminate the “pulling.”
Wear with some espadrille wedges and a cool pair of shades for a chic casual look as the mercury rises.
I’d love to hear your feedback everyone!
xoxox
Carly
for Threadbanger Blog Projects
Save
Leave Comment
Mar 30, 2010 | Fashion, Score!
SockTheory.com, a brand-new (as of January 2010!) online store devoted to legwear in all its fabulosity, has me drooling.
No, seriously. Drooling over…socks?
Well, it’s not just socks. They are purveyors of not only the trendy, but also the tasteful, elegant, everyday needs, and the hard-to-find items of legwear even the most die-hard connoisseursmight have a hard time sourcing elsewhere.
Pantyhose with toes?
Yup. They sell ’em.
Lace-up slipper socks?
Sure. (Getting that Chanel S/S 2010 look for $7 sounds like heaven to me!)
Printed stirrup-socks?
Yes, sireee.
And they also stock armwarmers too (a personal fave).
A-a-a-and everything on the site is $25 or less, with many items of legwear under $10! (Oh, and they deliver internationally – woohoo!)
Owner Morgan developed the concept of legwear as the centerpiece of an outfit, instead of just an accessory. She writes “I’ve been sock- and tights- obsessed for my whole life, so branching into this is a dream I’ve always had. When you are a lifelong New Yorker and walking Seventh Avenue every day, it’s impossible not to be fashion-minded. City-style fashion is something that inspires me.”
“Selecting only products that are unique and interesting is important. I’m not interested in carrying only your standard “top seller basics.” Sock Theory is about branching out and expanding your legware horizons =). I own, wear, and model everything you see on the site.”
SockTheory: Sexy Socks and Legwear for Any Theoretical Outfit!
Well, Morgan’s got a great eye for variety, and a gorgeous pair of gams to say the least!
And, exclusively for Chic Steals readers: enter code CHICSTEALS in the coupon code box during checkout to receive 10% off of purchases of $25 or more!
So what are you waiting for? Check out SockTheory.com now, browse through the many images of covetable legwear, get some great styling ideas, and clickety-click your way to 10% off, just in time for Easter.;-)
xoxoxo
Carly
Leave Comment
Mar 29, 2010 | DIY
(from zippermanufacturers.com)…Buy a metal-coil non-separating black zipper from a sewing supply store…
for a whole lot less.
I’m onto you, Forever21! You thought if you waited a year and a half, no one would notice you’ve knocked off Alexander Wang’s skirt (shown above, from the Lucky Magazine August 2008 issue – taped into my “inspiration files”)
Well – haha! The ruse is up.
I’ve now snapped up the Tiered Skirt from one of your stores, and will be adding a zipper and black waistband shortly – to make my very own Alexander Wang Ruffled Skirt lookalike!
$495 vs. $29.79 (the zipper is $4.99)….who is the wiser now, hmmmmm?
xoxox
Carly
Leave Comment
Mar 28, 2010 | From You
Leave Comment
Mar 28, 2010 | From You
Oregon!:-)
Leave Comment