Apr 26, 2014 | DIY
 1 / 2 / 3 / 4 / 5 / 6 / 7 / 8 / 9 / 10 / 11 / 12
Earlier I shared my must-have list for jewelry DIY projects. And now I’m following up with this list for sewing DIY projects! (These Must-Have Tools for DIY lists are on my DIY Resources page if you’re looking for them.)
My mother taught me to sew back when I was 8 or 9 or so. My first project was a lopsided white stuffed bear with a face that looked both happy and sad at the same time. Since then, I’ve graduated to using and eventually purchasing a serger, learning how to use an industrial sewing machine, and even sewing my prototypes for my short-lived clothing line back in 2007. I love using patterns and making patterns, stitching things together from scratch and upcycling pieces, and basically letting my imagination run wild. Some of my favorite projects that I’ve shared on this blog have been my Cute Summer ShirtDress (the very project that launched my focus on DIY here on Chic Steals!), my Men’s XLSweatshirts to Blouson Top project, and more recently my Ballroom Skirt from a Shower Curtain. Here is my recommended list of really great tools for DIY Sewing Projects:
1. Seam Ripper
You.Must.Have.A.Seam.Ripper. You need it to rip back or to take apart pieces to be cannibalized, to fix stitches…this is vital to creating a perfectly-sewn piece (even if it didn’t work out the first time around).
2. Rotary Cutter
Perfect for cutting uber-straight lines, this is my favorite tool to get things cut out in a flash. (Don’t forget the cutting mat to go with it!) I like the OLFA but Fiskars makes a good version too.
3. Chalk Pencil
This marking pencil is my absolute favorite since it makes super-precise lines and works just like a mechanical pencil. LOVE.
4. Extra Bobbins + Bobbin Case
Who ever has enough bobbins when they’re sewing?? (I’ve been known to wind a new color thread on top of a half-filled bobbin when I’ve run it…which is definitely not a best practice.) Though you of course have to get the correct type for your machine, these ones are my favorite for my Singer. Plus a little case to keep them in will keep them neat and tidy instead of a tangled mess!
5. Sharp, Sharp Sewing Scissors
El-cheapo scissors won’t cut it (literally) if you do a lot of cutting and sewing. Prepare to spend around $30+ for an excellent pair of Gingher or Singer scissors, and they will last you a lifetime. (Just never, ever, EVER cut anything else besides fabric with them [especially paper]…this will dull them like nobody’s business.
6. Sharp, Sharp Pins + Emery-filled Pincushion
I’ve found that certain “decorative”-style pins aren’t all that sharp, and the round-headed ones tend to cause bumps when pinning a pattern to fabric in order to cut. I prefer the extra-sharp flower-headed pins so the pattern isn’t puckering and lifting, and they don’t get in the way of the machine foot so much. Plus an emery-filled pincushion to keep them all corralled is a must. You can also DIY your emery pincushion by following a tutorial here.
7. Hem Tape
Though I prefer to sew whenever possible, some stitchery DIY’s can be accomplished quite easily with permanent Hem Tape instead. (See my DIY J. Crew Sporty Pants and my DIY Windowpane Sweatshirt for example.) This hem tape is just great.
8. Curved Nail Scissors
I love love love these scissors! (They also appear on my Must-Have Tools for Jewelry DIY’ing list.) That’s how much I love them! They work great as thread snips if you don’t feel like investing in those, and help you poke holes and cut perfect buttonholes (just be careful of the curved edges).
9. Pattern Notcher
I fell in love with this tool when creating my clothing line, and again at the clothing factory I interned at in Portland. Normally you’d notch your patterns and fabric at center front and center back, and when matching sleeves. I don’t like using the scissors to notch, because often the cut is not easily visible in the fabric, and sometimes I notch too deeply, straight through the line of stitching. NOT GOOD. With a pattern notcher, it goes through the fabric in a lovely V- or rectangle shape and won’t go deeper than 1/4″, so no chance of ruining your stitching. It’s easy to see and looks professional, plus it can be used to notch the seam allowance of curved stitching. I LOVE IT and highly recommend it.
10. Pattern Weights
Usually I’d use any old thing laying around (my water glass, the sleeping dog, my glasses, the very scissors I actually need to cut with)…but having a group of dedicated pattern weights is extremely useful. You could of course DIY them and make them utterly cute, too.
11. Variety of Machine Feet
Though the project will often dictate what feet you need, I find myself reaching for the same ones over and over again. My Zipper Foot, Ruffler, Narrow Hem Foot, Butttonholer, and Teflon Foot (for leather/suede) help me stitch up a variety of projects with professional results. (the pack pictured is for low-shank machines)
12. Turn-It-All
I absolutely adore this kit I bought awhile ago. It’s for turning thin tubes of fabric (like for spaghetti straps, waist-ties, decorative tubing, and more). I often use the long thin metal rod in place of an awl for holding fabric under my machine foot, and for poking corners out and turning pieces right-side-out in general. I highly recommend this!
Any extra sewing tools that you can’t live without? Let me know in the comments!
xo
Carly
*This post contains affiliate links. For my full Disclosure Policy, click here.
Leave Comment
Apr 23, 2014 | DIY
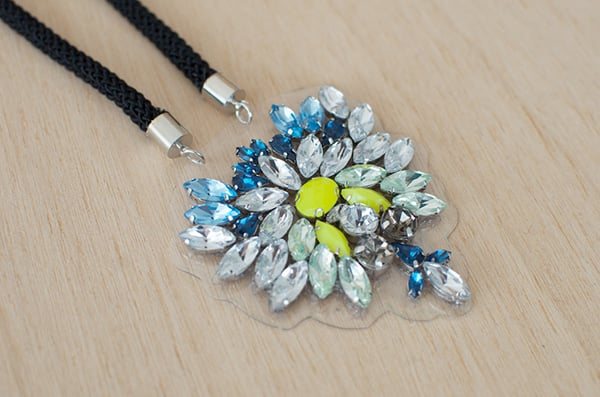
 Hello lovely readers! Today I’d like to share the DIY tutorial for the Gem Pendant Necklace I designed for Wander & Hunt. It was inspired by an over-the-top, bejeweled and utterly gorgeous Dannijo pendant – and so I couldn’t help myself but re-create all that glittery goodness.
 Here’s how:
You Need: (more…)
Leave Comment
Apr 21, 2014 | Fashion, Score!

Just like everyone these days,
my life is jam-packed. From morning to night, I’m going to the gym, taking my son to school, running errands, scouting locations, meeting my business partner, chatting with the girls over tea, picking up my son, and going to after-school activities (and then maybe out to dinner if I’m lucky!). Basically, my feet are
two busy dogs and I usually hit my 10,000 steps daily with little effort needed. With the new feather-light
Reebok Skyscapes, I can go from errands to car to walking to running around – all while
supported, comfy, and stylish.
The lace-to-toe molded silhouette and unique design provide
amazing comfort (seriously, you have to try these to believe it!!). This shoe is crafted borrowing the materials and soft molding process used to create lingerie, which provides all-around comfort and creates a shoe so lightweight that it weighs only 5.0 ounces. (The soft foam material in the upper feels just like my favorite molded bra – which feels almost like I’m wearing nothing on my feet at all.) I love that the shoe isn’t covered with all sorts of stitching and rubber bits and things that catch and weigh me down: the design is sleek and streamlined and looks like
a hybrid between an athletic shoe and a casual sneaker. Inside the footbed the Skyscape features
Skyspring technology, which is a unique design architecture designed to help support the foot and provide all day comfort for my on-the-go lifestyle.
It’s just like walking on clouds. (
“So lightweight and comfortable, you’ll forget you have them on” is their tagline.)

Perfect for keeping up with the dog: Pudding may have super-short legs, but she can run!
Plus whilst wearing them I love to
coordinate them to my outfit – and they don’t look as if I just walked out of a spinning class or something. (They’re now my choice of footwear when picking up my son at school for the long walk from the car to his classroom, standing around the playground, and then back to the car.) They come in some
fun and fashion-forward colors (mine are Pink Fusion!) and cost under $70 for a pair. Reebok Skyscapes are available for
online purchase, or at select Kohl’s, Reebok FitHub, or Outlet locations for
in-store purchase.
Giveaway

You can win a YourReebok Custom Card and create your own pair of Reebok Skyscape shoes!
How to Enter: Leave a comment telling me where you would wear your Reebok Skyscapes. To work, on the playground, to school, walking the dog, heading to the gym, hiking, etc.? Where would you rock these babies? Let me know in the comments on this post! (Comments on this post only; no comment within Facebook will be counted.)
Good luck to everyone!
xo
Carly
FTC Disclosure: I wrote this post as part of a paid campaign with BlogHer and Reebok Skyscape. I received 1 pair of Reebok Skyscapes for review purposes, and 1 pair will be provided to the winner of the giveaway. The above opinions are my own. To read my full Disclosure Policy, click here.
Sweepstakes Rules:
No duplicate comments.
You may receive (2) total entries by selecting from the following entry methods:
- Leave a comment in response to the sweepstakes prompt on this post
- Tweet (public message) about this promotion; including exactly the following unique term in your tweet message: “#SweepstakesEntry”; and leave the URL to that tweet in a comment on this post
- Blog about this promotion, including a disclosure that you are receiving a sweepstakes entry in exchange for writing the blog post, and leave the URL to that post in a comment on this post
- For those with no Twitter or blog, read the official rules to learn about an alternate form of entry.
This giveaway is open to US Residents age 18 or older. Winners will be selected via random draw, and will be notified by e-mail. The notification email will come directly from BlogHer via the sweeps@blogher email address. You will have 72 hours to respond; otherwise a new winner will be selected.
The Official Rules are available here.
This sweepstakes runs from 4/21/2014-5/18/2014.
Be sure to visit the Reebok Skyscape brand page on BlogHer.com where you can read other bloggers’ posts!
Leave Comment
Apr 20, 2014 | Fashion
 FTC Disclosure: This post contains affiliate links, which means that I receive a small commission if you click through and buy something. To read my full Disclosure Policy, click here.
Yup, the weather’s finally warming up and I’m in the market for a brand-new bathing suit. But nothing boring, nothing run-of-the-mill. I want a statement-maker. And Nasty Gal has some amazing options (even some that are more conservative than the usual fare). Check out my picks to outfit you and your unique style this Summer:
Above graphic, top row l-r: Nasty Gal Cruz Bikini Bottom in White / Chromat Tri Bikini Bottom
 / Lolli Line Up Bikini Top
 / Lolli Borderline Bikini Bottom
Middle row, l-r: Mandalyn Betty Swimsuit / Lanikai Swimsuit
 / Chromat Pentagram Swimsuit
 / Paixoto Alda Bottoms
Bottom row, l-r: Nasty Gal Bora Bikini Bottom – Black / Nasty Gal Bora Bikini Bottom – Red
 / Nasty Gal Martine Swimsuit
 / One Teaspoon Superman Bikini Top

Above graphic, top row, l-r: Nasty Gal Frill of the Chase Bikini / Mikoh Seychelle’s Monokini
 / 6 Shore Road Push Cart Swimsuit
 / Shakuhachi Heatwave Neoprene Bottom
Bottom row, l-r: Lee and Lani Rio Bottom / Sky and Staghorn Lottie Crop Top Bikini
 / Lisa Maree Twice Shy Bikini
 / Lisa Maree Night Sea Swim
Anything strike your fancy?
Happy Easter (and the beginning of swim season!) everyone!
xo
Carly
Leave Comment
Apr 15, 2014 | DIY
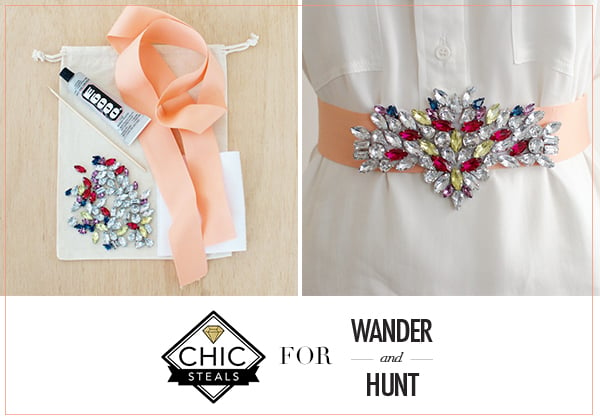
Hello friends! Today I am sharing the DIY tutorial for the Radiant Rhinestone Belt kit I designed for Wander & Hunt. It’s a fun little project with maximum impact, and you can place your stones however you like to get totally different looks. 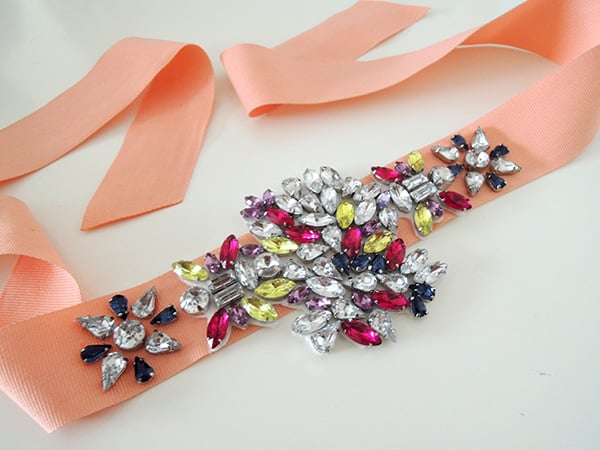 (My version is less symmetrical and more random, as you can see.) Here’s how:
You Need: (more…)
Leave Comment
Apr 9, 2014 | By Carly J. Cais, DIY
 I’ve just completed a super-fun collab with DIY kit shop Wander & Hunt – and designed 2 special DIY projects just for them.

 The first, the DIY Radiant Rhinestone Belt, was actually inspired by a rhinestone belt I spied on Anthropologie.com this past Winter, and figured it would be a snap to re-create. For $29 you get the ribbon base, felt for attaching the rhinestones, glue, a skewer, and an absolutely HUGE amount of rhinestones to deck out your waist embellishment. Gorgeous over a plain shirtdress or even a light coat, this will be an accessory you reach for again and again to dress up your outfits.
Check out the DIY Radiant Rhinestone Kit Here
 For the second project, the DIY Gem Pendant Necklace kit, I drew inspiration from a Dannijo bejeweled pendant I saw on Pinterest. Again, for just $29 you receive a bevy of gems, glue, a skewer, PVC plastic, endcaps, jump rings, and a rope for the necklace. The design is super-chic – and creates a fabulous statement!
Check out the DIY Gem Pendant Necklace Kit Here
You can also check out all the other DIY kits available at Wander & Hunt here (everything under $70!), as well as all the other supplies and materials that they offer. They have a ton of tutorials on the site as well, so you can get your DIY on without even buying a kit. Standard shipping is also free worldwide!

Thanks so much to the team at Wander & Hunt for making this happen! I had a blast designing these projects. 🙂
What do you guys think of these kits? Have you ever bought a DIY project kit – and was it worth it? Let me know in the comments!
xo
Carly
Leave Comment
Apr 8, 2014 | Fashion, Life
 Image source
Spring is finally here – and that means Spring cleaning! I always head to my closet first and foremost to do a major purge this time of year. It’s cathartic and frees up my mind to get rid of lots of old junk that has accumulated – and that I no longer wear and enjoy. And what do I do with everything I pull out of that overstuffed madness? I head to Goodwill and donate it all – since I know it creates jobs and helps my community: one of the best ways to create a local impact by investing back into it. (more…)
Leave Comment
Apr 6, 2014 | DIY
 Since Easter is coming up soon, I was collecting some images of inspiring egg decoration. I landed upon this, and began thinking…what about doing this to your nails? So I did. And it turned out amaaaaaazing. (Who doesn’t love chic gold leaf, right??!)
  Here’s how to do it too:
You Need: (more…)
Leave Comment
Apr 2, 2014 | DIY
 *This project I contributed to Snippets Magazine: The New York Issue on Cut Out + Keep in 2010, and am re-posting to my blog here.
A la Balmain or a la Jenny, this blazer is looking sharp!
 Though it only appeared onscreen for the briefest of moments, this was Little J’s take on an elegant cover-up to take her straight to the Ambassador’s Dinner and show up Damien. Making your own is easy, just by adding multiple safety pins to a blazer in need of a makeover.
Materials:
 Black fitted Blazer / Medium-large size silver Safety Pins
How To: 1. Start by inserting a couple safety pins in a fan-shape at one of the side-seams of the blazer, right where it hits your waist. Try not to push the safety pins through the jacket lining.Add more safety pins in-between the first row.
 2. Keep alternating placement as you fan out from the side and create a “starburst” pattern.
 3. Add a few larger safety pins near the edges.

4. Repeat for the other side of the blazer.

So easy- and so impactful. This piece looks great over skinny jeans, or even a slinky dress for a night out!
Happy DIY’ing!
xo
Carly
Leave Comment
Apr 1, 2014 | Media, Score!
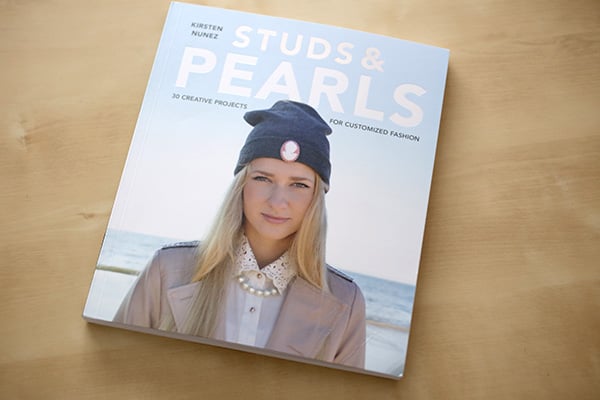 Studs & Pearls : 30 Creative Projects for Customized Fashion is from the eponoymous blog Studs & Pearls by Kristen Nunez, founded in 2010. We’ve been reading each other’s blogs for quite some time, and we’ve been frequent commenters on each other’s projects. Kristen’s DIY’s are always fun, simple, and have major visual impact. With this book you can get a ton of ideas for how-to’s that can easily take your basics and jazz them up a notch.

The book covers DIY basics, like Tools and Supplies, and then dives straight into the projects. It includes 30 projects, with multiple variations on each so you can put your own spin on them.  It covers a variety of techniques, including fabric dyeing, stamping, no-sew projects, trim embellishment, and painting.
  Plus the photography features real-life girls (like in street snaps) modeling the finished creations so you can get an idea of how the DIY’s will look when worn.
Most of the projects are extremely easy so even beginners or kids/pre-teens can get in on the fun. It’s a great jumping-off point for those just getting started to DIY.
 It also includes many projects that speak to current trends, like the embellished sunglass case-turned-clutch trend, trim-detailed mini-skirts, tie-dye, embellished sunglasses, beanies, mixed media embroidery thread-and-chain bracelets, and cocktail rings. Many of the project use easily-available or unusual materials, so supplies are a cinch to come by. (There’s a directory of sources and where to buy in the back.)
This statement clutch turned out so pretty with some well-placed painting! An interesting take on the plastic tube bracelet.
 These cocktail rings from buttons are particularly pretty.

Overall: It was nice to see all the variations on all of the projects. Many of the techniques are quite simple, which speak well to a young audience maybe not so familiar with DIY blogs and projects elsewhere. (There are 3 projects that do require a higher skill level, with dyeing and sewing a dress, but they stood out as somewhat incongruous next to the other projects.) It does provide inspiration and ideas on the variations, as well as styling tips, so it can be very useful in planning out your project. This would be a great book for a young teenager or someone who is just getting started to DIY.
Score: 
Giveaway
One lucky winner will receive a copy of Studs & Pearls : 30 Creative Projects for Customized Fashion by Kristen Nunez.
Enter using Rafflecopter below.
a Rafflecopter giveaway
Good luck!
xo
Carly
FTC Disclosure: I was sent a copy of Studs & Pearls for review from Laurence King Publishing. I am sponsoring the giveaway and shipping the item to the winner at my own expense. The above opinions are my own. To read my full Disclosure Policy, click here.
Leave Comment











