Sep 5, 2012 | Blogging, DIY, Life

The art of DIY is something I believe, to be enjoyed for oneself, shared with others as means of inspiration and encouragement, but not something that should be applied to creating exact replicas or knockoffs to make a profit on sales of such items. Inspired by, but not replicated if there are sales involved.  I get so many requests (even now!) for me to make a custom knockoff pair of those Christian Louboutin for Rodarte Super-Spiked Heels I DIY’d nearly 3 years ago, that sometimes I feel my intentions in sharing these how-tos and ideas on my blog are being misconstrued entirely.
Sometimes I wonder if I should only be sharing tutorials for items quite different from, but still inspired by, designer pieces. It’s a tough call.
But for all of us out there who craft, who create, and who produce art, there is always the question of inspiration vs. imitation. Though in her eloquent post designer Jessica Hische is writing about art in general, I believe her great analysis of the art of copying (and how to avoid straight-out mimicry) is a great read and utterly applicable to everything creative in life (including DIY!).
And especially DIY, and making your own projects for yourself, as well as to share with others. Ideas are everywhere, and what you choose to appropriate, re-appropriate, and re-mix becomes art the further away it gets from its original inspiration. I re-read this blog post all the time because it’s such a great one (and Ms. Hische is an amazing logotype and branding designer too!)
Just some food for thought on this late, late evening.:-)
xoxox
Carly
Leave Comment
Sep 2, 2012 | Fashion

Striped 3/4 Sleeve Top: Heritage 1981
Silver Horseshoe Charm Necklace: ? (won from Lucky Magazine; similar here
Pocket Rocket in Blue Boca Tote Bag: SCOUT by Bungalow
Rings: various (mostly Target and maygloba)
Slap Watch in Black
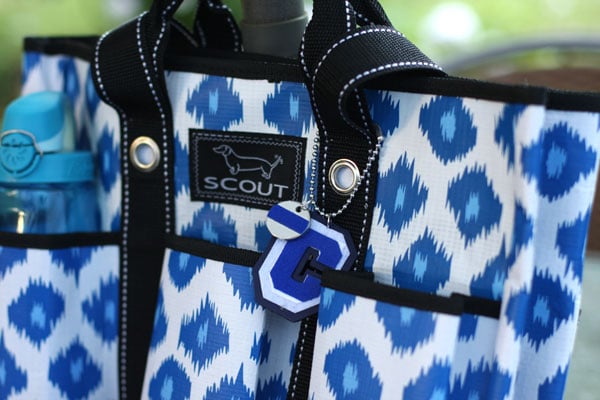
“C” Initial Keychain Purse Charm: DIY (tutorial coming soon!)
Colored Ankle-Zip Skinny Jeans: Divine Rights of Denim for Forever 21 (similar here)
Rope White Slide Heels: Abaete for Payless
Again, my Magic Paprika jeans had people stopping me to talk to me or remark on my outfit today. (more…)
Leave Comment
Aug 31, 2012 | Fashion

SCOUT by Bungalow is a line of colorful, preppy totes, bags, and carry-alls that are heavy-duty enough to take whatever you can throw at them and more.  What differentiates them from other carry-alls on the market are the fashion-forward, bright patterns matched with the incredible durability and functionality of each piece. The folks over there kindly sent me the Pocket Rocket Tote in the blue Boca pattern to try out and write a review about.

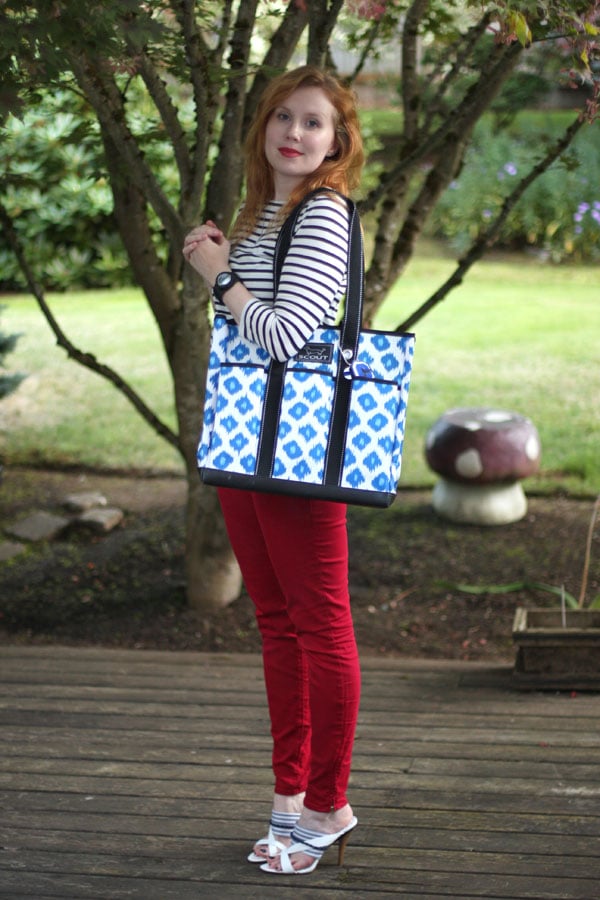
This particular tote isn’t made of canvas (though they do have canvas-material items for sale on the site); it’s made of a super-tough poly material; similar to tarpaulins. It wipes clean and amazingly resists wrinkling and spills.
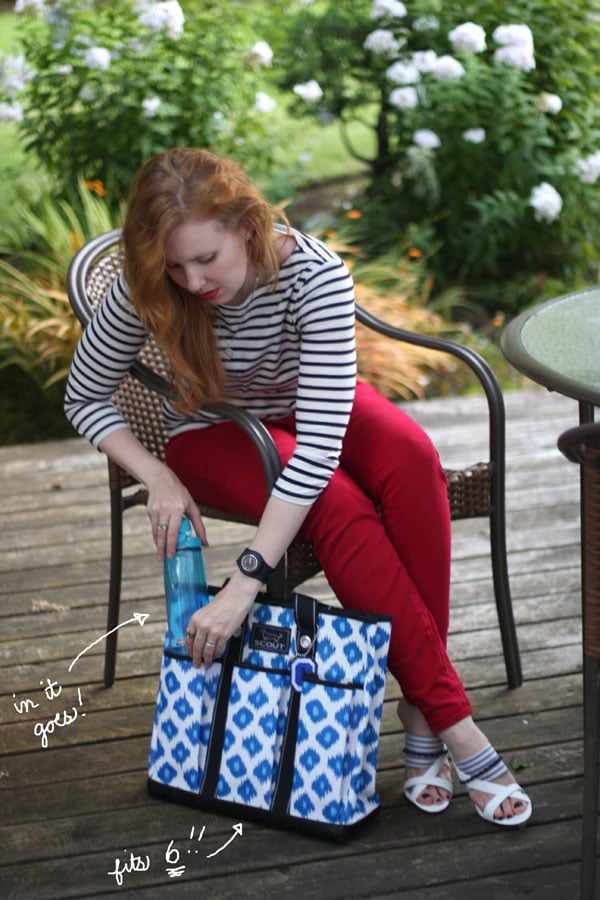
It has an inside zipper (perfect for when my bag turns upside-down…which it seems to almost daily!), and has outer pockets, enough to hold 6 bottles.
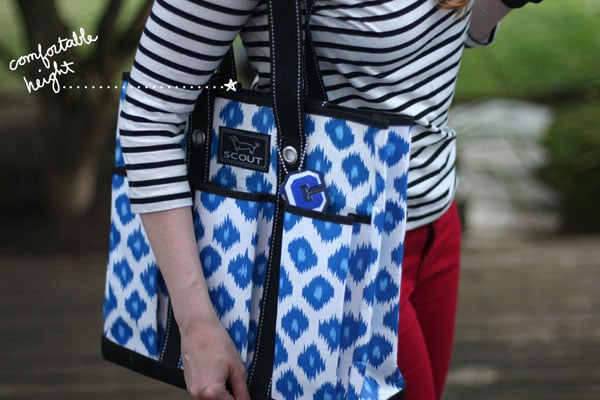
2 separate handles allow you to carry it as a shoulder-tote or as a carry-all.
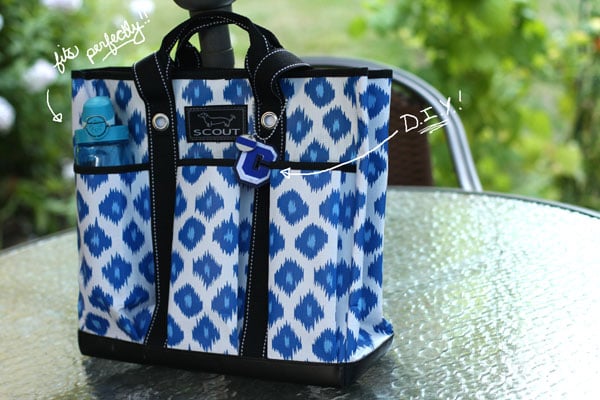
I also DIY’d a little preppy initial keychain charm for the handle…DIY tutorial coming soon!

I really like my tote and it’s already survived 2 family trips, stuffed to the gills with drinks, food, and clothing – and looks great paired with a number of different outfits! If you’re looking for something that looks fun and colorful and can hold all your stuff (and your family’s stuff!) check out SCOUT by Bungalow for the perfect carry-all! (And they also have storage and decorative options for your house, like their pretty Tabletop Collection – so check them out!)
xoxox
Carly
FTC Disclosure: I was sent one tote by SCOUT by Bungalow as a review item and have received no other compensation. The opinions in this post are my own. See here for my Disclosure Policy.
Leave Comment
Aug 29, 2012 | DIY
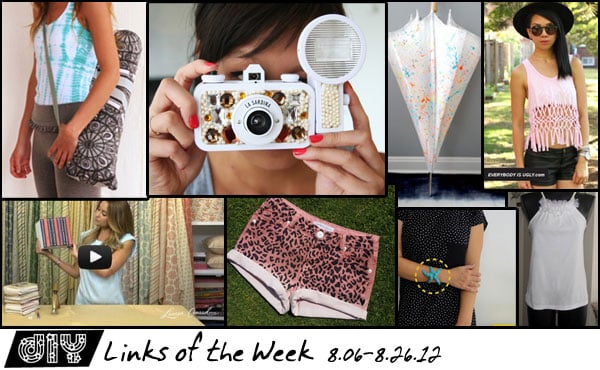 Alright, so it’s been 3 weeks again, but my relaxing Summer has gotten oh-so-busy what with my mother visiting me, a trip to Arizona, and school and work taking up much of my time. How about you guys? Are you all gearing up for the coming Fall season and…gasp!…the various Fashion Weeks around the world? Can it be that time again? Before we head off to our various virtual fashionable destinations, let’s gear up with a little creativity along the way…
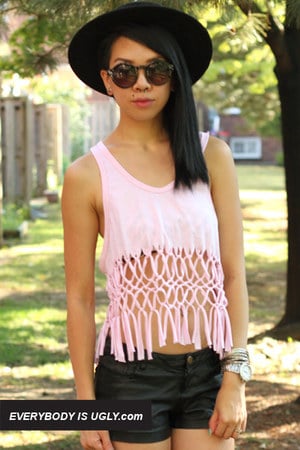 Love this easy DIY Macrame Tank by the girls of LipglossandBlack on Chictopia. Perfect festival…or late-Summer…or Labor Day party wear!
BLDG 25 [the official blog of Free People] posted this Yoga Mat Bag DIY for all the yogaphiles out there who haven’t yet found the perfect bag to tote around the only necessary piece of equipment for classes. Depending on the fabric you choose, the webbing for the handles, and the type of cord for the closure, you could make this totally boho or seriously luxe. I love that it’s all up to you!
Oh, sheesh, the Internet is being silly again. Lauren Conrad posted a DIY video on Youtube of her version of the ubiquitous “Bookshelf Box” (also available from many retailers in various forms for many, many years), which involved her buying new books, ripping out their pages, and gluing their spines to a box to create a concealed box that looks like a set of old tomes – and teh Interwebs rose up as one and denounced her. (See full discussion and original DIY video on The Look on Today.) Cool to destroy books in the name of DIY – or pure sacrilege? An example of the uber-wealthy but brainless elite doing wasteful things – or an idea to re-use what a changing society no longer wants? (Perhaps she should have just bought the book spines for her project from OriginalBooks.net and saved herself all this hullaballoo?)
Create your own DIY Blinged-Out La Sardinia Camera with Refinery29…which is basically another version of a Japanese-style deko-den (or “decorated cell phone,” though in this case it’s a decorated camera). If you’re looking for Deko-Den design inspiration (that can really be applied to any hard-sided accessory you have utilizing the correct glue for your parts), 2 of my favorites are KiraKira Shouten, and the design collection on Matome Naver. When it comes to stuffing as much junk onto your camera (or phone), it’s all about balance and quality!;-)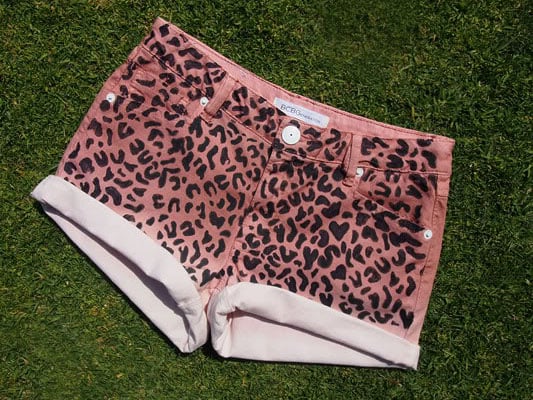
Because I’m Addicted posted these awesome DIY Leopard-Print Shorts‘ a little while back, but I think these are still totally on-trend and do-able for anything you got. All you need is a sharpie, your stencil, and a little bit (or a lot) of patience..but it will pay off in the end. Me-OW!
I just love the ingenuity of 2nd Funniest Thing‘s DIY Starfish Bracelet – using Fimo and a little bit of sculpting ability. (With screwdrivers;-) How amazing is her final creation?! I’m just dying to try this out!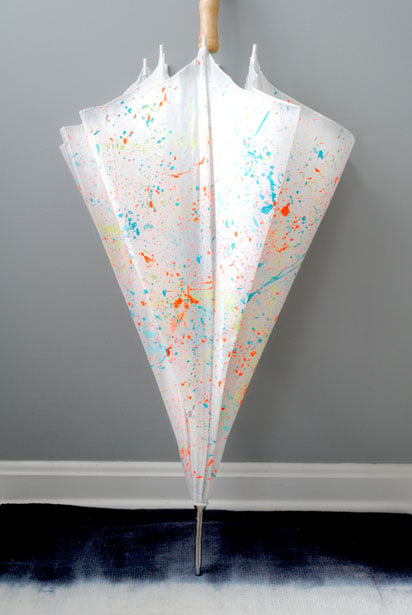
This Paint-Splattered Umbrella is just awesome. So easy – but such a chic result – from Design for Mankind. Who’s heading off in search of a translucent umbrella now in order to try this makeover??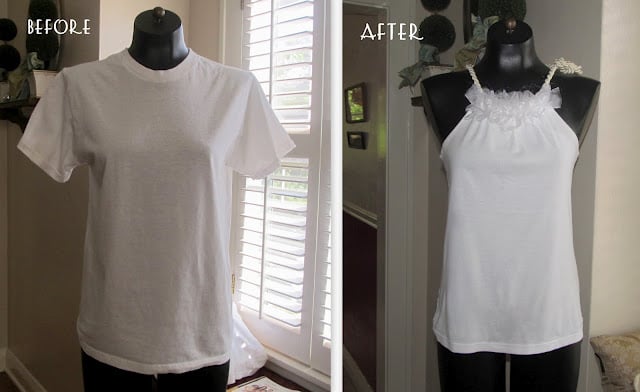
Check out this Halter Top from a Shirt tutorial over at Wobisobi – it’s so goshdarn cute! With just a little snippery – and some great choices for trims – you have yourself a perfect top for that late Summer barbecue or beach venture.
If your project was featured above, feel free to grab a button and share the DIY!

<a href=”https://chiccreativelife.com/category/links-of-the-week”><img src=”https://chiccreativelife.com/wp-content/uploads/2012/08/diylotwfeaturedbutton.png” /></a>
If you have a DIY how-to or tutorial that you’d like to see featured on Chic Steals, please email me at carlyjcais at chic-steals dot com – and I’ll try to squeeze it in to one of my Links of the Week posts! (Original tutorials/how-to’s with steps and photos included please! So everyone can share in the DIY goodness:-)
xoxox
Carly
-all photos copyright their respective authors; photo array by me-
~If you liked this post, please share it!~
Leave Comment
Aug 25, 2012 | DIY
 Sometimes elevating a Summer tee from plain to something more requires a bit of sparkle. Using sequin trim to create t-shirt details that don’t exist makes for a fun and unique piece that looks lovely paired with skirts and dressier shorts – and a t-shirt that’s a little more chic than your average white tee.
  And it’s super-simple! Here’s how to make your own:
You Need: (more…)
Leave Comment
Aug 23, 2012 | DIY
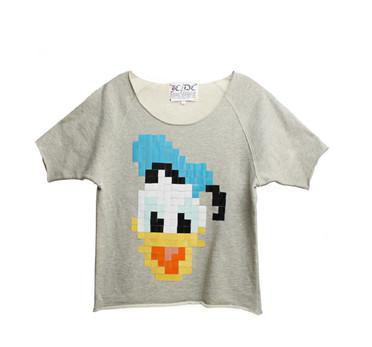 I feel like I’m regressing. Suddenly interested in character tees (perhaps fueled by my recent trip to Disneyland in early August), this (Topshop I think?) sweatshirt caught my eye while scrolling through all the pretty goodies on Fashiolista. (Follow me there! I have neat unique finds from Japanese shopping sites in my profile too!!)
But back to this shirt: totally DIY’able…just choose your favorite character’s face (Sailor Moon!)…or celeb’s photo (Marilyn Monroe!)…or random image (a flying seagull!)…which you can convert to squares by eyeballing it. Or super-accurately using Photoshop. Or try the online version of The Pixelator and download your creation for reference. Then apply the cut fabric squares using the Heat-n-Bond applique technique I shared here. (Or even trace your image onto your shirt and color in with Fabric Paint!)
However you do it, I think it would be pretty cool…and a great way to use up scrap fabrics!
Happy DIY’ing!
xoxox
Carly
Leave Comment
Aug 21, 2012 | Fashion

Having spent the last 4 days in Tucson, Arizona visiting my brother and his wife, I’ve returned this week feeling pretty tired out from a trip filled with sightseeing and walking around. It was super-hot; very dry heat; with tons of prickly things and creepy-crawly things all over the place to add to the ambiance. Here are some photos I took along the trip: (more…)
Leave Comment
Aug 17, 2012 | Fashion, Life

It was Springtime in Tokyo and the cherry blossoms were in bloom whilst I was there.
As many of you know, my family and I traveled to Tokyo, Japan in April of this year to take care of my mother who suffered a spinal stroke. (Who lives in Tokyo for her job.) Though I didn’t have much time to take photos in the beginning of my trip, near the end my mother’s condition had improved, so I was able to do some activities with my family and take some pictures.
You can see Part 1 of my travel photo diary here. Here are the rest of the photos I took during my trip: (more…)
Leave Comment
Aug 15, 2012 | DIY
 photo source
Ever wanted to get started making your own clothing and accessories, but not sure where to start? Sure, some of the projects I post are pretty advanced, but there are plenty of easy projects that have maximum impact out there. Here are a couple to start with and get your feet wet (or your hands dirty?;-) DIY’ing:
1. Painting Rhinestone Jewelry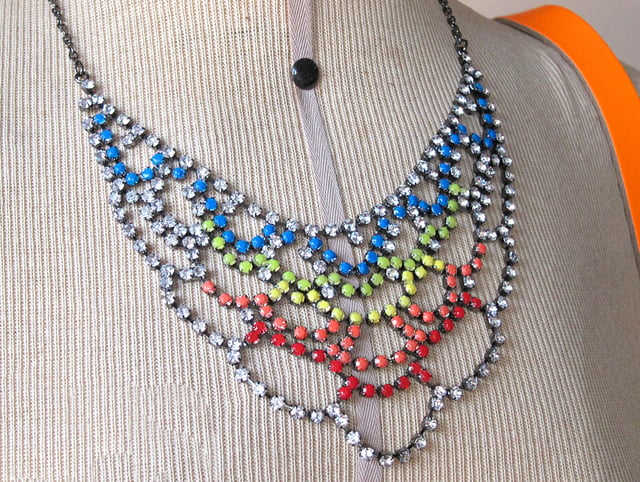
photo source: ?
A nail polish brush is super-easy to use, and a tool most of us girls are already quite familiar with. Using some bright nail polishes to paint over a crystal rhinestone necklace is a great way to get started customizing your jewelry. You can even use brown and black Sharpies, like The Glamourai, spray paint like A Pair and A Spare, or dab the nail polish on with a sponge, like Youtuber AndreasChoice. Genius, but oh so simple.
2. Studding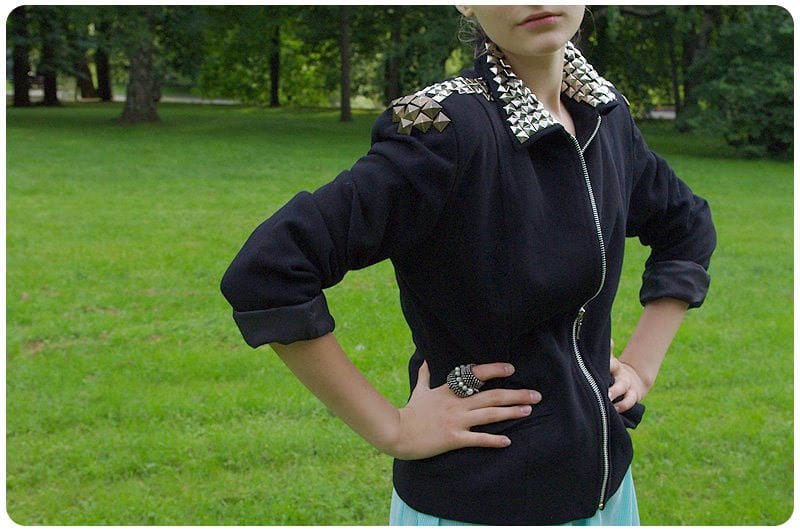
photo source: Style Hurricane
Though studs can be a little hard to come by from your local sewing store (hint: try M&J Trimming or StudsandSpikes.com for all your studding needs!), they’re extremely easy to work with. Just the addition of a few pyramid studs onto a jacket or a bag can create a totally new look for you in minutes flat. If the material is soft enough, you can just push the stud’s prongs through by hand; if it’s thicker leather you might need to make holes (recommended: using an awl) first. Don’t ever cut slits to match the shape of those prongs! Small holes only, and when you push the stud in it will stretch out the fabric to the necessary shape.
3. Tie-Dyeing
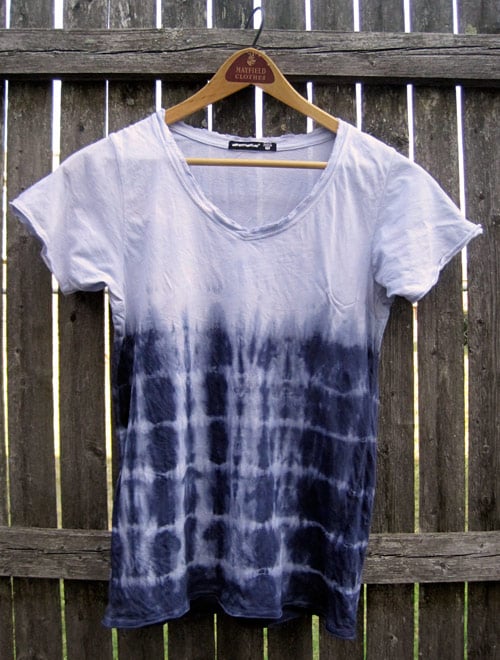
photo source: Short of Something
Though dip-dye or ombre-dyeing is currently very trendy, it can be a pain to accomplish, and difficult to accomplish well. A technique that’s super-easy (and no-fail) is tie-dyeing, where you wrap your project with rubber bands and submerge in a hot dyebath. Even easier? Using Simply Spray’s Soft Fabric Paint to spray onto your project instead…no hot water, dyebath, mixing, or submerging necessary.
4. Iron-On Applique
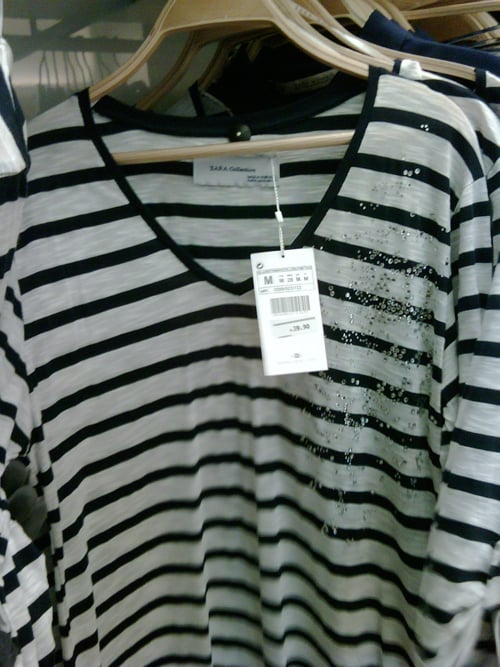
top from Zara, my own photo
If you can wield an iron, you can do this! Appliques strategically-placed on a piece of clothing or a bag can elevate a piece from ho-hum to whoa! very quickly. Though the variety of appliques sold at sewing stores has improved slightly of late, choose wisely…lest you end up looking like an over-appliqued granny. (Hot-fix rhinestone designs are available too!) You can also easily make your own applique by fusing Heat n Bond to the underside of a piece of fabric you want to stick on, like in my tutorial for a DIY Floral Applique Cardigan. Or even iron-on details from plastic bags like at Filth Wizardry!
5. Bracelet Makeovers

DIY Shambala bracelet, from guest post by Make It and Fake It
Probably the reason why bracelet posts always go viral is that they are very easy and perfect for beginners. Honestly, WTF is probably the queen of DIY bracelet tutorials, but you can also go old-school and make your own friendship bracelet from scratch with embroidery thread. Or even buy pre-made friendship bracelets and go wild with the studding and decorating!
Happy DIY’ing everyone!
xoxox
Carly
Leave Comment
Aug 10, 2012 | DIY
 Simply Spray is a non-toxic, non-flammable aerosol fabric spray paint, available in a range of colors and easy to use.
  The company sent me a 3-can kit of Simply Spray Soft Fabric Paint and Simply Spray Stencil Spray Summer Love Kit to try out in a project, so I decided to take the opportunity to jazz up a boring white scarf I had. (I’d always wanted to try an
Alexander McQueen-inspired skull scarf!) Here’s how to do the same…
You Need:
stencil (or, if you want to create your own stencil like I did, you need: digital image for stenciling / Sharpie / adhesive stencil film / cutting blade / cutting surface) / painter’s or masking tape / item for stenciling (mine is a plain white lightweight Summer scarf from Target) / Simply Spray Stencil Paint / old newspapers or something to protect your surface / paper towels
How To: (more…)
Leave Comment











