Feb 25, 2016 | DIY
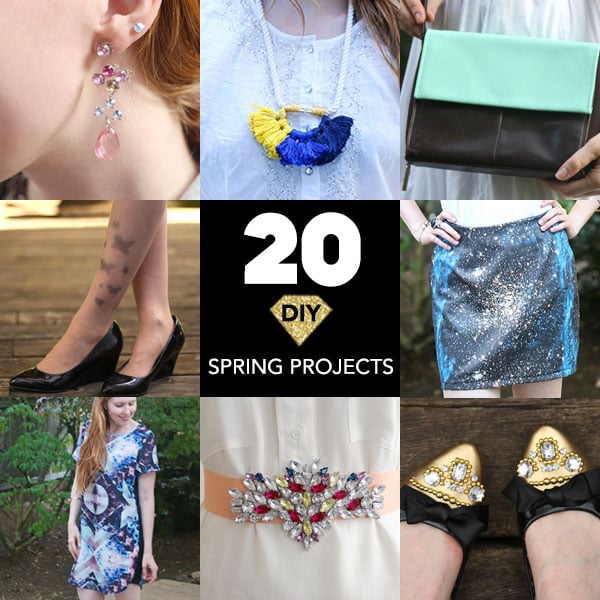
Spring is on its way, bringing a revival of pastel hues, flowery motifs, and lighter fabrics. Want to start the season off with a couple DIY projects to freshen up your wardrobe? Check out these 20 Spring Fashion DIY’s from the Chic Steals archives:

Illusion Jeweled Rhinestone Chandelier Earrings
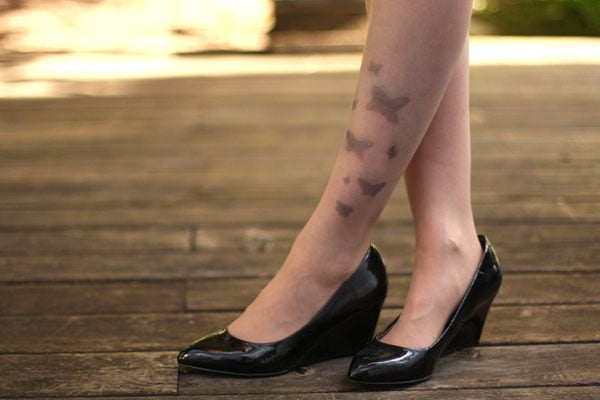
Super-Easy Tattoo Tights
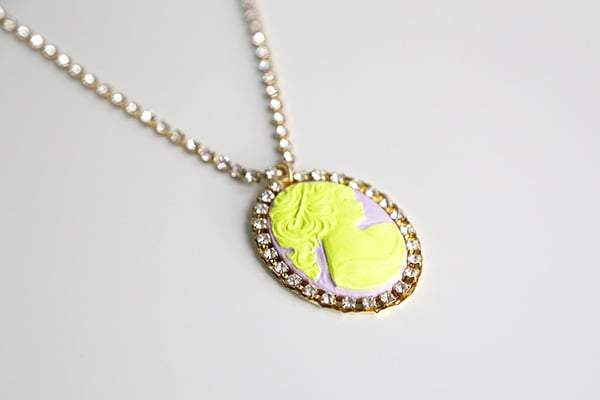
Tom Binns Neon Cameo Necklace
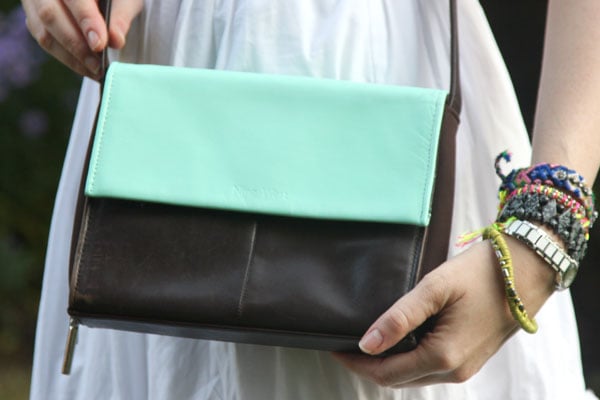
Colorblocked Bag (or How to Paint Leather with Acrylic Paint)

Easy 1 and 2/3 Yards Lace Dress

Alteration 101: How to Make a T-Shirt Dress Bigger

Colorful Anthropologie Tassel Necklace

Galaxy Print Mini-Skirt

Radiant Rhinestone Belt

Miu Miu Rhinestone-Embellished Flats
And I’m sure you’re looking for MORE Spring projects, so here you go!

Clockwise, from top left:
Flowered Ballet Flats | Floral Applique Cardigan | Prada Rose Cabochon Stud Earrings
Gold Foil Easter Egg Nails | Flower Barrette
Flowered Snackcessory Clutch | Watercolor Scarf | Enamel Bib Necklace

Lace Maxi-Skirt
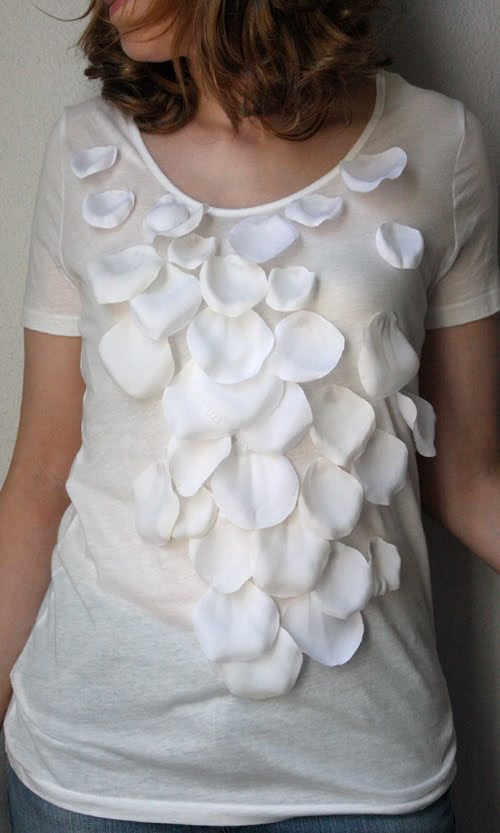
Flower Petal Top
Happy Spring – and Happy DIY’ing!
xo
Carly
Leave Comment
Feb 24, 2016 | Life

Never say never.
Though I’ve heard it many times before, I was surprised to find that this quote is first attributed to Charles Dickens’ Pickwick Papers. (Not Justin Bieber, strangely enough.)
As a creative, you will encounter many roadblocks. You will experience many naysayers along your journey…as well as your own internal voice that talks you down from that ledge of dreams. Don’t rule the possibilities out…and keep dreaming.
xo
Carly
Leave Comment
Feb 19, 2016 | Life
 For the first time ever, Pantone selected two colors of the year for 2016: Rose Quartz and Serenity. Leatrice Eiseman, Executive Director at Pantone Color Institute, describes the color combination as “reflecting connection and wellness as well as a soothing sense of order and peace.”
But because these perfectly lovely pastels are subtle hues instead of bold and bright ones…they can be hard to maintain wash after wash. Especially when fighting stains!
 Enter Clorox 2® Stain Fighter & Color Booster detergent, which is specially formulated to keep colors true no matter how many times you run them through the laundry. Here’s how to have success when laundering your most precious pastel garments:
Tips to Pre-Treat Your Laundry to Fight Stains
The best way to keep your clothes looking their best all year round is to care for them correctly. An easy way to do this is to pre-treat stains with Clorox 2® Stain Remover and Color Booster. Just follow these tips and add some Clorox 2® to keep your colors true and bright:
- The sooner you get to the stain, the more likely you are to be successful removing it. Don’t let stains sit if you can (and don’t run stained garments through the dryer, since the heat will set the stain!)
- When blotting stains, use a white cloth to prevent dye from transferring to the item you’re treating, and blot from the edges of the stain inwards to keep it from spreading.
- Apply Clorox 2® to the stain and rub it in gently. Wait about 3-5 minutes, then wash immediately as directed on the care label, in the warmest water recommended with your favorite detergent and some additional Clorox 2® to keep colors bright.

The Clorox 2® Stain Remover Precision Pen for Colors can provide precision stain targeting before you wash the item. Use it with Clorox 2 Stain Remover & Color Booster detergent for the ultimate stain-fighting power!
How to Remove Common Stains
Adhesive tape, chewing gum, rubber cement: Apply ice or cold water to harden surface; scrape with a dull knife. Saturate with prewash stain remover or cleaning fluid. Rinse, then launder.
BBQ Sauce: Working from the back of the stain, flush it with cold water. Next, pretreat it with a liquid laundry detergent, using an up-and-down motion with a soft brush to break up the stain. Rinse well. Then sponge with white vinegar and rinse again. Repeat, treating the stain with liquid detergent, then with white vinegar until you’ve removed as much stain as possible. Pretreat with a prewash stain remover and launder with bleach that’s safe for the fabric.
Beverages (coffee, tea, soft drinks, wine, alcoholic beverages): Sponge or soak stain in cool water. Pretreat with prewash stain remover, liquid laundry detergent, liquid detergent booster or paste of powder laundry product and water. Launder using sodium hypochlorite bleach, if safe for fabric, or oxygen bleach.
NOTE: Older stains may respond to pretreating or soaking in a product containing enzymes, then laundering.
Blood: Fresh Stains: Soak in cold water (do not use hot water as it will set blood stains). Launder. Dried Stains: Pretreat or soak in warm water with a product containing enzymes. Launder. NOTE: If stain remains, rewash using a bleach safe for fabric.
Chocolate: When the stain strikes, gently scrape off any excess chocolate. Once you get the item home, soak it in cool water. Then pretreat with a prewash stain remover and launder in the hottest water that’s safe for the fabric. NOTE: If stain remains, rewash using a bleach safe for fabric.
Cosmetics: Pretreat with prewash stain remover, liquid laundry detergent, paste of powder detergent or laundry additive and water. Or, rub with bar soap. Launder.
Crayon: For a Few Spots: Treat the same as candle wax or dampen the stain and rub with bar soap. Launder using hottest water safe for fabric. For a Whole Load of Clothes:
Wash with hot water using a laundry soap and 1 cup (212 g) baking soda. NOTE: If color remains, launder using sodium hypochlorite bleach, if safe for fabric. Otherwise, pretreat or soak in a product containing enzymes or an oxygen bleach using hottest water safe for fabric, then launder.
Deodorant: Light Stains: Pretreat with liquid laundry detergent. Launder. Heavy Stains: Pretreat with prewash stain remover. Allow to stand for 5 to 10 minutes. Launder using an oxygen bleach.
Grass: Pretreat or soak in a product containing enzymes. NOTE: If stain persists, launder using sodium hypochlorite bleach, if safe for fabric, or oxygen bleach.
Grease or Oil: Light Stains: Pretreat with prewash stain remover, liquid laundry detergent or liquid detergent booster. Launder using hottest water safe for fabric.
Heavy Stains: Place stain facedown on clean paper towels. Apply cleaning fluid to back of stain. Replace paper towels under stain frequently. Let dry, rinse. Launder using hottest water safe for fabric.
Ink: NOTE: Some inks in each of the following categories _ ballpoint, felt tip, liquid- may be impossible to remove, Laundering may set some types of ink. Try pretreating using one of the following methods: Prewash Stain Remover: Pretreat using a prewash stain remover. Launder. Denatured Alcohol or Cleaning Fluid: Sponge the area around the stain with the alcohol or cleaning fluid before applying it directly on the stain. Place stain facedown on clean paper towels. Apply alcohol or cleaning fluid to back of stain. Replace paper towels frequently. Rinse thoroughly. Launder. Alternate Method for Denatured Alcohol or Cleaning Fluid: Place stain over mouth of a jar or glass; hold fabric taut. Drip the alcohol or cleaning fluid through the stain so ink will drop into the container as it is being removed. Rinse thoroughly. Launder.
Paint: Water-based Paint: Rinse fabric in warm water while stains are still wet. Launder. NOTE: Once paint is dry, it cannot be removed. Oil-based Paint and Varnish: Use the same solvent the label on the can advises for a thinner. If not available, use turpentine. Rinse. Pretreat with prewash stain remover, bar soap or laundry detergent. Rinse and launder.
Sweat: Use a prewash stain remover or rub with bar soap. NOTE: If perspiration has changed the color of the fabric, apply ammonia to fresh stains or white vinegar to old stains; rinse. Launder using hottest water safe for fabric. NOTE: Stubborn stains may respond to washing in a product containing enzymes or oxygen bleach in hottest water safe for fabric.
Wine: Sponge the stain with cool water or soak it in cool water for about 30 minutes. Pretreat with a prewash stain remover. Launder; if safe for the fabric, add chlorine bleach to the wash.
Source
Good luck in your battle against stains and keeping your 2016 pastels perfect!
xo
Carly
FTC Disclosure: This post was created in collaboration with Clorox and Ketchum. The above opinions are my own. I was provided with the Clorox 2 products featured above and the cardigan to demonstrate the stain-fighting power of Clorox 2. I have not been compensated for this post. My full Disclosure Policy is here.
Leave Comment
Feb 14, 2016 | Life
 To my readers: love you all. Happy Valentine’s Day to you and yours on this special holiday.
MWAH!
xo
Carly
Leave Comment
Feb 3, 2016 | DIY
 On a recent trip to one of my favorite gem supply shops in the Portland area (Ed’s House of Gems as I wrote in an earlier post here) I found some pretty agate slices that seemed like they would be perfect for drink coasters. Sure, I got the idea from Rablabs many years back…but those coasters were $65 at the time and way more than I wanted to spend. So I decided to make my own DIY agate drink coasters – with a little metal leaf to glam them up – and some cork “feet” to protect my table. You can find agate or geode slices many places now (including at your local Michael’s or Jo-Ann Fabrics stores!) and you can buy them on eBay or here as well. I also shared this project idea on Darby Smart awhile ago…but I figured it was high time to turn it into a full-fledged tutorial. So here it is!
You Need:

agate slices (you can use dyed agate though the dye may bleed a little) / Mod Podge or metal leafing glue / clean, soft brush / metal leaf sheet in your favorite metal color / adhesive cork disks (find these in the furniture protection section!) / small scissors / adhesive sealant (optional, not pictured)
How To:

1. Brush the edges of an agate slice with Mod Podge or metal leafing glue. (If your agate is dyed, you may find that the color starts bleeding into the glue here.)

2. Allow the glue to dry a few minutes so it is tacky. Roll onto a metal leafing sheet, pressing hard and covering all edges completely with the sheet. Just rip and reposition!
3. Making sure your brush is completely dry (or just use a different brush), gently brush off the excess metal leaf.
4. Usually the adhesive cork disks that are sold for furniture are too large for coasters, so cut each disk into smaller pieces.
5. Place the cork pieces at opposite ends of the agate slice so the slice will sit level on a flat surface.
And that’s it! 
Pretty, colorful, organic coasters add a touch of class to any decor. If you’re concerned about the metal leaf coming off with use or exposure to liquids, I’d advise a quick spray of acrylic sealant around the edges of the coasters to make that permanent.
These coasters look so lovely shimmering in pale colors below translucent drinks!
What do you think? Is this a project you’ll be trying out?
xo
Carly

And if you love
agate projects (or need something to do with any extra agate slices you may have acquired ;-)…my
DIY Agate Keepsake Box (
above) materials are still available on
Darby Smart…and you can buy them individually in case you only need one or two supplies.
(And…pssst! Right now [early Spring 2016] in Target’s front $1 section right in front of the doors…there are beautiful hinged WHITE wooden boxes…for only $3, which I suggest you snap up IMMEDIATELY to take advantage!)Save
Leave Comment
Jan 25, 2016 | Life

“It always seems impossible until it’s done.”
-Nelson Mandela
From one of the most inspiring people of our time comes this quote, effective in its simplicity, awe-inspiring at its most humble.
When things seem impossible, know that they only do on this side of them because they aren’t done yet. And persevere. Like the brave and untiring Nelson Mandela did.
Truly inspiring.
xo
Carly
Leave Comment
Jan 19, 2016 | Fashion

FTC Disclosure: The post is part of a partnership with PandaHall, who purchased a banner advertising slot in my sidebar. If you are interested in purchasing a banner ad (or sponsored post) coming up on the editorial calendar, click here. Small businesses welcome! My full Disclosure Policy is here.
Hi friends!
To start 2016 off with a bang, I’m looking at stocking up for many projects on the horizon. (It’s going to be a huge year in many ways!!) Here are a couple of my favorite projects for the New Year (with [affiliate] links to the beads you need):
1. J. Crew Beaded Rose Bracelet
Such an elegant little bracelet, you could make it (and the similar necklace) using this brass link bracelet as the base, these Rose Quartz Gemstone Cabochon drops as the petals, and these rhinestones as the centers.
2. ModCloth How’s the Feather Up There? Necklace
A pretty and delicate layered necklace with feather charms, you could make this using these Electroplate Glass Bead Strands and these Tibetan Antique Gold Feather Pendants.
3. Anthropologie Valence Drops
These refined gemstone earrings could be DIY’d in a similar method to these DIY Illusion Jeweled Rhinestone Chandelier Earrings that I made, and using these supplies: Mixed Acrylic Rhinestone Montee Beads, Brass Lever Back Hoop Earrings, Glass Rhinestone Montee Beads, and clear PVC vinyl.
4. Free People Luxe Triple Necklace
Another layered necklace, this could be made with the Black Agate Bullet Big Pendant, Howlite Round Gemstone Bead Chain, Tibetan Style Latin Cross, Natural Black Rutilated Quartz Beads.
5. Pearl and Chain Spike Choker Necklace
Last time I worked with PandaHall I created this tutorial using their Non-Magnetic Hematite Rectangle Beads, Silver Color Aluminum Twisted Curb Chain, 6mm White Glass Imitation Pearl Beads, and Aluminum Twisted Curb Chain. See the full DIY tutorial here.
Hope these ideas prove inspirational to you!
What’s on your to-do list for fabulous jewelry this year? Do tell!
xo
Carly
Leave Comment
Jan 14, 2016 | Life
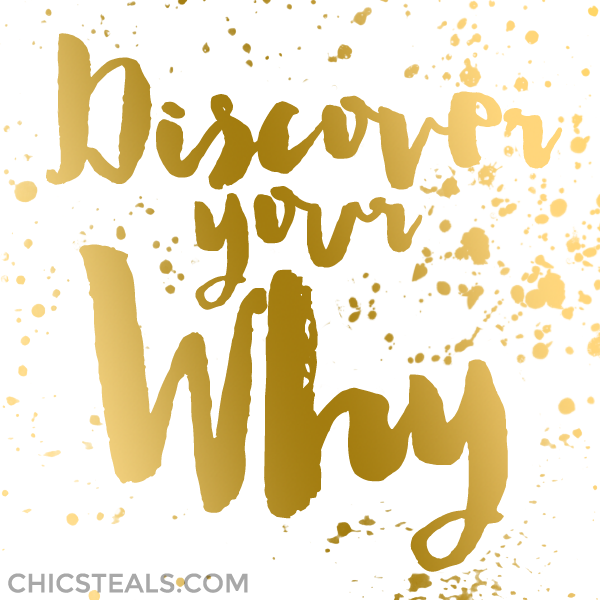
“Discover Your WHY”
So many people ask me how I’ve been blogging so long (8 years this month now!) and how I’ve been able to keep motivated for so long and consistently (er…mostly) kept up with posting, week in and week out, for many, many weeks (and months…and years…)
My answer is: I’ve discovered my WHY.
I can’t stress how important this is to every endeavor you may undertake in life. (I’m not sure of the attribution for this inspirational quote, but the words are so singularly important I’ve chosen to share this here.)
No matter what, if you are putting time, energy, and passion into it…you must have a WHY.
An overwhelming, underlying reason for WHY you do it.
And WHY you must keep going with it, even if energy, time, and passion fail. A greater conviction. A higher moral calling. Something to get you through thick and thin, through the dark days of uncertainty and self-doubt.
I find sometimes the best thing to do when my passion or focus flags…is to ask myself WHY. WHY do I blog? WHY do I put time into it? What do I get out of it?
And whatever answer I have…ask WHY again. Keep asking WHY until I reach the core reason – and that is what I must hold on to when motivation flags or I begin to doubt.
This is a great tool for discovering (or re-discovering!) your purpose, or getting in touch with your passion, and I highly recommend it for anyone who wants to continue a creative endeavor long-term.
Discover your WHY – and you can keep going until that WHY changes. May it buoy your wings…
xo
Carly
Leave Comment
Jan 13, 2016 | DIY
 So…sliced agate bookends are a big THING…but they can be ridiculously expensive. Just browse One King’s Lane or Joss & Main (and those are discounted to around $66, sheesh!) to see what I mean. Or Z Gallerie to see the full-priced version at $99. Even Target released a pair as part of their Threshold line…and of course the pair is about at the $25 mark. That’s still a price I think I can beat, so I began searching for how to create these lovely bookends for less.
Unfortunately to get good-quality sliced and polished matching agate chunks, you’ll have to pony up some cash, there’s no way around that. If you can score a pair on eBay for cheaper, that’s awesome…just be aware to factor in shipping to make sure you’re getting a good deal (those things can be heavy). Amazon has some great agate bookend options…similar to the lower pricepoint I found mine at – so I’d recommend buying through them!) Personally, I like to source my gems at local rock shops since I can get a pretty good deal depending on what they have in stock – and a favorite of mine is Ed’s House of Gems in NE Portland (don’t look at their website, it doesn’t begin to do this amazing store justice). Needless to say, I managed to find a beautiful pair of agate bookends there recently for a mere $18 – and set out to spice them up and make them look as nice as the Target (or the more expensive!) versions. (You could also cover the rough sides in actual gold or silver leaf if you wanted…but I had some spray paint on hand and figured that would be easiest.)
How to Make DIY Gold Painted Agate Bookends
You Need:

sliced agate pair | painter’s tape | gold spray paint (here are a variety of great options) | acrylic sealer (optional) | newspapers or something to protect your surface | sticky-back felt dots (optional)
How To:

1. Spread painter’s tape over the flat sides of each bookend, extending the tape beyond the side. 
Press firmly at the edge where the flat polished side meets the rough, rocky edge to prevent seepage.

2. Place on newspapers outside, and spray the rough, rocky sides gold. 1-2 coats should suffice.
3. Allow to dry.
4. (Optional) Hit the gold-painted side with a coating of acrylic sealer if you’re concerned about the gold rubbing off.
5. (Optional) Place sticky-back felt dots on the underside of the agate pieces to keep your shelving safe.

And there you have it!

You could easily just place the agate pieces as-is on your shelves and none would be the wiser…but I wanted some more finished pieces. They would also make a fabulous gift that looks oh-so-expensive…and you never have to tell anyone that you crafted them for a steal!
Happy DIY’ing!

If you’ve made your own version of these popular sliced DIY agate bookends – how did they work out for you? Let me know in the comments!
xo
Carly
Save
Leave Comment
Jan 8, 2016 | Life

“Ideas come from everything.”
-Alfred Hitchcock
One of my favorite quotes ever because it encourages you to look around yourself and feel inspiration surrounding you. Never feel that you are at a dead end…since the mind’s ability to pull new thoughts and wisdom from anywhere is unparalleled.
Thank you, Alfred Hitchcock!
xo
Carly
Leave Comment











