Dec 18, 2013 | DIY
 Anthropologie, season after season, comes up with the most fabulous items in their stores – and so many of them look homemade and crafty: the perfect fodder for DIY.
  I noticed this beaded ladder tassel necklace during early Fall (part of Anthro’s Bijouterie necklace collection), and after clipping the photo and hunting for supplies, I finally sat down and made a DIY version. It was a bit fiddly, but incredibly rewarding to find the finished necklace looked just as amazing as the original in the catalog. (And at an $8 investment, pretty affordable too!) Here’s how to make your own:
You Need: (more…)
Leave Comment
Dec 17, 2013 | DIY
 Hello lovelies!
Today I am over on We Heart This, posting my DIY tutorial for how to make your own Mercedes Salazar-inspired DIY Friendship Bangle Bracelets. They are a super-chic adult update to the typical friendship bracelet – and look fabulous stacked together on your wrist! (A last-minute holiday gift, anyone?) Click on over to see the full tutorial!
xo
Carly
Save
Leave Comment
Dec 15, 2013 | DIY, Life
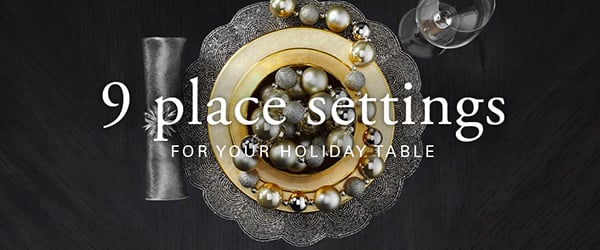 The holidays are upon us – and it’s time to think about dressing up one’s festive table: pairing dishes, napkins, glasses, and accessories to create the perfect backdrop for your feast. Though I LOVE Z Gallerie as an amazing source of inspiration for the holiday table, most of the time I’m willing to plunk down my money for a little more affordable. Take some inspiration from these dressed-up table settings, and DIY your way to the perfect set-up for your entertaining this season:
No. 1: Layer a bronze beaded placemat under a red charger (a cheap plastic one is fine!), followed by a gold plate and bowl (Dollar Tree has some great ones!). Add a gold ball ornament inside the bowl, and a DIY Gold Starburst napkin ring onto a tan chiffon napkin (just get a length of chiffon cut at the fabric store, and hem). A DIY Gold Etched Champagne Glass completes the set.
No. 2: This time make your DIY Starburst napkin ring with silver spray paint, paired with a pewter chiffon napkin. Use 2 white octagonal plates and 1 bowl, stacked above silver ball ornaments ringing the setting. A disco ball ornament (can be DIY’d with CDs if you can’t find a good one) in the center and a glass with a silver stem (spray-painted with Krylon Chrome Spray Paint makes the setting perfect.
No. 3: Use Tulip Shimmer Sheets to apply a gold foiling to a plain white square placemat. Stack 2 gold plates and a gold bowl on top of each other, adding a DIY Pearl Ornament covered in pearl and gold beads to the center. A piece of stemware can be co-ordinated with a bit of gold spraypaint in the center of the stem, and add a gold faux poinsettia to a hair elastic to tie a crimson satin napkin (extra points for adding some gold beading to the edges!)

No. 4: Use a square silver beaded placemat on the bottom, stacked with 3 silver square plates atop. Add a sprayed-on chrome bottom to the glasses as in No. 2, a string of silver ball ornaments in the center, and use a silver tassel from the upholstery section in the craft store to tie around plain white napkins.
No. 5: Use a flower-shaped placemat on the bottom (paint with a nickel-colored fabric paint if it’s not quite the right color), and stack 2 gold plates and a gold bowl in the center, filled with gold-colored ball ornaments. Use plain stemware, silver chiffon napkins, and a beaded napkin ring (using barrel-shaped clear glass beads on silver ball-end headpins).
No. 6: From bottom to top: a gold beaded square placemat, 2 silver square plates, 1 crystal flower-shaped tealight candleholder + telight candle. Add stemware with the centers painted gold (as in No. 3), a silver chiffon napkin, and a spiky-looking napkin ring DIY’d with gold seed beeds strung on to short lengths of jewelry wire that are twisted together in the center.

No. 7: Use a red charger, 2 white octagonal plates, and an octagonal bowl. Add some crimson plums, pomegranates, and/or berries (faux is fine too!), gold-painted stemware, a crimson satin napkin with gold beading at the edges, and a simple gold-and-crimson napkin ring (which you could DIY by spray-painting curtain rings).
No. 8: Gold sequined placemats could be made just by cutting up a piece of sequin fabric and hemming with stick-on hem tape if necessary ($18 a yard will get you more placemats than the $119.80 at Z Gallerie will!). Then add 3 square silver plates, a faux white grape cluster (spray paint something from the craft store floral section if you can’t find the right kind), stemware with the centers painted silver, and a silver pleated satin napkin (you can buy pre-pleated fabric from the fabric store, usually in the formal-wear section). A plain gold-and-white napkin ring finishes everything off.
No. 9: Use a faux white alligator placemat (like textured scrapbooking paper cut into a square, glued onto a piece of cardboard). Top it off with 3 white octagonal plates and 1 bowl, with a green disco ball ornament in the center. Add a green goblet and a green satin napkin with gold beading at the edges, along with a gold-and-white napkin ring.
Here’s to a Happy Holiday Table!
xo
Carly
Images source
Leave Comment
Dec 12, 2013 | DIY
 So I’ve presented a bunch of DIY ideas gleaned from the latest Fashion Weeks (for brands starting with A-M); now it’s time for the latter half. Check out some high-end fashions below…and ideas to do-it-yourself for a fraction of the cost.
 Left: Turn an oversized men’s shirt into a dress like at No.21, and add some jet beads stitched onto the hem in flower shapes.
Right: Norma Kamali‘s jersey maxi-dress can be made a little less sporty and more glam with some iron-on round nailhead trim.
 Left: Opening Ceremony‘s embellished sweatshirt can be made with some yellow fabric paint and some sew-on black rhinestones.
Right: The wild patterns at Peter Pilotto can be mimicked by tie-dyeing some fabric in candy splotches, and then hand-drawing floral designs with some black fabric pens. Cut out and sew onto the front of a button-down shirt for extra points!
 Left: For the bold, a sweatshirt with a photographic print like at Ports 1961 can be duped by playing with soft fabric paints on a wet white sweatshirt. (Just dye a base yellow color first and mask off where you want the sun before you add orange and brown.)
Right: A Preen by Thornton Bregazzi wrap skirt can easily be made from a flat piece of stiff sky blue fabric (and I even made a tutorial how-to here!)
 Left: Proenza Schouler’s chic trenchcoat can be made by slitting a heavy white (slightly large) maxidress down the front and folding the cut edges to the inside, finishing with hem tape. Add 6 lock closures spaced evenly down the front, and a black belt made of stretchy elastic around your waist.
Right: A simple satin sheath dress can be made so much more youthful with double-layered heart-shaped chiffon pieces stitched randomly on the front. Rachel Antonoff.
 Left: Jazz up a plain white skirt with freehanded tattoo-inspired details with black fabric pens like at Rachel Roy.
Right: Take a cue from Rebecca Minkoff and add embroidered iron-on patches around the neckline of a white top and a chain-and-thread braided belt with colorful tassels.
 Left: Sachin + Babi’s graphic peplum top can be made by sewing a semi-circle of black fabric to the bottom of a plain black top, and then gluing on tiny flowers cut from white leather.
Right: A plain white suit jacket can be made more Springlike with some embroidered iron-on floral patches like at Sass + Bide. Left: Though famous for their prints, a Suno-inspired outfit can be made by pairing a floral jacket with a necklace made of white fabric flowers.
Right: Tory Burch made use of some iron-on embroidered appliques on her plain sheath dresses, and so can you! (Add some rhinestones too for an extra statement.)
 Left: Chop up a men’s shirt into a short-sleeved top, and use the sleeves to create an obi-like belt like at Vionnet.
Right: Fashion Wren‘s version of the ubiquitous shirt-dress by sewing together the top from a chambray shirt to the bottom of a white button-down.
And if you missed part 1 of this (inspiration from brands A-M), check it out here!
xo
Carly
Leave Comment
Dec 11, 2013 | DIY, Life, Media
 Hello lovelies! Have you noticed that as of late there have been some FABULOUS DIY-themed crafty digital magazines to peruse while getting into the holiday spirit? No? Well, here are a couple of my favorites – I just can’t stop flipping through them (you may see some of your favorite DIY’ers and their projects featured)…and best of all, they’re completely FREE! Clicky click through the links to read…
Damask Love
Toile: A DamaskLove Holiday Publication
PapernStitch
The Happy Holidays Guide to DIY
{sign up for email list above to receive download}
Ruche
A Homemade Holiday
Hope you have a Happy Handmade Holiday!
xo
Carly
Leave Comment
Dec 8, 2013 | DIY

“Make the workmanship surpass the materials.”
-Ovid
I absolutely love using unconventional materials in my DIY’s. To me, any and everything could be used for a wearable – and I never hesitate to question “Could I use that?” if I find a texture, shape, or pattern interesting. Anywhere, even the Home Depot, Wal-Mart, or garage sales – could offer up a potential material that could be used for a DIY. Some of my favorite past DIYs include these unconventional materials, including my DIY 80’s Acrylic Earrings from a Photo Frame, DIY Lace Maxi-Skirt from a Curtain, DIY 40’s-Style Kitty Beret from a Pirate Hat, DIY Bolo Tie Style Necklace from a Shoelace, and DIY Boho Bangles from Curtain Rings.  Enter the unassuming polyester shower curtain. From a pin on Pinterest I found this gorgeous gemstone pattern (above) – and followed it to UrbanOutfitters.com where I found it was actually a shower curtain by a company called Family Jewels, a Danish interior design company. (And it’s still available for purchase!)
Family Jewels Diamond Shower Curtain, $44.99 (sale)
I loved the pattern so much I couldn’t resist the opportunity to do something amazing with it – so I snapped it up and waited impatiently for it to arrive. When I opened the package I found that it was made of a stiff, somewhat waterproof polyester, which to me felt a bit like a stiff satin or taffeta…which got me thinking ballroom skirts. Billowy, poufy, elegant – and perfect for holiday parties! So I set about making my own. Here’s how I did it:
You Need:
1 shower curtain / fusible lightweight interfacing / iron + ironing board / scissors / pins / marking chalk / measuring tape / matching thread / sewing machine + needle for lightweight polyester / 9″ long invisible zipper / overlocker or serger (optional)
How To: *sorry no photos of the process/materials, since I actually made the skirt at about 1 AM in my living room!
1. Basically, I followed this tutorial here for the making of the skirt, so full credit needs to go to Gertie’s Blog for Better Sewing. HOWEVER, make sure that when you cut you do it on your fabric that is folded over, so you are cutting 2 of each pattern piece and the waistband is one long length since it was cut on the fold (it escaped my notice until Part 2 of the tutorial, which was entirely my fault.) For my skirt, my measurements were: 41″ long and 32.5″ high. My waistband was 32″ long and 4.75″ high. (Both including about 0.5″ of seam allowance.) I also utilized the finished edges of the shower curtain in my cut piece so that I would have less overlocking to do.
2. I then overlocked all raw edges, except those that would be hidden inside the waistband.
3. Then, I followed Part 2 of the tutorial for the construction of the skirt.  It came together quite quickly and I made it in about 2 hours the night before I had to go to the airport to go to the 3-day Lucky FABB event in October!
When I attended Lucky FABB, my DIY Ballroom Skirt from a Shower Curtain caused quite a stir, with bloggers stopping me to ask me where I got it, and Erica Domesek of P.S. I Made This even going so far as to compliment it when I asked a question to her during a panel. (!! what a moment!!)
This skirt also looks amazing when worn over a crinoline or a petticoat so that it has even more stiffness and stands away from the body more. If you are in the market for a new ballroom skirt like this one, definitely check out home decor stores now: with it being the holidays, shimmery, sequinned, sparkly shower curtains are readily available…and much, much cheaper than buying a skirt ready-made. 
 How about you? Have you ever used unconventional materials for something that turned out much better than you hoped?
Do tell!
Happy DIY’ing!
xo Carly
Save
Leave Comment











