Mar 27, 2012 | DIY
 So how fantastic was Honestly, WTF‘s reinvention of the sunglasses case into a DIY Alexander McQueen-inspired box clutch last year? I think it’s safe to say that we all loved it – and all went out to the nearest store in search of a hard-sided sunglasses case forthwith.
However, I got to thinking: why not use something that may already be in your closet to make this?
Enter the velveteen jewelry box: often when we ladies receive or buy a piece of beautiful jewelry, it’s housed in its own velour-lined box. And those boxes are so pretty! Why not reinvent them?
I’ve held on to most of my velour jewelry boxes, not because I use them to store jewelry in still (I use flocked jewelry trays that stores use in their display cases), but because I thought to use them again somehow. And some of them were sentimental to me. Take this shell-shaped velour box – it used to hold a string of my grandmother’s pearls that I received when she passed away. The insides of the box had gotten old, deformed, stained, and crumbly over time…but the outside was still quite pretty. I thought it very Art Deco. And so decided to give it a second life, as a pretty box clutch. Here’s how I did it: (more…)
Leave Comment
Mar 18, 2012 | DIY
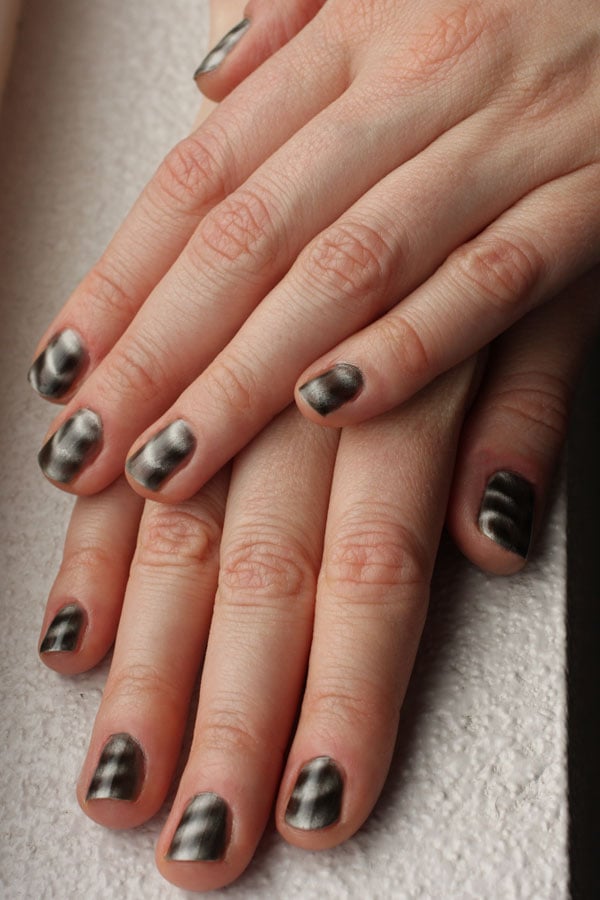
 As all of you have probably noticed, this year the newest trend for nails has been the magnetic manicure. Polishes with embedded iron filings in them respond to the pull of a magnet while wet…resulting in beautiful undulating patterns and subtle gradients across the nail.
Airbrush-style nail art made easy! Done in 5 seconds! And now popping up in stores everywhere.
I bought Nails inc. Magnetic Polish Trafalgar Square in order to try out.
The color, once applied, reminds me of dark grey iron filings, with bands of light silver waving through. And the polish was surprisingly easy and fun to apply. Here’s how:
1. Start with clean, dry nails. The instructions on the bottle do not say to use a base coat, so I also left it out.
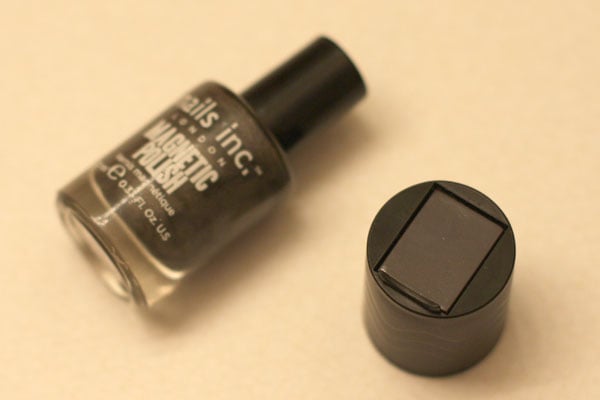
2. Remove the magnetic cap from the bottle. This particular one creates wavy patterns.
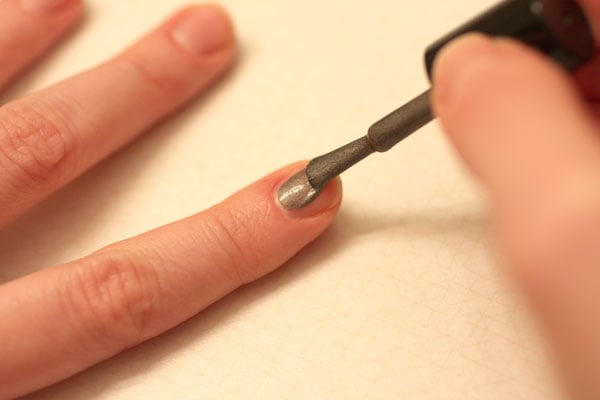
3. Apply a generous amount onto your nail – really glop it on there!

4. Quickly, while the polish is still wet, apply the magnet. You press the rounded ridge just below the cuticle and the magnet will sit about 1/8″ above your nail.
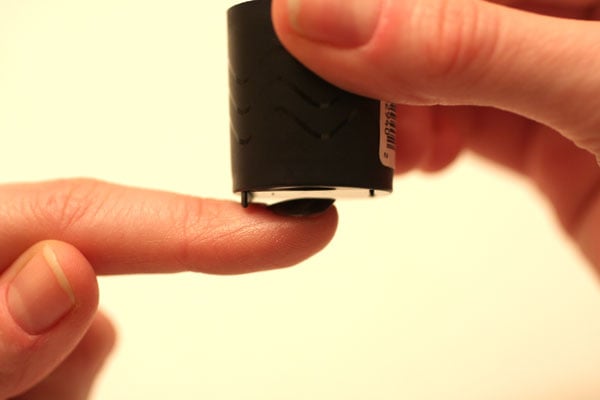
Hold that magnet there for about 5 seconds, but don’t let it touch your nail! (You may also see some polish lifting up and securing itself to the magnet…if so, just separate the magnet a little more from your nail.
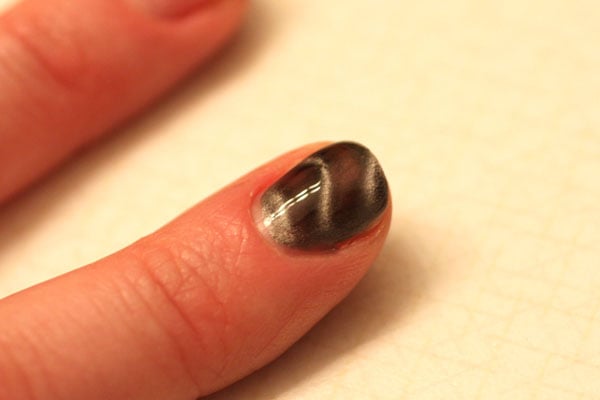 Pretty easy, right? Repeat for the rest of your nails. Once dry, add a clear topcoat to extend the life of the manicure.
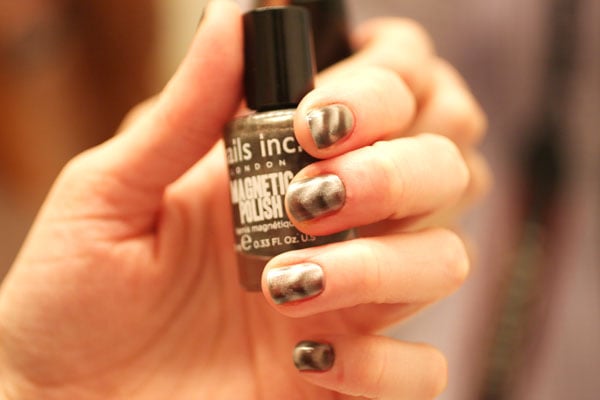

I did find that one coat, even when glopped on thickly, tended to be a little too translucent for my taste. So to deal with this after putting one coat on and applying the magnet…
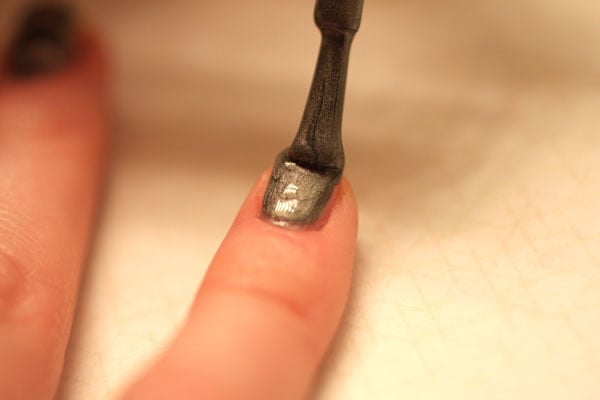 I spread another thick coat on (not even waiting for the first to dry!)…
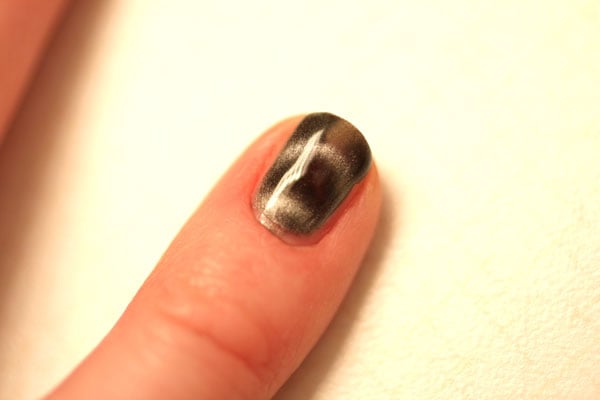 And then reapplied the magnet. As you can see, the dark areas are a lot darker, and a lot less translucent. I think this is something you’d have to play with depending on the color of your polish and how opaque you want it.
Now I’ve also recently spotted $10 magnetic polishes available at Ulta (Magnetix Nail Lacquer from China Glaze), so having this lower-cost option is great. China Glaze also sells a separate magnet that has 3 different designs on it which looks really fun to play with. Or I might steal something off my refrigerator to see what happens!!;-)

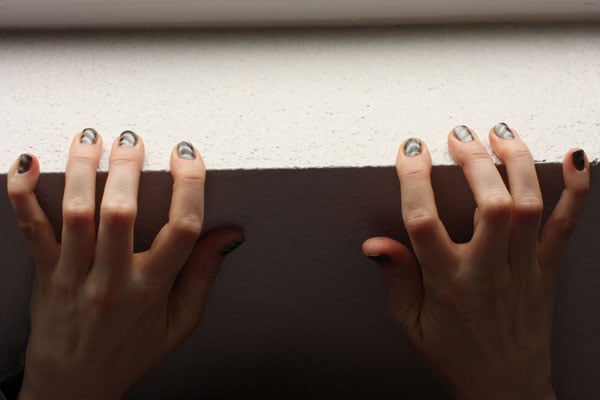 How about you guys? Have you tried out these magnetic polishes – or are you thinking of giving them a whirl?
xoxox
Carly
~If you liked this post, share it! I’d love it if you added it to StumbleUpon! {click the little orange + sign below…}~
Leave Comment
Mar 15, 2012 | DIY, Fashion
 (Well, “from A-V” at least!;-) I was going to follow up on my first post “DIYs to Try from New York Fashion Week” with a “Part 2,” but in the interim the rest of the world has had Fashion Weeks, so I figured it would be best to just collect all the inspiration in one big post.
So here it is, from New York to London to Milan, some great DIY inspiration for Autumn/Winter 2012:
Use a pieces of white and orange duct tape to create a belt, adding two pieces of velcro as a closure like at Acne. Also add some rings or bits of metal from the hardware store on the side!
Get two knit dresses, one black, one white. Cut each in half and sew the different-colored halves together like at Alice + Olivia (give the other finished dress to your bestie!)
DIY was simple and chic at Barbara Bui – and you can use a piece of black ribbon tied in a bow under the collar of your white blouse for a whole new look! (Psst- it’s an upcoming trend in Japan according to this month’s Vivi Magazine!) You can also make a belt from a strip of leather and two large ribbon choker crimp end clasps found from your local jewelry supply shop.
Bottega Veneta went all-out with the Swarovski bling – and you can get the look by gluing a heap of pretty, sparkly gems over your favorite fitted midi dres (hint: buy in bulk!).
Copy the new way to tailor trousers that Celine put forth: pleat and sew in zippers on the front of the shins to gather the excess fabric to your body. Instant femininity!
Christian Dior showcased wrapped-and-coiled gem necklaces. Super-easy to make with satin piping (from the trims section of the sewing store) or rope and oversized cabochons.
David Koma showed some insane tailoring and cutouts; get the look by cutting out the shoulders on a turtleneck shell (sew or glue on contrast piping to create a finish), and punch grommets at the waistline to thread a black belt through. Sleek and futuristic!
Go paint-crazy and make a Gary Graham-inspired topper using a neutral coat and primary-colored fabric paints dabbed, sponged, and masked over the top.
LOVE the colorblocking on the tights at Issey Miyake: totally doable following this tutorial using a pair of grey tights and some acrylic (!) paint.
Jason Wu‘s fur-covered sleeves on his boxy jacket made a statement – and they’re so doable following this tutorial on a thrifted navy blazer. (Using faux fur, of course!;-)
Jen Kao‘s dip-dye dress is easily achieved using a white lace dress and some dye appropriate for the fabric (RIT for cottons; iDye for synthetics)
Kelly Wearstler‘s grommet-sided skirt is just begging to be DIY’d…and those socks can easily be made by chopping up some black short stockings.
That blouse from Libertine reminded me so much of that Simply Screen Screenprinted Tree Skirt I made awhile ago…just download my PDF pattern here [it’s free!] and print it out on a transparency to use for the screenprinting kit. If you’re not into screenprinting, you could also freehand that white (lightning bolt?) with some fabric paint and a thin brush down the front of a sheer black blouse.
Replacing the buttons with big, bold, flower-shapes on a neutral jacket (and adding a line of them down the sides of the matching pants!) is a must at Louis Vuitton.
Make the new generation of fur neckwarmers using a strip of faux fur with a piece of fabric at each edge, securing with gold snaps, like at Marni.
Take a velvet sheath dress into statement dress territory by layering a tone-on-tone layer of lace over the top, cutting the edges according to the lace pattern. Accessorize with a wide black belt and add a chain through the belt-holes like at McQ.
Go for the ultimate colorblock by spraypainting a big bold line of fabric paint across the bottom of a chunky, neutral sweater, like at Paule Ka.
Create a beautifully unqiue skirt by gluing satin ribbons to it to create a grid pattern. Air out your shoulders a bit by cutting (and topstitching the cut edges!) of a chunky sweater, all inspired by Roland Mouret.
Add some interest to a neutral shell by gluing on some textured faux-croc strips (from the upholstery section in the fabric store!), like at Sachin + Babi.
See by Chloé had a sporty take on the suit blazer by sewing a channel at the waist and threading a thick rope through, ending it in beads for a quirky waist-cinch.
Make a cute belt with a wide black velvet ribbon fashioned into a bow (Bowdabra, anyone?), and place a brooch on top like at Temperly London.
Add interest to a simple bright t-shirt by making teardrop-shaped cutouts and backing each with a small piece of sheer organza or chiffon, like at Tracy Reese.
Add some chic military styling to a tight long dress with some added black faux pockets, gold buttons, and epaulets like at Victoria Beckham.
Happy DIY’ing!
xoxox
Carly
all photos from Style.com; photo collages by me.
~If you liked this post, please share it with your friends!~
Leave Comment
Mar 13, 2012 | DIY
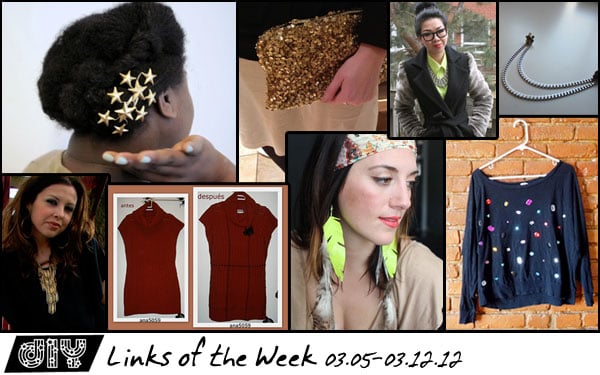 Hi everyone! So another week has gone by, and I’ve been embroiled in a ton of work for school; this is my last week and Finals are upon me! I have two huge projects due this coming Monday…and only time will tell to see whether I’ll have to go light on posting on this blog this week to make it all happen. But…in other news, the blogosphere has been a-buzz with some great projects that I’m sure you’ll all want to try! Like…
Well, for one, March is NATIONAL CRAFT MONTH!! Celebrate by crafting up a storm with some of my favorite crafting sites, including Cut Out + Keep, One Pretty Thing, Tip Junkie, Instructables, Martha Stewart, and Dollar Store Crafts. And to start you off, why not try out this chic-looking DIY Paperclip Necklace featured on Dollar Store Crafts? It reminds me a bit of a Forever 21 paperclip necklace that I saw awhile ago…only better. Check it out!
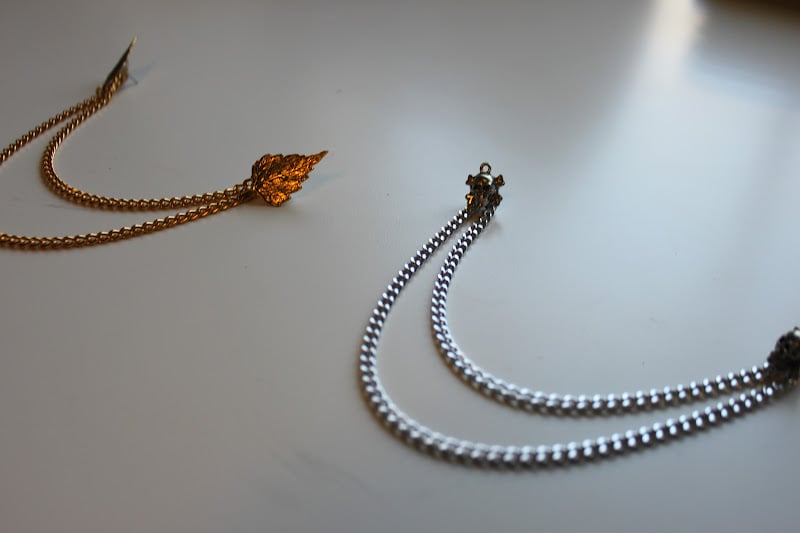 Taylor & Demolish created yet another way to bling out your shirt collar…with some DIY Chained Collar Tips! Love that she converted earring posts to make it super-simple for anyone to do.
LOVE this. DIY some furry gorilla arms (don’t be scared! They’re actually really fashionable:-) on your old Winter coat. Which not only will be perfect for A/W 2012, but also right.right.NOW. (Especially since it just snowed today here in Portland!! Eek! Will Spring never come??) from Lipglossandblack on Chictopia.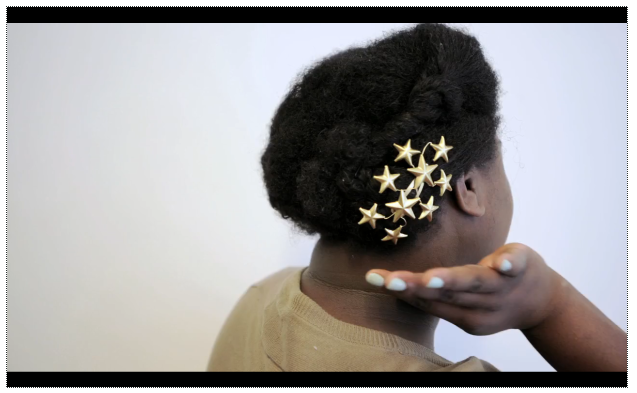
Refinery29 shared this great video: How To Make your own DIY Rodarte Star Hair Clips, which is just an awesome idea. How about using buttons, different-shaped studs, or vintage broken-down bits of jewelry instead? Instant perfect hair accessory!
How about something bright and fun and part of Spring’s neon trend? Hello Brit‘s Duct Tape Feather Earrings are super-simple and won’t break the bank!

Hey! Look What I Made crafted a pretty, sparkly top inspired by a sweater from Pixie Market. Simple and chic! (and check out the rest of her blog, her writing is uber-funny. I warned ya!;-)
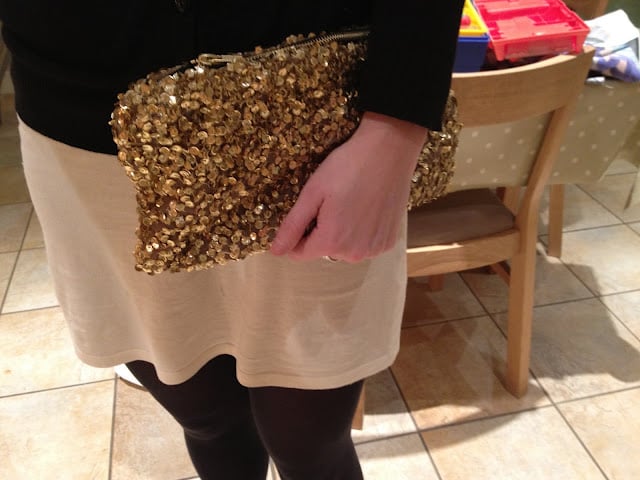
The Embellished created a beautiful sequined clutch from a spangled Ebay bolero. Sequin fabric is indeed hard to come by, so working with something that already exists is a great way to get some good materials! How amazing is the finished product that she made??

From ¿Qué puedo hacer con esto?, a Spanish-language DIY blog, I found this fun tutorial for adding a faux tartan-pattern to a sweater. Just a little simple stitching with some yarn and you have a whole different look to your sweater! (Reminds me a bit of my Woven Ribbon Sweater DIY that I did last year.)
If your project was featured above, feel free to grab a button and share the DIY!

<a href=”https://chiccreativelife.com/category/links-of-the-week”><img src=”https://chiccreativelife.com/wp-content/uploads/2012/03/diylotwfeaturedbutton.png” /></a>
If you have a DIY how-to or tutorial that you’d like to see featured on Chic Steals, please email me at carlyjcais at chic-steals dot com – and I’ll try to squeeze it in to one of my Links of the Week posts! (Tutorials/how-to’s with steps and photos included please! So everyone can share in the DIY goodness:-)
xoxox
Carly
-all photos copyright their respective authors; photo array by me-
~If you liked this post, please share it!~
Leave Comment
Mar 9, 2012 | DIY
 Hello lovely readers!
 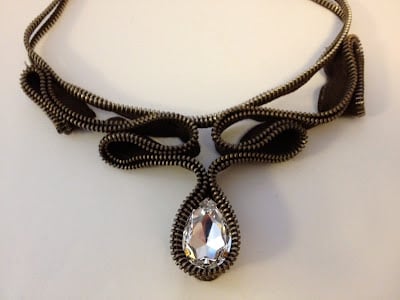 Today I have a wonderful talented guest poster here: Katrine from Make It and Fake It. Though her blog is fairly new on the DIY scene, she’s been a posting a number of chic and easy tutorials that can help you get the designer look at a fraction of the cost.
  And she’s been especially prolific with her bracelet tutorials – giving you a TON of DIY options to make your own pretty, bejeweled, knotted, blingy, stacked wrists full of arm candy.
 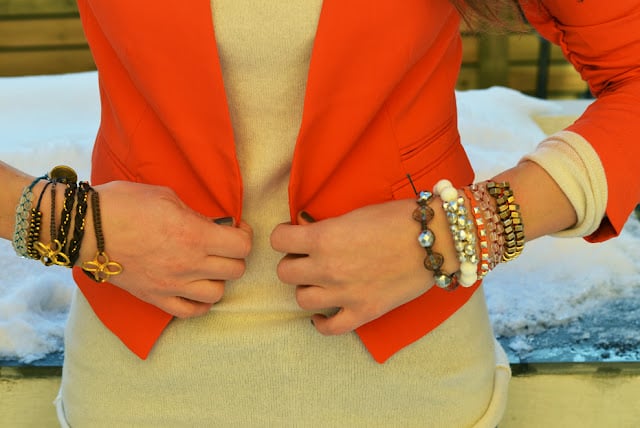 Check out her tutorials for the Orange Stud Bracelet, White & Stud ArmCandy, Hair Elastic/Bracelet, and Gold Clover Bracelets and to get you started!
But she’s here today to share with you guys a never-before-shared tutorial…for a DIY Shamballa bracelet! What’s a “Shamballa bracelet?” you ask. Well, just read on! Katrine, take it away!
Hi everyone,
I am so excited to be a guest here at Chic Steals! Today I’m going to share a special DIY with you all so I hope you love it as much as I do.
Have you seen the Shamballa bracelets everyone from Jay Z to Heidi Klum have been effortlessly rocking?! Well if you don’t have the thousands to spend on a black diamond real one, this is a pretty cool swap.
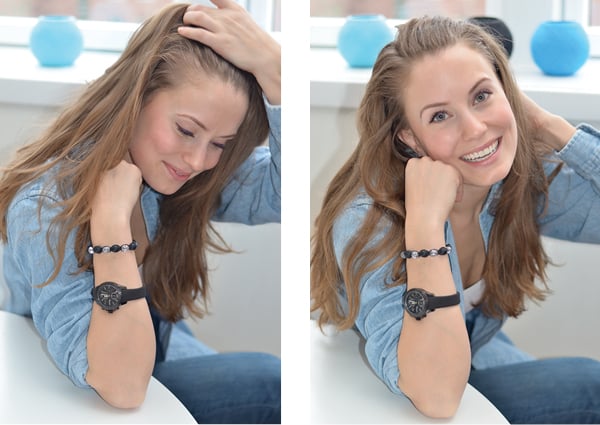
You will need black (or what ever colour floats your boat) cotton string, different kind of round beads and 30min of patience. Lets get started.
 You cut a piece that’s long enough to go around your wrist with a couple extra inches on both sides (for the centre string), and one that’s about 4 times as long for the string you’ll be wrapping around the beads.
Tie the longer string about 4-5″ from one end of the centre string and start with “braiding” (see pic for how to) I love this technique and I use it for several of my bracelets (for different ways to use it you can check it out this tutorial here and my Orange Stud Bracelet [linked above]). How you do it is that you take the right string over the centre string, then you take the left string over the right string, under the centre string and up through the loop made by the right string (see pictures). Then you do the opposite, so the left one over the centre etc., adding your beads as you go.
The clasp is adjustable which is perfection; I hate awkward clasps that are hard to put on by yourself. For this one I just crossed the two sides of the centre string did the same “braiding” technique to lock them together.
I seal all my knots with clear nail polish, and I find that does the trick.
Add beads to each side of the string ends so they won’t slide through…and then you are ready to go!

Well, that’s it for you, readers! Hope you liked this post, and if you’d like to see more of Katrine’s lovely creations, check out her blog below!
Thanks Katrine, it’s been a pleasure!
xoxox
Carly
~If you liked this post, please share it!~
Leave Comment
Mar 6, 2012 | DIY
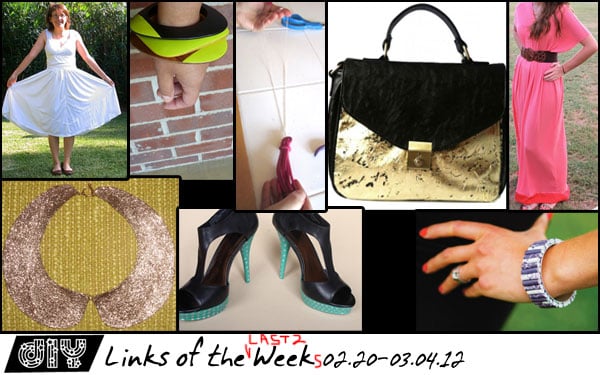 Woohoo!
March is here! Portland is beginning to pull itself out of a long, dreary Winter (hellllloooooo daily hailstorms!) and things are happening over here in this corner of the world! I’m feeling more like myself than in ages – and have even gotten back to more frequent DIY’ing! So let’s all shrug off those cobwebs of Winter, throw our shoulders back, and head straight-on into Spring and all the beauty and promise that it brings. And what better way to celebrate the changing seasons than a little DIY??;-) 
For the bold DIY’er: how about a DIY Spring Wedding…DRESS, that is, made out of t-shirts? How fabulous is this??? From CRAFT Magazine’s blog.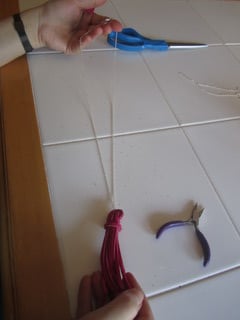
Smashion’s blog came up with a cute DIY leather tassel necklace, inspired by a piece from Jewelmint. It’s a great way to use up some old leather scraps! (And believe me, I have a ton of those leftover from various projects throughout the years.;-)
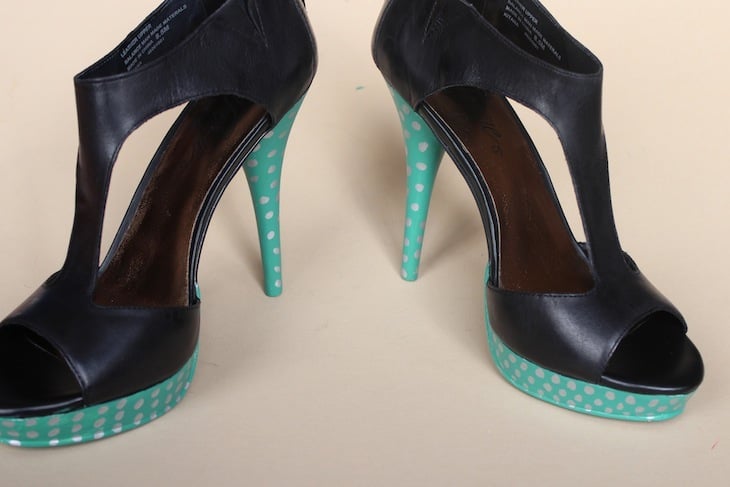
Stripes and Sequins made these beautiful Springy polka-dotted DIY Loeffler Randall-Inspired Shoes! Different treatments on your shoe’s platforms are so in right now…and you could do pretty polka dots, stripes, flowers…anything that strikes your fancy.
 This sweet Boho Maxi Dress from Sweet Verbena is super-easy, bright, and fun! Looks like I now have my go-to Summer lounging dress!
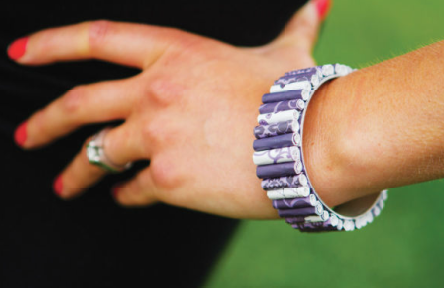
Use quilling to create rolled floral paper beads – and glue onto a cuff! This Modern Bouquet Cuff Bracelet from Michael’s will look great using a slightly thicker cuff – and some floral scrapbooking paper.
Create a sparkly, sweet DIY Glitter Peter Pan Collar with Made by Geneviève. Just a little bit of Mod Podge and you can attach practically anything to anything! Think how pretty that will look with a little LBD or lightweight Spring sweater. And if you’re needing a pattern for that collar, you can pick up a copy of my DIY Pattern: The Peter Pan Removable Collar from my Etsy store!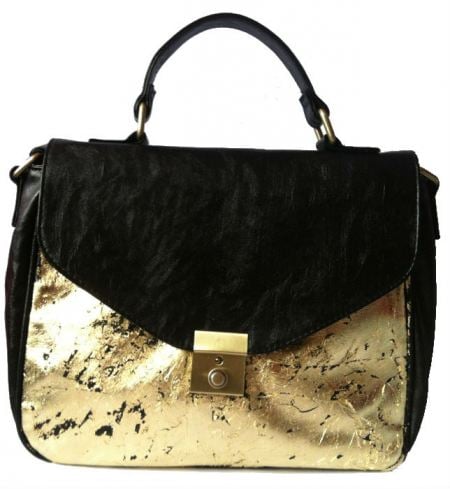
How about this GORGEOUS DIY gold-leafed tote – a handbag makeover inspired by MIMCO by Beyond the Open Spaces? It looks so expensive and luxurious now, you’d have a hard time convincing anybody that you didn’t pay a bundle for it!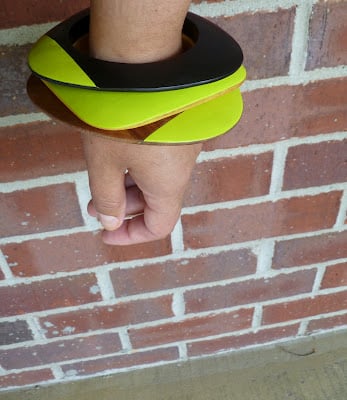
Soccer Mom Style shared her tutorial for some Neon Detail Painted Wooden Bangles, and I’m dying to makeover my old bangles too! Neon is so perfect for Spring/Summer 2012!!
If your project was featured above, feel free to grab a button and share the DIY!
<a href=”https://chiccreativelife.com/category/links-of-the-week”><img src=”https://chiccreativelife.com/wp-content/uploads/2012/03/diylotwfeaturedbutton-2.png” /></a>
If you have a DIY how-to or tutorial that you’d like to see featured on Chic Steals, please email me at carlyjcais at chic-steals dot com – and I’ll try to squeeze it in to one of my Links of the Week posts! (Tutorials/how-to’s with steps and photos included please! So everyone can share in the DIY goodness:-)
xoxox
Carly
-all photos copyright their respective authors; photo array by me-
~If you liked this post, please share it!~
Leave Comment











