Oct 2, 2011 | DIY, Fashion

Above: cut the collar of a bright shirt and wear with a low scoop-neckline neutral cami.
The Spring 2012 Carven RTW runway show was chock-full of DIY inspiration from the latest trends. Removable collars? Cut-outs? Bright color-blocking? Oh yes, give me more! 
Thrift a bright knit camisole and cut the neckline into a low scoop; finish the top with hand-stitching or machine-stitching to prevent unraveling. Wear over a white button-down.
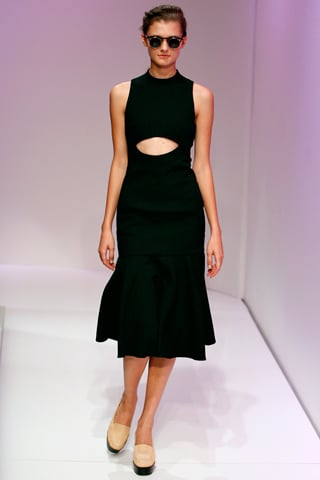
Cut an oval shape out of the center of a simple black dress.
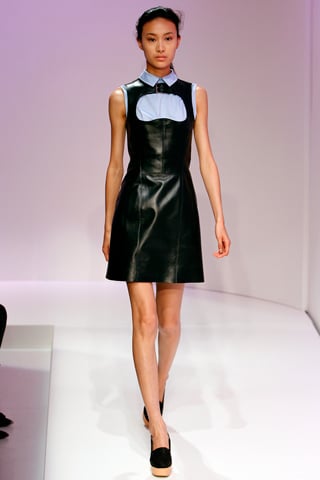
Cut a wavy shape out of the front of a leatherette mini=dress (check the thrift store for possibilities). Wear over a denim blouse that’s had the sleeves cut off.
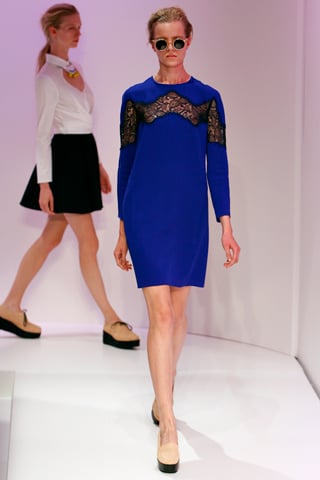
Cut a zig-zag shape into the front of a bright dress. Glue black lace into the hole from the inside.

Cut a heart-shape out of the front of a white blouse. (One that buttons down the back if you can find it.) Wear with a bright decorated collar necklace that sits right in the cut-out.
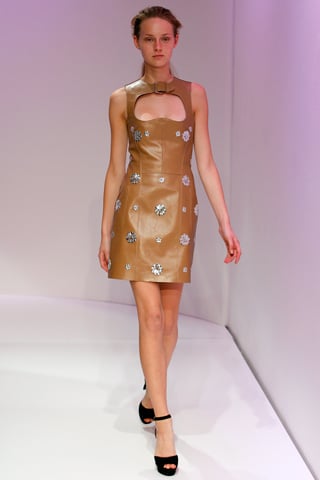
Cut a wavy shape out of a leatherette mini-dress. Pull apart some metallic flowers (from the floral or the scrapbooking section of the craft store); glue onto the dress with leather glue.

Cut out a round shape at the bust of a bright dress. Splatter with gobs of contrasting fabric paint.

Change the cut-out regimen by cutting out a rectangle just above the waist of a striped dress. Add some large beads or paillettes in a similar color across the neckline.

Cut out a polygon shape from above the waistline of a lace dress. Glue black lace into the hole from the inside.
xoxox
Carly
~If you liked this post, please share it!~
Photos by Marcus Tondo / GoRunway.com, from Style.com
Leave Comment
Sep 27, 2011 | By Carly J. Cais, DIY
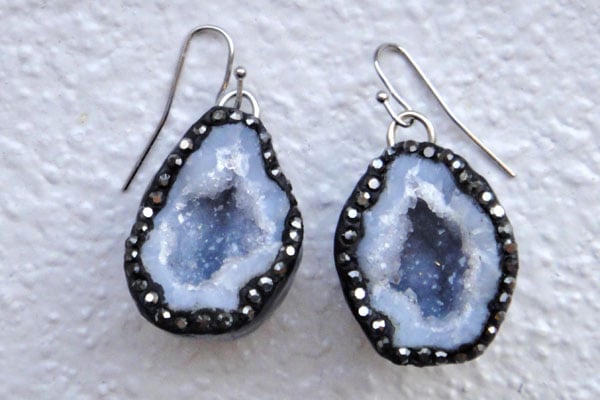 I finally finished a pair of earrings this weekend that I’ve been working on for so long…I had attempted making them numerous times before but just couldn’t seem to get them exactly right.
I’ve always been drawn to the rough imperfections in natural stones and crystals, far more so than anything ever cut or polished by humans. Geodes are the perfect example of this: the jagged, rough crystals inside that are at once both perfectly symmetrical and so perfectly without order.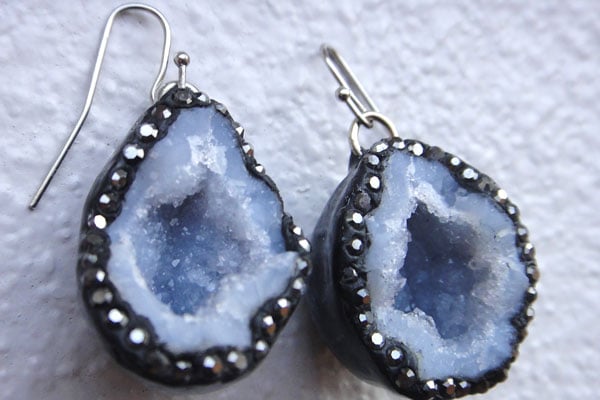
I surrounded two halves of a split geode crystal (technically a thunderegg, I guess) with black epoxy resin; then hand-set hematite-colored Swarovski crystals around the perimeters. Pewter French hooks finish off the earrings.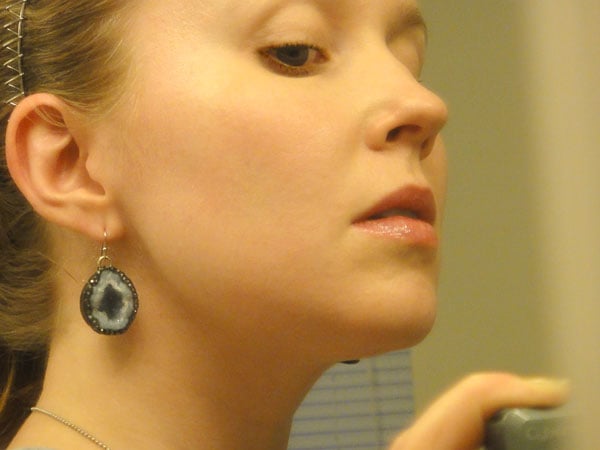
Given their sparkliness, contours, and depth I found they were incredibly hard to photograph late in the day and on my own, in the mirror. I’ll have to try when it’s nice and bright outside!
I’m also going to experiment with another pair, this time with Silver Shade Swarovskis around the geodes. I just couldn’t decide whether the dark hematite gray or crystal-like Silver would look better! There’s something I like about the smoky gray color glinting against the black resin, though.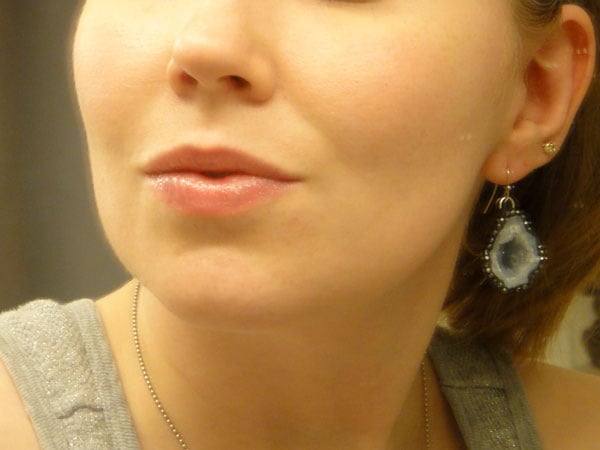
Hope you guys had a great weekend!
xoxox
Carly
~If you liked this post, please share it!~
Leave Comment
Sep 23, 2011 | DIY
 I’m so thrilled to have been featured on the I Love to Create blog as a guest poster!
They sent me a lovely package of goodies from their immense ILoveToCreate.com website a little while ago (chock-full of Tulip-brand and Aleene’s products, fabric dyes, finishes, paints, and embellishments…if you haven’t checked it out for all your crafty needs, or for tutorial ideas and inspiration, please do!! You’re so missing out!!). I’ve used the contents of the package to create a couple tutorials for them that will be featured on their blog in the coming weeks. My first project, a Leopard-Print Infinity Scarf, repurposes the bottom of an old t-shirt and uses a stencil from one of their tie-dyeing kits to create a fancy feline look. Here is the tutorial in full below:
Fashion blogger Carly J. Cais of Chic Steals will be featured in the next few weeks as a guest blogger here on the iLoveToCreate blog! She has created some trendy and fashionable looks and she shows you step by step how to make them! Take it away Carly…
How to Create a DIY Leopard-Print No-Sew Infinity Scarf From an Old T-Shirt
Nothing could be easier than re-purposing the bottom of an old t-shirt as an accessory! Wear as a simple scarf for a pop of pattern at the neck, a lightweight hood, or sew the bottom closed and add a drawstring to use as a pouch for makeup. By using two colors in the leopard print and varying the size of the spots, you get a much more finished, high-end look than by just using the stencil alone.
Materials:
– Tulip Tie-Dye Fashion Kit in Wild Thing (stencil, gloves, Aqua dye, Cobalt Dye)
– white t-shirt
and…
– garbage bags
– paper towels
– cotton swab (not pictured)
– small bowl for paint (not pictured)
– fabric scissors or rotary cutter
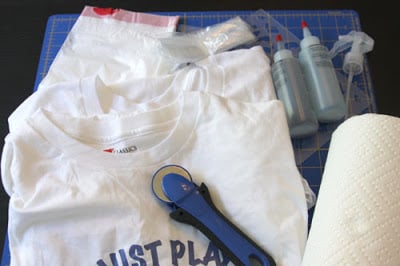
How To:
1. Begin by creating the leopard pattern on the t-shirt. Wash the shirt in the washer (do not use fabric softener) and dry in the dryer to remove sizing.
2. Place onto a garbage bag, laid onto a flat surface. Place another garbage bag in-between the fabric layers so the dye does not seep through.
3. Place the leopard stencil from the Tie-Dye Fashion Kit onto the shirt, and cover around the stencil with paper towels to prevent overspray.
 4. Put on the gloves in the kit. Mix the Tulip Aqua Tie-Dye according to the kit directions, and spritz onto the fabric using the spray bottle. Be careful to not spray too much; just enough so the stencil shapes are visible (too much and it will seep under the stencil and the pattern won’t be crisp).
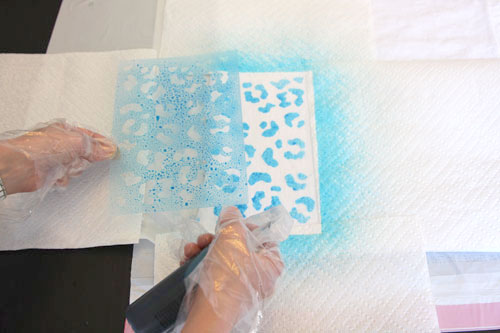 5. Remove the stencil; wipe down with a paper towel.
6. Repeat Steps 3) – 5) to cover all the area below the underarms of the t-shirt on the front. Turn the shirt onto the back and repeat.
7. Allow to dry about an hour.
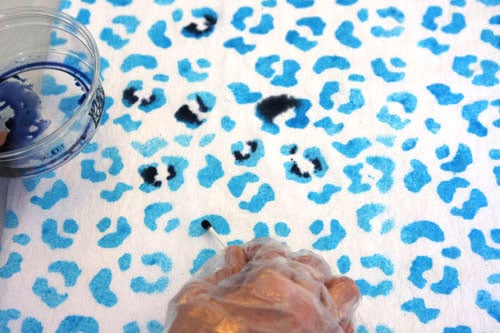 8. Mix the Tulip Cobalt Tye-Dye according to directions, and squirt some dye into a small bowl (not used for food). Dip a cotton swab into the dye and dab it onto the t-shirt, on top of the aqua spots you made with the stencil. (Reference a photo of what a leopard’s spots really look like to help with placement.)
9. Cover with plastic and allow to dry 4-6 hours. Once dry, wash in the washer with a small amount of detergent and water at the hottest suitable for the fabric. Dry in the dryer.
10. Once dry, cut off the top part of the shirt, from side to side right under the sleeves.
And you’re done! Wear the fabric loop as an infinity scarf for a punchy pattern at the neck, or customize further with a little craftery on your sewing machine.
Happy DIY’ing!
xoxox
Carly J. Cais
~If you liked this post, please share it!~
Leave Comment
Sep 21, 2011 | DIY, Fashion
 Whew! That Fashion Week went by in the blink of an eye (and now we’re on top London), but I’m still collecting ideas for new projects to begin later this season and into next. Spring? Already? Wha-….?
The trends on the runway were captivating; the ideas full of Spring and renewal. Who didn’t swoon over the pastel minimalism at 3.1 Phillip Lim, the bold prints at Anna Sui, and the metallic fringe at Marchesa? Though minimalism and fresh colors dominated, I was still inspired by the latest round of DIY possibilities. Hit it, girls!
Alexander Wang: Embolden a pair of basic leggings with some fabric paint – just first use some painter’s tape to mask off geometric graphics.
Alice + Olivia: Thrift a diaphanous chiffon curtain and sew the vertical sides together. Thread a ribbon through the top pocket (where the rod would go); tie at the back of the neck. Cut off the excess bottom and slice a side-slit for an easy, springy halter dress.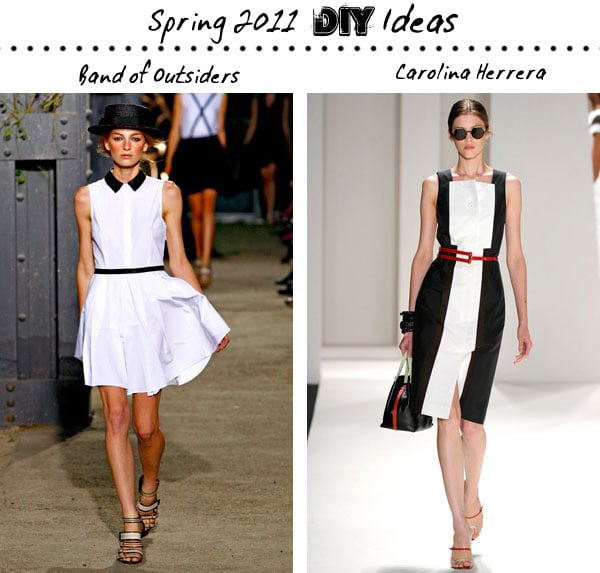
Band of Outsiders: Create a contrast-y dress by adding a black collar (cut off another shirt if need be, or just by covering the dress’s existing collar in black fabric, and iron-on some black trim at the waist.
Carolina Herrera: Re-invent the LBD by adding the front of a white shirt, cut out, to it. Create the unique belt by simply cutting the negative space out of a 2-3″-wide red belt.
Cynthia Rowley: Cut jagged pieces from gold lame (or use gold lace!) to embellish the shoulders of a simple black cocktail dress.
Donna Karan: Use black elastic straps and hand-sew them to a mini bustier.
Erin Fetherston: Use a graphic print to create a simple sheath (or find something that fits the bill off-the-rack). Use a fabric marker to “color in” areas of the print for a bolder, eye-catching piece.
Jen Kao: Take a simple trench and dye it military-green, reserving the bottom for a dip-dye of lavender and orange sherbet.
Juan Carlos Obando: Punch large holes with a leather punch or using a pair of scissors (or even a scrapbooking punch!!) in a leather or vinyl jacket for a sultry peep-show.
Kimberly Ovitz: Cut out triangles from the sides of a sheer white blouse.
L.A.M.B.: Take a plain tote and cover side-to-side with a layer of neon yellow-green duck tape. Add more tape (or even vinyl trim!) – this time in camel – in geometric lines across the front.
Marc by Marc Jacobs: Replace the buttons of an otherwise unremarkable blue blouse with bright orange buttons. Tack on some khaki pockets (salvaged from an old pair of trousers or an overcoat) to a pair of dark blue pants.
Michael Kors: Cut the sides out of a python-print maillot. Cut the top from the bottom, add a belt in the middle, and hand-stitch each end to the top and bottom of a belt buckle. (Don’t swim in it!)
Monique Lhuillier: A bright wrap dress (dyed?) can be made edgier with pieces of black lace affixed to it strategically.
Some of these I’ll probably be doing tutorials for in the coming months. See anything you’re just dying to know how to make? Leave it in the comments section, and if it’s possible, I’ll make it so!
Also: Part 2 (N-Z) Coming Soon!
xoxox
Carly
All photos found at Style.com. Layouts by me.
~If you liked this post, please share it!~
Leave Comment
Sep 20, 2011 | DIY
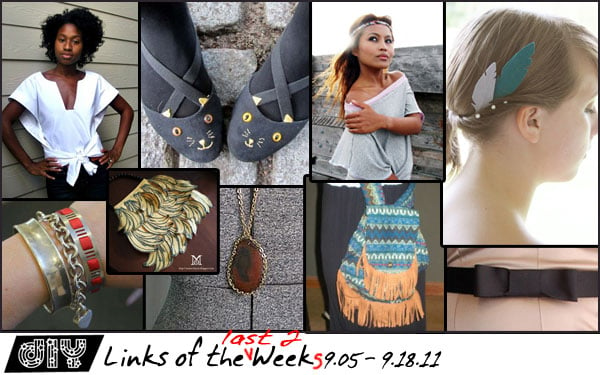 Another week has gone by in a thrice. Between spending 3 hours a day in the car toting Lil Tot to and from school, I’m also trying to stick to my workout schedule. For almost a month now, it’s been 6 days a week of hard, grueling workouts. Focusing on getting healthy, I’ve been preparing a lot more meals at home, measuring everything, and trying to cut out the junk. There’s been a few visual improvements overall, and I’m feeling a lot better – but all this activity is making me exhausted, ready to hit the hay at 9 o’clock at night instead of staying up and browsing the Internet for more DIY. You guys have been so great in sending me links to your projects, I wouldn’t know what to do without you!
So here are a few things that caught my eye this week:
Crafting Your Own Fashion – a Frugal Fashionista’s Guide from Frugal Beautiful contains a number of must-try tutorials and ideas. It will definitely keep you busy for awhile!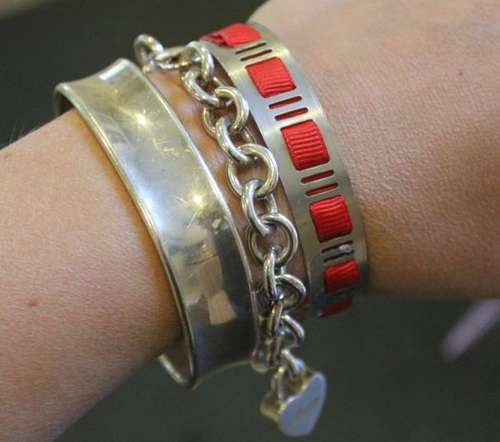
And the hardware as adornment trend continues! Henry Happened‘s Instructable for a grosgrain ribbon bracelet from a hose clamp looks so chic I had to look twice at it to realize it came from Home Depot!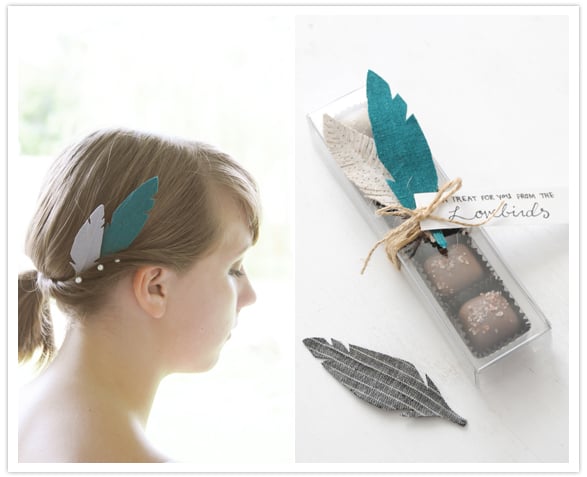
Make some easy fabric feathers with the help of Ez from Creature Comforts (as posted on 100 Layer Cake). Use to decorate headbands, brooches, jewelry – even as a cruelty-free option for weaving into your own hair!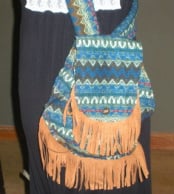
From The Opposite of War comes this sweet fringed boho backback-style bag. It could also be done all in leather or vinyl if you don’t want to use fabric, and looks so chic!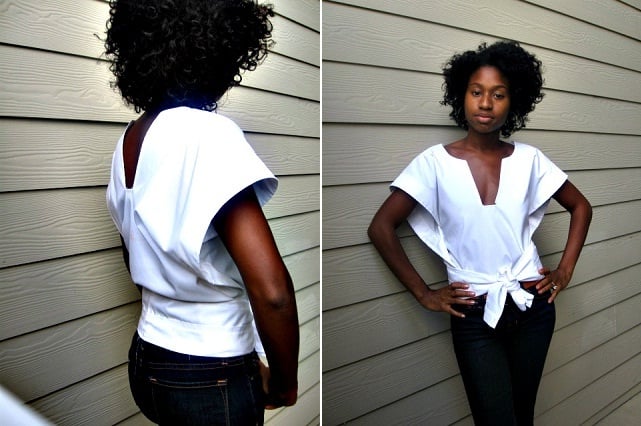
Freshly Given has another fabulous white blouse to share…and this time it’s made from a skirt! Check out her Grandma’s Skirt to Blouse tutorial here.
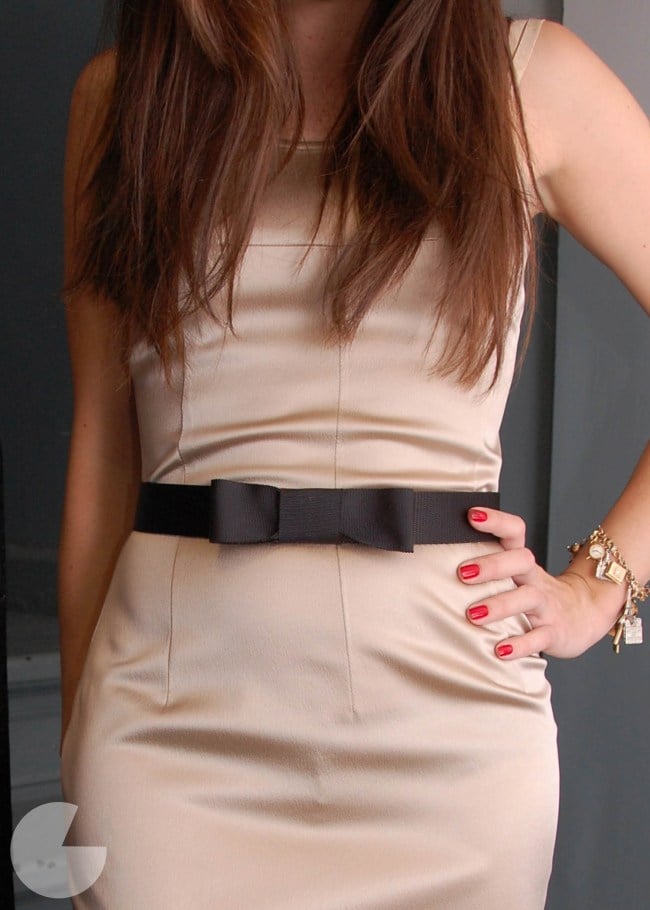 New DIY blog discovery! RunwayDIY.com has sprung onto the scene with a number of fresh, cleanly-edited, easily-achieved DIY’s. Love the graphics and simplicity of it – and check out all her fabulous DIY’s like her Little Black Bow Belt.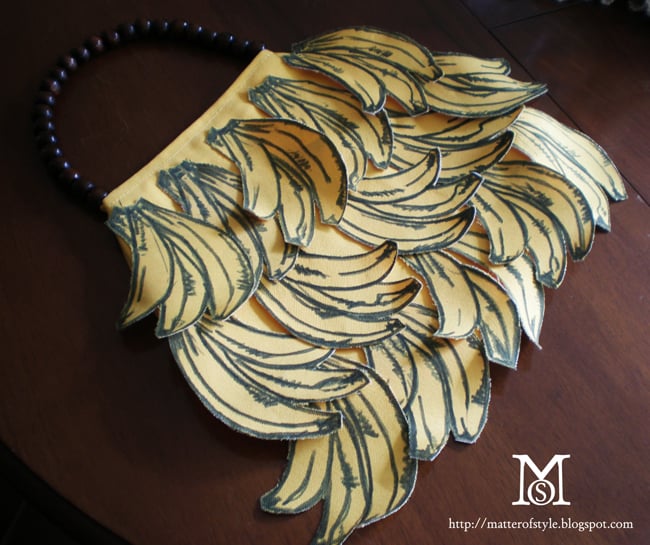
A Matter of Style posted a great Bananas Bag DIY inspired by Prada. How fabulous are all those little bananas??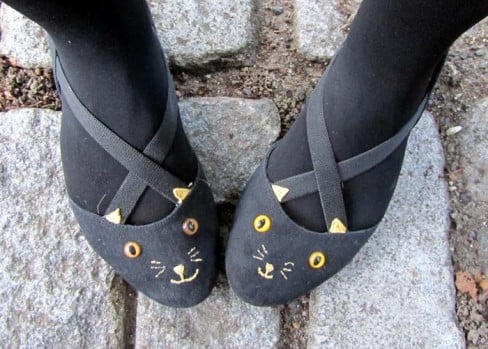
Love kitty-cats? Make some Charlotte Olympia-inspired Cat Flats with the help of Andrea from The Paper Sparrow, posting on The Teal Cat Project. Utterly adorable!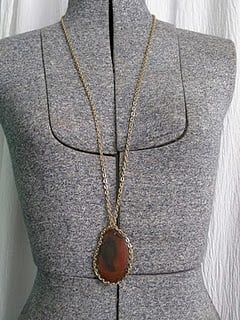
Thanks I Made It just started a DIY blog and posted a tutorial for this lovely Chain-Link Agate Necklace. It looks earthy, bohemian, and just perfect to go with all that Fall Fashion heading our way!
If your project was featured above, feel free to grab a button and share the DIY!

<a href=”https://chiccreativelife.com/category/links-of-the-week”><img src=”https://chiccreativelife.com/wp-content/uploads/2011/09/diylotwfeaturedbutton.png” /></a>
If you have a DIY how-to or tutorial that you’d like to see featured on Chic Steals, please email me at carlyjcais at chic-steals dot com – and I’ll try to squeeze it in to one of my Links of the Week posts! (Tutorials/how-to’s with steps and photos included please! So everyone can share in the DIY goodness:-)
xoxox
Carly
-all photos copyright their respective authors; photo array by me-
~If you liked this post, please share it!~
Leave Comment
Sep 17, 2011 | DIY
 Today I have the pleasure of welcoming Stacie, whom some of you may already know from her blog Stars for Streetlights, which I’ve featured a few times in my DIY Roundups. Or you may have seen how amazingly talented she is by seeing that jaw-dropping DIY Fendi Rose Dress she made awhile ago, or DIY Jeffrey Campbell Tick Studded Espadrilles. She’s a crafty one, alright!;-) We’ve been following each other’s blogs for some time now, and when she contacted me about a possible guest post I was so excited! Take it away, Stacie!
Hi everyone! My name is Stacie and I am a new writer over at Affordable Style and I am so happy that Carly has let me guest post on her blog today. I have followed Carly’s blog for over two years now, (it was actually one of the first blogs I found in the beginning stages of my blog obsession). Carly’s blog is always packed full of great ideas and DIYs that make me want to leave my computer and get craftin’.
A little about me: I just graduated from college in Indiana and started working at Affordable Style—this is my first big guest post. I’ve always loved blogging and finding inspiration in little nooks and crannies around the blogspot and internet world. Part of my job at Affordable Style is to write for Affordable Scarves. It’s really fun, I get to write about anything from alternate scarf uses to 37 Ways to tie a Scarf. A pretty great gig for someone who loves DIY projects and tutorials as much as I do.
Today I am going to show you a really, really easy tutorial on how to make a flowy vest from a scarf. Originally I saw this tutorial on Studs & Pearls (she’s another great DIY fashion guru). You can use any scarf you want from pashminas, shawls, or even square scarves. (Thrift stores are a great place to find scarves if you do not have a specific look in mind.)
DIY: How to Make a Vest from a Scarf
What you need:
-1 scarf (I used this pashmina because of its autumnal colors.)
-Scissors
-Sewing needle or sewing machine
-Pins
Step 1:
First you need to lay your scarf out on a large surface and find the middle. This will be the back of your vest.
Step 2:
Next, you need to make the cuts in your scarf for your arms. It does not have to be perfectly exact, but I measured 4-5” down from the top and made 12” angled slits that look like the lines in the photo.
Step 3:

After you have made your cuts, it is time to pin back the slits towards what will be the inside of your vest. Make sure the rough edges are being pinned onto the side that you don’t want to show off. You don’t necessarily have to sew the slits down, but I think it looks a lot nicer and it will make sure your scarf does not tear more or unravel.
Step 4:

Here is what my scarf looked like after I sewed the edges back. I have a machine that can do little funky designs, but you can do a simple zigzag stitch on most machines and it will look pretty nifty as well. (My sewing machine was the best graduation gift from the best mom ever. :))

One thing I love about the scarf vest is the little collar that the scarf creates if you leave a few inches at the top. Plus, if you want to wear your vest as a scarf again, the scarf drapes and folds so that it is hard to see the cuts!

Another shot.
GIVEAWAY!

Now we have a great opportunity for a Chic Steals reader!
If you want to win this scarf, just visit Affordable Scarves, pick out your favorite scarf, and comment below! You can get an additional entry by tweeting about the giveaway, and if you blog about it, we’ll give you two extra entries! Just leave those links in the comments below as well.
Thank you so much to Carly for having me, and good luck to everyone with their scarf DIY’s! Have fun makin’ stuff. 🙂
Cheers,
Stacie
Thanks so much to Stacie for this great tutorial!
So if you’d like to win this pretty Fall-inspired scarf-turned vest…
1. Leave a comment below with your favorite scarf from Affordable Scarves.
2. Tweet this giveaway and leave the link to your tweet IN A SEPARATE COMMENT.
3. Re-blog this giveaway and leave the link to your blog entry IN A SEPARATE COMMENT.
Total: 3 entries per person allowed.
All extra entries (Tweets and re-blogs) MUST be left in separate comments or they WILL NOT BE COUNTED.
Entry period ends Sunday, September 25, at 11:59 P.S.T.
Good luck!
xoxox
Carly
~If you liked this post, please share it!~
FTC Disclosure: I have not received any compensation for this post, except for a vest handmade by the guest poster which has been offered for giveaway to one of my readers. Read my full Disclosure Policy here.
Leave Comment











