May 18, 2011 | DIY, Media
 I love the idea of using a wicker or straw handbag once the weather warms up. There’s just something about an airy, earthy bag that spells summer to me. Using a basket as a handbag reminds me of delightful childhood stories, dressing up as Alice, tea parties, picnics on the lawn…
 And baskets are just about everywhere! Check out a thrift store or a garage sale for the most affordable baskets imaginable. (Baskets with built-in lids are a lot harder to find, but they’re certainly out there!) Craft stores like Michael’s or Jo-Ann’s sell them (but for a lot more than thrift).
 This scan from the May 2011 issue of Ray magazine presents a wonderful assortment of basket-style handbags…and though the prices are something to gasp at, there are oodles of wonderful DIY ideas in there as well. Dress up baskets with silk flowers, scraps of lace, purse hardware, pompons, paint, ribbon, or gems, for starters. Add a satin lining, a dried starfish, a vintage brooch, sequin trim, bows, or even a teddy bear’s disembodied head. (!)
 I DIY’d a half-moon clutch a couple years ago, by stitching on some puka shells and adding a little tassel pull and braided trim I made from raffia.
 So if you can’t find what you’re looking for locally, there’s always Ebay, which is a great source for baskets, straw totes, and wicker clutches. (Like this one below – which looks oh-so-Chloe S/S 2011!)
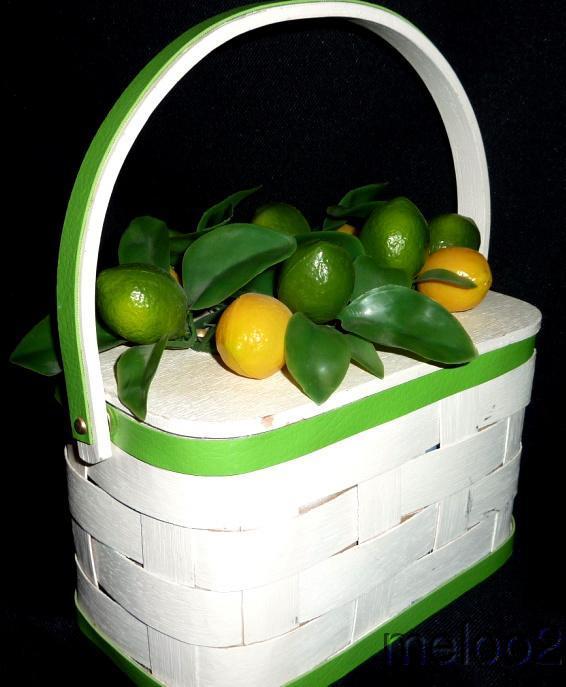
The only difficulty is narrowing it down to the one you want!
xoxox
Carly
~If you liked this post, please share it!~
Leave Comment
May 17, 2011 | DIY
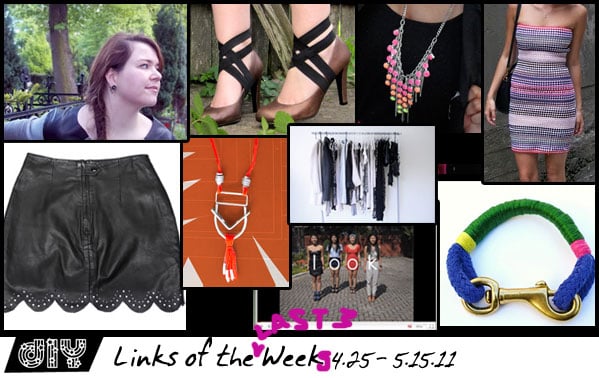 Again having to condense a couple weeks into one LOTW. Time is just whizzing by, and there’s not enough hours in the day to check out all the great DIYs and ideas out there. But first, some food for thought:
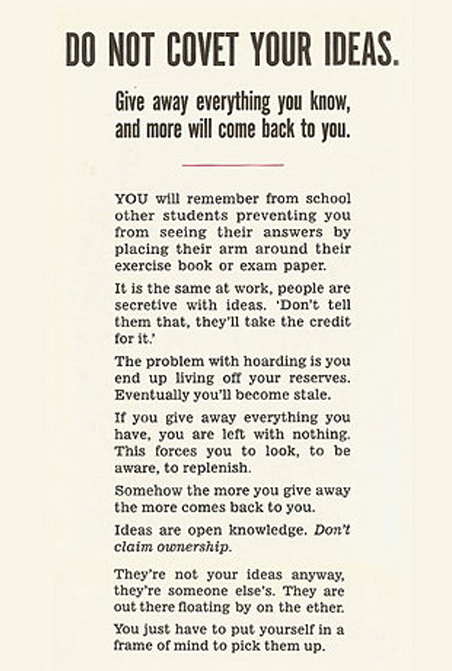 found on Outsapop
DIY is just re-appropriation of ideas. Sure there are firsts, but we won’t be the lasts – give credit where credit is due, and the world will pay you back tenfold. Or so I believe.

Have you seen LookUnderHere‘s Youtube channel? Some great DIYs in there like a turband, bandeau, and wired headwrap. Definitely check it out!
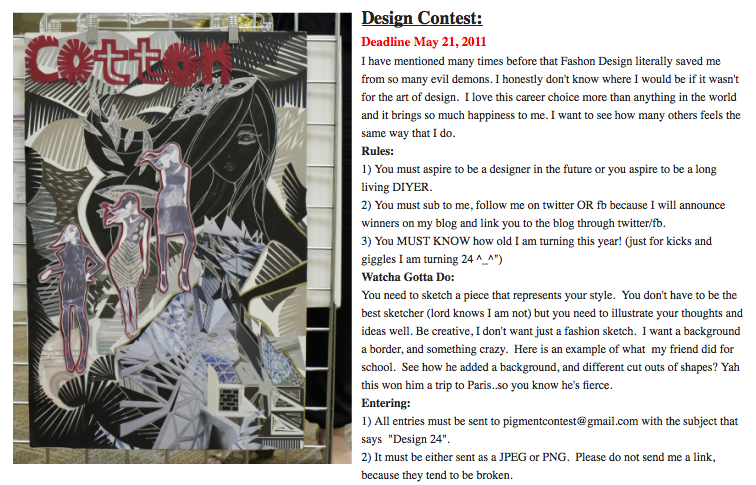
Speaking of video DIY’ers, Secret Life of a Bio Nerd (of Threadbanger fame) is doing a giveaway! You still have until May 21 to get your entry in. Check out how to enter here.

MIchelle’s Style File posted a Color-Block Bracelet Tutorial. Love the use of the lanyard hook as the closure!

img from Heart + Bleecker
The new luxury is the small wardrobe. Fashionising remarks on the post-modern convergence of style + minimalism in the face of cheap excess.

Did I miss this? Awesome punky DIY Neon Rhinestone Necklace from Glitter n Glued. Bright and super-fun.

I can’t believe I haven’t seen this before! StyleCaster‘s Hardcore DIY Statement Tassel Necklace is another take on the hardware necklace. Super-creative, and check out everything in their Hardcore DIY series which will have you hurrying down to your nearest hardware store to fashion a new spin on your accessories.
I’ve just discovered the blog Syl and Sam and I’m in love with all their DIY’s! Their amazing perforated leather skirt tutorial has me itching to whip out my leather punch!
Sara from Short of Something shared her own version of the elastic shoe-band (similar to my DIY Elastic Shoe Bands that I shared last year). I love the chic ballerina feel hers has! Katarina from She sells sea shells made over a sweater with lovely leather patches. The inclusion of leather updates the sweater for 2011 and gives it a modern Wang vibe. (Alexander Wang, that is.;-)
 Got an extra rug? Or 4 of them? Make your own DIY Bodycon Dress like Geneva from A Pair and A Spare did. It’s so colorful and summery!
If your project was featured above, feel free to grab a button and share the DIY!

<a href=”https://chiccreativelife.com/category/links-of-the-week”><img src=”https://chiccreativelife.com/wp-content/uploads/2011/05/diylotwfeaturedbutton.png” /></a>
And since I’m not doing my DIY Roundups anymore, if you have a DIY project, tutorial, or creation that you’d like to see featured on Chic Steals, please email me at carlyjcais at chic-steals dot com – and I’ll try to squeeze it in to one of my Links of the Week posts!
xoxox
Carly
-all photos copyright their respective authors; photo array by me-
~If you liked this post, please share it!~
Leave Comment
May 15, 2011 | DIY
 Aaargh, I almost never do this…but I’ve been back-to-the-wall lately with having a root-canalled tooth (I had a root canal done on it THREE YEARS AGO!) get an infection last month and create an abcess that’s now eating away a hole in jaw (so I’ve been feeling like utter crap for about 5+ weeks and am now on super-heavy-duty antibiotics), a bout of 3 colds in a row ending with the flu last week, and huge project after midterm after huge project due for my classes, not to mention a couple of other personal projects that have all had deadlines this past week. And I have to do prop design and creation and set styling for a video shoot coming up this week and I have barely had time to even start to prep that. I’ve been trying to put together a worthwhile post since Friday but tonight yet again it’s not going to happen.:-(
So I’ll just post some sneaky teaser photos of my next DIY…
It’s lace, it’s EASY, and it has a little secret…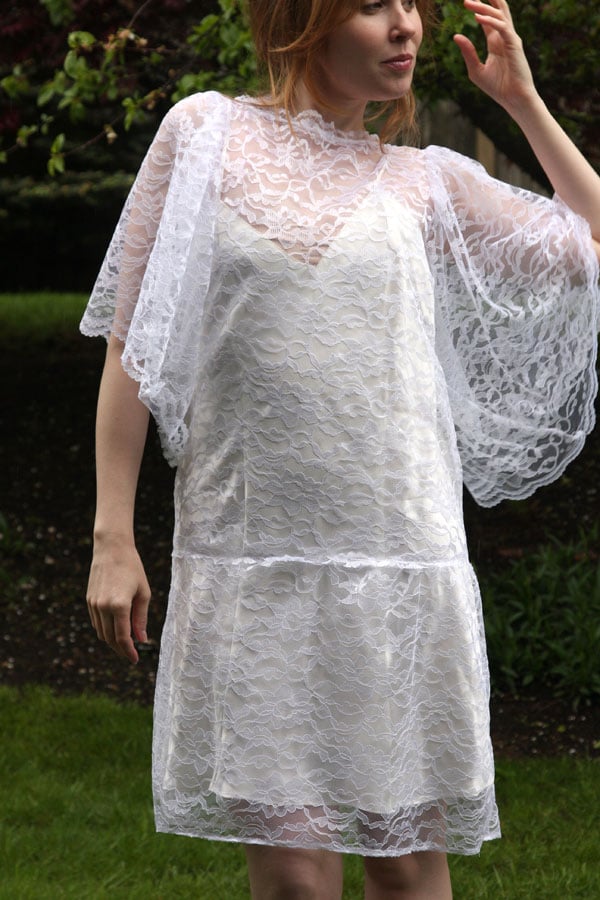 Shhhh!;-) Stay tuned for the tutorial, coming up soon….
Now back to bed so I can fight this infection more and get up nice and early for an emergency root canal (well, re-root-canal, in my case) for tomorrow.
 Hope everyone had a great weekend!
xoxox
Carly
~If you liked this post, please share it!~
xoxox
Carly
Leave Comment
May 12, 2011 | DIY, Life
 Ooooh, I’m so upset I missed this!
Though Easter is long since over, here are some lovely Easter eggs designed for Vogue.com by some brands you may have heard of…like Chanel, Jason Wu and Rag & Bone. The assortment uses materials such as buttons, glitter, quartz spikes, lilac flowers, washi paper, and lace to embellish a variety of eggs ranging from ostrich eggs to chocolate to papier mâché to local certified organic hen’s eggs. (I’m partial to the glowing gold egg and the rocker-style biker chic egg with its own mini-jacket myself!) Check out the pretty and file away in the DIY inspiration file for next year…
Which one speaks to your inner fashionista?
And if you’re wanting even more ideas to store away for 2012, there’s always Martha Stewart’s Gallery of Easter Egg Ideas. (62 of ’em!)
xoxox
Carly
~If you liked this post, please share it!~
Leave Comment
May 10, 2011 | DIY

(Pamela Love ring img source)
I fell in love with this tough but earthy Arrowhead Ring from Pamela Love (link is to the matte pink version) awhile ago. Sporting a hand-carved arrowhead set in a thick silver bezel, this ring also has a line of silver flattened discs at the base creating a Southwestern-feel setting – which looks great with all the sheer pieces, bleached denim, and leather we’re seeing for Spring. It’s taken me awhile, but I’ve finally figured out a way to recreate something similar to this lovely piece (less the $528 pricetag!). Definitely not for the faint of heart, this 3-stage tutorial will take you some time, but the results are amazing. It uses Apoxie Sculpt**, a new non-toxic, moldable crafting substance I’ve discovered recently, to emulate the black resin setting. So, for around $40 total, here we go….. (more…)
Leave Comment
May 4, 2011 | DIY
 Since it’s Rings Week here at Chic Steals, I wanted to share with you a quick n easy way to add a bit of pizazz to a store-bought 2-finger ring (with a flat top) and some scrapbooking embellishments. It’s DIY in 5 – minutes, that is. The easiest, quickest ways to take a piece from blah to fab and update it to current trends.
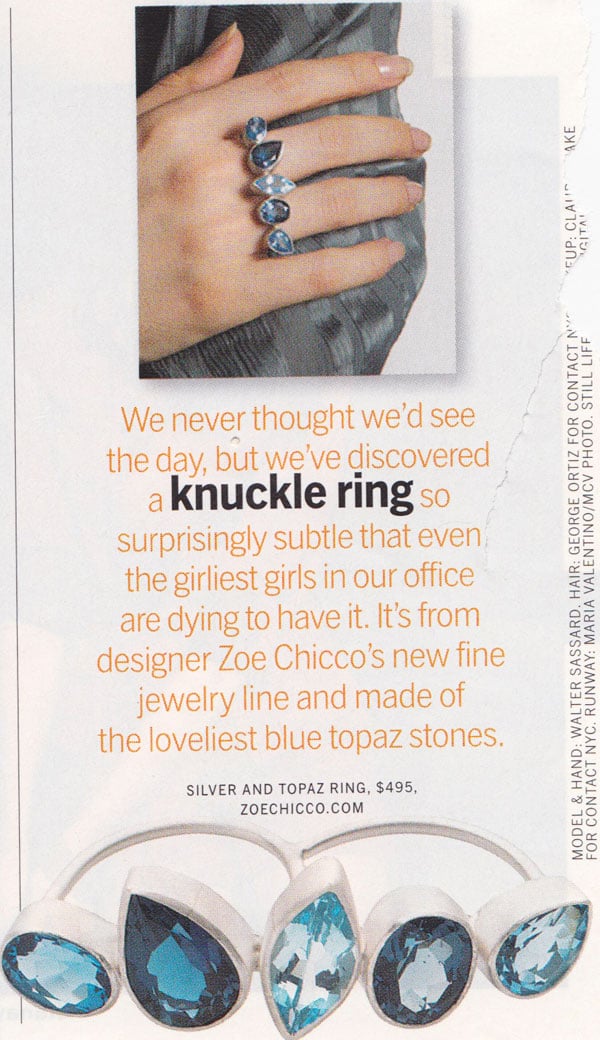 Lucky Magazine posted a photo of this gorgeous Zoe Chicco knuckle ring waaaaay back in 2008? or so, and I kept the clipping on my inspiration board. As usual, they were way ahead of the trend, since it’s only been since 2009/2010 that we’ve been seeing 2- and 3-fingered rings adorning the fingers of fashionable girls the world over. At $495, I found this beautiful ring beyond my budget back in 2008, and it’s sadly unavailable now besides. [BTW if you’re wanting this style but don’t want to DIY, Soixante Neuf sells a veeeery similar bejeweled ring so if you feel like spending $216 then the same style can be yours!] You can also probably find this double-finger ring covered in jewels from some lower-priced trendy retailer like Forever 21 or elsewhere if you look hard enough. But of course, I wanted to make my own – similar to the original!
It wasn’t until recently (around the holidays last year) that Jolee’s Jewels dimensional scrapbooking stickers came out with a new line of colored stick-on jewels in their settings…something that’s pretty hard to source for jewelry or embellishment projects, sticky-back or no. (Ever found set acrylic jewels (i.e., jewels in a silver or gold pronged or rim setting) in Jo-Ann’s or Michael’s? No? I found a small selection in M&J Trimming last time I was there, but it was very limited, and though yes, the BeDazzler will “set” gemstones onto fabric, the settings are really cheap-looking and the gemstones have to be super-small to fit into the Bedazzler nozzles. So anyway, large set gemstones as embellishments have been near-impossible to find – until NOW!)
You Need:
*Jolee’s Jewels “All that Bling” Vintage Gems dimensional stickers (I used gems from the Royal and Light Blue and the Baby Blue and Silver packs); or other set jewels
*flat-top 2-finger connector ring (the one in the photo above is the Hearts Two Finger Ring from Payless)
*jewelry glue/glue for metals (my fave is GS Hypo Cement)
How-To:
1. If using the scrapbooking stickers, you may want to pull the sticky back off first and figure out how you want to place your jewels. I found it was easy to position my jewels on the ring top while they were sticky – but super-difficult to pull them off one by one and add the glue. Your choice!
2. Once you’ve decided on the placement, just spread some glue onto your ring base, and position the jewels on top. Allow to dry for 24+ hours before wearing.
 And that’s…amazingly…it!

Here are some picks for base rings if you’re looking to buy online…though you could probably find good bases at Claire’s (which is where the ring I actually used is from), Forever 21, or other retail brick-and-mortar stores that cater to the young and trendy crowd. Here are some more picks from online:
Or alternatively, you could glue the jewels onto a piece of metal (like an old piece of jewelry; a sheet of embossing metal; or a metal jewelry blank from Michael’s newly-added hammering and embossing section)…and then glue TWO separate flat-pad ring shanks onto the back of the embellished metal, right next to each other, to create the two-fingered ring.
Happy DIY’ing!
xoxox
Carly
~If you liked this post, please share it!~
Save
Leave Comment











