Sep 19, 2010 | DIY
In the home stretch now, everyone! Another one of my submissions for Style Sample Magazine and New York Design Shop’s Create Couture Challenge back in early August.
Materials:
*White Sweater Style Stretch Trim
*Gold Circle Studs
Additional Tools/Materials:
*thin headband
*sewing machine + needle for knits (optional)
*hand-sewing needle
*matching thread
*hot-glue gun
How to:
1. Sew the Stretch Trim into a tube down its long side. (I sewed it on the sewing machine but you can hand-stitch it if you prefer.) Turn right-side out.
2. Cut into 3 pieces: 1 longer for the large flower, and 2 shorter for the two smaller flowers.
3. Hand-stitch the two ends of the long piece of Trim together, to form a circle.
Make 5 loops in the circle and push inwards to the center, stitching through the center area.
4. Pull the thread tight to gather the loops.
5. Sew a few times more all the way through the center to secure.
6. Repeat Steps 3) – 5) for the two smaller flowers. I made only 4 loops (4 petals) for each.
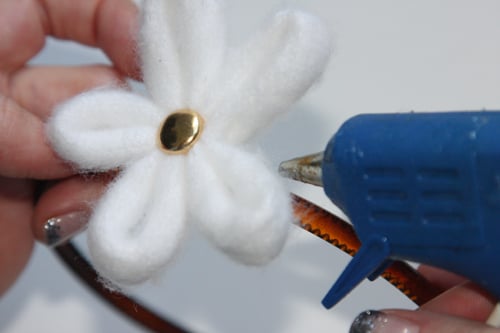
7. Dab some hot glue in the center of each flower, and glue down a Circle Stud.
8. Hot-glue each flower to the top of a thin headband. (For more security, I’d recommend hand-sewing the flowers on, looping the thread around the headband.)
And that’s it! This of course can be accomplished by using any scrap fabric or ribbon you have – though it works particularly well with “puffy” fabric like this sweater stretch trim because it creates a tube-like appearance to the flower petals.

Everything’s in bloom during the summer!
xoxox
Carly
~If you liked this post, please share it!~
Leave Comment
Sep 16, 2010 | DIY
It’s been a little while since I’ve been able to do these Roundups!
But now I’m back on track with DIY Roundup 4! First let me share with you 2 pieces I recently made. I saw London-based jewelry brand bex rox featured in Lucky Magazine awhile back (below), and was taken with the idea of weaving ombre-dyed stain cord through the links of heavy curb chain to make a thick necklace.
Lucky Magazine feature on bex rox, January 2010
My version of the woven chain necklace.
I made two: one bright rainbow-colored, and one pastel shades colored! I can’t decide which one I like better.;-) And you could try this with leather cord, velvet ribbon, chiffon ribbon, rope…though if you chose something flat like a ribbon to weave through the links, you’d have to deal with the ribbon curling and tangling inamongst the links (which could have a nice result). You could even make a high Elizabethan chain collar with black leather cord and go goth with it! Anyway, it’s a cute little technique to try out sometime when you have a little time to kill (it does take awhile, fyi).
So now you get to share your own DIY’s! If you have a DIY project or tutorial, please feel free to link below! (However you can only link YOUR OWN PROJECT. Please do not link others’ projects!)
DIY ROUNDUP 4
If you’ve linked up your project to the Roundup, feel free to grab the button below.
Can’t wait to see everyone’s projects!
xoxox
Carly
xoxox
Carly
~If you liked this post, please share it!~
Leave Comment
Sep 15, 2010 | DIY
Project #9 in my submissions for Style Sample Magazine and New York Design Shop’s Create Couture Challenge back in early August.
You Need:
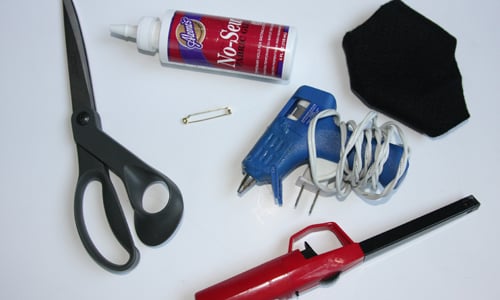
*Victoria Lace
*Cream Ruffle Stretch Trim
*Brown Sweater Style Stretch Trim
*Baby Single Face Satin Ribbon in Brown
*Large Iron-On Butterfly
*White Rose Pin (pin back only)
Additional Tools/Materials:
*scissors
*fabric glue
*hand-sewing needle
*matching thread
*black felt
*lighter
*iron
*sewing machine (optional)
[prep: iron ribbons and trim if kinked or curled]
How-to:
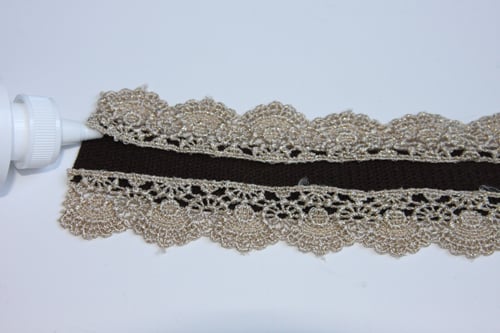
1. Cut Victoria Lace in half.
2. Place each side onto the edges of a piece of the Sweater Style Stretch Trim. You can either glue them down with fabric glue, or sew them down.
4. Trim the end off the Sweater Style Stretch Trim.
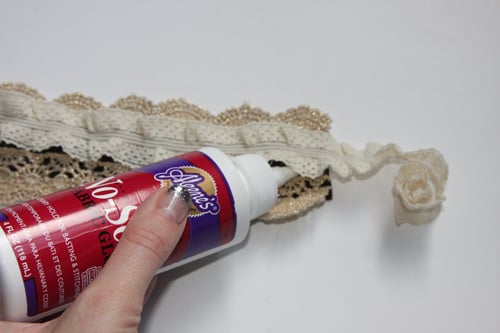
5. Sew or glue down the Cream Ruffle Stretch Trim in the center, covering up the Sweater Style Stretch Trim. I cut the Ruffle Trim a little shorter so it wouldn’t go completely all the way around my waist.
6. Cut the Satin Ribbon in half, on an angle. Seal the ends with an open flame.
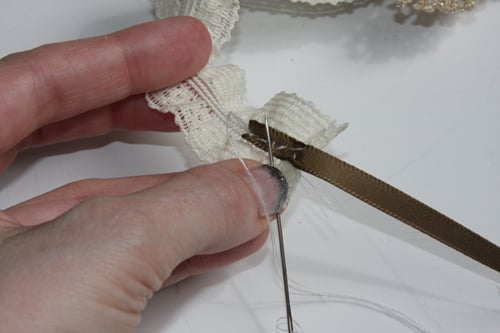
7. Hand-stitch the un-angled ends of the Satin Ribbon to the underside of each end of the Ruffle trim.
8. Iron the Butterfly on to the felt.
9. Trim the felt around the butterfly carefully.
10. Remove pin back from White Rose.
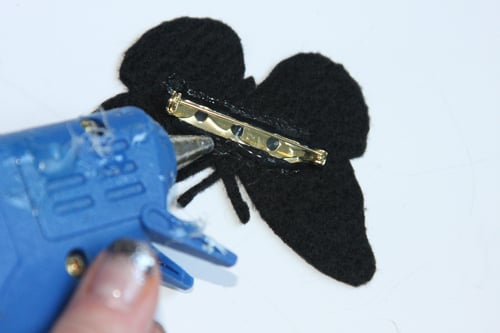
11. Hot-glue pin back to the wrong side of the butterfly, and pin to the belt.
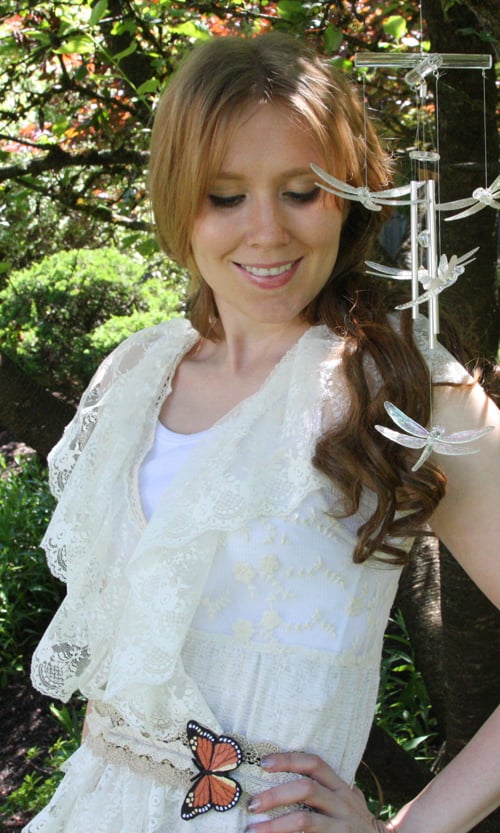
A pretty and vintage-fabulous result for a pretty simple process!
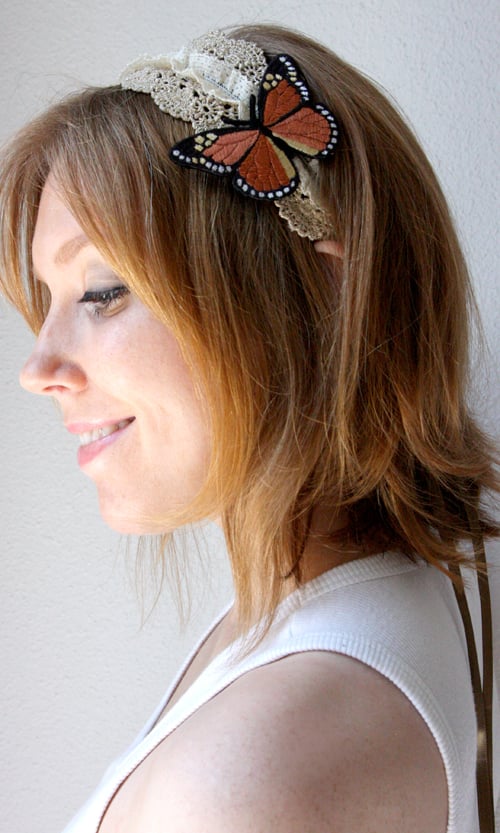
You can wear this piece as a belt or as a headband – and the butterfly as a separate pin.
Choices, choices…
Happy DIY’ing!
xoxox
Carly
~If you liked this post, please share it!~
Leave Comment
Sep 15, 2010 | DIY, Fashion, Media
The DIY Fashion Examiner has put together a great slideshow of DIY-able looks emerging off the current runways from Mercedes-Benz New York Fashion Week. From Cynthia Rowley to Jason Wu, Lela Rose to DKNY, these picks for Spring/Summer 2011 are fodder for any frugal crafter or high-fashion-loving DIY-er anywhere! Definitely check it out if you want to get those creative wheels a-spinning!
xoxox
Carly
~If you liked this post, please share it!~
Leave Comment
Sep 14, 2010 | DIY, Life, Score!
Wow, I’m still coming off the high from the first Create Couture Challenge New York Design Shop sponsored back in August!
Well, NYDS has done it again and put together another challenge for DIY and crafty bloggers out there:
The 2nd Create Couture Contest officially begins! Today marks the first day of the nomination process. Nominate your favorite blogger or DIY enthusiast by any of the following:
1. sending a tweet to @nydesignshop
2. writing on their facebook wall
3. by leaving a comment on THIS blog post, [clicky-click cuz that’s a link!] OR
4. by e-mailing them at info@newyorkdesignshop.com
You have until Monday, September 20 so think hard about who you think will make the best DIY Halloween costume. You may nominate more than one person. 15 contestants will be chosen from the nominees. All nominees will be announced on the NYDS blog. Contestants will be notified by NYDS on Tuesday, September 21, and must decide if they want to participate by Friday, September 24. Rules and Regulations will be distributed via e-mail by Monday, September 27.
Know anyone crafty or uber-talented? Dying to see what your favorite DIY blogger could come up with? Nominate someone via the methods above – and cross your fingers to see if they’ll step up to the challenge!! (And it seems there’s nothing against nominating yourself, either;-)
xoxox
Carly
~If you liked this post, please share it!~
Leave Comment
Sep 14, 2010 | DIY
Another project -this time a bag project- I submitted for Style Sample Magazine and New York Design Shop’s Create Couture Challenge back in early August. It’s a little bohemian and a whole lotta fun!
Materials:
*Rust Suedette Fringe
*Gold Circle Studs
*Leather Flower Appliques
Additional Tools/Materials:
*faux suede handbag
*scissors
*pliers
*leather glue
*awl (optional)
[prep: remove embellishments on bag…I also cut the shoulder strap off and braided it, reattaching it to the bag]
How-to:
1. Cut Suedette Fringe in half.
2. Apply leather glue to underside of fringe, and place just under the top edge of the bag.
3. Allow to dry.
4. Lift fringe up, and glue second layer of fringe underneath so the top fringe just barely overlaps it.
5. Push a Circle Stud through the center of each Leather Flower.
6. Apply flowers to bag, pushing the prongs of the studs through the bag, and using pliers to fold the prongs over on the inside. If the material of the bag is very thick, an awl can be helpful to poke hole first.
7. If you prefer more security, add a thin layer of glue between the leather flowers and the bag in order to glue them down.
Let the 70’s come alive again!
Happy DIY’ing!
xoxox
Carly
~If you liked this post, please share it!~
Leave Comment