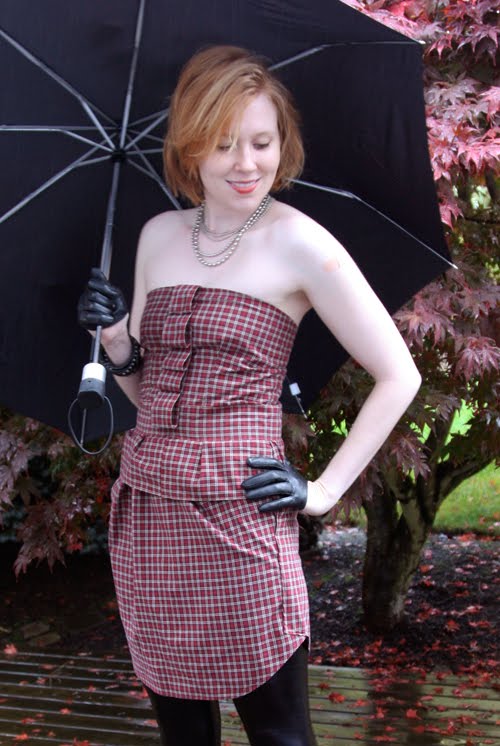
Aug 29, 2010 | DIY, From You
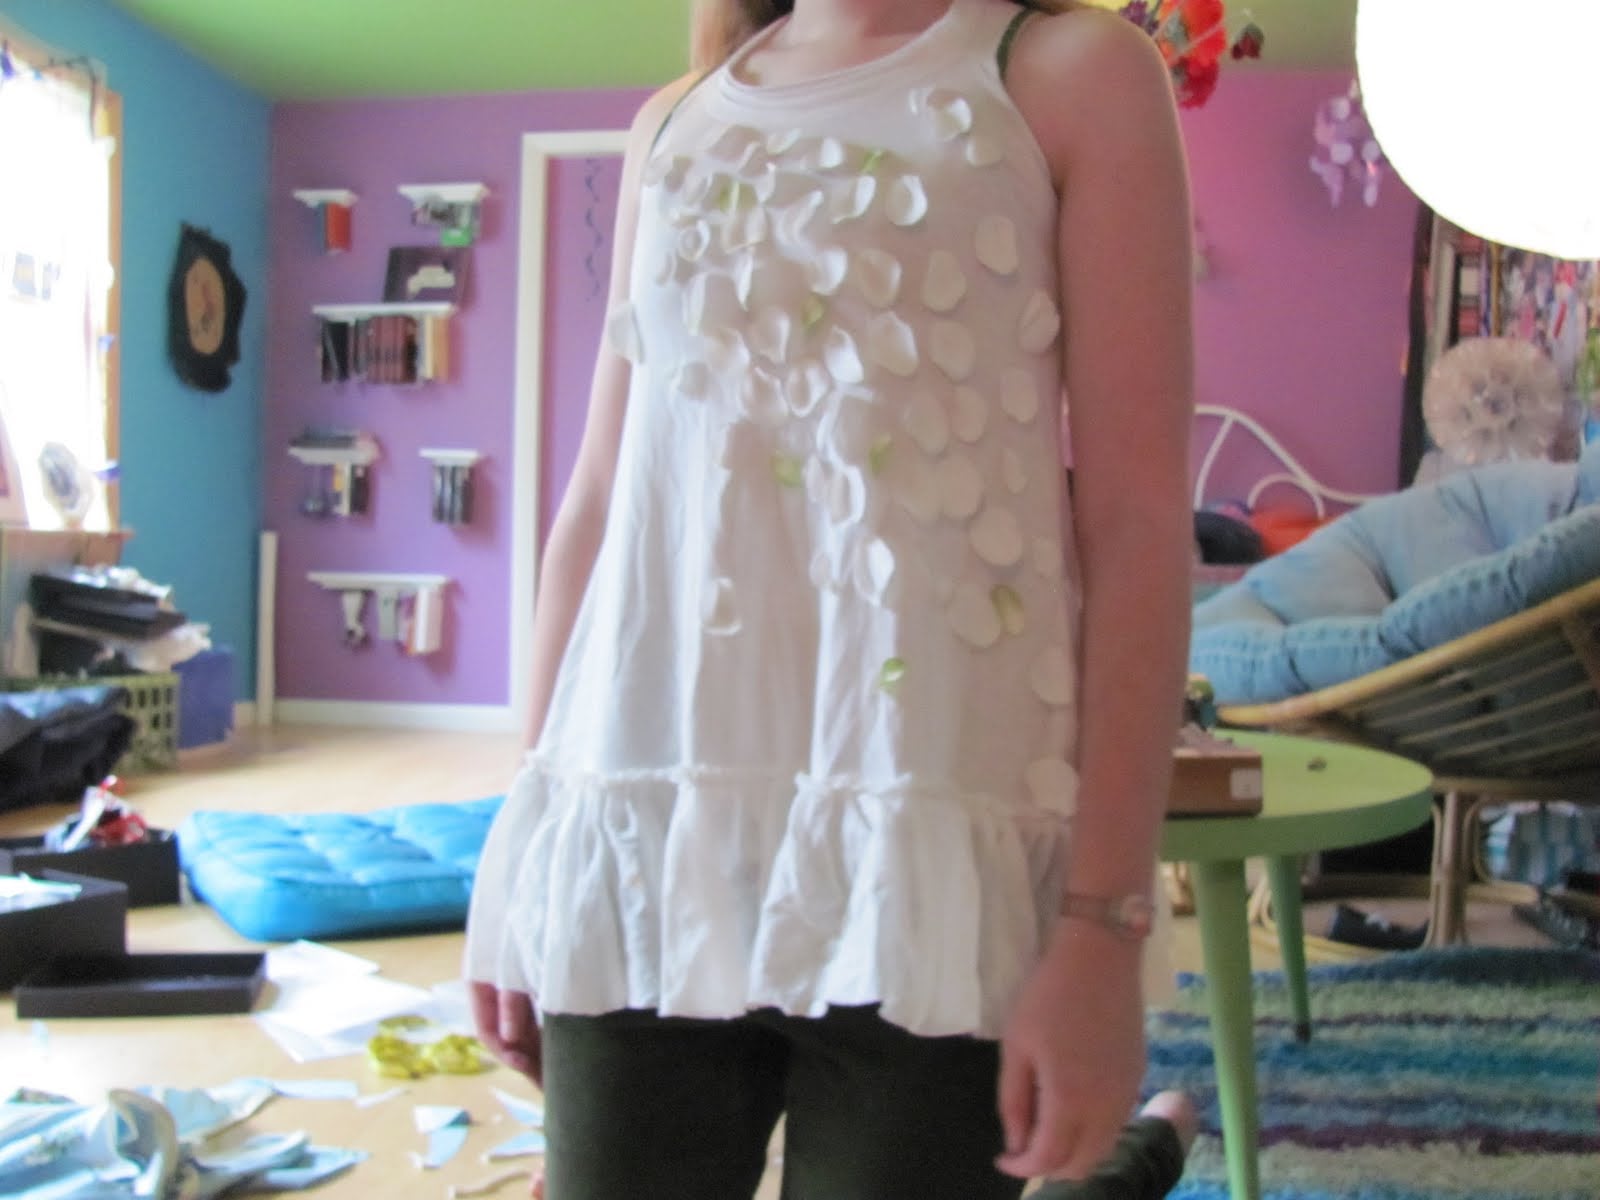
Reader Anna from Shy Shirley sent me this link to her version of the DIY Petal-Front Top that I created the tutorial for in the recent Create Couture Challenge.
I love the breezy, floaty nature to the top – and the little sprays of green from the flower petals.
What a fabulous and creative job!
And if you haven’t seen her blog, please pay her a visit – she has a couple GREAT tutorials for an Anthropologie and a Free People necklace, some cool Etsy stats, and some fashion terminology that is a must-know if you’re interested in being trendy and current! I can’t wait to see what else she comes up with…
Thanks for sharing, Anna!
xoxox
Carly
Save
Aug 27, 2010 | DIY, Fashion
photo from all over the web; not really sure where the original’s from.
The Huffington Post points out that the idea of luxury has deflated and independent designers have business that is booming among consumers tired of the ol’ branded shtick.
This is exactly why I began Chic Steals two and a half years ago: to examine the idea of “value” of clothing, brands, and labels – and to deconstruct the idea of “luxury.” I want to teach people to try their hand at making their own fashionable items – to demonstrate that value is conceptual, and instilled in an object when one takes the time to create it oneself. It’s amazing how much you value something, crooked seams and all, when you’ve slaved over it, day after day, or researched how to do a certain process in the making of it. YOU become invested in your creation – and though the cost at the register may be insignificant, the emotional and skillful investment you’ve made into your piece is immeasurable. One of my core beliefs is this:
Luxury is a concept.
It’s a fleeting idea, created in the minds of consumers chiefly for the purpose of constructing a demand for expensive items manufactured by large brands. Your handmade item becomes a luxury item to you – something whose value is not necessarily determined by the quality of the materials or the extensive skill of the craftsperson or the social cache of the label, but made so by the hours labored upon it and your emotional investment in it.
I’ve noticed as of late, with the economy sluggish, clothing retailers closing, brands going out of business, and sample sale sites abounding – the idea of luxury is being taken apart, brick by brick. Consumers are getting smarter. We want to see behind the curtain of the brand – to see why something is priced the way it is, to see where our money goes when we pay at the cash register.
DIY is a movement to get you involved in the creation and/or personalization process – to have you invest a little bit of yourself so as to better grasp the concepts of value and the principles of design. It gives you skills and makes you a smarter shopper in the long run. Even if it doesn’t appeal to you as a long-term hobby or an experience you’d like to repeat – you now know how much it cost you to buy the tools and materials to make the item in question – and how long it took you. This can help you calculate what’s a good deal and what isn’t when it comes to buying something similar at retail.
And, a wonderful side effect of DIY is that you appreciate the process – and can rationalize better the retail price of clothing and accessories made by indie designers and upcoming brands. (A constant question I got from customers when I was selling my line is “Why does it cost this much?” This is a common question independent designers receive from a consumer base used to Forever 21 and H&M prices. People have no idea what is involved in the manufacturing of clothing and the costs that go on behind the scenes, especially when you’re dealing with small, limited runs.) By encouraging everyone to try making their own fashion items, you educate and inform – which makes to easier to rationalize purchasing items from younger, growing brands, rather than from overpriced luxury brands.
What do you think? What has making or DIY’ing your own pieces taught you? Are you still swayed by a Louis Vuitton bag, a Juicy Couture tracksuit, a Gucci belt just because of the name and cost attached to them?
xoxox
Carly
~If you liked this post, please share it!~
Aug 24, 2010 | DIY
Yet another of the projects I submitted for Style Sample Magazine and New York Design Shop’s Create Couture Challenge.
You Need:
*Rust Suedette Fringe
*Mocha Suedette Fringe
Additional Tools/Materials:
*double-chain necklace
*hand-sewing needle
*matching thread
*scissors
How to:

1. Start on bottom chain of necklace. Stitch chain links onto top of Suedette Fringe (I stitched through every other link).
2. Cut fringe once you’ve reached the end of the chain.
 3. Repeat for the lighter-colored fringe and the top chain.
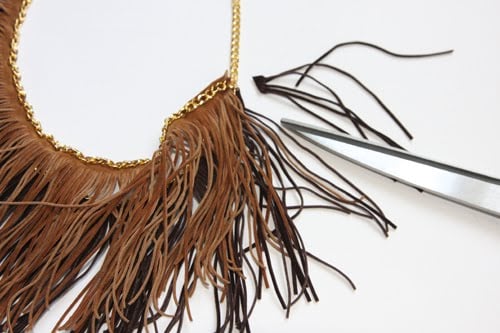 4. If desired, trim edges of fringe so they hang better whilst wearing.
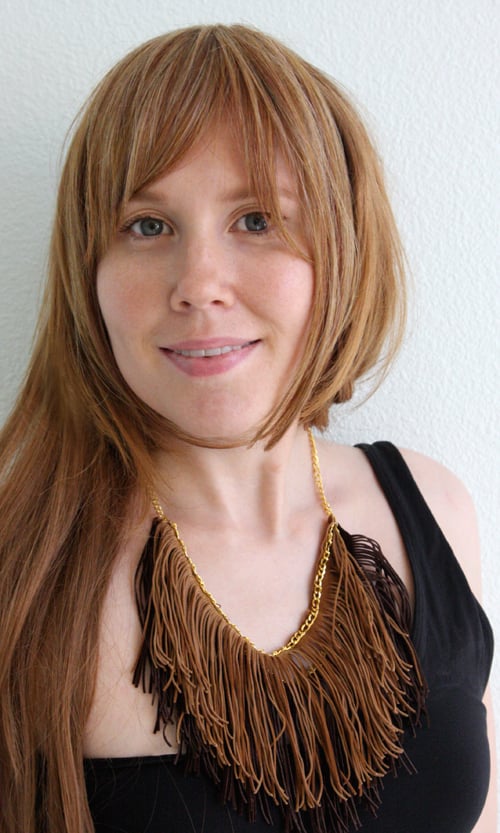 Sometimes the best thing about DIY is the fringe benefits! 😉
xoxox
Carly
**This was actually the project that the person who won the random commenter drawing commented on, saying she loved it! (I know that sentence doesn’t seem to make sense, but my brain is feeling muddled right now:-) So I sent this fringed necklace to the winner – and I hope she likes it! Congrats, Monica!
~If you liked this post, please share it!~
Aug 22, 2010 | DIY
Once I saw this bow tunic dress in Vivi Magazine, it was all over. I’m such a sucker for bows and anything really girly – especially when it’s multifunctional! This sweet little piece you can wear with the bows running down your back or down your front depending on your mood. Fashioned from an oversized man’s long-sleeved shirt, with a couple fixes it becomes a cute A-line batwing tunic dress – paired with pretty tights if you like your dresses super-short, or perfect over a miniskirt or leggings.
You Need: (more…)
Aug 16, 2010 | DIY, Life, Score!
The Competition is now LIVE on Cut Out + Keep!
If you have a project you’d like to enter into the competition, you can do so in 3 simple steps.
First head on over there to their homepage, click the “Sign Up” button in the right-hand box, and register with them first. (If you’re already a registered member of CutOutandKeep.net, you don’t need to re-register.)
Then upload a project once you’re logged in under the “Projects” tab. (Follow the rules outlined here – don’t forget you need to submit your INSPIRATION PHOTO as well for your project to be eligible for a prize!)
Finally, go to the Competition Page and choose which category you’d like to submit your project into
under “Enter the Contest” – the dropdown menus will automatically load all the projects you have on CutOutandKeep.net. Click “Enter” and your project thumbnail should appear soon after in the correct category.
That’s it! Good luck to everyone and we can’t wait to see what you come up with!
xoxox
Carly
Aug 15, 2010 | DIY
So I spent the majority of the day today working on a tutorial for upcycling yet another men’s shirt into something way cuter for the girls! I can’t wait to take the photos of the finished product to share with all of you.
But that got me thinking…a reader asked me on formspring.me to share some tips for working with men’s shirts…and so I thought maybe I should share with all of you how I choose my shirts to re-work, and some techniques I use when sewing them.
How to Choose a Shirt
First of all, I’m assuming that you are going to use a shirt that is not new or off-the-rack (right??). Using shirts that have been pre-worn for your re-fashions is one of the best ways to be eco-friendly, save something from being discarded and give it new life, and make a one-of-a-kind piece just for your very own. But it does pose some unique challenges.
*Choose a shirt that is NOT SEE-THROUGH.
Unless you’re planning on making a lining or always wearing your finished piece over something, you have to make sure that the shirt you choose is completely opaque, even when you’re standing in front of a light source. Many men’s shirts are made of “summerweight” cotton, which makes them very see-through if you’re not wearing an undershirt like a guy would be. TRY IT ON if you’re in a thrift store that has changing rooms; if not, place your hand inside the shirt. If you can see your hand, it’s a no-go.
Pilled fabric. These shirts can only be upcycled very creatively. img source
*Do not use a shirt whose fabric is thinning, pilled, worn, frayed, or with stains/holes.
The more times the shirt has been through the washer/dryer, the thinner the fabric will be. If it’s visibly in bad condition, adding seams and making it into a dress it won’t help the situation. Do not choose something that is stained or has rips or holes in it unless the final design will cover those areas.
*In the same vein, do not choose a shirt whose seams are pulling.
Even if the shirt looks like it’s in good condition, pull at the side seams. If the fabric pulls away from the stitching and you can see obvious/large stitching holes down the seam, the fabric in that shirt cannot withstand seams that take stress. Stitching (even re-sewing) such fabric will result in visible holes, if not the fabric tearing completely away from the seam. DO NOT USE.
*Choose a shirt that is LARGER than you are.
This is a no-brainer. You need the extra fabric to work with and to make the details (and especially in case you make a mistake!). In most situations, I choose a shirt that’s as large as I can find.
How To Sew a Shirt
(so it doesn’t look like a re-fashion)
The shirt in question (since it’s pre-worn) will also probably be pre-washed…if not, wash to remove the sizing using the hottest water recommended for the fabric, and dry it according to the directions.
*Use the same color thread as what was used to sew your shirt together in the first place.This is a little obvious. Bring the shirt with you to the sewing store and match the thread color visually.
*Use the same type of thread as what was used in the shirt.
I know it’s a hassle, but read the fiber content of the label and choose the thread accordingly to get the most professional results.
100% Cotton or Linen Shirt (a typical Men’s Button-Down): Cotton mercerized thread [size 50]
Cotton/Poly Blend Shirt: Cotton/Poly thread [size 50]
Rayon or Stretchy Shirt; Knit Shirt: Polyester thread [size 50]
Lightweight Silk Shirt: Silk Thread [size A]
*Use the right needle for the fabric.
Usually I’ll specify the type of machine needle needed in my instructions, but in case you’re using a different type of shirt than what the instructions call for, match your needle accordingly. Needle for knits = used for any knitted fabric. Needle for wovens = used for any woven fabric. Even if your woven fabric has a bit of stretch to it (like a cotton/rayon blend, let’s say), still use a needle for wovens. If you’re unsure how to tell the difference between a woven fabric and a knit fabric,
check out this easy explanation here. And learn how to choose the right size needle
here.

*Replicate the stitching in the shirt by practicing first.
Alot of my instructions for re-fashioning men’s shirts call for visible stitching, topstitching, hems, etc. To make sure the stitches you are adding to the shirt match those that are already there, practice on a piece of scrap fabric that’s similar in fiber content to the shirt. Adjust the thread tension and stitch length until your row of straight stitches looks exactly the same as the topstitching in the shirt. And don’t adjust your stitching beyond that – just leave your machine on that setting for the entire project.
And there you go! Hope that’s a bit of help – and just by following these simple rules on selecting and sewing shirts, you should have no problem creating a finished piece that rivals any ready-to-wear!
If anyone has any further questions on issues I didn’t cover, please leave them below in the comments section!
xoxox
Carly