Nov 28, 2009 | DIY

This was a lo-o–ooooong time in coming. Hope you guys didn’t get bored waiting!:-)

The highly, highly coveted Christian Louboutin for Rodarte spike heels – only sold for a short time at Christian Louboutin boutiques in Fall of ’08, never showing up at Net-a-Porter, not ever appearing on eBay. Victoria Beckham even stepped out in the gorgeous gold ones below. But how to get a pair for oneself?
 Source: StyleFrizz.com
 The RedSole version.
Of course, you could always fork over $188 for the black knockoffs over at RedSole (or here for the gold ones, pictured above). They’ve changed that texturized (Swarovski-encrusted?) area on the toe to snakeskin, and the heel isn’t as high or as skinny, but it’s a fairly good knockoff…if you want to pay $188.
(source: Fashion Mongers)
You could always DIY your own following the instructions at Fashion Mongers
here for a similar style also in the Rodarte line.
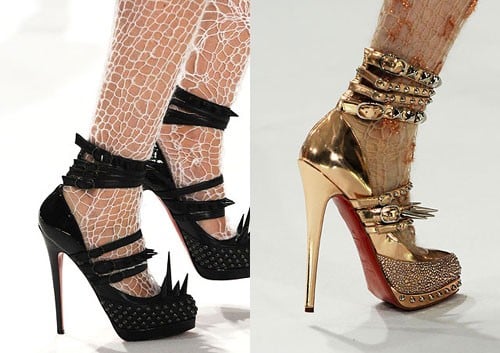
But I wanted the exact same style as the shoes above on the right, butin black- and I haven’t found
any DIY tutes out there on the Internet yet (correct me if I’m wrong!:-) So here ya go – step by step!
I have to break the process into multiple steps, since this is quite long though not excessively complicated. So, in 4 Parts:
To DIY Your Own Pair of Rodarte Spiked Heels You Will Need: (after the jump)
(more…)
Leave Comment
Nov 25, 2009 | DIY

While the economic news of the past couple of seasons has been somber & depressing, accessories have been anything but! Bold, funky, colored, and exuberant pieces crafted from unusual, low-end materials like plastic, acrylic have a larger-than-life 80’s feel but with modern, penny-pinching sensibilities – the perfect counterpoint to a sleek dress or structured, tweedy suit. Inspired by the likes of Marni and Alex + Chloe, we’ve put together this little D.I.Y. so you can outfit yourself with bold shapes cut out of shrink plastic and layered with mirror for the ultimate Eighties Revival Necklace.
This is what you’ll need:
*shrink plastic (found at the craft store or online at ShrinkyDinks.com; we chose the pack of Ultra Thick Misty White shrink plastic for about $7)
*sheet of cuttable mirrored plastic (craft store or online at Scrapbook.com)
*glue (like GOOP)
*jump rings
*chain necklace
*scissors
*sheet of cardboard (if using an oven to bake the shrink plastic), or a heat gun
*pen
*awl, thick needle, or other sharp instrument
*pliers

MAKE THE PENDANT SHAPES
1. Cut the shrink plastic into your desired shapes (such as randomly-sized triangles) to make pendant backings. Remember: Your plastic will shrink to about 45% of its original size – so cut almost twice as large as you want the finished piece to be!
2. Bake pieces in oven (or using heat gun) according to package directions.
3. Allow to cool. When cool, trace pendant shapes onto wrong side of a sheet of mirrored plastic.
4. Cut out mirrored plastic and glue onto shrunk plastic pendant backings.

ATTACH TO NECKLACE
5. Using an awl, thick needle, or other sharp tool (it works best when heated), poke a hole at the top of each of your pendant pieces.
6. Add jumprings and attach to chain necklace.
VOILA! A girl can never have too many shiny, mirrored things in her life! Pair over a white tee and some dark skinny jeans for a rocker, glam-girl vibe; layer under tangled chains and rhinestones for a Renaissance revival; or let it stand on its own as a statement necklace with a gorge printed wrap dress.
Rather not do all the cutting and baking yourself? Order your pendant pieces ready-made at Ponoko.com, where you can get your own sheets of mirrored plastic, acrylic, vinyl, or balsa wood lasercut to your specifications. String onto a necklace or earrings and enjoy your creation – or even sell your finished products through their marketplace.
TIP: Don’t be afraid to experiment further with shrink plastic! Besides making pendants, you can also form bracelets and rings, make tags and charms, craft buttons, curl it over while warm to create 3D shapes…the possibilities are only limited by your imagination. You can stamp it, paint it, airbrush it, lacquer it, decoupage it, marble it, or add crystals or heat-fix studs. It’s a really interesting medium that lends itself superbly to a variety of different designs – and allows you to mimic the look of designer accessories for very little investment.
Happy DIY’ing!
-Carly J. Cais, Contributing Editor
(as posted on FashionTribes)
Save
Leave Comment
Nov 23, 2009 | DIY
 Note: Though this is a somewhat long and rambling post about shoe adornment, I do include a quick-and-easy DIY for the shoe elastics above. Scroll down for the tutorial!

As evidenced by the above Polyvore I made, elastic-banded pumps are in, in, in! I love how the black stretchy part over the upper contrasts so sharply with a shiny patent.
But I get the weird feeling that these will also be passe in a couple seasons. What to do??? I love that in Japan they’ve taken the idea of shoe-adornment to a whole ‘nother level with shoes that feature removable bands so you can change up your look whenever you get bored.
 Even though the above shoes were in a magazine a couple years ago (!), you can buy the bands separately, in red, holographic silver, white, brown, gold, or black, for about $9 a pair here. If I started making sets – like a set of 3 pairs – and sold them for $12, do you think they would catch on in the States?
  The concept of shoe bands is kinda similar to shoe clips, but just…bands. If you opt to adorn the top of your boot, then maybe Bandits are for you! They carry a number of different styles, not just the Southwestern-inspired motif pictured above.
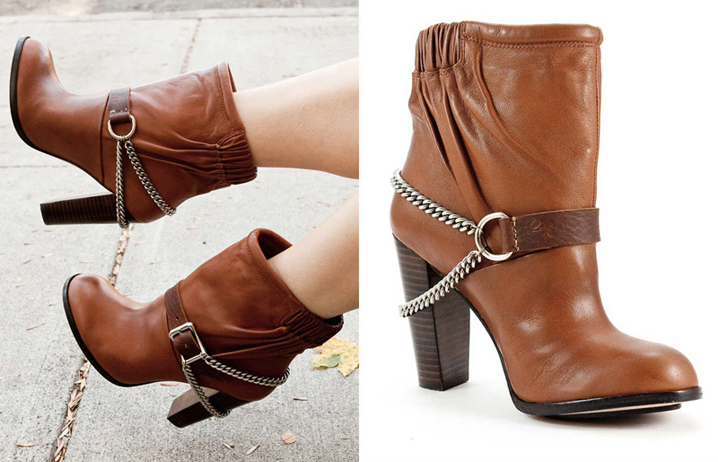 Bandit boot chains above. Adding to DIY list pronto.
Their boot chains are completely covetable, and a lookalike of
LitterSF‘s boot chains, only about $20 cheaper. But I digress.
Shoe bands! Right. So why buy when you can…
You guessed it!
DIY!
D.I.Y. Removable Shoe Elastics…Cause Why Not??!
(This is soooo simple!)
I have the skinniest, boniest feet ever. I know.
 You need:
*your favorite pair of heeled shoes
*about 8″ elastic
*sewing machine
*thread matching elastic color
(sorry, no photos…but you can definitely figure it out!!)
1. Start by puting on the pair of shoes you want to adorn with elastics. Wrap a piece of thick elastic around the upper part of your foot (halfway onto your arch). The band needs to go all the way around the pump and overlap about a 1/2″ on the underside, in front of the heel. Make sure it’s tight so it won’t slip down (just not too tight since we don’t want to crush our foot bones!).
2. Cut elastic to correct length.
3. Sew on a sewing machine – just reinforcing the overlap area on the elastic.
 See? The meeting of the two ends is at an angle – NOT straight on.
I’ve found they work best when the elastic overlaps at an angle – NOT one side meeting the other side exactly – to accommodate the curve of your foot. Repeat for other elastic.
Only really necessary for 1.5″ wide elastic like this; for the thinner types of elastic it doesn’t really matter.
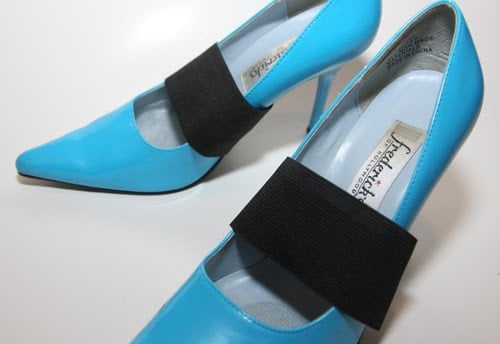 Presto! It’s like you have a whole new pair of shoes!
 And I also tried adding thinner elastic to the ends of silver vinyl belting for a different look…and sparkly silver ribbon for yet a third look. Both have thinner pieces of elastic sewn onto the ends of the contrasting ribbons. (The elastic is only about 1.5″ long in-between, for the underlay part and to allow the band to slide over the widest part of the shoe at the toe.)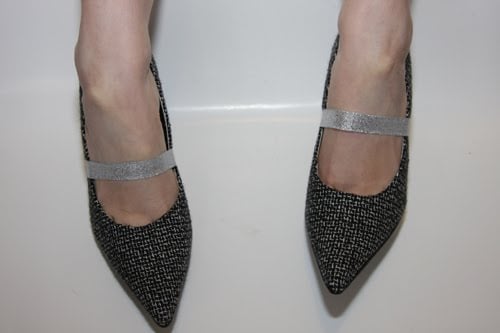
You could do virtually anything! Chain overlaid onto ribbon…frilly ribbon with grosgrain in the center…a line of sequins…anything at all!
Happy DIY’ing!
xoxox
Carly
Leave Comment
Nov 16, 2009 | DIY

 I became obsessed with making myself a Panja [i.e., back-of-the-hand jewelry piece] since seeing the above in Vogue October 2009. For all it’s highbrow designer, impossible-to-make-yourself fashion spreads, once in awhile the magazine showcases an idea that’s just mindblowingly awesome. How cool is this rhinestone-and-chain Alyssa Norton piece that the model above is wearing? (All her jewelry is really eclectic and covetable…to sum it up to its lowest common denominator, she likes wrapping silk thread around rhinestone chains; making rhinestones “cast” in metal and set into jewelry as if precious stones; barettes with dangling cords and rhinestones; and chain mail. Def. check out her site if you get a chance!)

But I’ve had Panjas on the brain since about 2005, when I saw the above Hahn An Su (sp?) design in a Vivi Magazine. I didn’t know what they were called then, but I definitely wanted one!

And then recently I saw this photo posted at Maverick Malone. She’s such a cool girl – and has great style – she just wrapped this broken necklace around her hand and wrist and called it a day. Love.
I don’t really know much about Panjas, so I am unable to educate anyone about them (and if they have religious significance I’m very sorry for my desecration and sacrilege) but….
Perhaps you can feel a DIY coming on?? LOL
I’m not paying $805 for the Alyssa Norton piece! So here’s the DIY:
How to Make a Panja [Back-of the Hand Jewelry]
You Need:*1 post rhinestone earring, pictured above (I used these earrings I got from Forever21 for $9.80)
*2″ flat silver curb chain
*1 small silver jumpring
*1.5″ wide x 8″ long piece of black fusible stretch mesh interfacing
*1 pair sew-on snaps
*needle + black thread (doesn’t have to be silk but can be if you like)
*pliers
*sewing machine
*iron
How-To:
1. Push the earring post through the center link in your chain piece. Using pliers, bend down and around the chain so the earring is secured and there’s no scratchy post end sticking out.
2. Wrap the chain around your index finger – cut to size. Secure with a jumpring.
3. Fold both long sides of mesh interfacing in towards center. Fold again in the center so you have a long rectangular strip with all raw edges enclosed. Iron flat – the heat of the iron will fuse the mesh together.
4. Sew along long edge of mesh to secure the folds you made.
5. Fold each shorter end over and secure with hand-stitching.
6. Place earring flat and stitch bottom rhinestone dangle to center of black mesh. This is the tricky part – you just need to weave in and out of the rhinestones with your needle, securing them both together and down. You don’t want the rhinestone dangles to move too freely across the back of your hand – so sew together inbetween the settings, and be carefuly of the thread catching on the rhinestone prongs.
7. Wrap the thread around the black mesh for a textural effect. (Here, to make it exactly like the Alyssa Norton piece, you can smudge silver fabric paint at intervals onto the black mesh, and decorate with rhinestones. I chose not to because I wanted more simplicity.
8. Hand-stitch a snap and its counterpart to each end of the black mesh.
You’re done! Super-easy, right???
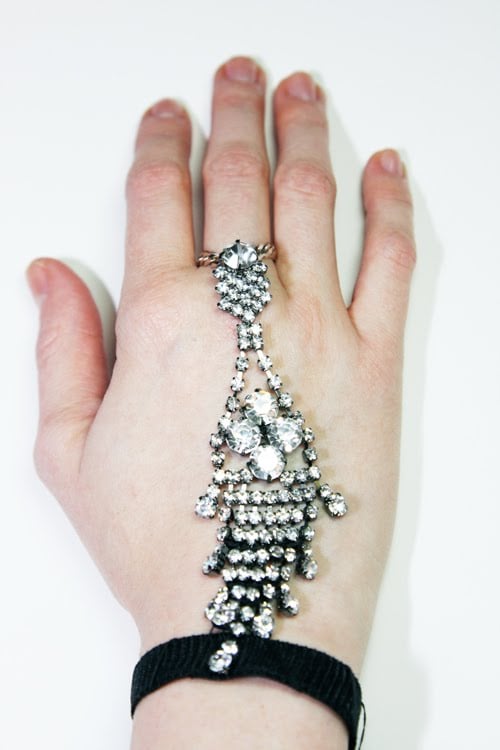
Feeling the backs of my hands are sad and naked now without my Panja….
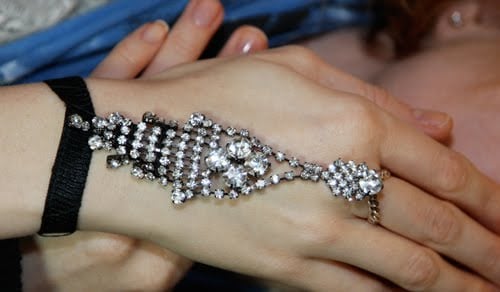
Happy DIY’ing!
xoxo
Carly
Save
Leave Comment
Nov 15, 2009 | DIY, Fashion, Media

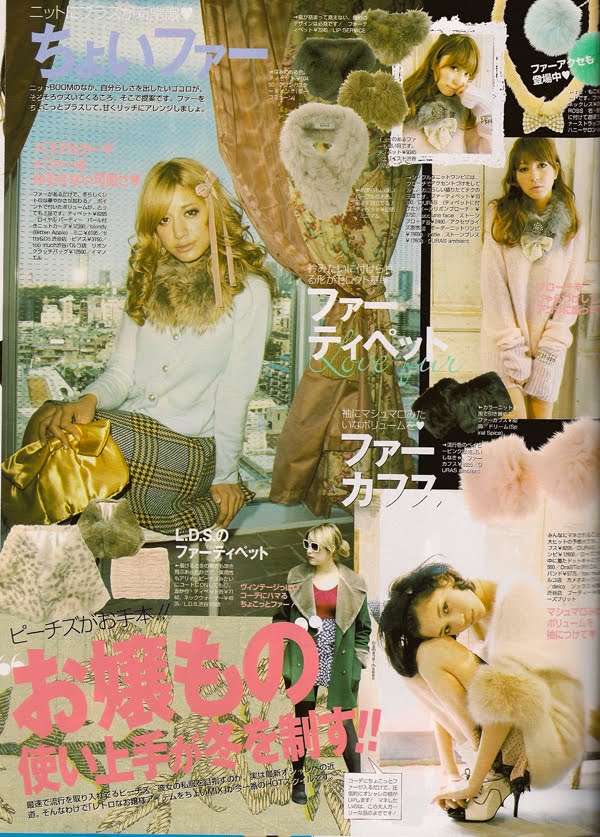
I’ve written before about how much I adore Vivi [a monthly Japanese women’s Magazine published by Kodansha]. It’s so jam-packed with trendy, opulent items – the styling is always spot-on – the girls are gorgeous…AND many of the pieces featured start my styling and DIY wheels a -spinning.
 Case in point: this studded black cardigan! Totally DIY-able…just pick yourself up some heat-set square studs from Kandi Corp (or your local craft store if they sell that kind of stuff…FYI Jo-Ann’s and Michael’s DON’T!) and jazz up the button plackets and front pockets with a line of studding. But this was from the November issue of Vivi…so let’s move on to the December one.
 How cute is this? Jazz up a plan black sweatshirt or sweater rolling around in your closet with sweet little bows in every color of the rainbow.
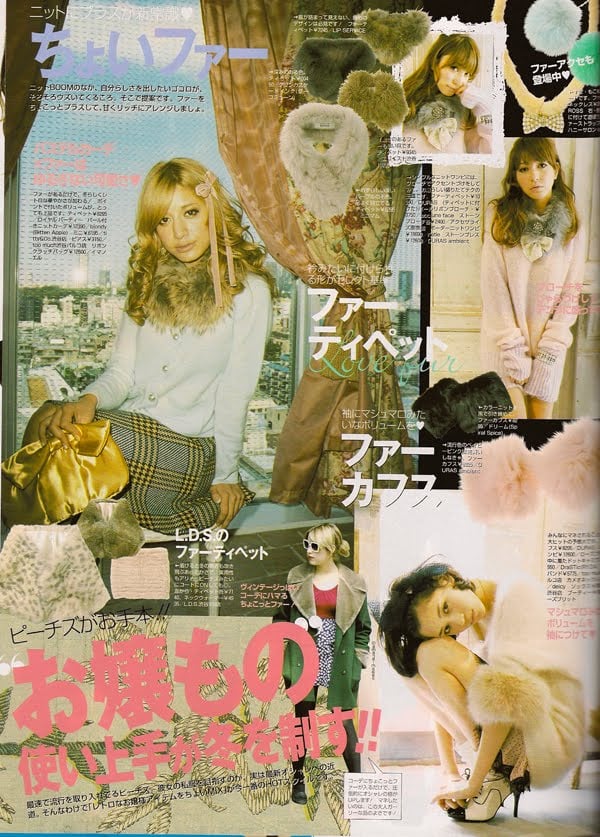 For winter, try adding a bit of fur [faux!] to an outfit – like with a ribbon-tied collar or puffy removable cuffs. Boudoir-feminine.

How cool is the
chain-adorned jacket on the top right? Totally DIY it!
 I DIED when I saw this spread: 5 items [print tee, leopard scarf, studded cardi, lace gilet, slick leggings] on sale from 10/23 for 10,500 yen!! [About $110.] From Spiral Girl, one of my favorite brands. *sigh* Will likely be sold out by now – and I totally would have rocked this every day as my go-to outfit this winter. Curse those fools who wait an entire MONTH before shipping Vivi to the U.S.!!! Would that I had knooooo–o-ww-wwwn!
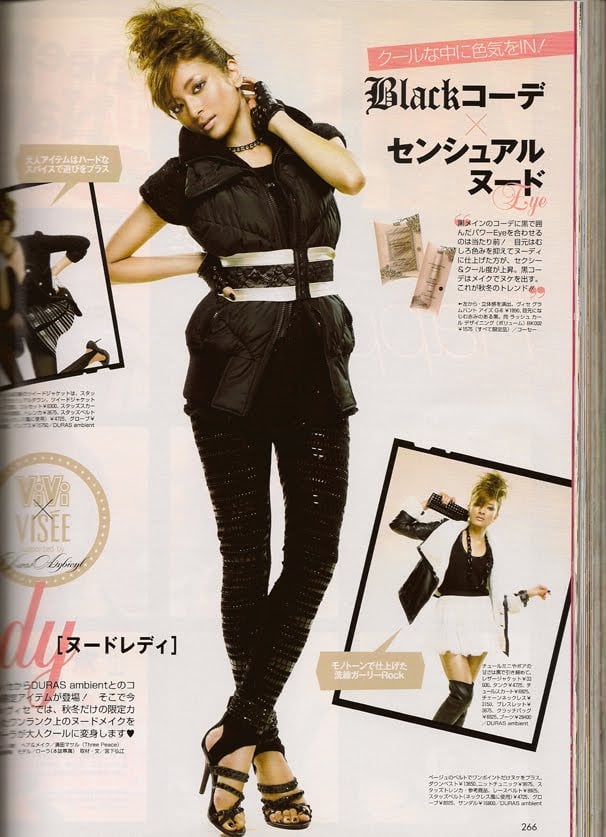
I’ve never seen anyone wear
a corset belt over a ski parka…but she looks undeniably chic
…and not at all bulky here.
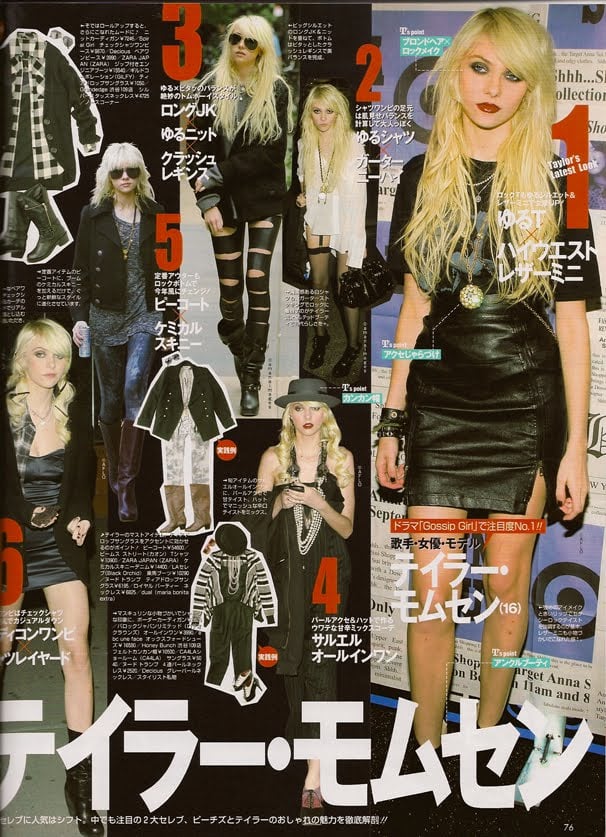
This was a spread where they showcased Taylor Momsen’s style and Peaches Geldorf’s style. Taylor’s looking pretty fierce and fabulous. (We’ll skip Peaches hahahaha.)

This
little striped shirt under a poufy black dress with bow at the back + red beret [upper right] screams Parisian-chic to me. Maybe I’ll just start with the red beret.
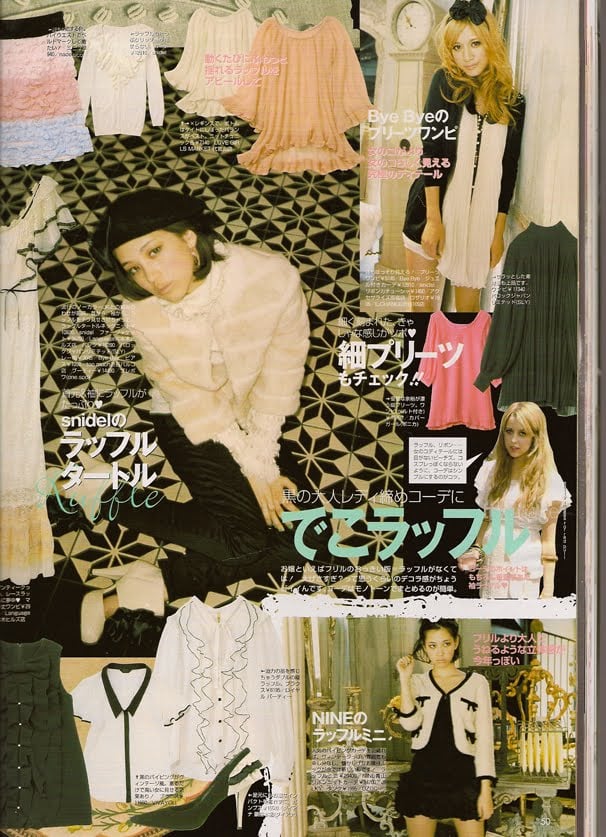
Girly, ruffly, chiffon-y finds.
Love.
 Fabulous
 idea: a removable, ribbon-tied,
embellished collar.
Slip over a tee to jazz up a basic outfit. Totally DIY-able.
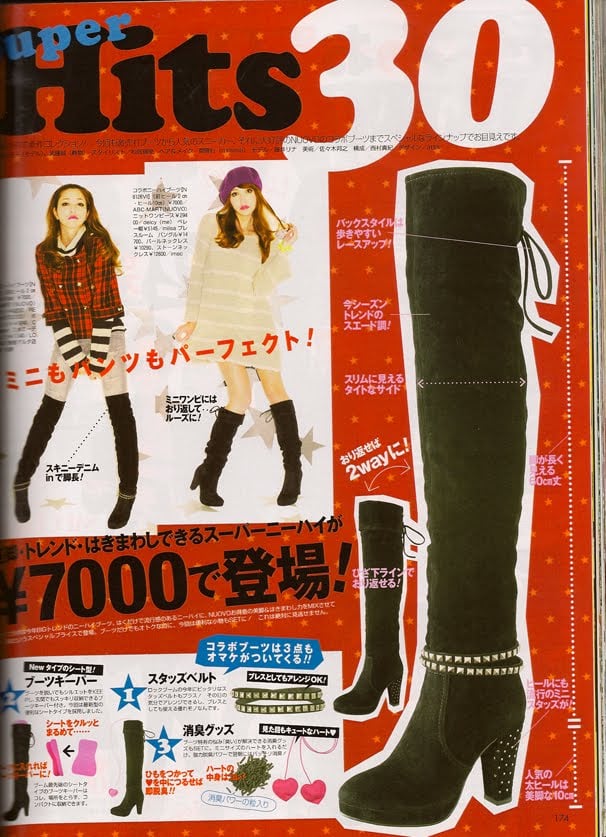 I’m in love with these shoes. Suede, over-the-knee, cuffable, and with removable studded ankle belts and chunky studded heel for 7000 yen [$78]?? Me WANT!
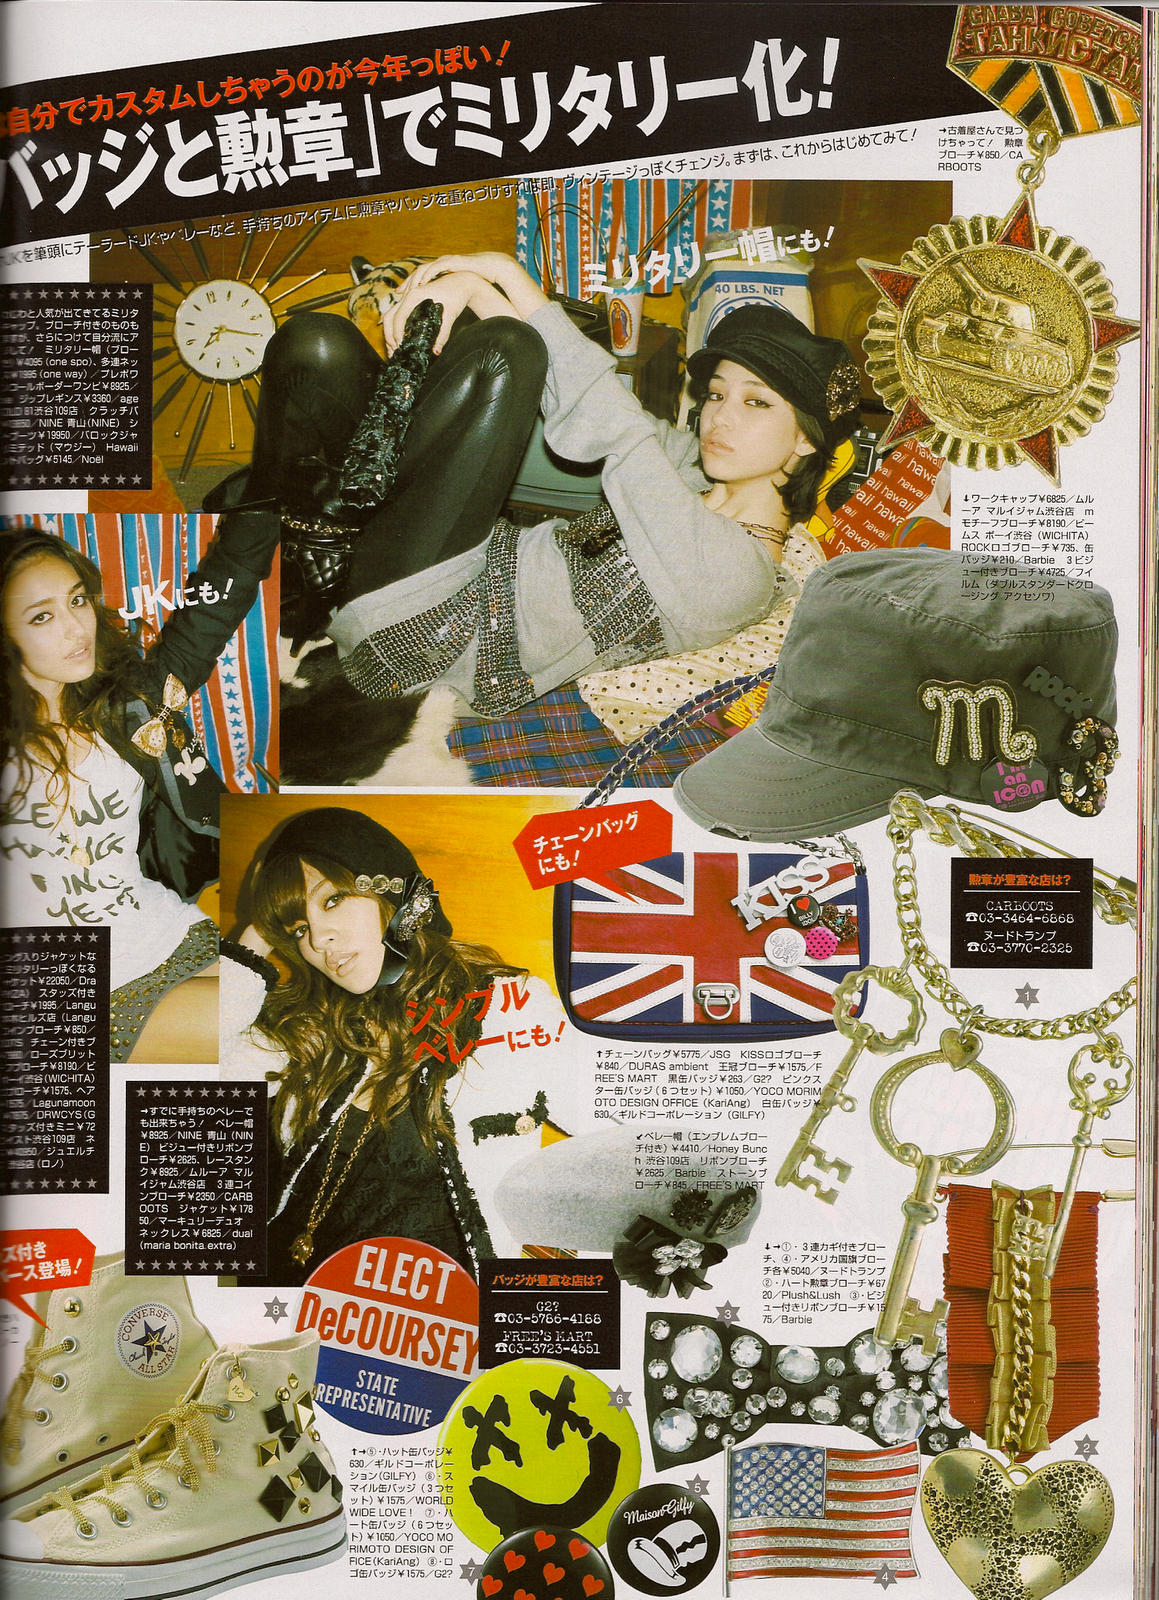 Studded Converse
? Check. Cute
military accessories? Check.
Rhinestoned-bowtie? Check, check, and CHECK!
Hope this has given you some ideas!
To see more from this issue check their homepage out here. (Rollover the Table of Contents page and you’ll see clickable items where you can click and view the pages if you can’t read Japanese.)
Happy DIY’ing!
xoxo
Carly
Leave Comment
Nov 13, 2009 | DIY
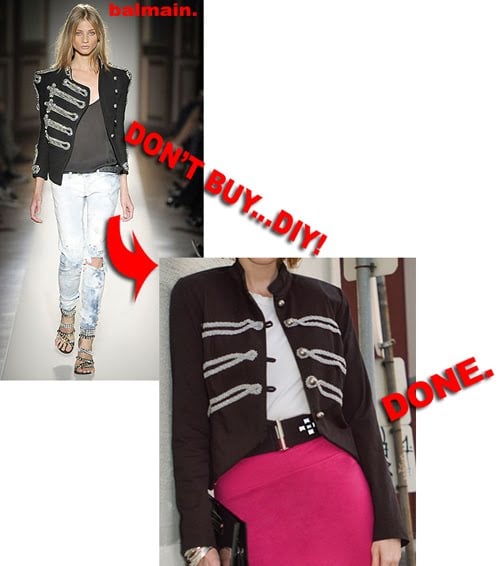
As you may have seen in my most recent entry for America’s Most Stylish Blogger Competition (I’m getting a little tired of writing that by now;-) All the shameless self-promotion is wearing me down!), I styled the hot pink miniskirt with a DIY band jacket that I made from a jacket I already had in my closet.
No joke! Here’s the DIY:
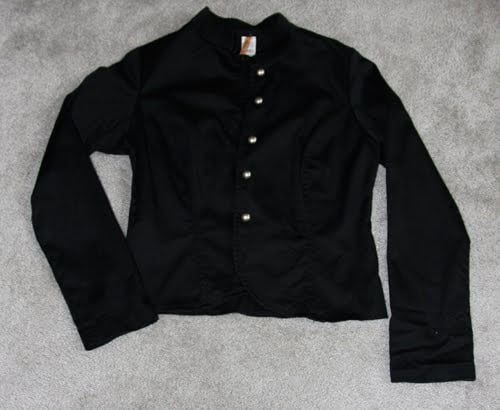

1. Use a jacket that is a shorter length with a little mandarin collar or similar collar to what you want your final jacket. (A boxy shape and flimsy material for the jacket is best!)
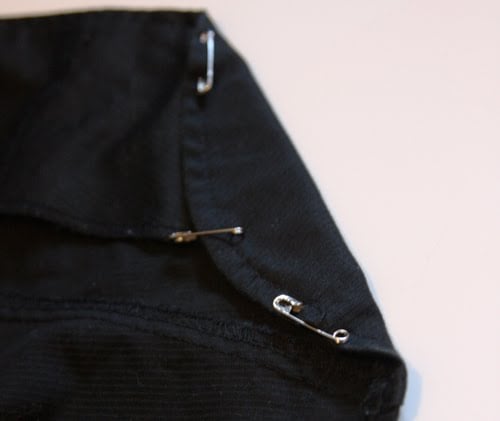 The underside of the pinned edge.
2. Pin under your hemline, using safety pins, to create that cutaway band jacket shape. Iron if you want to create a crisp, sharp edge.
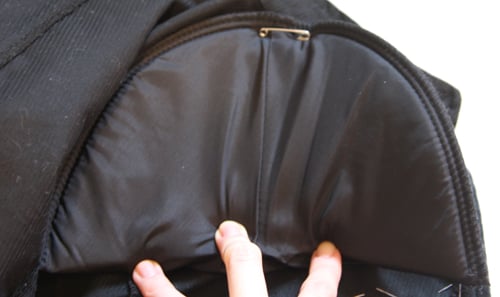 3. Pin shoulder pads inside the shoulders, using safety pins. (I used foam Dritz ones in Large that I got at my local Jo-Anns. Alternatively, you can rip them out of a jacket you already have – but you need them big to create that strong structured shoulder, so double them up if you can!)
4. Sew decorative trim onto the front of you jacket in scalloped curliques. (I just used matching thread and long basting stitches. This took awhile, but wasn’t very difficult.)
The inside of the jacket showing my basting stitches.
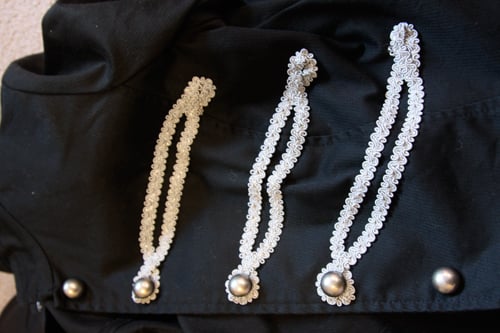
The trim on the outside encircling the buttons.
5. Optional: If you want, to create more of a “couture-looking” line below the shoulder, take in the sleeve in the upper arm area a little. (By sewing a line inside the sleeve seam line in the upper arm area.) This will make your shoulder pads “pop out” and give it that Balmain-look. Ideally speaking.:-)

PLUS, once you get tired of the look, remove your safety pins and shoulder pads, cut your basting stitches, re-iron your hem and your jacket is back to the way it was! *sigh* Multiple options in the same garment are just so, so lovely.
Happy DIY’ing!
xoxox
Carly Multifunctional Cais
Save
Leave Comment