Mar 1, 2012 | Beauty
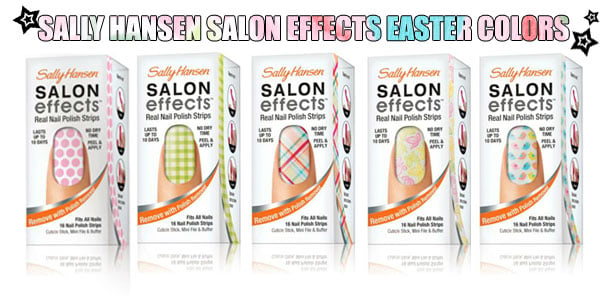 I’ve been enjoying Sally Hansen Salon Effects Nail Polish Strips for awhile (mostly in the pretty glitters they offer!) – and was pleased to see that they’ve come up with some great new patterns, just in time for Spring!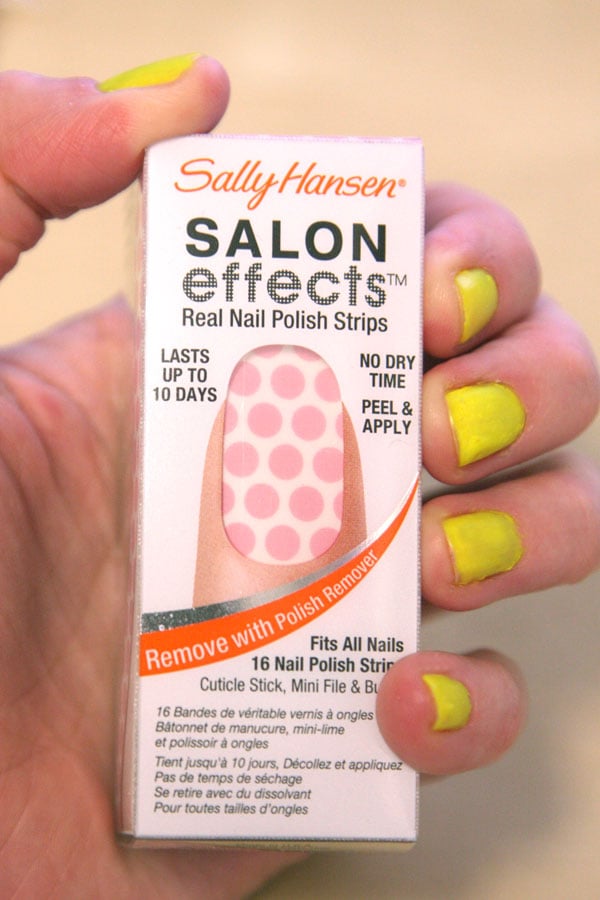
I picked up the pink polka dot pattern (“Pink-A-Dot“) the other day – and as soon as my fluorescent yellow mani needs replacing, I’ll be trying this one out! (which will probably be soon…ahem)

photo from my January review last year
The review I posted of them when the original colors came out last year garnered a lot of interest; if you’d like to check out the post to see the step-by-step, you’ll find it here!
What do you guys think? Any pattern/color strike your fancy?
…And if you’re looking to buy them, you can find them at Walgreens, Target, CVS, and other drugstores nationwide…as well as online at Ulta.com!
xoxox
Carly
flower texture source; product collage by me.
~If you liked this post, please share it!~
Leave Comment
Feb 27, 2012 | Beauty, Fashion
 Do you use a flat iron to straighten your hair?
For the longest time, I didn’t…not until my late twenties, at least. In fact, I was mostly just a get-out-of-bed-pull-my-hair-into-a-ponytail kinda gal. It’s only as I’ve gotten older – and begun to look at myself and how I look as a complete picture, that I finally realized that the make-it-or-break-it component to any stylish outfit is what you wear on your head. Yes folks (as probably everybody else already knows;-) it’s your hairstyle (or lack thereof) that truly ties everything together and makes your look chic…or not. So I’ve added flat ironing into my repertoire of hair styling techniques, and as my hair’s growing out longer, there’s a lot more to play with. So awhile ago I bought myself a $29 iron (a national, well-known brand) from my local discount store, thinking that there was no reason to spend money on what was the equivalent of just a couple of hotplates stuck on a pair of tongs. Boy was I wrong. (more…)
Leave Comment
Feb 11, 2012 | Beauty, Fashion
 img source
If you celebrate V-day with your significant other and want to look your best on the big day…here are a couple tips for romantic makeup, hair, and outfits. With just a little bit of effort, achieving the whole package just got a little easier!
MAKEUP

A great look starts off with your face – and what better way to find inspiration than a slideshow of different romantic looks from Refinery29?
HAIR
 From Nicholas Penna, Jr., owner and lead stylist at SalonCapri in Newton and Dedham:
The Sock Bun: Start by blow-drying hair with a natural bristle brush; once hair is dry, apply a dime-sized drop of smoothing serum to the shafts and ends of hair. Using a fine-tooth comb to smooth out bumps, slick hair back into a high ponytail at the crown of your head and secure it with an elastic. Cut off the end of a clean, unwanted sock (where your toes would be), and roll it up into a donut shape, placing it around the base of the ponytail. Tilt your head slightly forward and spread your ponytail evenly around the sock so that half of your hair is toward the top of the sock, pointing toward your forehead, and half is at the bottom, pointing toward your back. Use a second hair elastic to wrap and secure hair around the outside of the sock, creating a ballerina-bun at the crown of your head. Twist remaining hair in one direction and use bobby-pins to tuck and clip the ends underneath your bun. Finish with a light application of hairspray.
Sleek, “Wet-Inspired” Hair: Start by combing through wet hair with a wide-tooth comb to remove tangles, and add a walnut-size dollop of styling balm to the top half of wet, tangle-free hair. Brush your hair towards the back of your head with a fine-tooth comb and secure it tightly with an elastic. Twist hair gently, and wrap it into around the base of the ponytail to create a round bun. Use bobby pins to secure the end of your ponytail and tame fly-aways. Run a fine-tooth comb through the top of your hair up to the bun to smooth over any bumps, and finish with a generous amount of an extra-hold hairspray.
Bouncy, Volumized Hair: Start with a classic blow-dry using a round, natural bristle brush and a palm-full of volumizing mousse. Once hair is dry, add volume to the top of the head by teasing the hair using hairspray and a round brush. After desired volume is achieved, curl hair away from the face from end to root with a large barrel (2″) curling iron.Using a dime-sized drop of smoothing serum, rub your hands together and gently run your fingers through the curls to separate them. Finish the look with light hair spray and you’re red carpet ready!
Smooth and Sleek Hair with a Center Part: Start by parting wet hair directly in the center of your head using the edge of a fine-toothed comb. Dry hair with the nozzle attachment of your blow-dryer, and a natural bristle brush, pulling hair and the dryer downward to smooth out hair. Apply a pea-sized drop of smoothing serum from the shafts to the ends of your hair. Run a straightening iron through your ends to straighten out any waves and voila, you have a classic look for day or night!
OUTFIT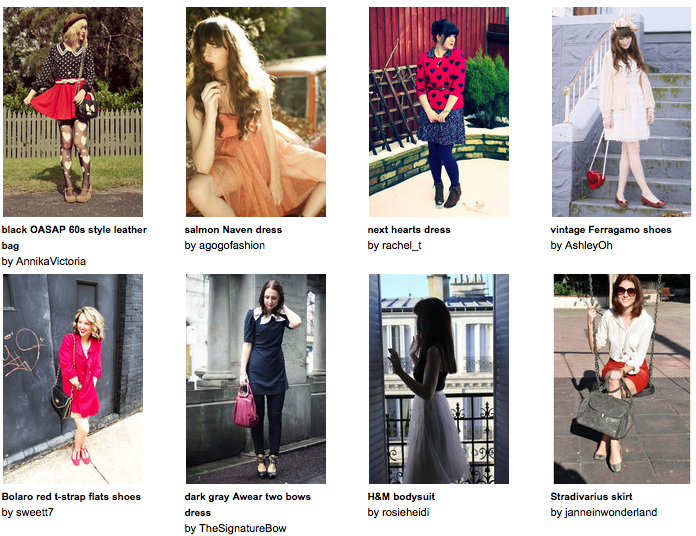
Need some ideas for what to wear on your hot date? Want to go beyond “sexy and red?” Try checking out looks that other stylish ladies on Chictopia have put together:
HANDMADE GIFTS TO GIVE
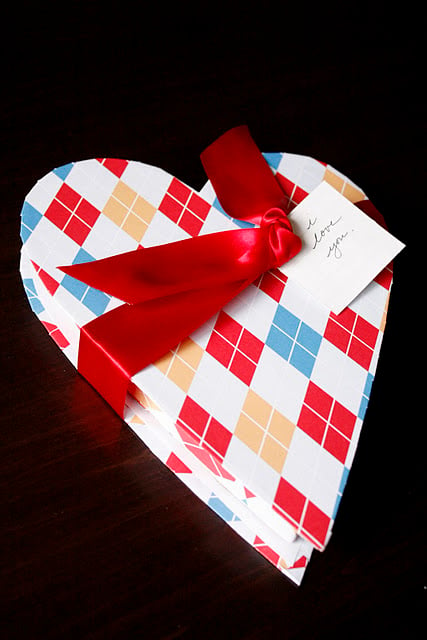
And if you’re still stuck for a gift, try out this handmade chocolate box from Delia Creates:
or this geek-chic Lego heart necklace from Iridium on Karmaloop (try a DIY if you have the parts!):

or a whole bunch of ideas of what to craft for your guy over at Dollar Store Crafts (heart-print boxers from ILoveToCreate.com):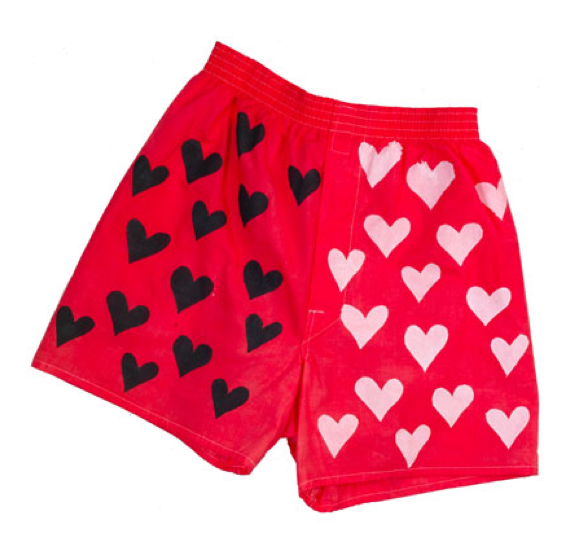
Hope that gives you some ideas for the Day of Love!
Happy Valentine’s Day to everyone!:-D
xoxox
Carly
~If you liked this post, please share it!~
Leave Comment
Dec 14, 2011 | DIY
 I don’t know about you, but I have a lot of trouble drawing straight lines with my non-dominant hand. Whenever I attempt some nail art with straight lines, my efforts on one hand turn out perfect, and the other hand looks all wonky and wiggly. I figured a template or stencil would be the best way to combat this – so I thought why not DIY? These candy cane striped nails are actually a cinch to do, and if you’re using sticky color dots (found at any office supply store), they’re also cheap! No striper brushes or special nail polish required. Here’s how:
You Need: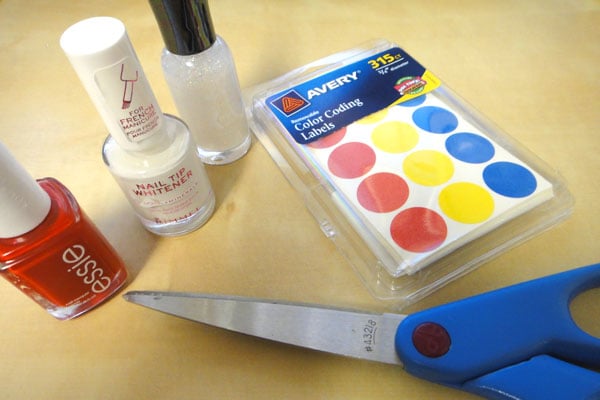
*sticky dots (or you can using sticky labels, or even tape…anything that will stick to your nails will work)
*base nail polish color (I’m using Essie’s Russian Roulette from my Secret Santa Miranda from the Portland Blogger Meetup)
*contrast nail polish color (I’m using white, from a Rimmel French Nail Polish Set)
*glitter nail polish/topcoat (I’m using Sally Hansen Hard as Nails in Disco Ball , which contains little holographic flecks)
And…
*scissors
How-To: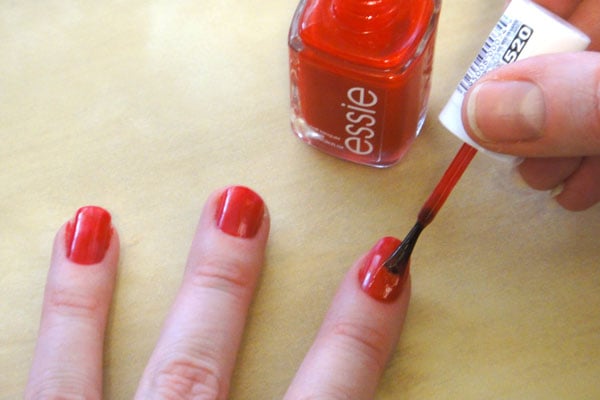
1. Paint the base color onto your nails. I had to do two coats to achieve uniform coverage. Allow to dry completely before going on to Step 3). (I couldn’t wait, so ended up making things a bit messy.)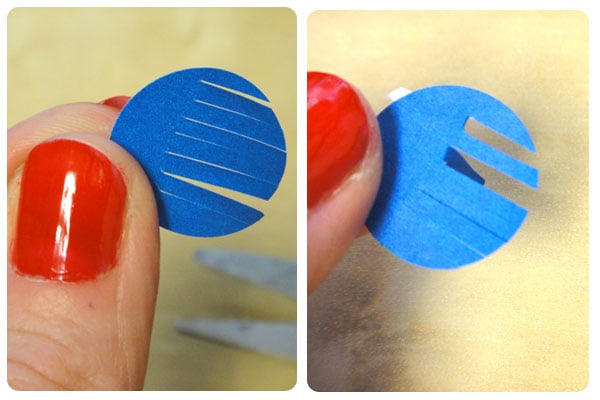
2. Remove 5 dot stickers from the package. Cut each of them into a fringe, stopping the cuts before the edge of the circle. 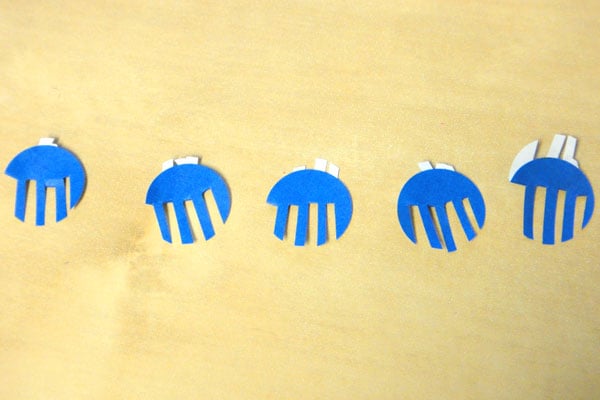 Fold every other fringe strip under itself…this will become the stripe stencil for your nails.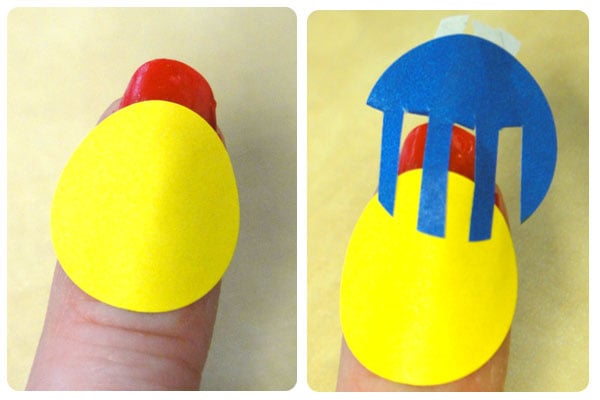
3. After your base color is completely dry, place the dots onto your nails, positioning the stripes how you like. For my shorter nails I made my stripes diagonal, like a candy cane, and for my longer nails I used an uncut dot to create the curve of the tip, and then placed the cut dot with the stripes going up-and-down on the tips only. Have fun with it and mix it up!
4. Use your contrasting color of nail polish to paint the stripes. You may have to do two coats for complete coverage. Make sure the stripes are strongly stuck onto your nails or else you’ll get leakage around the edges!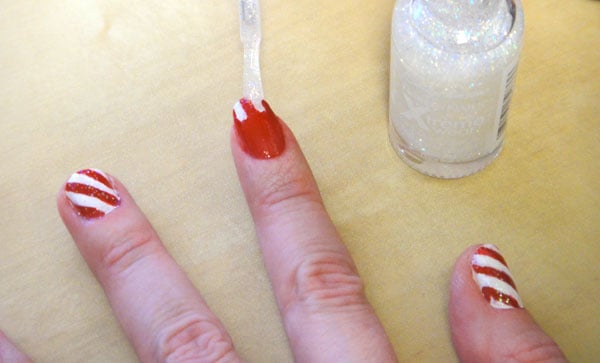
5. After the polish is dry, remove the stencils and finish with a swipe of glitter.
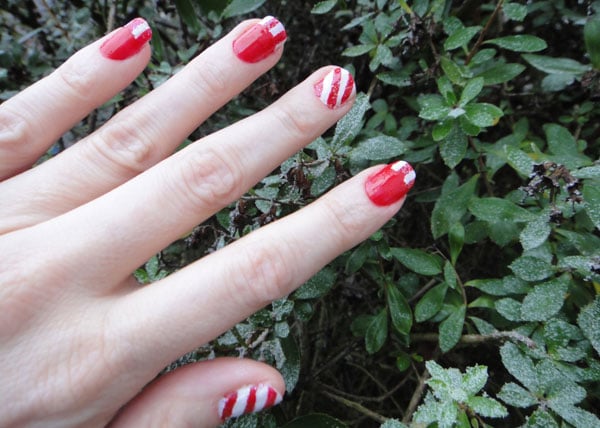
Now if only I had peppermint-scented nail polish…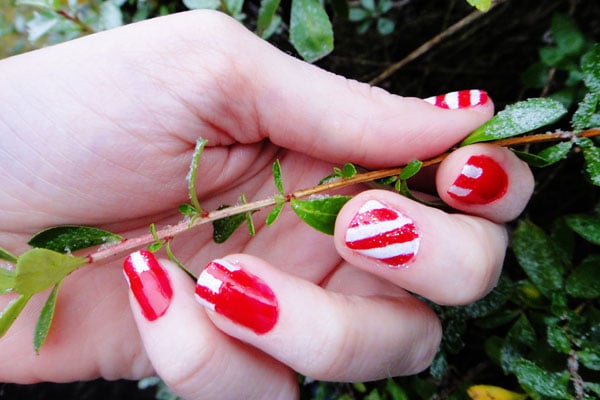
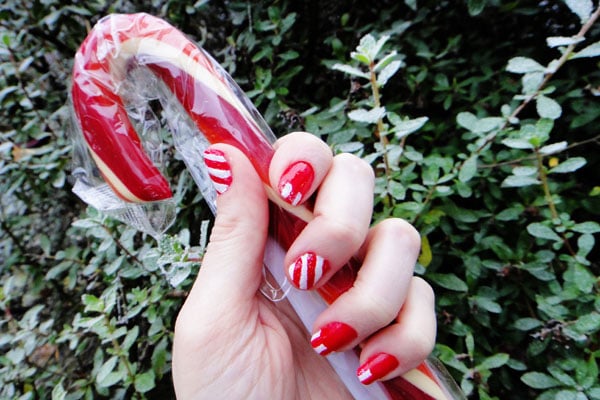 Happy Holidays, everyone!
xoxox
Carly
~If you liked this post, please share it!~
Save
Leave Comment
Oct 31, 2011 | Beauty
 In honor of Halloween, I tried out my new Mia Secret Crackle Nail Polish in black
 , over a coat of a light baby blue (Sally Hansen). The effect reminds me of a turquoise snakeskin…or black spiderweb netting over my nails. MIA Secret is a lot cheaper than OPI, too – at around $4 for the polish + shipping from Amazon.com. I think the crackle effect would be different if I stroked the polish from side-to-side over the nail too!
 I totally love this effect!
Happy Halloween to everyone! Hope it’s a great one~
xoxox
Carly
~If you liked this post, please share it!~
Leave Comment











