Jul 3, 2010 | DIY, From You
from formspring.me:
hey carly! any advice on how to diy this dress? http://lookbook.nu/look/813921-Romantic-floral-dress-and-Balenciaga Thanks!
Hi there!
I’m having a lot of trouble seeing the dress up close from the photo. It looks like a simple tube dress – but could it be constructed from multiple tiers of fabric? If you are wanting to create those tiers (i.e., likely a single piece of fabric with horizontal pleats) this is an extremely time-consuming piece. You could do this one of three ways:
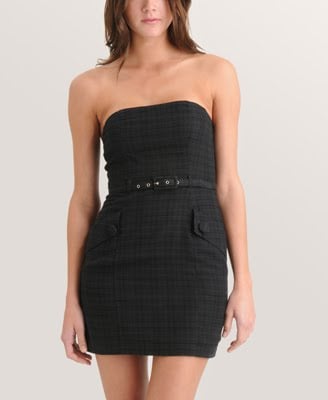
1) [USING A BASE DRESS] Take a similar, well-fitting, cheap woven tube dress, like something from Forever 21, (like this plaid dress, above) and use it as the basis for your pattern. Rub off the shape for the front piece and the shape for the back piece onto a piece of paper. Then cut your paper horizontally in to 1″ increments. Add 1″ in-between, taping in more paper. Add the proper shape of the seam allowance to the edges to allow for the under/overlap of the pleats. Do the same for front and back pieces. Trace onto floral fabric, marking the bottom of each of your original 1″ cuts. Then pleat at those marks, pressing with an iron to set the pleats. Sew fabric pieces onto your Forever 21 dress.
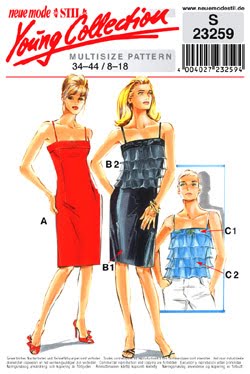
2) [FROM SCRATCH] Alter a store-bought pattern in the same way as above to the outer pieces, cutting horizontally, adding paper, fixing the seam allowances, tracing onto your outer fabric, cutting, pleating, and pressing. You would make the inner (if there is one) exactly as in the pattern, and join the outer to the inner.
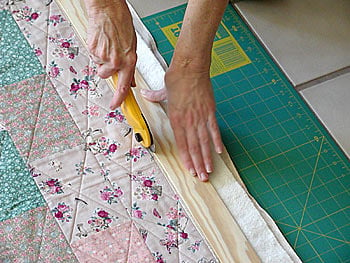
3) [NO PLEATING] Or, alternatively to not use a single piece of fabric, you could take a piece of that floral print, and cut it into 3″ horizontal strips (you’d need at least 28 strips, judging by the photo, and you’d have to adjust accordingly to how long you want your dress). Then you’d have to fold each strip in half vertically, and press that crease flat. Then you’d have to sew each piece onto your cheap Forever 21 base dress, starting at the bottom, going all the way around, and overlapping the strips vertically by 1/2″. Where they meet in the center back you’d have to leave about 1/2″ unsewn to either side of CB, trim and fold the sides of your strips under themselves, and then topstitch to the CB, and to either side of the zipper once you get to that point.
However you do it, you’re looking at hours of tedious precision work. The best fit will be accomplished by option 3).
If you just want a floral tube dress and don’t care about the tiers, you can just cut up a similar store-bought floral dress and anchor the top with elastic to keep it up. Or you could make one from scratch with a store-bought pattern.
Hope that helps!
xoxo
Carly
Jul 2, 2010 | From You
from formspring.me:
Carly, I need your help! I have a job interview for a teaching position in Japan for next year, and one of the school’s American teachers told me I need to go and buy clothes that are stylish, professional, and designer but I’m such a tight budget I can only spend a few hundred on work clothes and fun clothes. Suddenly everything I own (even my street clothes) seems not trendy or awesome enough for Japan! Where do you suggest shopping in the US?
Well, first of all, it goes without saying DO NOT GO AND BUY ANYTHING UNTIL YOU HAVE THE JOB!!! Please!! Save your money until it is certain.
Secondly, are you going to be there for an entire year without returning to the US at all in the interim? Will you be able to go there, see what the dress code is, and return to the US to shop? Do you have someone stateside to ship you boxes of clothing or shop for you once you’re gone? (Unfortunately now there is no Sea Mail anymore – so sending boxes to Japan is horribly expensive…but perhaps a necessity if you end up going and needing something sent afterwards. Believe me, I’ve done that more times than I care to count!)
If you do get the job, first of all I’d recommend having enough undergarments in your size. Unless you have an Asian body – you’re going to run into fit issues, even if you are slim and petite enough to fit into Japanese sizes. (Bras constructed for the Asian market are made to fit bodies that are flatter, with the breasts spaced further apart on the ribcage and a higher armscye – a fact that PeachJohn [the equivalent of Victoria’s Secret in Japan] boasts on their catalog pages/website addressing why Japanese girls should buy their products instead of those made by Western companies.) Victoria’s Secret does sell in Japan – but the prices and shipping are more expensive than in the U.S.
PeachJohn’s explanation of how bras are made differently for different body types in different markets.
Figure on the left is a Western body; figure on the right is a Mongol body.
Also, trends and fads come and go in Japan like that. If you can fit into Japanese sizes, I’d highly recommend you shop there after you arrive to purchase things you feel are trendy, chic, work-appropriate, and fit into your budget. I’m not sure where you’ll be living, but if you’re in Tokyo, my favorite places for trendy stuff is Shibuya-109 and Free’s Mart in Jiyuugaoka; and LaForet Harajuku, Marui City, and beams (Shibuya) for more upscale chic items. Office attire (like suits) can be amazingly expensive but can also be bought at any department store – like Marui – and they do offer tailoring services.
If you do not fit into Japanese sizes (i.e., you’re taller than 5’4″ and larger than a 4/6) – then I think the most cautious approach (so you don’t use up all your hard-earned money) is to find out the dress code from a future colleague or the teachers’ liaison at the school. (Not the person who told you to wear only designer – though I can’t speak to that particular school’s dress code, if that’s a recommendation of what you have to wear in Japan to look “professional” in general, then that person doesn’t know squat!) Bah. You can wear any type of clothing, any style – and look fine! (You’ll probably be surprised at what looks “professional” depending on the profession and the workplace.) As a foreigner you’re automatically in a class by yourself and are thus quite exempt from stranger’s judgments on how you dress. (Within reason.) The only question is dressing appropriately for the job – in which case I think only the people working there will be able to enlighten you as to what works.
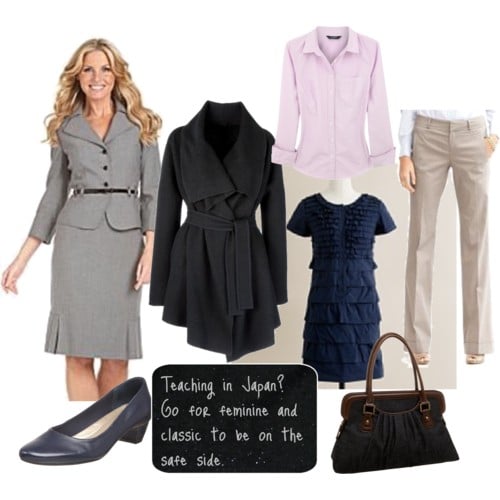

Teaching in Japan by carlyjcais featuring J Crew
Many online stores will ship to Japan (though for a hefty fee) if you’d feel more comfortable shopping after you arrive. At the very least, if no one can offer advice (though I’m not sure what type of teaching job it is or where), I would arm myself with one skirt suit, just in case (I like ones from Victoria’s Secret, J. Crew, Spiegel, Newport-News, Banana Republic, and Ann Taylor; department stores like Nordstroms, Dillard’s, Marshall’s, TJ Maxx, Burlington Coat Factory, and Macy’s will also have some great, affordable choices); a button-down shirt in a solid feminine color; low-heeled, extremely comfortable shoes for the TONS of walking you will do there (and any extra shoes if you do not fit into a 23.5 – 24.5 regular width shoe…i.e, size 6.5 – 7.5 which are the standard sizes routinely available in Japan); a comfortable dress (maybe a low-key print?) and a cardigan to go over it – i.e., no bare shoulders!; a bag with multiple compartments that you can lug around all day; and a pair of crease-front pants in a neutral color. (For all I know you may be teaching at a completely casual place where the teachers show up in polo-shirts and shorts!!) Nothing has to be designer; pick black and you can’t go wrong; stay away from busy, bright prints or loud colors; have a good coat to last you through the winter…and everything else can be bought there. (Hose; handkerchief; gloves; scarf – even shoes etc.)
Hope that helps and best of luck!
xoxox
Carly
imgs in compostie from magicaljapan.co.jp; breakthroughlearninganddevelopment.com; luggage.com; composited by me
Leave Comment
Jun 28, 2010 | Beauty, From You
from formspring.me:
Hi Carly, I really love you blog. Been reading it for a while now and you always manage to inspire me into new sewing projects! I have a little DIY question for you… I’m shaving my head for charity in a couple of weeks and as I will be pretty much bald
Hi there! Can you continue your question in the comments to this post? The question got cut off by formspring, as you can see!
Thanks-
Carly
Leave Comment
Jun 25, 2010 | DIY, From You
from formspring.me:
Could you do a tutorial on how to make one of these headbands?
That’s an easy one! They’re exactly the same principle as the instructions for making the main fabric part of my DIY Jennifer Behr Spiked Turban, except these headbands use a slightly wider piece of fabric, folded over and knotted in the middle. (You don’t need to do an underpanel like in the Jennifer Behr turban; that was merely to protect the forehead from being scratched by the spikes. For this version, “fluff up” the center knot to give it more volume so it doesn’t cinch the fabric too tightly.) To me – it looks like one of the headbands is a stretch black velvet, but that could just be the lighting. Definitely use a piece of fabric that has some stretch to it (i.e., lycra).
Hope that helps!
Have fun making your own-
xoxox
Carly
Leave Comment
Jun 25, 2010 | DIY, From You
from formspring.me:
Hi Carly – I recently discovered your blog and I love it! You are doing a great job. I have a question – as you love DIY and fashion, I am curious if you could tell us about your wedding dress! Hope you have a great day, Liz
Hi Liz! hehe, you make me blush.:-) My wedding dress…well, that was an attempted DIY if you want to hear the story…
Ever since I was a kid I was sketching what type of wedding dress I would wear when I was all grown up and getting married. I sort of knew even then that I wanted to design my own, because since I’m such a cheapy I would never be able to stomach the immense guilt over spending thousands of dollars on a single piece of clothing to only be worn once. (Unless I became a movie star and my priorities changed!) Once I hit my mid-teens, I had kind of settled on the design: form-fitting, fishtail, long silvery-satin with a low-cut back.
But then I did get married – Hub and I married in a civil ceremony when I was 26. We both wanted to take some time and plan a beautiful wedding, we wanted to save up some money, and we wanted both our families to be in attendance, and it just wasn’t possible at the time, so we made it legal but put off having an “official” wedding until the timing was better. Then, a year later, I found out I was pregnant, and suddenly we had to plan a wedding super-quick since I refused to walk down the aisle “showing,” if you know what I mean.;-) The question of the wedding dress was still in my head, and form-fitting, silvery-white, low-cut back seemed now totally inappropriate considering the circumstances (plus I was worried showing that much skin at my wedding would scandalize the inlaws). I had seen a photo of Gwen Stefani’s Galliano gown from her wedding – the one with the pink ombre at the hem – and thought it FABULOUS!

So I made one similar. I bought 5 yards of raw silk from a store online (sorry, I don’t remember which store), and hand-dyed the silk with Procion dye in 076 (Cobalt Blue) to make the outer bodice fabric. After a bit of trial-and-error, I came up with a mottley light blue.
As you can see the ombre color at the hem of the skirt is almost invisible since the silk was so thin and see-through, and I didn’t extend the lining down to the bottom. But it’s there! You can see it better in the first picture.
I used a pattern for the dress lining and the skirt outer (made from undyed raw silk). I hand-ruched the bodice fabric and attached it to the bodice lining. Then I mixed up a batch of the same dye in my bathtub, wet the skirt, and dipped the bottom hem in it, praying all the while. The dye slowly crept up the skirt and then I brought the dress into the living room, suspending it over a bucket and attaching threads around the skirt perimeter to anchor it outwards so the skirt wouldn’t shut on itself and ruin the ombre effect. (Of course, our cat Muffin got all tangled in the threads at one point and I almost had a heart attack since the dress was still wet.) But it finally dried, and the ombre effect was quite a bit lighter than I had really wanted – but good enough.
I also made my veil out of a doubled-over piece of white tulle I sewed to a silver flower hair-comb from Claire’s.
The whole process took me about 2 months working on it a little bit at a time as I was planning the entire wedding by myself and working full-time…and as my stomach grew, I had to alter the dress twice – adding larger fabric panels and opening the waist darts. I had to work right up until the day before the wedding (at first the hotel where I worked wasn’t even going to give me time off for my wedding day!) and I was hand-sewing the bodice to the dress while answering the switchboard [I was working as a PBX Operator/Linguist]. My supervisor called me in and said I was not allowed to “do arts and crafts” at work, which really made it difficult to get it finished in the critical last 2 weeks. (All the other women working read magazines, newspapers, drew, journaled, or worked on homework [if they were going to school.]) I was even tacking the skirt lining to the outer on the day of my wedding as I was getting my hair done in the salon.
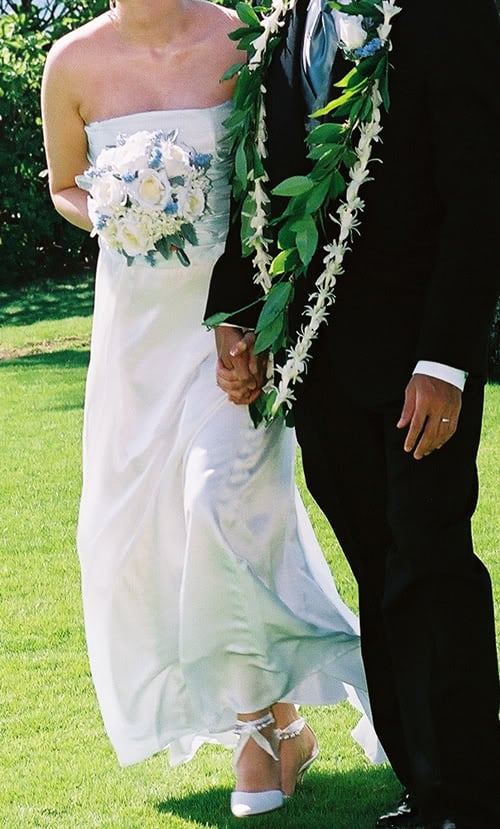
The whole dress and veil cost about $150 – the shoes were Payless!!
My mother-in-law made my bouquet and provided flowers for my hair that matched the blue of my dress.
Had I known then what I do now about construction (and the see-thru nature of silk!!!!), I would have probably done something more like that Galliano dress with the full skirt supported with layers of tulle underneath – but considering everything, I was pretty happy with my version.:-)
Thanks for your question – it was a real trip down memory lane!
xoxox
Carly











