
DIY: 2 Men’s Shirts to Cute Babydoll Dress
Get This Tutorial As a PDF

This tutorial has been updated, and is now available as a full step-by-step with photos in my new book 7 DIY Men’s Shirt Makeovers, part of the DIY Men’s Shirt Makeovers System.


(Sorry for the super-dark photos – my sewing room is lit only by a firefly, various glow-in-the-dark toys, and a sputtering birthday candle.)
You Will Need:

2 men’s button-down shirts in coordinating colors (I used size 16 – I think that’s an L, but I recommend using an XL if you are a S/M Misses’…an XXL if you are L/XL Misses.’) / thread matching topstitching thread in shirts / 23″ of 3/4″ wide flat elastic (white) / 3 m elastic cord (white)…we’ll be gathering fabric so only about 1m will be used eventually, but you need a longer length to do the gathering properly.
Tools:
sewing machine / needle for wovens / fabric scissors / seam ripper / iron (optional) / 1 safety pin
How To:
PREP YOUR PARTS
1. Cut Shirt #1: the sleeves off the shirt and straight across the top just under the second button.
This will serve as the body for your dress.
MAKE THE FRONT INSERT & DRESS BODY
2. To make the front insert, first cut the cuffs off both sleeves and discard. Pin the sleeves together on the long side closest to the sleeve opening placket. Sew together with a 3/8″ seam allowance, open up the piece you just sewed, and lay flat.
3. Turn insert upside-down and pin both sides of it to the underside of the opened shirt front we cut in Step 1), matching bottom hemline. (Underlap about 3/8 – 1/2″ on button placket.)
Sew to shirt front vertically along button plackets.
4. Close top button. On underside, create pleats in front insert, and pin to underside of front.
5. Sew a line straight across the top of the insert, through all layers, catching all the pleats. (This will result in a visible line of stitching through the front of your dress.) Then sew button placket closed above the line you just sewed, going through all layers.
MAKE THE BOTTOM RUFFLE
7. Using the bottom of the shirt as a guide, hem the upper strip in a similar fashion (note the center front and center back of the shirt is lower than both sides). I just traced the shape of the bottom hem, added 3/8″, turned under, and stitched a 1/4″ hemline. (I know, technically the top strip needs to be 7 and 7/8″ tall, not 7.5″…but we won’t tell anyone.;-) It’s easier to explain this way.)
8. Cut Shirt #2 according to the photo above: cut the sleeves off, and cut the yoke off the back (we’ll use the yoke later on).
As to the sleeves, mark 7.5″ down from the top of each sleeve, and 7.5″ down below that. Cut sleeves straight across at those marks. (We won’t be using the cuff pieces.)
Pin each sleeve piece together at sides to make one long continuous piece. (In this order: Sleeve cap + bottom piece + sleeve cap + bottom piece. If you’re totally anal about this piece matching the hemmed pieces from Step 7), cut one of the bottom pieces in half widthwise – and pin each half to the outside edges of this joined piece. I.e., bottom piece half + sleeve cap + bottom piece + sleeve cap + bottom piece half.)
Sew sleeve pieces together. Hem the edge that has the rounded part of the sleeve caps in a similar fashion to the piece you hemmed in Step 7), cutting off the extra to create a similar hemline.
9. Connect all 3 ruffle pieces together by sewing them at their sides with a 3/8″ seam allowance. (Connect all so you’ve made a continuous piece.)
10. Make a double knot in the end of your elastic cord. Place it on the wrong side, along the top of the ruffle piece you just sewed (about 3/8″ from the edge). Using a loose zigzag stitch on your sewing machine, zigzag over the elastic cord all the way around the ruffle piece. Do not stitch through the cord – it must remain free and moveable under your stitches. Backstitch a couple times at the beginning and end of your stitching to strengthen it.
11. Pull on the un-knotted end of the cord, gathering the fabric underneath it. Gather the ruffle piece until it is basically the same circumference as the bottom of your dress.
12. Pin the gathered ruffle to the bottom of the dress, right sides together. The bottom of the dress is already a curvy hem – pin the straight side of your ruffle around these curves. This will create a beautiful wavy hem when finished. Double-knot the elastic cording again once you have verified the pinned length of the ruffle – then cut off the extra cord.
13. Stitch ruffle to bottom of dress, stitching below the elastic cording.
GATHER THE DRESS TOP
14. Fold under top of dress about 1″+. Stitch straight across bottom of folded edge to create a casing.
15. Attach safety pin to one end of your flat elastic. Thread through the casing and out the other side.
16. Match end of elastic to edge of dress; stitch down the edge to secure.
17. Hold the elastic firmly and gather the front fabric – the finished width of your dress front needs to be 11.5″.
18. Once at the correct width, stitch down the other end of the elastic, and trim so nothing is visible from the front.
19. Repeat for the back of the dress – the finished length for the back of the dress needs to be 10.5.”
MAKE THE SHOULDER-STRAPS
20. Cut back yoke off Shirt #1 as well as from Shirt #2…which we did in Step 8). (The yoke is usually double-sided; if yours isn’t, you have to scavenge fabric from somewhere else on your shirt. I think the ties look best when the stripe pattern is going up and down the length of the tie, not across, so I chose an area where I can get a piece of fabric 17.5″ long with the stripes going up and down.)
21. Sketch out the following shape onto both pieces: a tall trapezoid, with the top side 1.25″ wide, the bottom 2.5″ wide, and the entire piece 17.5″ tall. Cut shape out, separate the front and the back, and remove any labels with a seam ripper.
22. Fold each piece over, right sides together, and sew along longest edge, pivot, and along shortest edge. Turn piece right side out, and topstitch along unstitched edge to flatten it. (You can also iron it at this point to flatten it out further.)
23. Pin each piece under the top of the dress, at both front and back, about 1/2″ down from top hem, on either side. I positioned the pieces matching the dress body at the front, and the pieces matching the ruffle at the back.
24. Stitch across strap through all layers using a zigzag stitch for strength.
25. Tie bows tightly to prevent slippage.
You’re done!

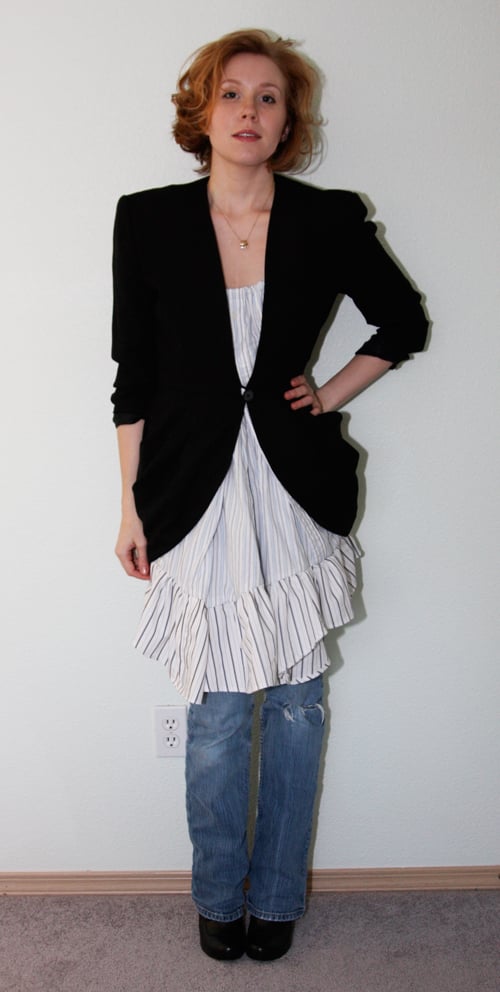
You now have a super-cute dress perfect for lounging about, a sweet babydoll nightie appropriate for the boudoir – or even, under a blazer and over jeans or leggings, a chic piece to add into any day ensemble. Or you can wear it out as is during warmer months – rocking it with some lace-up sandals, a little metallic clutch, and a rhinestone clip in your hair.
Notes:
When I created the front of the dress, I sewed 2 sleeves together – resulting in a wide pleat at the front which can, in profile, make the wearer look preggers.:-P If you prefer a less generous A-line, create use a single sleeve instead for the front insert. This dress, because of the generous front pleat, would also be great maternity wear! (It’s kind of cute-sexy, so I think it would work great!)
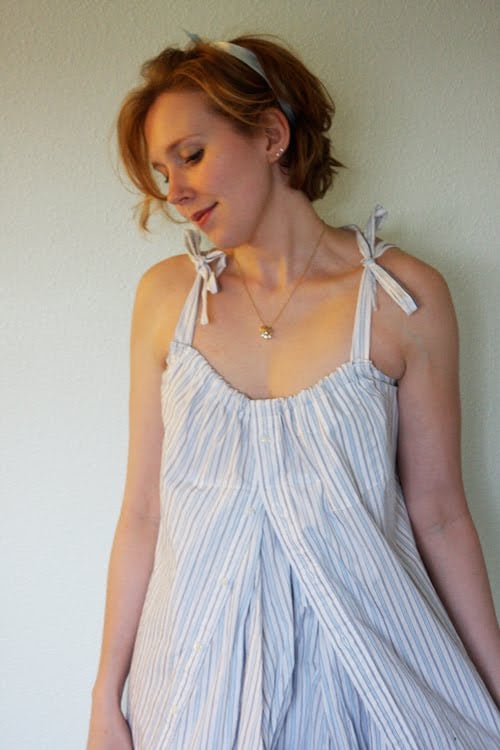
I would recommend if you wanted fuller bows – to either use fabric from other parts of the shirt and double the width of the cut parts…or cut the pieces as I wrote above and instead of folding them in half, just fold under the raw edges about 1/4″ and topstitch to keep in place (eliminating Step 22)- thus leaving you with single-layer fabric bows instead of double layer.
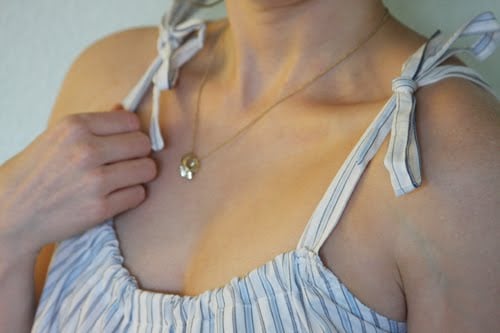
The finished dress may be somewhat short for some people -I’ve thus recommended an XL men’s shirt to hopefully deal with the length problem. Making the ruffle 8″ or 8.5″ high before you cut it out may also help with this if you’re concerned about the length – I am 5’6″.
I’d also recommend ironing your shirts first! My blue-striped shirt was a little rumply – which is reflected in the finished piece. The dress is now extremely difficult to iron due to all the ruffles – so make sure your shirts are free of wrinkles first!


Happy DIY’ing!
xo
Carly
Get This Tutorial As a PDF
This tutorial has been updated, and is now available as a full step-by-step with photos in my new book 7 DIY Men’s Shirt Makeovers, part of the DIY Men’s Shirt Makeovers System.
DIY: Men’s Button-Down Shirt to Sexy Bustier Dress

As most of you probably already know, I did a DIY refashion of a Men’s Shirt to a Cute Summer ShirtDress that I posted back in August. One of my lovely readers, Amanda V., sent me a photo of the dress she made following the tutorial.

So I decided to do another shirt dress tutorial…this time using a men’s plaid shirt as the base, and changing up the front embellishment.
Are you ready? Here we go…
(say that 10 times fast!)
You’ll Need:
*1 men’s shirt (I used an Eddie Bauer M size shirt)…preferably not flannel
*1 invisible 14″ zipper
*12″ of 1/4″ wide elastic
*hook and eye
*thread matching topstitching thread in shirt
seam ripper / fabric scissors / pins / hand-sewing needle / sewing machine + regular sewing foot / zipper foot for sewing machine / a friend (or, a sewing dummy to pin on)
How To:
PREP YOUR PARTS

1. Cut shirt as follows:

- cut button placket off front
- cut sleeves off body
- rip pocket off front with seam ripper
- cut bottom off shirt, going straight across from underarms, through front and back
For each sleeve:
- cut cuffs off sleeves

cut top rounded part off sleeves (we won’t use the tops)

2. Remove buttons from button placket.
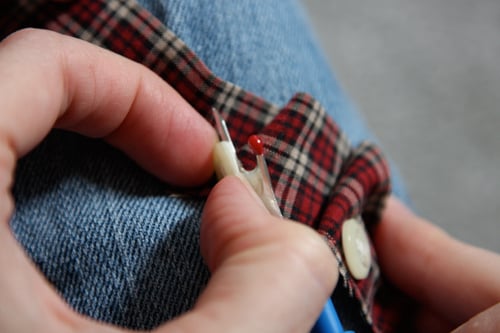 Bye-bye buttons!
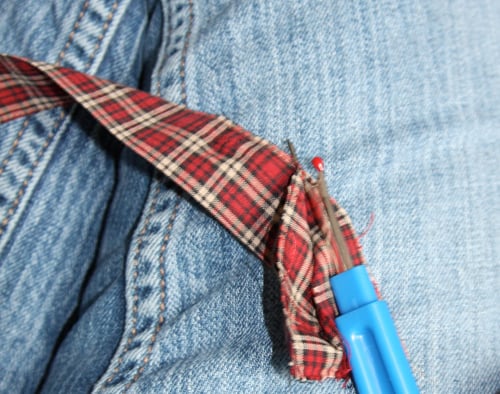
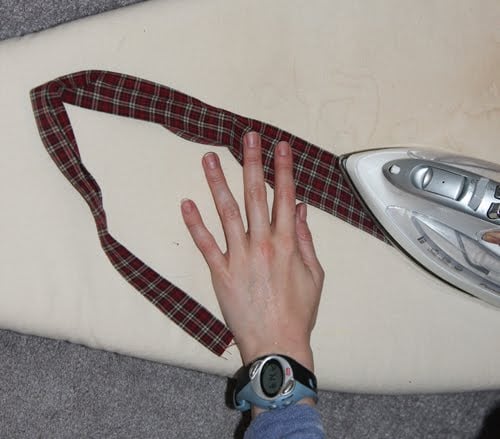
3. Use seam ripper and open cuffs up at edge seams all the way to buttonholes; remove buttons.
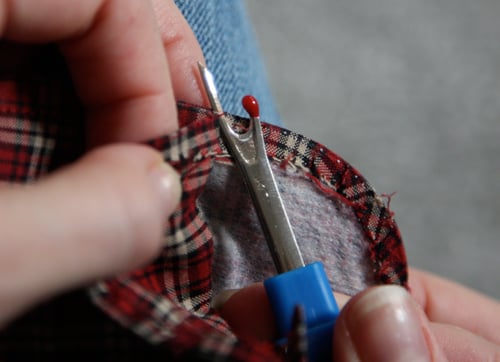
Cut off ends of cuffs where the buttonholes are (we won’t use those parts).
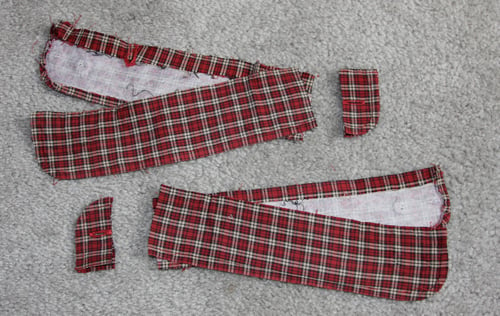
Peel off any interfacing that’s stuck to your cuffs and discard.
PIN

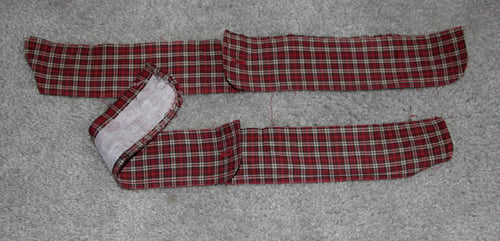
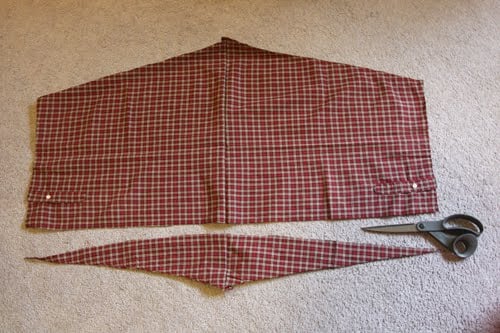
4. Turn shirt bottom inside out and cut off buttonhole placket. Pin edges together (where button placket formerly was). This will be your skirt. (top piece in photo; the shirt bottom is folded in half and flat)5. Pin the two sleeve pieces right sides together, matching the line where you cut the rounded tops off them. This will become the bodice of the dress. (bottom in photo above)
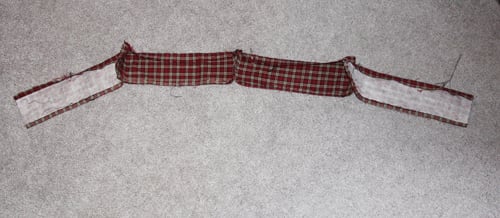 5. Pin cuffs together, matching short ends, to make a long line. (I matched the center two so the curved parts of the cuffs will be in the center.) This will be your waistband. (I haven’t yet removed the interfacing in the photo below. My bad.:-)
SEW

6. Topstitch sleeve opening plackets closed on the back side of your bodice.
Sew both bodice pieces together where you pinned. (not pictured)

8. Sew all cuffs together at their ends.

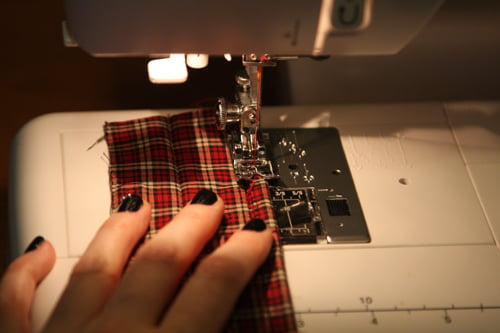
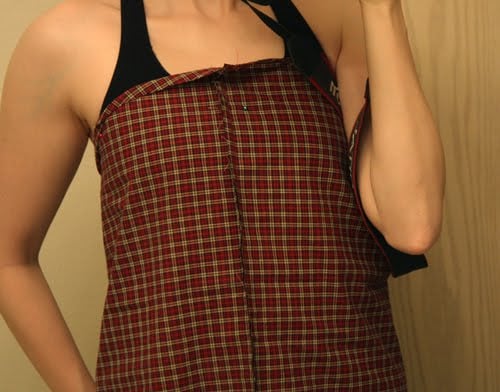
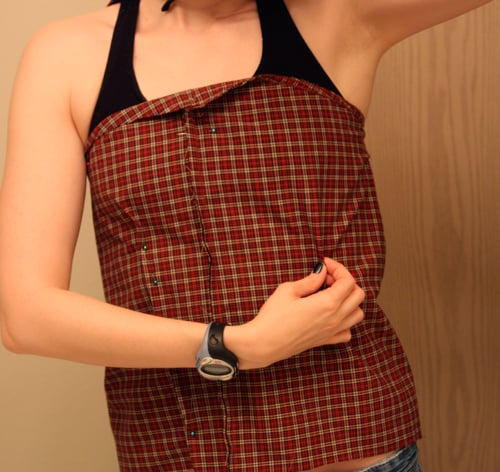
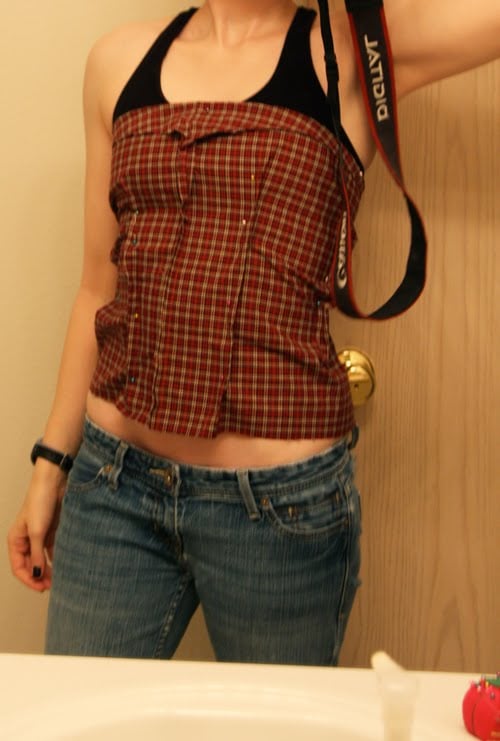 I know it looks like it’s pulling in a lot of directions – mostly it’s because I’m raising one arm to take the photo.
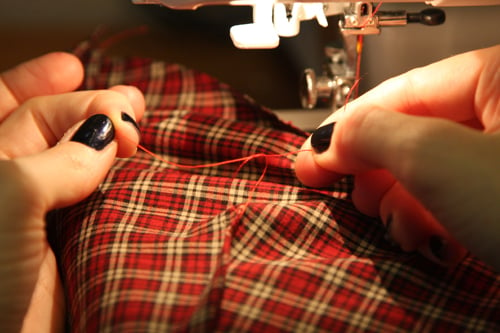
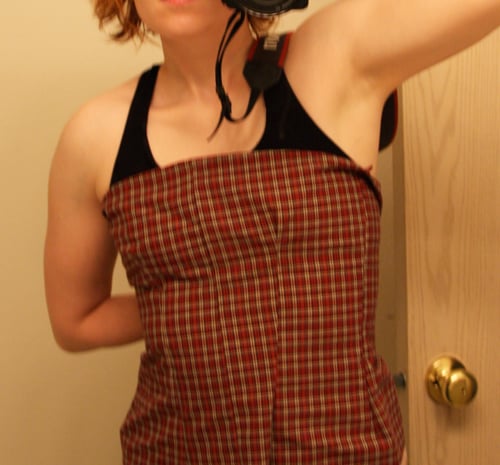
SEW THE TOP TO THE BOTTOM; MAKE THE PEPLUM
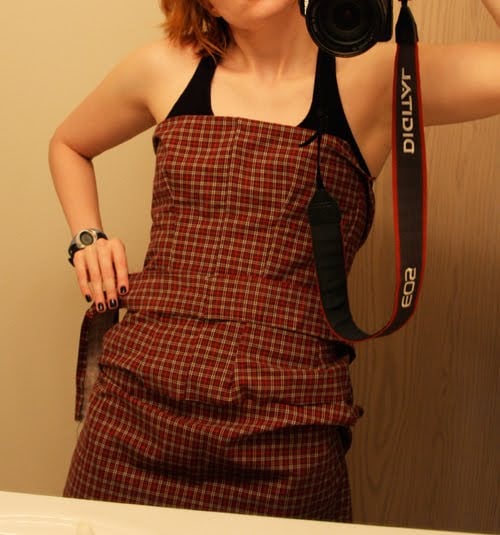
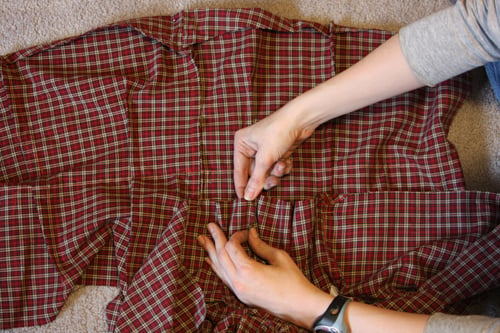
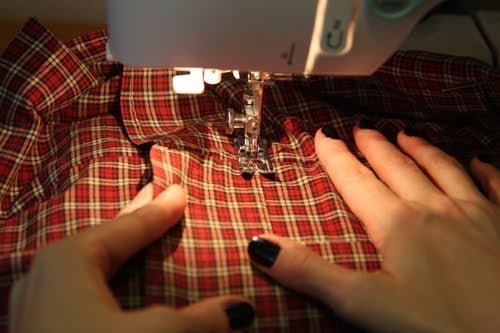
19. Topstitch top of waistband through all layers.
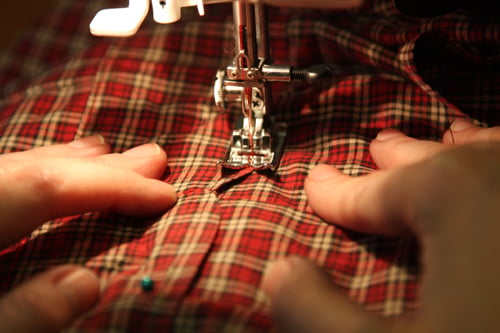
See the little w-shaped center to the waistband? A new day – you can see I’ve ditched the black nails.:-)
20. Topstitch bottom of waistband through all layers, preserving gathers in skirt as you stitch through them.

PLACE THE ZIPPER
22. Try dress on inside out. Have a friend pin the dress at center back to create the seam allowance for the zipper. Also measure the zipper against the back of the dress and place a pin in the center back at the point where the zipper ends. (not pictured)
23. Take the dress off again. Sew the CB seam on your skirt up to the pin your friend placed. (not pictured)
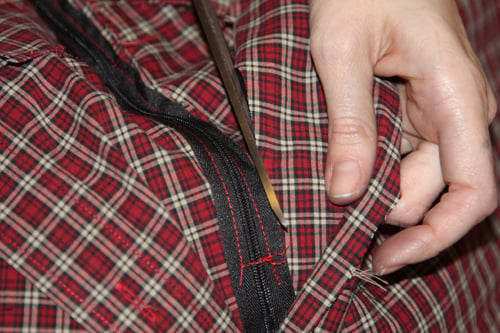
24. Place the dress on a flat surface and pin the zipper to one side of the CB opening. Sew the zipper on one side, using a zipper foot. (Pre-basting if necessary.) Close the zipper, pin to other side of CB opening, and sew. Make sure not to catch the peplum in your stitching. (not pictured) Trim seam allowance next to zipper.
FINISHING TOUCHES
25. Put the dress on again. Fold under top of bodice to create a straight line, and pin. Take dress off; trim seam allowance under top. Stitch a 1/4″ seam at the top. (not pictured)
26. Try the dress on yet again. If the bodice seems too loose, zigzag-stitch a piece of elastic on each side of the back bodice, at the top on the wrong side of the garment. (not pictured)
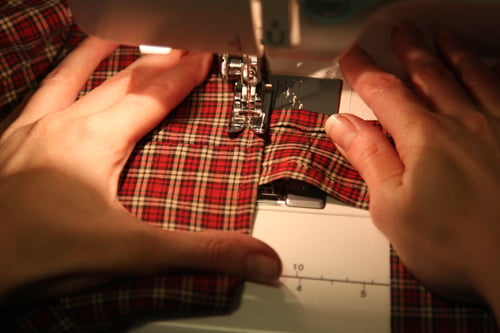
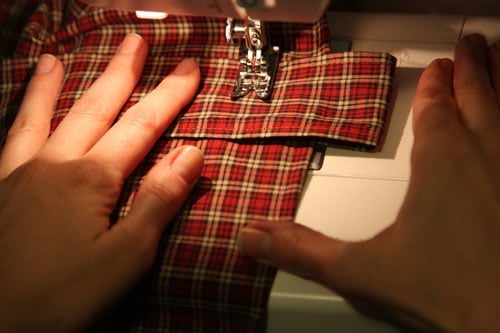
Push placket fabric up and out of the way, and sew straight across placket to secure at 1″ down from top of bodice. Repeat another 4 times to create cascading ripples down the front of the bodice; cut placket at appropriate length. The bottom looped ripple will cover up the end of the placket if you sew the end about 0.5″ above the bottom of the loop, and where the waistband top hits. (Your bottom loop will overlap the waistband slightly.)
28. Add a hook-and-eye closure above the zipper in the back. (not pictured)
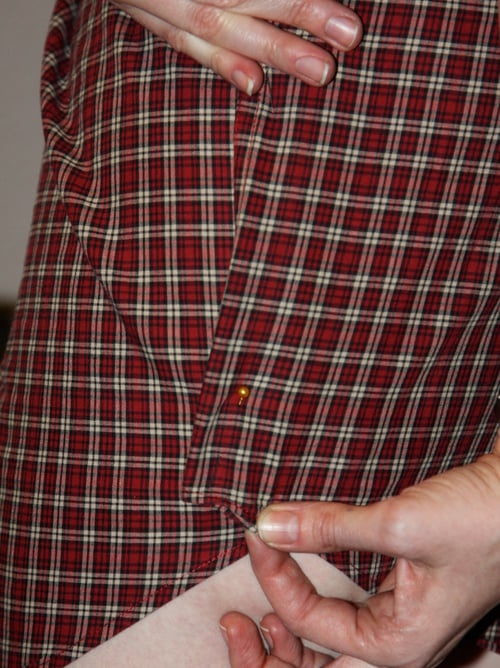
29. To create a tulip-like effect to the skirt, overlap the edges at the side seams slightly, pin, and topstitch.Believe it or not, you’re finally done!!
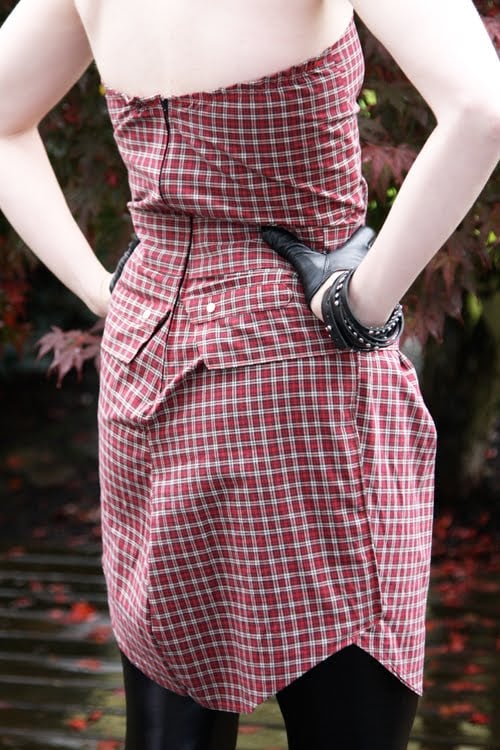

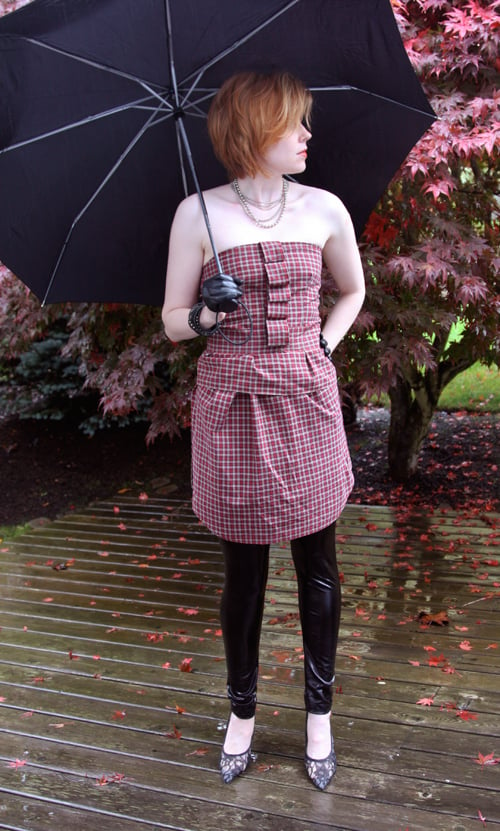
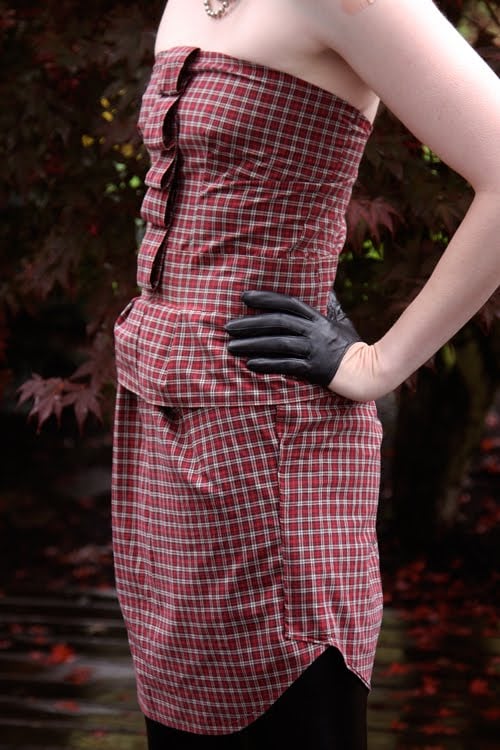
Leave Comment
DIY: Gossip Girl-Style Headband from Men’s Shirt Collar
Get This Tutorial As a PDF

This tutorial has been updated, and is now available as a full step-by-step with photos in my new book 8 No-Sew DIY Shirt Scrap Makeovers, a bonus available with purchase of the DIY Men’s Shirt Makeovers System.

I made a ruffle-front cute summer shirtdress from a men’s shirt a couple months ago…(tutorial here)…and I still wanted to use up more of the shirt fabric, rather than let all the scraps go to waste. (I’m thrifty like that!! Okay, usually not – usually my scraps will sit around in the recesses of my closet until I forget about them, and then re-emerge years later when I am desperately pawing back there looking for something else. But I digress.)
How to Make a Gossip Girl Blair Waldorf-Style Double Bow Headband from a Men’s Shirt Collar
Inspiration:

(photo from CWTV.com)
Materials:
one men’s button-down shirt [collar piece and a bit of the shirt fabric) / thin headband (I used a Goody headband from the supermarket – $3.99 for a pack of three!)
Tools:
fabric scissors / hand-sewing needle / machine needle for medium-weight wovens / thread matching topstitching thread in collar / seam ripper (optional) / fabric glue (optional)
How To:
Cut the Pieces
1) Cut the collar off the shirt. Cut each end off the collar (app. 4″ from bound point), so you now have 3 pieces total.
2) Using scissors (or a seam ripper), open the topstitched seam from the cut edges of your collar pieces, along the side about 3/8″. This is to allow the tucking under of the fabric so we can create a perfectly-bound and topstitched bow, rather than a bow with one raw-edged, messy side.
3) Cut a long, thin strip of fabric from some part of your shirt that is wide enough to go all the way around the thickness of your headband PLUS 3/4″. The strip must be single-layered, non-interfaced, and the length of your headband PLUS 1″ at least. This will be the covering for your headband. (see above photo from Step 1)
4) Cut a small rectangular piece from your shirt fabric (single-layered, non-interfaced), about 1.25″ wide by 3″ long. This will be the center to your bow. (see above photo from Step 1)
Topstitch the Collar Pieces
5) Fold the bottom fabric layer of one of your collar pieces to the inside – curling interfacing in on itself about 1/4″ ~ 3/8″. Stitch along edge (spreading top layer of fabric away from the needle as you sew) to secure your fold.
6) Fold under top layer of fabric about 1/4″ ~ 3/8″. (Don’t forget to tuck under the side edges that we opened up in Step 2)!) Topstitch all the way around to secure the edges. (We will be leaving one raw edge that will be concealed in the bow center.)
7) Repeat for remaining collar pointed piece.
8) Using the same method, finish the bottom raw edge of the collar center piece.
Sew Fabric Ractangles
9) Turn under about 1/4″ on long edges of small rectangle of fabric. Sew along long edges.
10) Sew along long edge of long strip of fabric. Turn right side out to create a long tube.
Create Double-Bow
11) Flip one pointed collar piece over, and overlap it on the other piece about 3/8″. Hand-stitch in place.
12) Loop collar center piece over on itself, matching raw edges, and stitch in place directly above the loop you just made in the previous step. Stitch a few times through all layers in the center to secure.
Cover Headband
13) Slip headband into tube you made in Step 10). Fold ends over about 1/2″, and stitch ends in place to close the tube. (I used fabric glue to secure the ends first, since the lightweight fabric was fraying for me.)
Attach Bow to Headband
14) Using the small fabric rectangle from Step 9), stitch one end to center of bow on the underside. Wrap around top of bow and secure under headband. Stitch a few times in the center on the underside in order to squeeze the strip tight and shape your bow properly; but not too tight since we still want the bow to be slideable along the headband.
Voila! A menswear-inspired Gossip Girl Headband!

Happy DIY’ing!
xo
Carly
Get This Tutorial As a PDF
This tutorial has been updated, and is now available as a full step-by-step with photos in my new book 8 No-Sew DIY Shirt Scrap Makeovers, a bonus available with purchase of the DIY Men’s Shirt Makeovers System.
DIY: What to Do With the BF’s Old Tees #1

I’m sure (for those of you who have SO’s who are male) you’ve got a man’s white underwear-style t-shirt bangin’ around somewhere. Probably Hanes, no?
Hub has this ridiculous tendency to toss his clothes in the trash the minute they have the slightest stain, look a little dingy, exhibit some pilling, or stretch out of shape a little. Wasteful! Though I donate as much as I can of his used clothes to Goodwill/Salvation Army, his ol’ white tees were begging to be given a new life.
And there’s no end to the possibilities with a little fabric dye or paint on hand. Tie dye, potato printing, brushstrokes…it’s all up to you. 80’s-style, abstract tees are all over the place right now.
So why buy when you can DIY?


Then – scribble, scribble, scribble front, let dry, turn over, and scribble, scribble, scribble back – and you’re done!

I know the scribbles don’t exactly hide the pilling and the stains – but they draw the eye away, leaving me with a very wearable t-shirt. It also looks casual cool under a blazer/suit combo.

Something to try over the long weekend, perhaps?

xoxox
Carly
Summer Shirtdress
 (handmade dress from Dockers men’s shirt, Ebay DIY clutch, DIY silver necklace, jelly flats, Jeans Warehouse sunglasses)
Hub says my new hat makes me look like a Columbian druglord (no offense to druglords intended LOL:-). I made this dress out of an old shirt of Said Detractor…I posted the step-by-step tutorial (along with my crappy illustrations) here. The dress has hidden straps that I can wear tied as a halter, tucked down and hidden, or as regular spaghetti straps.


The clutch I bought on Ebay after I had seen a similarly shell-adorned Lulu Guinness clutch (above) at Neiman Marcus…it was on sale for $75 I think, but I didn’t buying it and ended up kicking myself for awhile…so I bought a half-moon straw clutch on Ebay (turned out a little more orange than I expected, haha) and sewed on some little conch shells and added a raffia tie to the zipper pull, as well as some raffia braid around the edge of the bag. I kind of like how it turned out, even though it is Oompa-Loompa-colored!! LOL.

 And remember jelly flats? I has a pair of them when I was 7 that I wore for 3 months straight until they literally fell to pieces. Well they’ve come back in style again, and some brands are offering styles for adults…so I opted for this spiderwebby-looking pair (that was $7 from my local Fred Meyer – shhh! Don’t tell anyone:-) They’re the spitting image of the Melissa Compana Corallo Jelly Ballet Flats (sold at Saks 5th for $60 hahaha)…and they’re so cheap they don’t even have a brand imprinted on their soles. Love at first sight!
xoxox
Carly J. Cais
Who I Am

Carly J. Cais I am a DIY’er, designer, sewist, maker, and marketer. Chic Creative Life is where I share what I do, and help others bring their unique style into their own lives.








Just Pinned



