Mar 31, 2010 | DIY
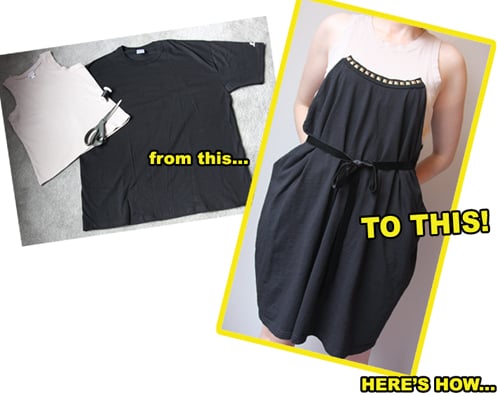
The temperature’s rising, but maybe you’ve tired of the ol’ tanktop-and-jeans ensemble. Maybe you want a go-to summer dress but still want it to be comfortable for when it gets really hot. Revamp a tanktop with the addition of an old men’s tee,** and live in soft-washed cotton comfort all summer.
**I’ve adapted this recon from the book Kakkoii Kuchuuru Rimeiku [“Cool Couture Remake”], by Hiroko Yamase [Bunka Publishing, 2009]. The book is in Japanese, and I’ve converted the sizing to Western sizing, and changed the methodology here and there. Hope you like it!
You Need:
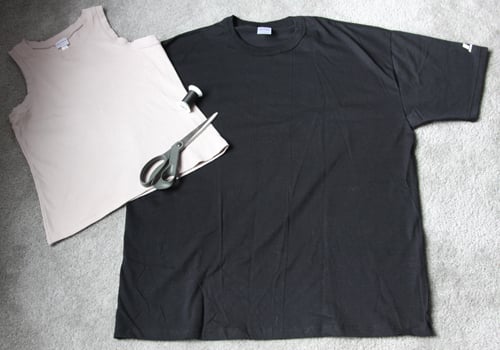
*1 tanktop that fits you well
*1 men’s t-shirt (preferably XL)
*thread matching t-shirt
*fabric scissors
and…
*marking chalk
*pins
*measuring tape

Optional:
*velvet or satin ribbon (1″ – 1.5″ wide)
*pronged studs, sew-on jewels, hotfix nailheads, or fancy trim
How To:
Prep Time
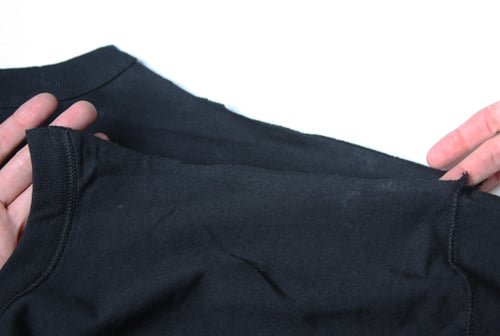
1. Wash and dry both your tanktop and t-shirt if they haven’t been washed before. Turn the t-shirt inside out and cut off the label at the back of the neck. (not pictured) Cut off the shoulder seams all the way to the sleeve seams.
Start Sewing
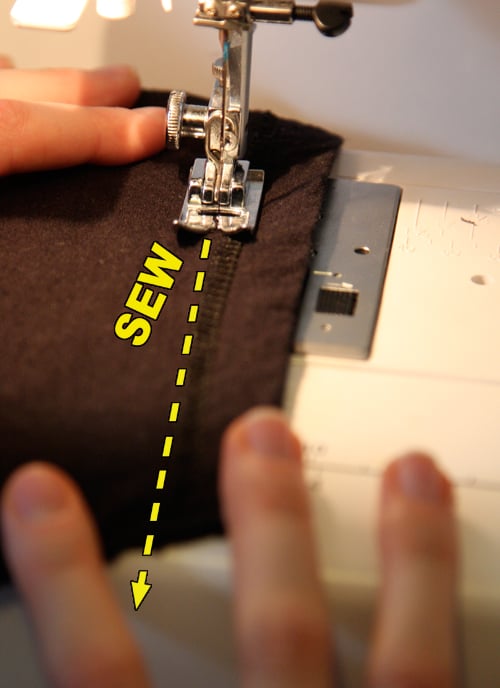
2. Sew the ends of the t-shirt’s sleeves closed, just inside the sleeve cuffs. These will become pockets.
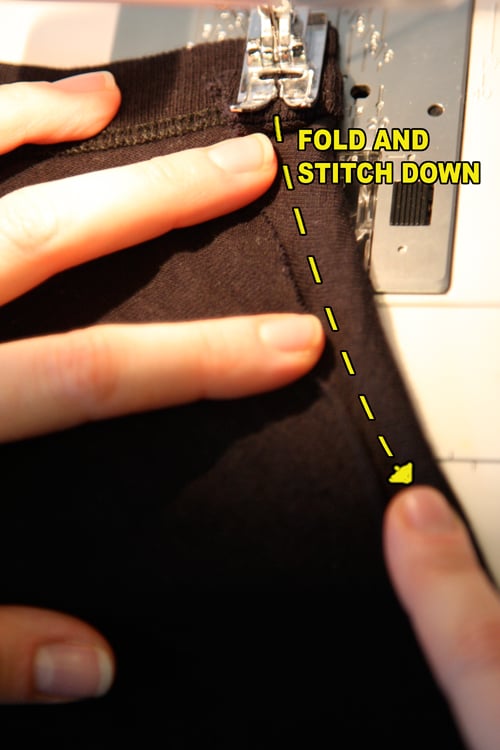
3. Fold down about 1/2″ along the slit shoulders (the raw edges) of the t-shirt, all the way around, front to back, neck ribbing to neck ribbing. Stitch down, creating a 3/8″ hem.
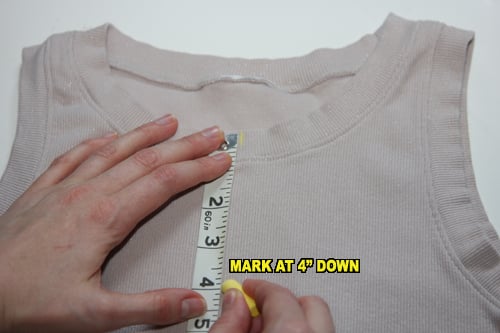
4. Turn the t-shirt right side out, tucking the sewn sleeves inside. Fold in half and mark the center front and center back at the neck ribbing. Do the same with the tanktop.
5. Measure 4″ straight down from the mark you made on both the front and the back of your tanktop. Make another mark at each point.
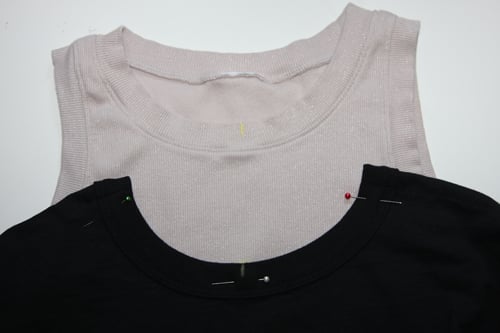
6. Place the tanktop inside the t-shirt. Line up the center front of your t-shirt on top of the mark you made on the center front of the tanktop. Pin in place.
7. Pin the neck ribbing of the t-shirt to the front of the tanktop, following the natural curve of the t-shirt’s neck. (I folded the edges of the t-shirt under about 1/2″ again, since I liked the way that looked.)
8. Repeat Step 6) and Step 7) to pin the back of the t-shirt onto the back of the tanktop.
9. Stitch the t-shirt to the tanktop, following the lines of the neck-ribbing of the t-shirt. Sew TWO lines of stitching to secure: one line at the very top of the neck-ribbing, and one line at the point where the ribbing connects to the t-shirt. Do for both front and back of your piece.
Embellish It! (Optional)
9. Use a piece of ribbon as a tie for the waist, stitching at the back to secure. (not pictured)
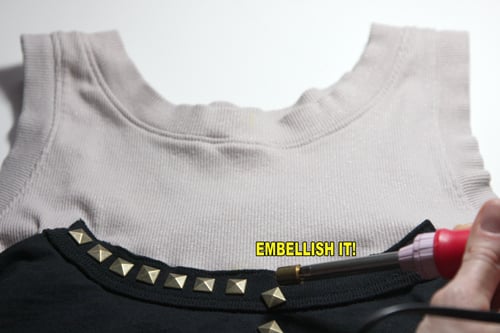
10. Add studs, hotfix embellishments, sew-on jewels, or fancy trim to the the tanktop neck, the t-shirt ribbing, or the hem of the garment to doll your piece up.
You’re finished!
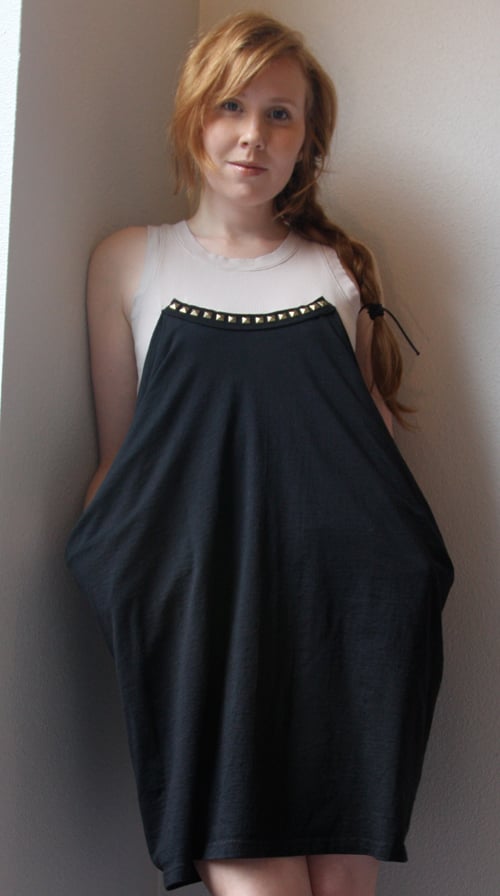
Without the belt, hands in pockets.
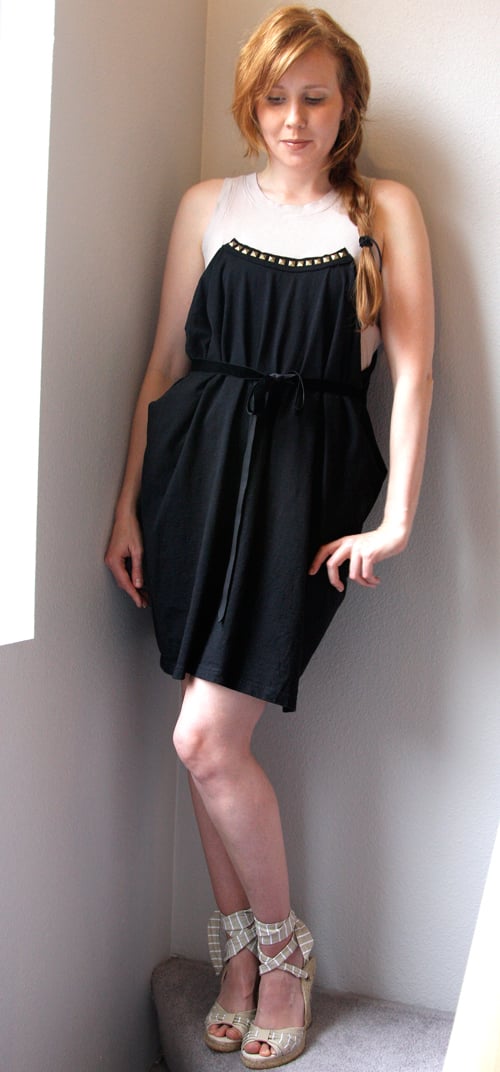
Belted with a velvet ribbon.
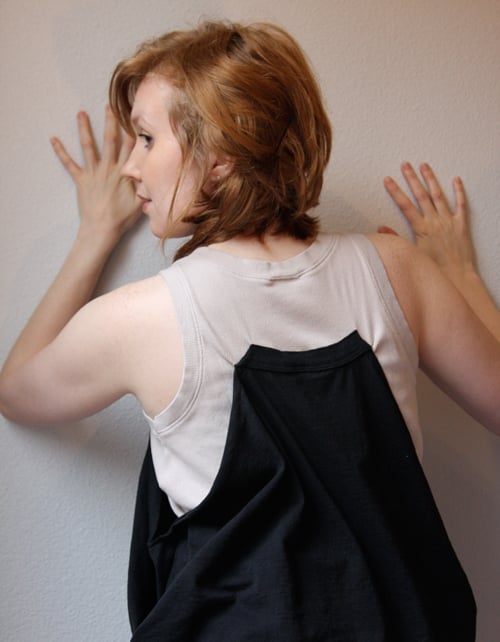
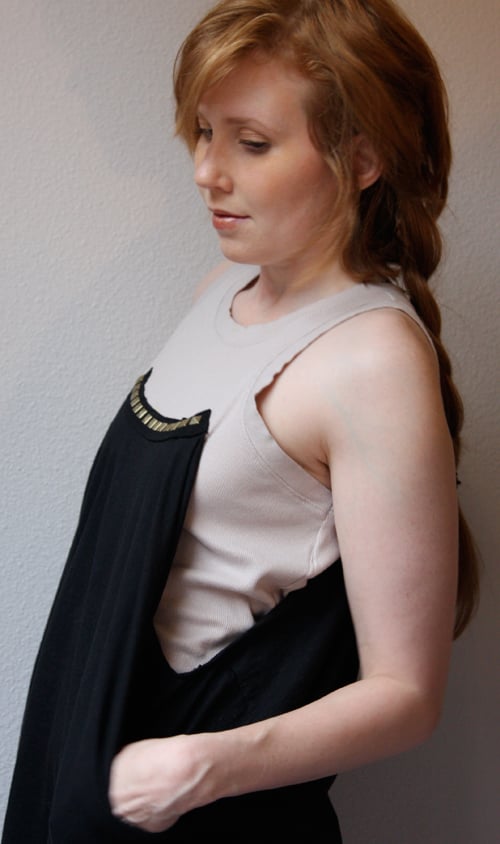
Tip: If you feel the weight of the t-shirt distorts the tank too much, sewing the sides of the tee to the tank will help eliminate the “pulling.”
Wear with some espadrille wedges and a cool pair of shades for a chic casual look as the mercury rises.
I’d love to hear your feedback everyone!
xoxox
Carly
for Threadbanger Blog Projects
Save
Leave Comment
Mar 6, 2010 | From You
I have this really cool old hockey jersey, but every time I wear it, friends say I look homeless. Do you have any ideas for what I could make it into so it’s more hip/flattering?
Leave Comment
Dec 21, 2009 | DIY
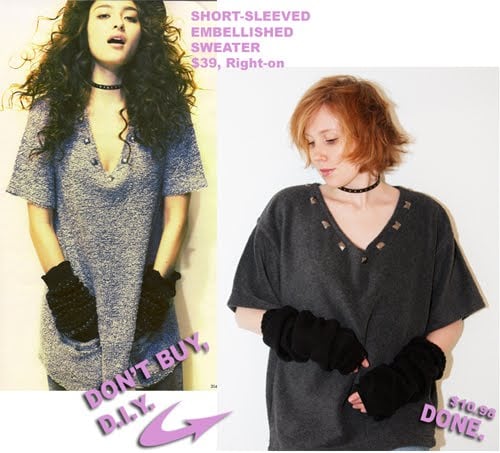 Okay, there’s not much of a price difference there, but still…
Fa la la la la! I love the holidays!!
But one thing I don’t love is all the correspondence it entails. Email just won’t cut it at this time of year.
Sorry for the short absence from the WWW – just been overwhelmed with sending holiday packages, cards, New Year’s greetings, baking Christmas cookies, and gift-shopping.
7 packages, 27 cards, 11 packages of cookies, 9 holiday letters with photos later…I always overachieve this time of year and end up dropping off the face of the planet for about a week. Plus, spending an hour and a half standing in line at the post office yesterday (in THREE separate lines – one for parking, one for the automatic postal machine, and one for the window) can put anyone into a bit of a bah humbug mood. Or make one go postal. Yuk yuk yuk. Can anyone relate?
But I love the holidays – all the festivities of, all the traditions – seriously, the most happy times growing up.
So anyway…
I wanted to share a DIY I finished a little while ago with all of you.
Perhaps you or your SO has a fuzzy gray sweater or fleece in need of a makeover?
Who says winter sweaters have to be long-sleeved? This one is super-cute with armwarmers, gloves, or another layer underneath for when the weather outside is frightful.

Scanned from Vivi December 2009 issue. What can I say – I love this magazine maybe a bit too much!:-)
So I figured, why not make this from an oversized sweater? (after the jump)
DIY: MEN’S SWEATER TO EMBELLISHED SHORT-SLEEVE TOP
You Need:
oversized sweater (nubby knit or fleece, preferably men’s) // 9 faceted sew-on jewels
scissors // pins // needle and thread // sewing machine // sewing machine needle for knits
How To: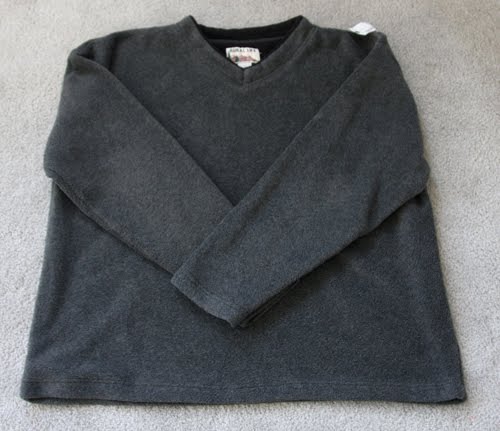
1. Cut off sleeves and trim neckline into a V-neck.
2. Turn under sleeve cuffs and stitch raw edges down. (not pictured)
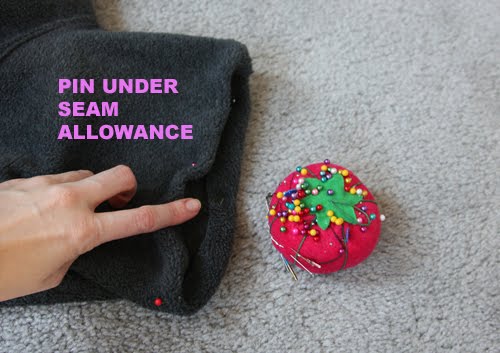
3. To size the sweater smaller (if using a men’s sweater), try on sweater and pinch extra fabric at back of neck until V-neck lays properly on your collarbone (i.e., not too wide). Have a friend stick a pin in the excess, take off the shirt, and turn inside-out. Pin in a line down the center back, all the way to the hem.
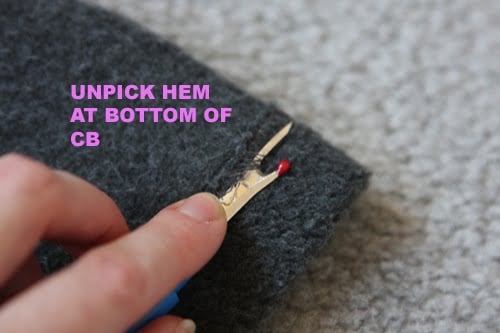
4. Unpick the bottom hem of the shirt so you can flatten the line you pinned all the way down to the cut edge of the fabric. (Probably about 1″ or so on either side of the line you pinned.)
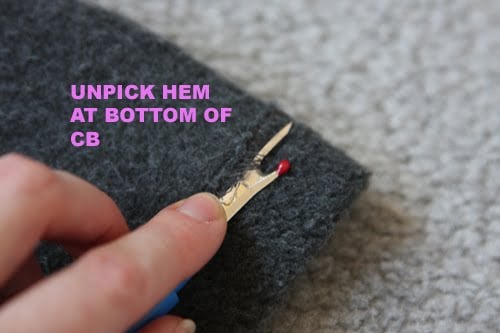
5. Sew CB line all the way to the cut edge. (not pictured)
6. Turn hem under once more and re-stitch hemline. (not pictured)
7. Cut off excess of CB seam. (not pictured – obviously, I got lazy here)
8. Turn under seam allowance around neckline, and stitch down. (not pictured)
9. Sew jewels around neckline.
Done!
I’m thinking about resetting the sleeves so the shoulder seam is shorter, which I think might make this less matronly and more like the original.
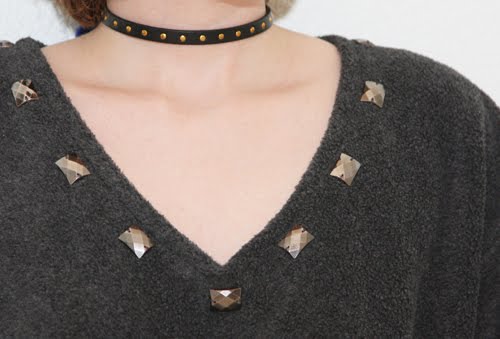 But maybe I’ll leave it as is!
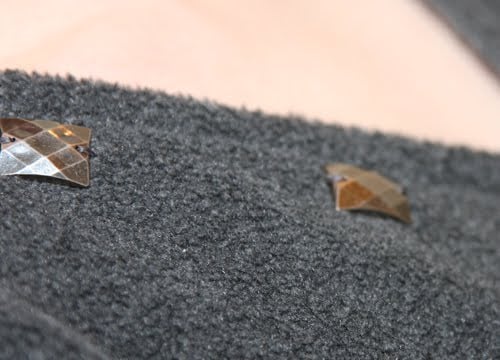 These little jewels were in a multisize pack of 25 for about $3.99 at Jo-Ann’s. And the shirt was $6.99 at Goodwill. Super-warm!
Happy DIY’ing…and Happy Birthday to me! (It’s today!) Not quite sure the appropriate emotional response…but hopefully I’m another year wiser! (Maybe to avoid the P.O. after December 15 next year?)
xoxox
Carly
Save
Leave Comment
Nov 7, 2009 | Fashion
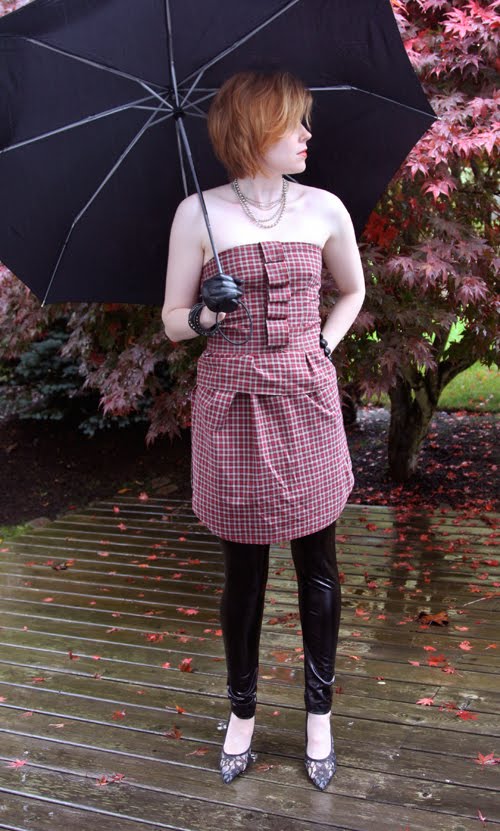 (handmade dress from a men’s shirt, Claire’s ball-chain necklaces, studded leather bracelet from Buffalo Exchange, Forever21 vinyl leggings, Newport-News lace pumps, DIY leather half-scoop gloves)
This was one of the main reasons I chose to shoot in a studio for my America’s Most Stylish Blogger entries: Portland weather has been like this pretty much every day for 3 weeks. (It has mysteriously cleared up for the weekends…but timing-wise I was only ready to shoot my outfits during the week…I put a lot of thought into each one, and since I don’t get the item from Bluefly until Friday, it didn’t give me enough time to formulate something in time for the rare and unexpected good weather.) Blah. So it’s been cold and wet consistently, but I wanted to post this outfit while it’s still Fall for goodness’ sakes.
Inspired by a reader’s version of the Cute Summer ShirtDress from a Men’s Shirt I made back in August, I chose a plaid shirt for my newest men’s shirt makeover…and created a bustier top with a zip-back, bust-darts, folded front detail, faux belt, peplum, and tulip skirt. (Too much? Customize at will!:-) It took awhile, but it’s done! Tutorial coming soon soon soon once I sit down and write the silly thing.
 DIY half-scoop gloves tutorial here. I love them to death! To death I say! (And in this photo, you can see the band-aid on my flu shot that I got that very morning; how very chic.)
 The lace pumps really don’t match but I felt like pairing something lacy with the outfit to offset the vinyl leggings.
 I am totally feeling plaid for Fall. (By now it’s a little cold, so it will go over a black mesh long-sleeved top, and maybe on its own for parties.)
xoxo
Carly
Leave Comment
Sep 16, 2009 | DIY
I love to take seemingly unfashionable, frumpy-looking garments and give them a makeover – and boxy men’s sweatshirts are in dire need of some redo! The following tutorial I have adapted from the incredible book “Kakkoii Kuchu-ru Rimeeku” (“Cool Couture Remake”) by Hiroko Yamase (Bunka Publishing, 2009).
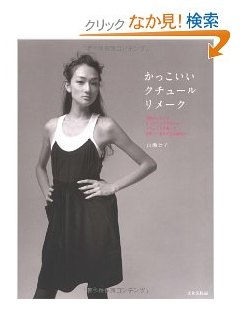 Unfortunately there is no English translation available (able translator right here, Bunka Pub.!! *hint hint*) and I would not recommend buying it unless you read Japanese very fluently or are able to make incredible leaps in logic while following the directions [in which not all steps are illustrated]. (There are also some mistakes in the Japanese, missing directions, and mistaken diagrams…something a better editor should have caught.) The first half of the book is devoted to refashioning men’s sweatshirts and tees into feminine, draped garments, featuring the incomparable supermodel Ai Tominaga modeling, and the latter half deals with men’s button-down shirts into…um, slightly less-fashionable, more girly pieces. (We won’t mention the last third where scarves and neckties are used to create clothing – a section best left forgotten.) But the first half of the book is stellar, and has some great ideas in it…The original “Button Blouse” in the book is now my “Convertible Blouson Tunic,” and I’ve adjusted measurements for our sizing system, Western bodies, sewing notions, and I’ve changed the methodology here and there.
To Make a MISSES’ One-Size-Fits-All CONVERTIBLE BLOUSON TUNIC
Read how to after the jump…
Materials List
3 Men’s XL Sweatshirts (we will call them Sweatshirts A, B, and C)**
10 buttons 3/4″ diameter (shanked, not the kind with holes on the face)
104″ of round cord elastic, any color (will be trimmed to around 54″ in Step 8)
3/8″ wide elastic, any color (see Step 11) for length)
**Notes regarding sweatshirts:
*A Men’s XL sweatshirt measures approximately 26″ from side to side, and 30″ long from side of neck to hem.
*Do not use sweatshirts with front kangaroo pocket – this will have to be removed. Style of neck does not matter (crewneck, v-neck).
*Medium-weight fleeced sweatshirts are used for this project.
*Sweatshirts can be printed on the front/back as long as you can salvage a piece of fabric 15″ high, measured from hem upwards. Therefore, if there is writing on the chest or sleeves, it won’t matter because we won’t be using those parts. Or, if the design extends below that 15″ high measurement, you will have to incorporate it into the finished project.
*Sweatshirts A and B must be exactly the same size, shape, style, and color – or else the front and back of your finished tunic will be different – which could be an interesting harlequin effect, if you will.
*Sweatshirt A MUST have no side seams unless you want a seam running down the center front of your finished tunic.
*Sweatshirt C may be smaller than XL
*You can use women’s sweatshirts instead of men’s for all 3 as long as you have garments that are approximately the same measurements as the men’s sweatshirts below…and the sides of the sweatshirts are not tapered or “fitted” to the body. The sweatshirts need to be boxy in order to create the ruching in the finished garment.
*This is a “one-size-fits all” loose garment – on Misses’ small or petite sizes it will appear oversized (so you may want to use L sweatshirts instead), and on Misses’ L sizes it will appear closer to body measurements (there will still be at least several inches of ease). Women’s sizes – use XXL or larger – and adjust required elastic lengths accordingly (you may want to add two or more extra buttons and buttonholes for stability at the neck).
Tools List:
Sewing Machine
Sewing Machine Needle (Med. Weight Knits)
All-Purpose thread matching your sweatshirts
Zigzag foot
Straight Stitch foot
Buttonhole foot (optional)
Fabric Scissors
Hand sewing needle
Safety Pin/Bodkin
Iron & Ironing Board (optional)
How-to:
1.
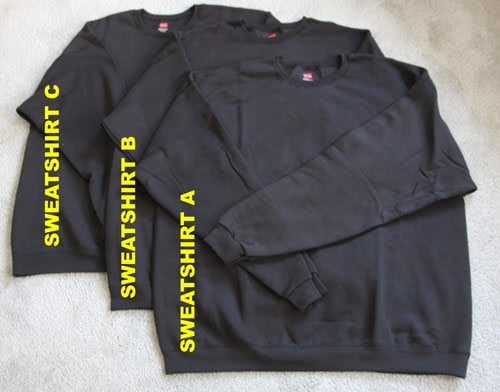

Cut Sweatshirts A, B, and C as above, straight across under the arms. Set aside the neck/sleeve areas (we won’t be using them).
Now we will call each piece we just cut Piece A, Piece B, and Piece C.
2.
Cut down one side of Piece A and Piece B, and open each piece flat. These will be both the front and the back of your garment. (Piece C we’ll deal with later.)
3. (Optional: You may want to iron Piece A and Piece B at this point in order to flatten any creases that occurred along their sides – we want the center front of the garment to be as crease-free as possible.)
Locate the center of Piece A (Center Front – referred to as CF from here on). At 4″ on EITHER side Piece A’s CF, mark two vertical buttonholes (large enough to accommodate your buttons), centered vertically in the ribbing area. Mark more buttonholes further outwards, spacing them 2″ apart, until you have marked 10 buttonholes (5 on either side of CF). Mark Piece B in exactly the same manner for your buttons.
4.

Sew the buttonholes on Piece A using your sewing machine (you will not need stabilizer on the wrong side of the fabric as long as you choose a wide enough setting for stitch width). You can determine the length of your buttonholes by measuring the diameter of your button, adding the height of your shank, and adding 1/8″. (Tip: Make a practice buttonhole on some scrap fabr
ic – or in the sleeve ribbing of one of the sweatshirts you cut up in Step 1). Test to see if your button will go through the hole and sit properly; if not, adjust accordingly.) Cut buttonholes open. (tutorial for making buttonholes on your machine here )
5.
Hand-sew on your buttons onto Piece B at the marks you made in Step 3). Sew on all 10 buttons, and shank them by winding the thread around your stitches several times.
5.
Place Piece A and Piece B right sides together, and sew side seams together with a 3/8″ seam allowance. We will call this Piece A/B from here.
6. Make a double knot in the end of your round cord elastic. Place on top of the side seam on the wrong side of Piece A/B, approximately 3/8″ from cut edge of the Piece.
Using a zigzag stitch on your machine, zigzag over the cord elastic, sewing it all the way around the cut edge of Piece A/B. (Start sewing just below the knot you made in the elastic, and backstitch several times to secure.) DO NOT SEW THROUGH THE CORD ELASTIC; the elastic must remain moveable underneath the zigzagging stitches.
7. When you get all the way around the edge of Piece A/B, backstitch a few times over the cord elastic, and remove from your machine. Trim thread ends.
Pull on the elastic firmly and pull the fabric in the opposite direction – this will create a gathered effect. Keep gathering your fabric by pulling on the cord elastic until cut edge of Piece A/B is the same size as cut edge of Piece C.
8.
Double-knot cord elastic and trim end.
9.
Insert Piece C inside Piece A/B, matching cut edges, right sides together. Pin together.
Sew top of C to gathered bottom of A/B, sewing to the left of the line of zigzag stitches so that none will be visible on the right side of the garment.
10. Determine length of bottom elastic. Button all buttons on your garment, and try it on. Wrap a measuring tape around your body at the point where the bottom ribbing hits on you. Add 1″ – this will be your 3/8″ wide elastic length, so cut elastic accordingly.
11.
Cut a small hole in bottom ribbing of Piece C on the wrong side of the garment. Attach a bodkin or safety pin to the end of the 3/8″ wide elastic, and thread it through the ribbing, all the way around. Pull the other end all out the hole- and stitch the ends together overlapping about 1/2″. Feed back into the hole you made – and if you’re a perfectionist, hand-stitch that hole closed.
You’re finished!
This is a convertible piece – you can wear as a blouson tunic (shown above), or in the configurations below:
Button-Waisted Skirt
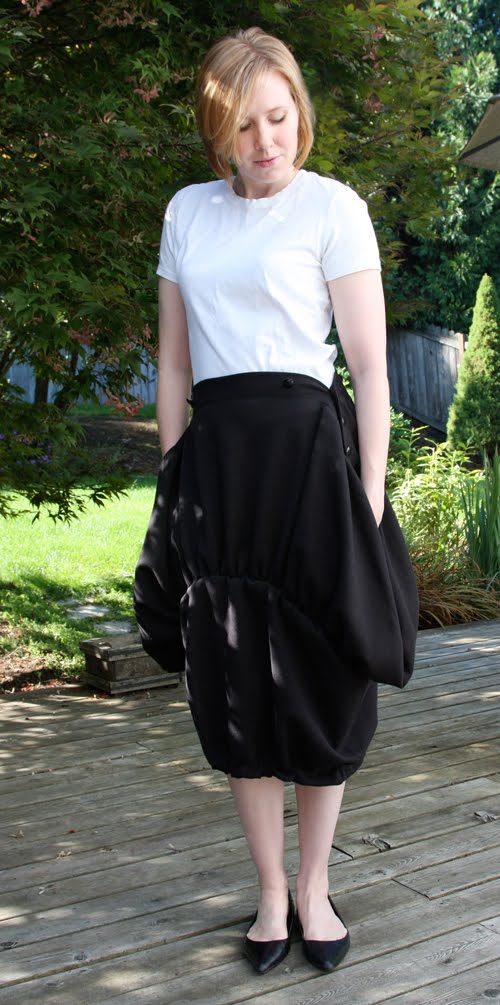
Undo one or two buttons on either side of the neckhole of your tunic, step into the neckhole and pull up to your waist, fastening buttons as necessary to keep it from falling down. Tuck each sleeve into itself to create drippy pockets (though you won’t want to put anything in them since the sleeves are still open!). If you like, safety-pin the sleeves closed on the insides so you you don’t have gaping holes in your skirt.
Ruffle-Bottom Skirt
Turn tunic upside-down and undo all buttons. Wear with bottom elastic as a waistband.
It seems a huge waste of 3 sweatshirts, but if your SO has extra unworn ones or you score at the Goodwill, it gives them another great life. Can you imagine this done in cream, with gold anchor-embossed buttons for a sailor look? Or seafoam green, with pearl buttons? Or two-toned: heather gray on top with black at the waist? The options are endless…and only limited by your imagination!
Plus-don’t throw away the top parts of your sweatshirts..more tutorials on what to do with those are on the way!
For reference purposes: I am a Misses’ Small/Medium, 4/6 – I am 5’6″ tall and my measurements are 33.5 – 27 – 34.5. I used two Men’s XL sweatshirts for Part A/B – and for Part C I used an Men’s L sweatshirt.<
br />
Happy DIY’ing!
xoxox
Carly
Leave Comment