May 10, 2011 | DIY

(Pamela Love ring img source)
I fell in love with this tough but earthy Arrowhead Ring from Pamela Love (link is to the matte pink version) awhile ago. Sporting a hand-carved arrowhead set in a thick silver bezel, this ring also has a line of silver flattened discs at the base creating a Southwestern-feel setting – which looks great with all the sheer pieces, bleached denim, and leather we’re seeing for Spring. It’s taken me awhile, but I’ve finally figured out a way to recreate something similar to this lovely piece (less the $528 pricetag!). Definitely not for the faint of heart, this 3-stage tutorial will take you some time, but the results are amazing. It uses Apoxie Sculpt**, a new non-toxic, moldable crafting substance I’ve discovered recently, to emulate the black resin setting. So, for around $40 total, here we go….. (more…)
Leave Comment
May 4, 2011 | DIY
 Since it’s Rings Week here at Chic Steals, I wanted to share with you a quick n easy way to add a bit of pizazz to a store-bought 2-finger ring (with a flat top) and some scrapbooking embellishments. It’s DIY in 5 – minutes, that is. The easiest, quickest ways to take a piece from blah to fab and update it to current trends.
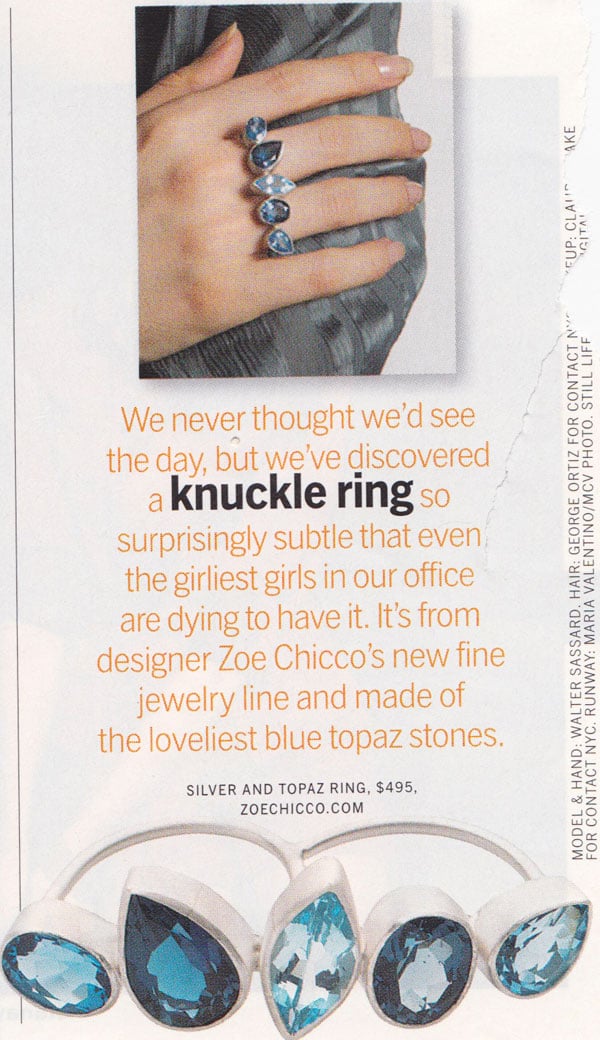 Lucky Magazine posted a photo of this gorgeous Zoe Chicco knuckle ring waaaaay back in 2008? or so, and I kept the clipping on my inspiration board. As usual, they were way ahead of the trend, since it’s only been since 2009/2010 that we’ve been seeing 2- and 3-fingered rings adorning the fingers of fashionable girls the world over. At $495, I found this beautiful ring beyond my budget back in 2008, and it’s sadly unavailable now besides. [BTW if you’re wanting this style but don’t want to DIY, Soixante Neuf sells a veeeery similar bejeweled ring so if you feel like spending $216 then the same style can be yours!] You can also probably find this double-finger ring covered in jewels from some lower-priced trendy retailer like Forever 21 or elsewhere if you look hard enough. But of course, I wanted to make my own – similar to the original!
It wasn’t until recently (around the holidays last year) that Jolee’s Jewels dimensional scrapbooking stickers came out with a new line of colored stick-on jewels in their settings…something that’s pretty hard to source for jewelry or embellishment projects, sticky-back or no. (Ever found set acrylic jewels (i.e., jewels in a silver or gold pronged or rim setting) in Jo-Ann’s or Michael’s? No? I found a small selection in M&J Trimming last time I was there, but it was very limited, and though yes, the BeDazzler will “set” gemstones onto fabric, the settings are really cheap-looking and the gemstones have to be super-small to fit into the Bedazzler nozzles. So anyway, large set gemstones as embellishments have been near-impossible to find – until NOW!)
You Need:
*Jolee’s Jewels “All that Bling” Vintage Gems dimensional stickers (I used gems from the Royal and Light Blue and the Baby Blue and Silver packs); or other set jewels
*flat-top 2-finger connector ring (the one in the photo above is the Hearts Two Finger Ring from Payless)
*jewelry glue/glue for metals (my fave is GS Hypo Cement)
How-To:
1. If using the scrapbooking stickers, you may want to pull the sticky back off first and figure out how you want to place your jewels. I found it was easy to position my jewels on the ring top while they were sticky – but super-difficult to pull them off one by one and add the glue. Your choice!
2. Once you’ve decided on the placement, just spread some glue onto your ring base, and position the jewels on top. Allow to dry for 24+ hours before wearing.
 And that’s…amazingly…it!

Here are some picks for base rings if you’re looking to buy online…though you could probably find good bases at Claire’s (which is where the ring I actually used is from), Forever 21, or other retail brick-and-mortar stores that cater to the young and trendy crowd. Here are some more picks from online:
Or alternatively, you could glue the jewels onto a piece of metal (like an old piece of jewelry; a sheet of embossing metal; or a metal jewelry blank from Michael’s newly-added hammering and embossing section)…and then glue TWO separate flat-pad ring shanks onto the back of the embellished metal, right next to each other, to create the two-fingered ring.
Happy DIY’ing!
xoxox
Carly
~If you liked this post, please share it!~
Save
Leave Comment
May 1, 2011 | DIY
 I noticed these beautiful embellished ballet flats in my favorite Japanese magazine, Vivi, back in Winter of 2010. They’re Miu Miu, available in lovely pastel colors, and boast a pretty hefty pricetag ($745!).
I figured I could make my own lookalikes from a pair of shoes I already had. And it cost less than $15! Here’s how…
You Need: (more…)
Leave Comment
Apr 28, 2011 | DIY
 Straw orange and pink sunhats from Marc Jacobs Spring/Summer 2011 RTW Collection.
A little paint gives a floppy straw hat a vibrant 70’s-inspired makeover a la Marc Jacobs.
Merona Wide-Brim Floppy Straw Hat, Target, $12.99.
Tulip Fabric Spray Paint in Fuchsia and in Pumpkin, $5.79 each, CreateforLess.com.
Happy DIY’ing!
xoxox
Carly
Photo is a scan of one of the Marc Jacobs advertisements shot by Juergen Teller, found in Vogue Magazine (or something…)
~If you liked this inspiration, please share the DIY!~
Save
Leave Comment
Apr 26, 2011 | Fashion
 Have you guys seen Fabulous on a Budget? It’s a FABULOUS website all about being creative (with not a lot of cash), run by two DIY mavens: Mary Darling and Leah Ashley. I love their fun and glamorous aesthetic – and you may have also seen them on TV! They also have created videos for Style TV for the Look for Less! (Remember that show??? I LOVED it!)
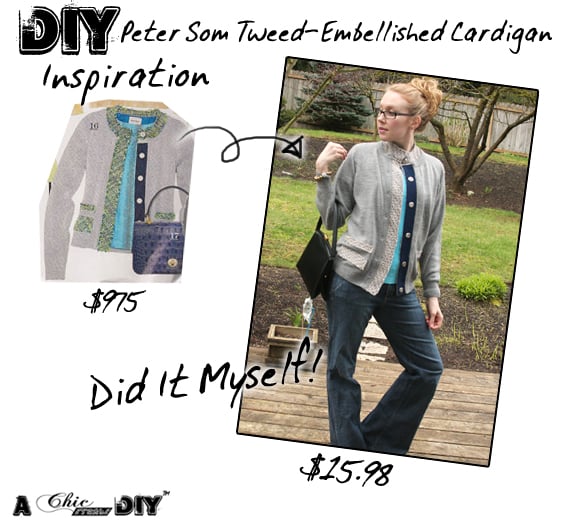 When they contacted me asking if I’d like to guest-blog for them, I said heck yeah! I even went the extra mile and edited and laid out my photos in a Photoshop collage instead of just editing them like I normally would.
With just a bit of sewing and some glue, it’s super-easy to update a boring old cardigan into something Springy and fun. Please check out their website for the full how-to!
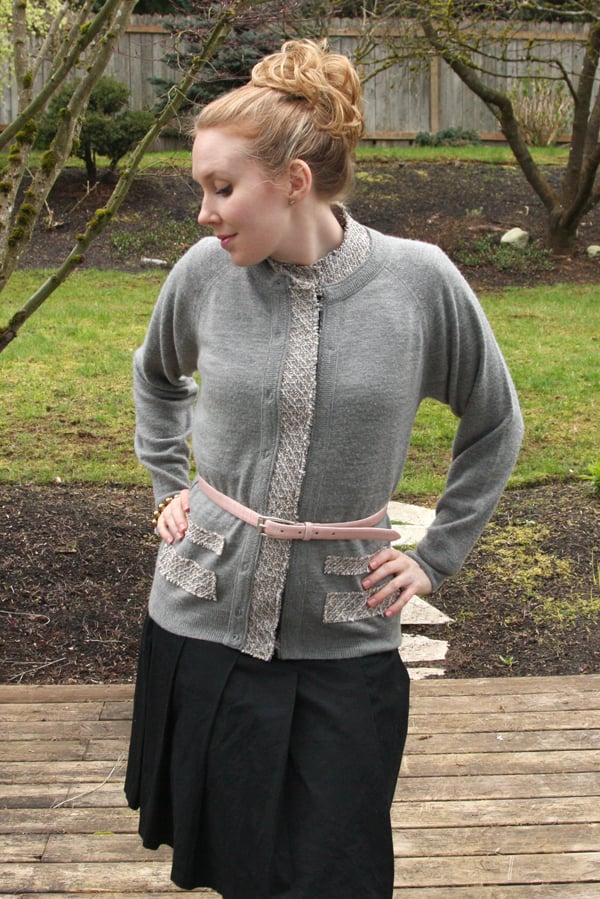
Hope you guys like it!
xoxox
Carly
~If you liked this post, please share it!~
Leave Comment











