Sep 27, 2011 | By Carly J. Cais, DIY
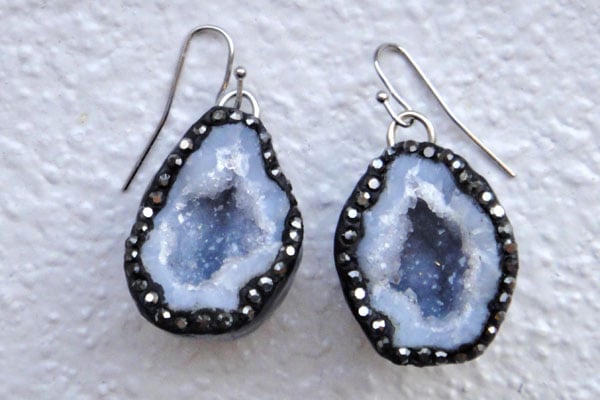 I finally finished a pair of earrings this weekend that I’ve been working on for so long…I had attempted making them numerous times before but just couldn’t seem to get them exactly right.
I’ve always been drawn to the rough imperfections in natural stones and crystals, far more so than anything ever cut or polished by humans. Geodes are the perfect example of this: the jagged, rough crystals inside that are at once both perfectly symmetrical and so perfectly without order.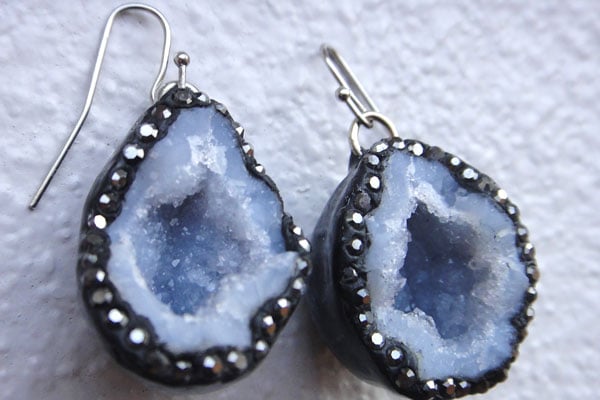
I surrounded two halves of a split geode crystal (technically a thunderegg, I guess) with black epoxy resin; then hand-set hematite-colored Swarovski crystals around the perimeters. Pewter French hooks finish off the earrings.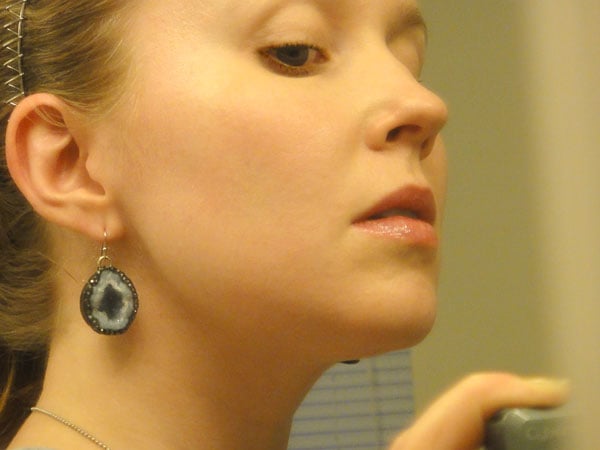
Given their sparkliness, contours, and depth I found they were incredibly hard to photograph late in the day and on my own, in the mirror. I’ll have to try when it’s nice and bright outside!
I’m also going to experiment with another pair, this time with Silver Shade Swarovskis around the geodes. I just couldn’t decide whether the dark hematite gray or crystal-like Silver would look better! There’s something I like about the smoky gray color glinting against the black resin, though.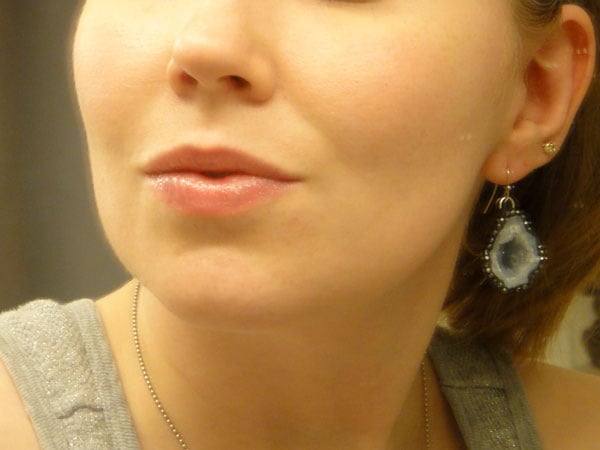
Hope you guys had a great weekend!
xoxox
Carly
~If you liked this post, please share it!~
Leave Comment
Sep 24, 2011 | Life, Score!
Hey guys, the entry period ends tomorrow (Sunday) night at 11:59 PM PST, so if you’re needing that beautiful scarf-turned-vest piece that Stacie from AffordableScarves.com is generously gifting one Chic Steals reader, get those entries, re-Tweets, and re-blogs in ASAP!
xoxox
Carly
~If you liked this post, please share it!~
Leave Comment
Sep 23, 2011 | DIY
 I’m so thrilled to have been featured on the I Love to Create blog as a guest poster!
They sent me a lovely package of goodies from their immense ILoveToCreate.com website a little while ago (chock-full of Tulip-brand and Aleene’s products, fabric dyes, finishes, paints, and embellishments…if you haven’t checked it out for all your crafty needs, or for tutorial ideas and inspiration, please do!! You’re so missing out!!). I’ve used the contents of the package to create a couple tutorials for them that will be featured on their blog in the coming weeks. My first project, a Leopard-Print Infinity Scarf, repurposes the bottom of an old t-shirt and uses a stencil from one of their tie-dyeing kits to create a fancy feline look. Here is the tutorial in full below:
Fashion blogger Carly J. Cais of Chic Steals will be featured in the next few weeks as a guest blogger here on the iLoveToCreate blog! She has created some trendy and fashionable looks and she shows you step by step how to make them! Take it away Carly…
How to Create a DIY Leopard-Print No-Sew Infinity Scarf From an Old T-Shirt
Nothing could be easier than re-purposing the bottom of an old t-shirt as an accessory! Wear as a simple scarf for a pop of pattern at the neck, a lightweight hood, or sew the bottom closed and add a drawstring to use as a pouch for makeup. By using two colors in the leopard print and varying the size of the spots, you get a much more finished, high-end look than by just using the stencil alone.
Materials:
– Tulip Tie-Dye Fashion Kit in Wild Thing (stencil, gloves, Aqua dye, Cobalt Dye)
– white t-shirt
and…
– garbage bags
– paper towels
– cotton swab (not pictured)
– small bowl for paint (not pictured)
– fabric scissors or rotary cutter
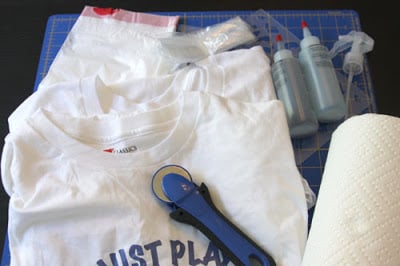
How To:
1. Begin by creating the leopard pattern on the t-shirt. Wash the shirt in the washer (do not use fabric softener) and dry in the dryer to remove sizing.
2. Place onto a garbage bag, laid onto a flat surface. Place another garbage bag in-between the fabric layers so the dye does not seep through.
3. Place the leopard stencil from the Tie-Dye Fashion Kit onto the shirt, and cover around the stencil with paper towels to prevent overspray.
 4. Put on the gloves in the kit. Mix the Tulip Aqua Tie-Dye according to the kit directions, and spritz onto the fabric using the spray bottle. Be careful to not spray too much; just enough so the stencil shapes are visible (too much and it will seep under the stencil and the pattern won’t be crisp).
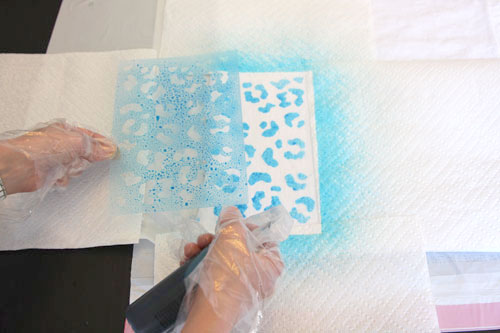 5. Remove the stencil; wipe down with a paper towel.
6. Repeat Steps 3) – 5) to cover all the area below the underarms of the t-shirt on the front. Turn the shirt onto the back and repeat.
7. Allow to dry about an hour.
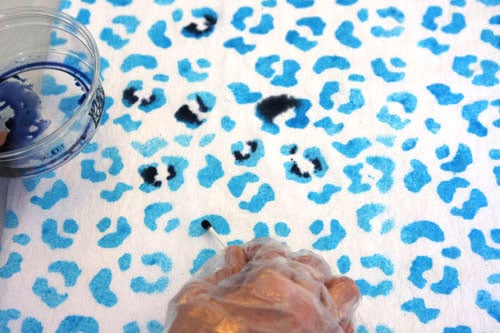 8. Mix the Tulip Cobalt Tye-Dye according to directions, and squirt some dye into a small bowl (not used for food). Dip a cotton swab into the dye and dab it onto the t-shirt, on top of the aqua spots you made with the stencil. (Reference a photo of what a leopard’s spots really look like to help with placement.)
9. Cover with plastic and allow to dry 4-6 hours. Once dry, wash in the washer with a small amount of detergent and water at the hottest suitable for the fabric. Dry in the dryer.
10. Once dry, cut off the top part of the shirt, from side to side right under the sleeves.
And you’re done! Wear the fabric loop as an infinity scarf for a punchy pattern at the neck, or customize further with a little craftery on your sewing machine.
Happy DIY’ing!
xoxox
Carly J. Cais
~If you liked this post, please share it!~
Leave Comment
Sep 23, 2011 | Fashion
 Hair: worn in a topknot with the help of my Odango cushion
Cleopatra Crescent Necklace: Forever 21
Ginger Chiffon Blouse: Forever 21
Multicolor crystal earring set: bought in Japan
Convertible faux-leather bookbag: Ober Tasche, bought in Japan
Watch: Citizen Eco-drive
Rings: wedding rings; Beyond Rings Gunmetal Claw Ring, bought at HauteLook
Super Stretch Colored Skinnies: Divine Right of Denim for Forever 21
Zipper suede heels: Sam Edelman (bought at Nordstrom Rack)
Do you all have an outfit that not only makes you feel like a million bucks – that you can put on any time and instantly feel awesome no matter what – and that garners you compliments everywhere you go? Apparently, this is one of those MAGIC OUTFITS for me. (more…)
Leave Comment
Sep 21, 2011 | DIY, Fashion
 Whew! That Fashion Week went by in the blink of an eye (and now we’re on top London), but I’m still collecting ideas for new projects to begin later this season and into next. Spring? Already? Wha-….?
The trends on the runway were captivating; the ideas full of Spring and renewal. Who didn’t swoon over the pastel minimalism at 3.1 Phillip Lim, the bold prints at Anna Sui, and the metallic fringe at Marchesa? Though minimalism and fresh colors dominated, I was still inspired by the latest round of DIY possibilities. Hit it, girls!
Alexander Wang: Embolden a pair of basic leggings with some fabric paint – just first use some painter’s tape to mask off geometric graphics.
Alice + Olivia: Thrift a diaphanous chiffon curtain and sew the vertical sides together. Thread a ribbon through the top pocket (where the rod would go); tie at the back of the neck. Cut off the excess bottom and slice a side-slit for an easy, springy halter dress.
Band of Outsiders: Create a contrast-y dress by adding a black collar (cut off another shirt if need be, or just by covering the dress’s existing collar in black fabric, and iron-on some black trim at the waist.
Carolina Herrera: Re-invent the LBD by adding the front of a white shirt, cut out, to it. Create the unique belt by simply cutting the negative space out of a 2-3″-wide red belt.
Cynthia Rowley: Cut jagged pieces from gold lame (or use gold lace!) to embellish the shoulders of a simple black cocktail dress.
Donna Karan: Use black elastic straps and hand-sew them to a mini bustier.
Erin Fetherston: Use a graphic print to create a simple sheath (or find something that fits the bill off-the-rack). Use a fabric marker to “color in” areas of the print for a bolder, eye-catching piece.
Jen Kao: Take a simple trench and dye it military-green, reserving the bottom for a dip-dye of lavender and orange sherbet.
Juan Carlos Obando: Punch large holes with a leather punch or using a pair of scissors (or even a scrapbooking punch!!) in a leather or vinyl jacket for a sultry peep-show.
Kimberly Ovitz: Cut out triangles from the sides of a sheer white blouse.
L.A.M.B.: Take a plain tote and cover side-to-side with a layer of neon yellow-green duck tape. Add more tape (or even vinyl trim!) – this time in camel – in geometric lines across the front.
Marc by Marc Jacobs: Replace the buttons of an otherwise unremarkable blue blouse with bright orange buttons. Tack on some khaki pockets (salvaged from an old pair of trousers or an overcoat) to a pair of dark blue pants.
Michael Kors: Cut the sides out of a python-print maillot. Cut the top from the bottom, add a belt in the middle, and hand-stitch each end to the top and bottom of a belt buckle. (Don’t swim in it!)
Monique Lhuillier: A bright wrap dress (dyed?) can be made edgier with pieces of black lace affixed to it strategically.
Some of these I’ll probably be doing tutorials for in the coming months. See anything you’re just dying to know how to make? Leave it in the comments section, and if it’s possible, I’ll make it so!
Also: Part 2 (N-Z) Coming Soon!
xoxox
Carly
All photos found at Style.com. Layouts by me.
~If you liked this post, please share it!~
Leave Comment











