Feb 28, 2011 | Fashion
How many of you watched the Academy Awards last night? Sadly, I missed it, but was able to catch up this morning on all the coverage courtesy of the vastness that is the Internet. Now, DIY is not usually an option when it comes to glamourous, $10,000+ formal gowns and diamond jewelry…but finding similar pieces at an affordable pricepoint definitely is. Here are some get-the-look-for-less jewelry pieces, straight off the Red Carpet:
Blingy Cocktail Rings
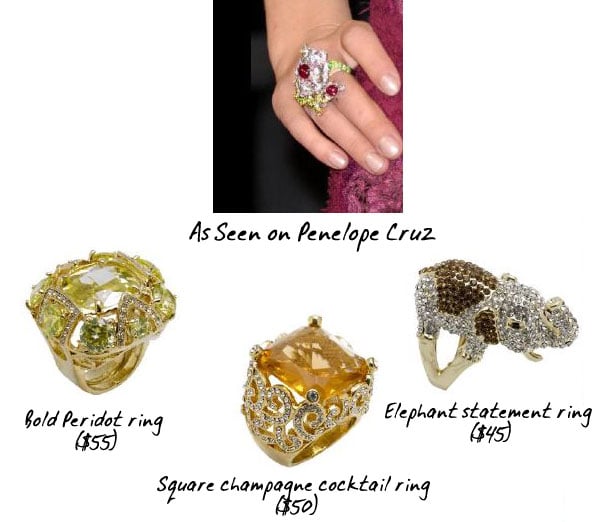
Bold Peridot ring ($55); Square champagne cocktail ring ($50); Elephant statement ring ($45)
Sparkly Wrist-Adornment
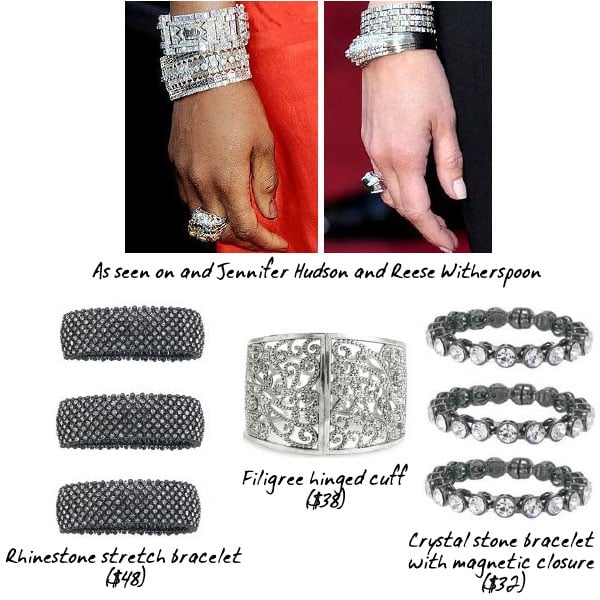
Rhinestone stretch bracelet ($48); Crystal stone bracelet with magnetic closure ($32); Filigree hinged cuff ($38)
Lovely Necklaces

Crystal rock necklace ($58); Enameled CZ Handbag Pendant ($28)
Other Finishing Touches
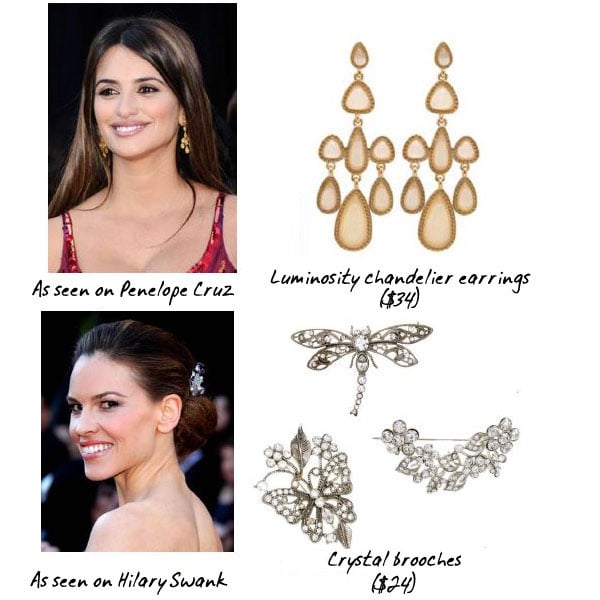 Luminosity chandelier earrings ($34); Crystal brooches ($24 each)
Did any of you have an Oscars viewing party? I need to find me some local fashion-savvy girlfriends to do just that!;-)
xoxox
Carly
Original photos courtesy of Ann Magnin, Inc. Photo arrays by me.
~If you liked this post, please share it!~
Leave Comment
Feb 26, 2011 | Beauty, From You
 Priscilla-brand Clip-In Curly Wigpiece
from Formspring.me:
Hi there, I have been reading your blog for a while now and quick question. I don’t read or speak Japanese but think I might like a clip in ‘curly’ extension if it is indeed curly. Checked site mentioned but very lost. Any ideas for my language barrier?
Did you know you can access Rakuten.com in English? (If that’s the site you were referring to…) Or try reading the site through Google Translate? (http://translate.google.com/)
However the wig pieces appear in the photos is how they look straight out of the package; there usually isn’t any false advertising when it comes to stuff from Japan (probably because consumers won’t tolerate it!). I personally love the Priscilla brand because I find it’s high-quality, usually heat-tolerant, and I found one of their colors is a perfect match for my natural color. If you’re looking for the clip-in curly extensions, they’re called “Eriashi Wig” (エリ足ウィッグ) or “Mecha Raku Ekusute” (めちゃ楽エクステ) but I don’t see any available that are reaaaallly curly, so I’m not sure just how curly you’re looking for. Wigland (http://www.rakuten.co.jp/wigland/) is my fave one-stop shop for all my hair-pieces; maybe you could browse around in there to see if you see anything you like? (English interface: http://search.borderless.rakuten.com/borderless/search.action?l=en&sid=wigland&tl=0&p=1&vm=2&f=0&sm=0&k=&fs=1)
Good luck!
xoxox
Carly
Leave Comment
Feb 25, 2011 | DIY
 One day I was browsing in my usual drugstore in Hawaii, Lil Tot in tow, when I spied something in the Sally Hansen nail products aisle
that stopped me in my tracks. Ardell Duralash Eyelash Extension Kit. DIY eyelash extensions???!
It was mid-2007, Talika Lipocils seemed to be taking over the world, and I was toying with the idea of forking over the $40 for a tube. I’ve always had sparse, light brown lashes with blonde roots – so I’ve had to gunk on tons of mascara to get full coverage all the way to my eyelids to completely disguise the blonde part. (Which I’ve found almost impossible anyway.) I’d considered getting them dyed before, but the side effects and potential for disaster (blindness, anyone?) had scared me off. After having my son, I noticed my eyelashes were falling out about the same time the hair on my head was [if you didn’t know, about 6 weeks – 4 months after having a baby your body begins shedding all the hair that it held onto during pregnancy; normally you lose about 100 hairs a day but during pregnancy your hair does not shed at the same rate – we’ve all heard that your hair gets thick and luscious during pregnancy, right? It’s in part due to less shedding…which commences abruptly and often in large clumps after delivery, just FYI]. So I was looking to do something about the situation…and being such a do-it-yourselfing frugalista, I figured I wouldn’t be stepping into a salon anytime soon.
I was so intrigued by the concept of the eyelash extension kit, I just had to try them. They were pretty affordable, too – at around $11 for a pack. So I took them home, and after my son was asleep for the night I spent about an hour and a half grappling with them and applying them.
The next day, it was amazing. I got so many compliments wherever I went – from the women in my Mom’s Club asking: “Did you do something different?” to the lady at the grocery checkout line telling me I had beautiful eyes. Amazing!! And even more amazing, the lashes I had applied so painstakingly over that hour-and-a-half lasted….3 and a half WEEKS. Absolutely incredible.
So since then, I’ve been hooked on  Ardell Duralash. Not too long afterwards I started seeing ads for expertly-applied eyelash extensions in the Japanese magazines I was reading, and eventually went to a salon in Tokyo to have them applied ($84 for 120 lashes!!…back in 2008, though it’s more pricey now). But since I don’t go to Tokyo more than once a year (and salons that apply extensions here in the U.S. are few and far between and AMAZINGLY expensive at $150 – $400 for a full set of extensions) this DIY version is much more doable.
Now, eyelash extensions are not something that should be worn continuously. As your natural eyelashes grow, the extensions start to twist in different directions and poke you in the eye, or get matted in the corners of your eyes. The glue is annoying and crusty, and visible in closeups (unless you get them done by an expert). You don’t ever want to get the glue in your eyes or on your eyelids, since it will burn and possibly cause damage. You can’t rub your eyes or else you run the risk of pulling the extensions off. You can’t wear mascara or eyelash conditioner on your lashes at the glueline since both will dissolve the glue. And with extended weight on your eyelashes for long periods of time, your natural eyelashes can become brittle and prone to breaking off. You will want to give your eyelashes a “rest” in-between wearing the extensions, so they can get healthy and flourish during their natural growing cycle, and you may have to regularly use an eyelash conditioner to undo the damage. Plus, I’m not an expert and am not dispensing medical advice – if you choose to follow, please do so at your own risk!!
So, if you do want to try out Ardell Durlash, they are available online where I’ve linked above, and in the Sally Hansen/false eyelash section of your drugstore (at least here in the States, I’m not sure about internationally). The only version I’ve seen for years includes eyelashes that are wide, fanning clumps – not the kind they used to have (the slimline, bundled clump which I used in the below tutorial). But the application method is the same: (WARNING: There’s a lot of close-up photos of my eye in the tute below, so if you find close-up photos of [my] eyes gross, skip it!)
You Need:
 *Ardell Duralash Eyelash Extension Kit (my old kit is on the left; currently sold kit is on the right)
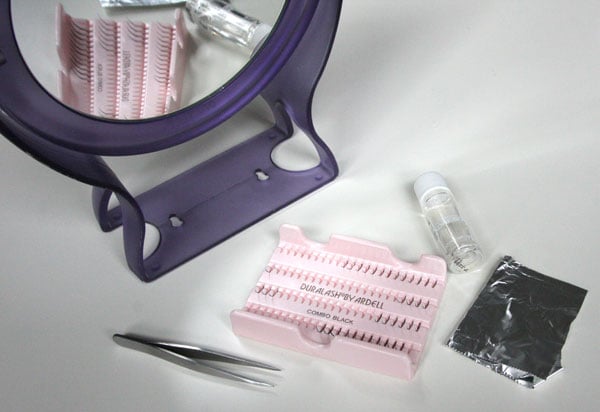 *magnifying stand mirror (it’s sooooo much easier when your mirror is on a stand!!)
*small pieces of foil
*tiny scissors (optional), not pictured
*tissue (optional), not pictured
*lampstand if you need more light, not pictured
[The tweezers, LashTite adhesive, and set of lashes are all included in the kit.]
 The Before photo. I was startled by how much I look like Steve Buscemi in the above photo. :-/
How To:
1. Open up the kit, pull out the tweezers and Eyelash Adhesive. Fold the piece of foil so it’s doubled-over.
 2. Pour a small amount of the adhesive onto the foil (about the size of a pea).
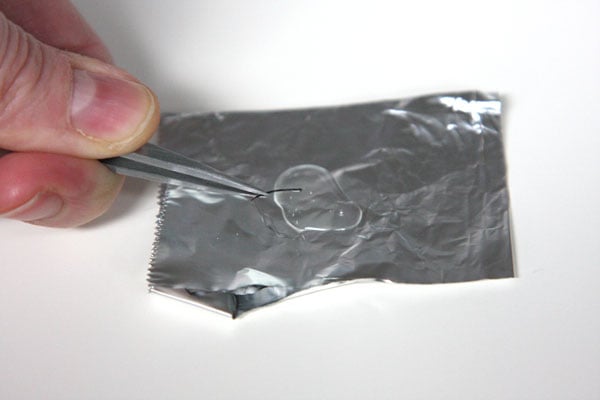 Grasp one of the shorter eyelashes near the end (just beyond the curve in the center) with the tweezers, and dip the knotted end into the adhesive. Allow a tiny bead of adhesive to form on the underside of the knot before you apply.
 3. Close one eye and use your other hand to hold the eyelid taut while you are applying. (I like to start in the middle of my eye and fan out from there, but it’s up to you.) Carefully place the lash ON TOP of your top lashes.
 Use the tweezers to squeeze the lash onto your natural lashes, and open your eye and squeeze the lashes together (being careful not to touch the gluey end). Wait for a few seconds, and the glue should dry and adhere to your natural lashes. DON’T touch or try to shift the extension lashes at all after a few seconds, or else you could pull them off.
 4. Repeat with the shorter lashes, applying in towards your nose, and then outwards towards the outer corner of your eye.
 Change to the medium- or even the longer-length lashes near and at the outer corners of your eyes for a natural look.
 5. If you find the application doesn’t look as “full” as you like, go back in and apply the shorter lashes in-between what you’ve already applied. If you drop the lashes or the glue dries too fast before you can place them on your natural lashes, you can wait a few seconds, and use your fingers to “ball up” the glue and pull it off the lashes, and then re-apply glue and start over. If you get glue on your natural lashes where you aren’t applying the extensions, pull off the glue as quickly as you can before it dries using your fingers (you can also use Adhesive Remover, included in the kit, on a tissue to remove extra gobs of glue). I also find that as I’m going back in and filling in the lashes, I can use my fingers to grasp the lashes and then “squeeze” them onto my lashline since I have all the applied lashes to grip and press against.
 6. Once you’re happy with one eye, count the number of lashes you end up applying. Then apply the same amount and sizes to the other eye so they match. For me (since I’ve done this many, many times), the whole process takes about 30 minutes, and I usually do it while watching some bad late-night TV.
 7. (Optional) I find that straight out of the kit the lashes are a little long for me for daily wear, so I like to trim them with nail scissors. DON’T simply cut the ends straight up or else they’ll look weird; you want to half-close the scissors and pull the blades down the length of each clump of the lashes so they snip the ends at different lengths (kind of like how you would “feather” your bangs or hair if you were cutting it). Always snip just a little – you can go back and cut more if you want. And DON’T cut your natural lashes!!
Once all dry, take care of them – no scrubbing or pulling; avoid contact with soaps/makeup/makeup remover; and be extra careful when you wake up in the morning and want to rub the “grit” out of your eyes – because a lot of it is GLUE that needs to be there!! Your natural lashes will shed as time goes on, and the glue will weaken and the extensions fall off, so you can choose to re-apply more, or use the Remover that was in the kit to remove them all.
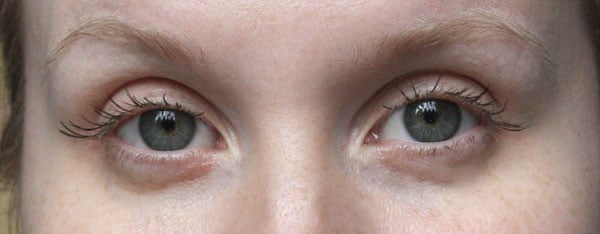
 No more Steve Buscemi! And the best thing is, I wake up in the morning, look in the mirror, and feel pretty immediately…without makeup, without washing my face or doing my hair…it’s truly amazing what a different a pair of lashes make!
But they’re still long-lasting lash extensions for a fraction of the cost!
I know, I know – here I am advocating poking at your eye with sharp instruments and a pair of scissors, not to mention toxic, smelly glue and bristly clumps of eyelashes. FOLLOW AT YOUR OWN RISK!!
 Happy DIY’ing!
xoxox
Carly
Leave Comment
Feb 23, 2011 | Fashion
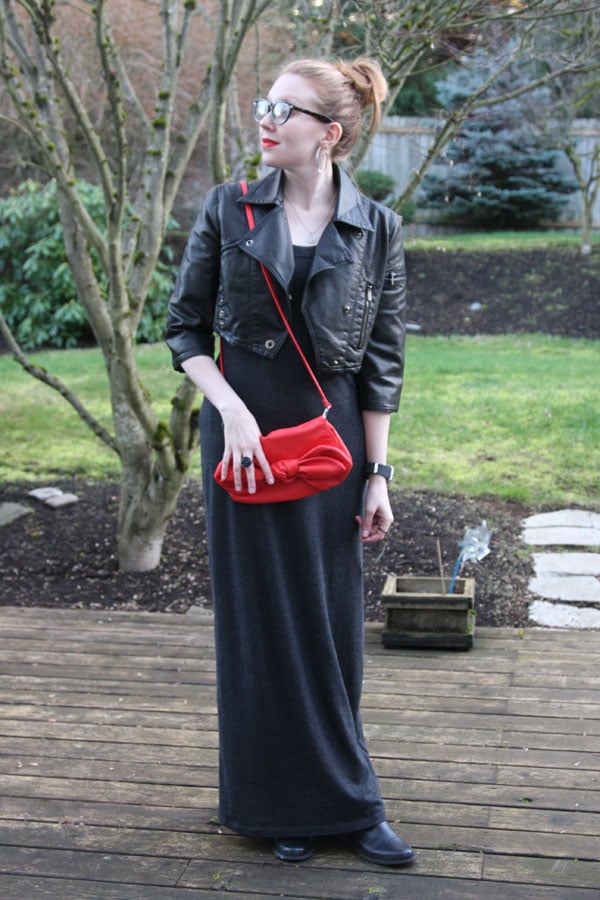
Hammered Twisted Silver Hoop Earrings: Target
Faux leather jacket: Kitson (a recent HauteLook purchase)
Bow Bag: H&M
Manmade Goldstone Rock Candy Ring: my Etsy shop
Motorcycle Boots: Zara
I’ve been into maxidresses lately. Perhaps it’s because my jeans aren’t fitting very well…? I’ve been lax lately and stuck behind the computer, sitting, for hours at a time, so things are definitely expanding. And maxidresses are way more forgiving. Ah well – I’ll jump back on the exercise bandwagon again soon!
 I couldn’t resist these glasses when I saw them at Forever 21. So nerdy! Hub says they are completely unflattering on me and I look like I’m from the 80’s. Well…I AM! (Actually I’m from the 70’s if we must split hairs, but I only can remember the 80’s.) Manrepeller #1: Thick-framed round nerd glasses!!
 I finally made it out to Portland’s H&M (what can I say – I never hang around downtown much) – and this orangey-red bag was calling my name.
 I thought it was a lot like this lipstick I found at Sephora – I was looking for a bright red with orange undertones…and this one (the color’s called “It Girl” – R06) was perfect! It looks more red indoors, but appears very orangey-red in natural light. Manrepeller #2: Orange lips!

I was so excited the other day when I realized my hair was finally long enough to put into a topknot!! It seems I’ve been growing it out forever, and now it’s badly in need of a trim and a style. So I’ve taken to wearing it back or in a ponytail…but now a topknot is within the realm of possibility! Manrepeller #3: Topknots. [with apologies to the iconic, the original ManRepeller for all the references.] Yeehaw!
We’re supposed to get snow tomorrow…I have my fingers crossed that school will be cancelled so I can sit at home all day and work on all the projects that are piling up quickly…Can you believe it will be March in a week?? Egads!

I also have to get my serger fixed as all the chicken costumes I made for Lil Tot’s school play screwed up the machine and now the timing’s off. Well, it hasn’t been serviced since 1995 so I guess it’s about time…But that means no sewing DIY’s for a little while…*phooey*
Hope everyone’s having a great week so far! Does anyone have any cool plans for the last week of February?
xoxox
Carly
~If you liked this post, please share it!~
Leave Comment

 img source
 Yes, the entry period to win this beautiful crocheted hat ends at
  Thick-Framed Glasses,










