Feb 23, 2011 | DIY
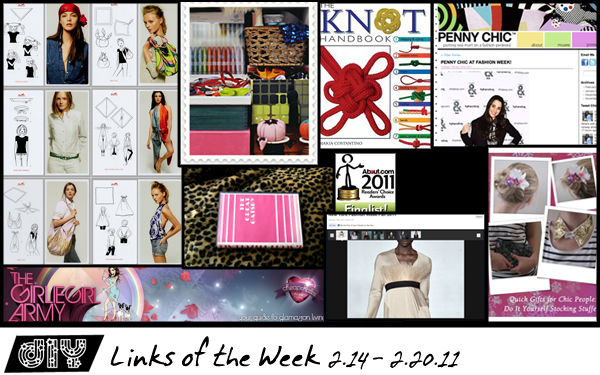
I’m getting behind! Hopefully in the coming week Ill be able to post this on Monday…when I intended to. And the NYFW Fall 2011 runway collections are over?? Already???!
 image by me.
Sometimes it’s harder to go simple and let your greatness speak for itself.;-)

I’ve been nominated for an About.com award in the DIY Fashion Blog category!
Vote for your favorite blogs (you have until March 8) – and it will only take a second
>>click here to vote<<

These Hermes Knotting Cards from MaiTai’s Picture Book are super-duper helpful. All the ideas! All the DIY possibilities! How many of you are running to your closet to pull out all your scarves and try this out? I am!

Speaking of knots, I’m also drooling over this knot book! Just think of all the belts…brooches…barrettes…earrings…rings…and other numerous accessories you could fashion out of knots!! Really, REALLY early birthday present, pretty please?
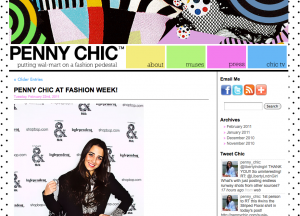
I’ve just discovered this fashion blog that focuses on the cheap, but chic: the creator only showcases outfits bought at Wal-Mart…yes, I said “Wal-Mart“! Check it here at PennyChic.com
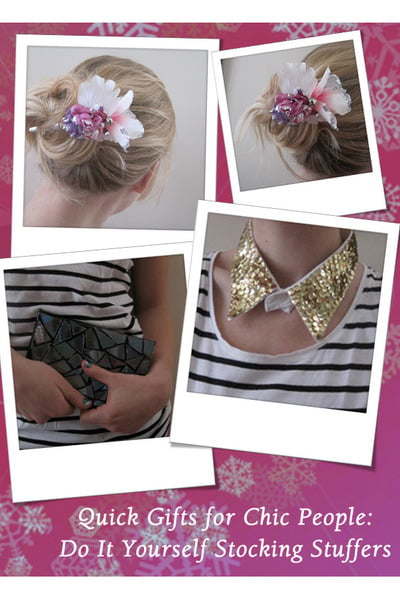 DIY: Quick Gifts for Chic People posted by Chictopia user Le Petit Lapin. LOVE the sequined collar and bag covered with cut-up CD’s. What great ideas!
 Maegan from …love, Maegan has launched a new series called “Maeg it Yourself,” where she DIY’s items suggested by her readers. Go here and let her know what you’d like her to make, and you could even win her creation!

Samantha Baldwin (AKA blogger Bromeliad) of the Examiner.com has posted oodles and oodles of DIY inspiration from New York Fashion Week for Fall 2011. Phillip Lim? Alexander Wang? Betsey Johnson? It’s all there, ready for the DIY’ing.
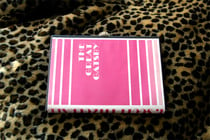
Plus she also posted a great tutorial for a DIY book clutch, inspired by Kate Spade. The cover is interchangeable = ingenious!!

I’m loving Girlie Girl Army‘s comprehensive list of Vegan/Eco Shoe, Handbag, and Clothing Lines. Since oftentimes “Vegan” is synonymous with “affordable”…there’s a lot of great chic and cheap shopping gems on that list!
Recent favorite affordable and cute shopping destinations:



(Right now I can’t get enough of SockTheory‘s crocheted anklets, rugby striped overknees, and pothole backseam stockings! Plus, you can use coupon code PERFECT10 for 10% off your entire order, and get $3.99 shipping (and free shipping on orders over $50!) to a US address!)
 And, if you haven’t already – don’t forget to enter the Dahlia Soleil x Chic Steals Giveaway of a beautiful crocheted slouchy hat! The giveaway is open to readers worldwide…so head on over and leave your comment to enter!
xoxox
Carly
-all photos copyright their respective authors; photo array by me-
~If you liked this post, please share it!~
Leave Comment
Feb 17, 2011 | DIY

Yesterday I coveted it, so today I’m going to show you how to make it. It’s DIY in 5 – minutes, that is. The easiest, quickest ways to take a piece from blah to fab and update it to current trends.
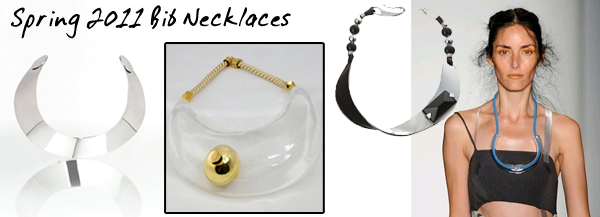
From left to right: Giambattista Valli, Alexis Bittar, Giorgio Armani, VPL Victoria Bartlett.
photo credits: Style.com, Wireimage.com; photo array by me.
With the coming of Spring, jewelry tends to go lighter, translucent, and more plastic-y…and the bib necklace is no exception. But finding just the right clear acrylic piece for a necklace is pretty tough; jewelry supply stores usually don’t sell large bib-style acrylic pieces, for one thing. You could always design it yourself and have it cut by Ponoko.com – but there’s a steep learning curve for the design software, usually multiple prototypes are necessary before you reach your final design, the service is pretty expensive for just once, and hiring out lasercutting seems a bit over-the-top for just a single piece for yourself. No, fast, cheap, and easy is the name of the game, so when I spied a set of acrylic purse handles at Jo-Ann Fabrics and Crafts store, I figured one would be perfect for a necklace.
Project Difficulty: (Easy/Beginner)
You Need:
 *1 acrylic purse-handle
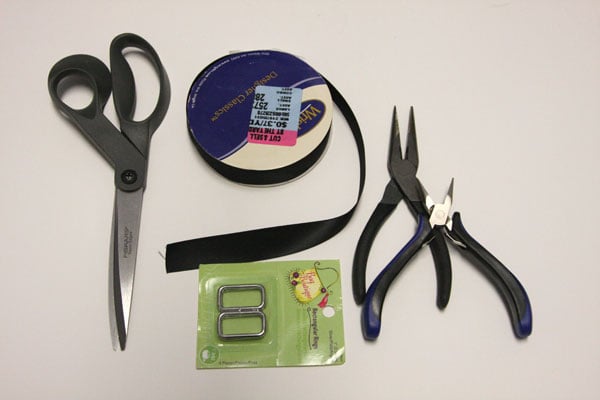
*2 silvertone rectangle rings or D-rings (also found in purse-making section)
*1/2″ wide satin ribbon
*2 silvertone scrapbooking brads (not pictured)
And…
*pliers (optional: wirecutting pliers)
*scissors
*awl
*lighter/flame
How-To:
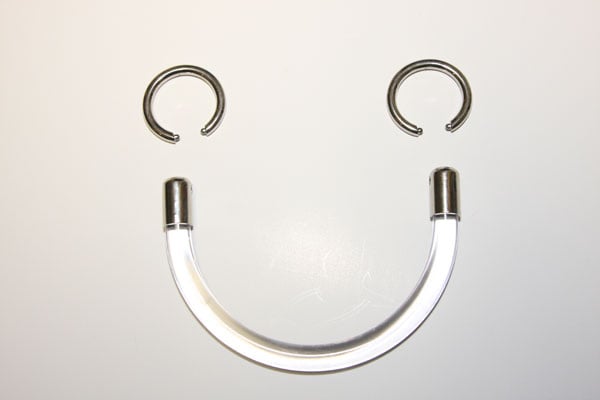 I love how it looks like the purse handle is smiling at you. Happy Handle!:-D
1. Use the pliers to remove the top rings from the handle – usually I find these rings, being sized for purses, are too big and bulky in relation to the size of the handle to use as-is for a necklace. (It literally looks like you’ve slung a purse handle around your neck…something I don’t want to be too obvious in the finished piece.)
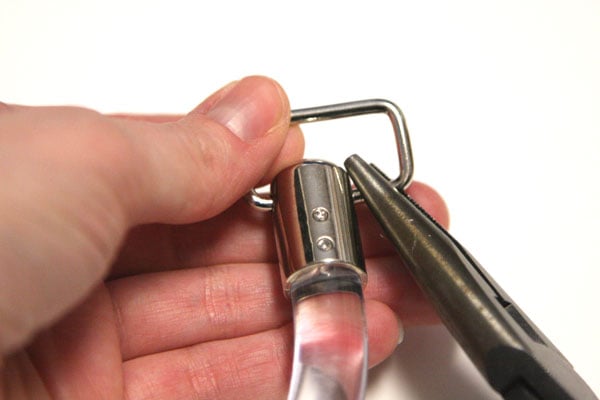
2. Attach the rectangles or D-rings that you got separately to the ends of the handle with the pliers – twisting apart and then re-closing like a jump ring with 2 sets of pliers. (If you couldn’t find any rings or don’t like that look, you can always skip this step and just thread the ribbon ends through the holes in the ends of the handle instead.)
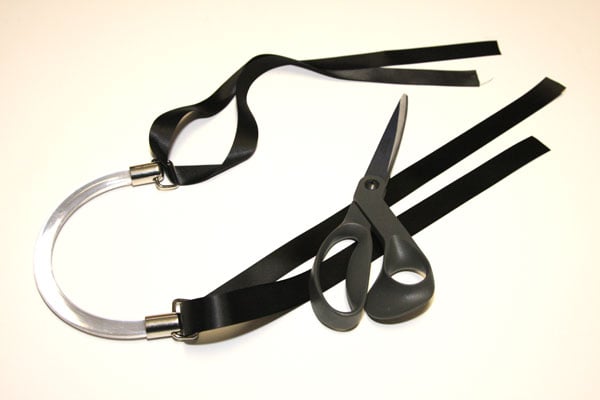
3. Cut two long pieces of ribbon and thread each through the rectangles/D-rings. (Make sure each ribbon piece when doubled-over, is still long enough to tie behind your neck.)
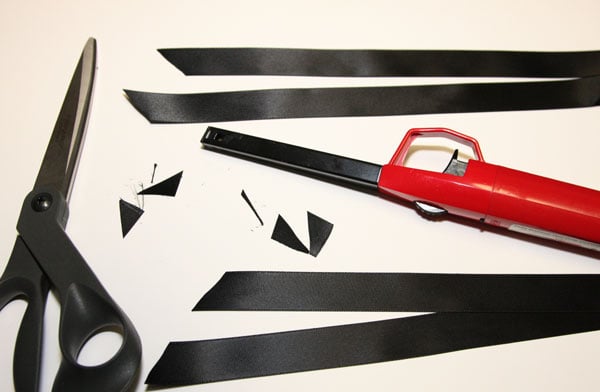
Cut the ends at an angle and heat-seal them with a lighter or open flame.

4. Use an awl or the scissors to poke a hole through the ribbon center near the rectangle/D-rings. Attach a scrapbooking brad through the hole and fold over the brad legs. (You can also trim them if they stick out beyond the width of the ribbon by using wirecutting pliers.)
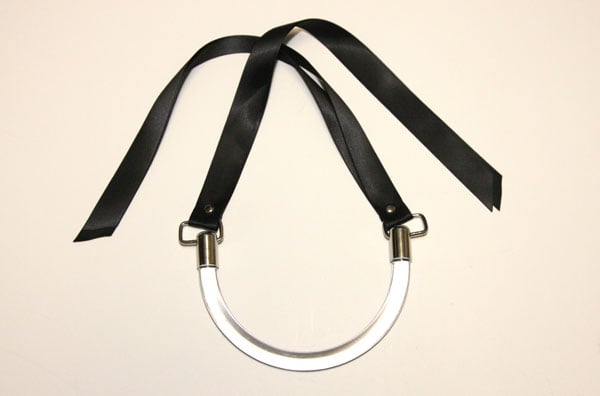
The doubled ribbon ends you then tie behind your neck in a knot or a bow depending on your preference.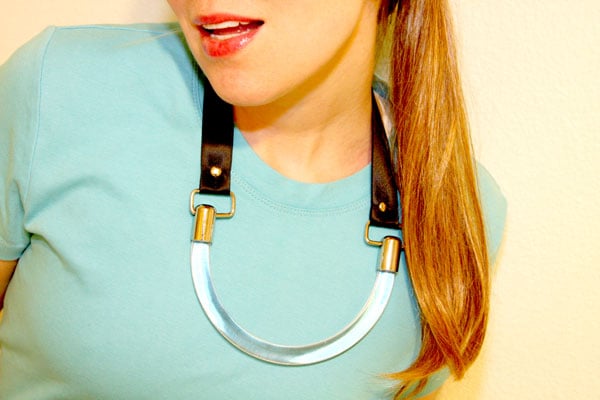
Wear paired with brighter-than-bright colors for a Spring 2011 feel, or over bare skin for a more upscale vibe.
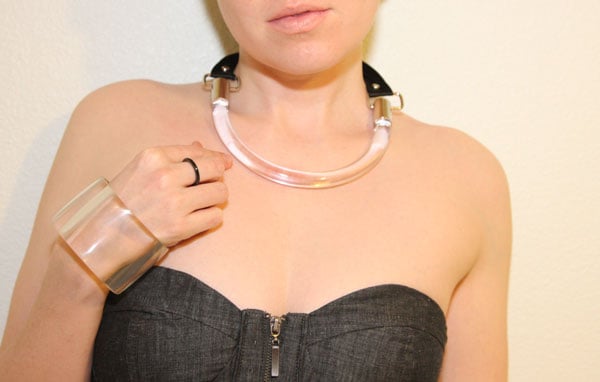
Happy DIY’ing!
xoxox
Carly
~If you liked this post, please share it!~
Save
Leave Comment
Feb 16, 2011 | Life

This was me today. (I’m sure you can guess which one I am;-) Yes, the circa 1992 ski poncho got many approving looks from the fashionable set. Well, no one will ever be mistaking me for someone else, so I’m not liable to get lost. Hey, whatever works, right?
 Yes, the above is how I skiied the entire day. I am uber-sore from doing this with a 5-year-old child stuck between my legs down the bunny slopes “just one more time!,” so I am getting into bed ASAP.
Hope everyone’s having a great week!
xoxox
Carly
Leave Comment
Feb 15, 2011 | DIY
 A week that had me scrambling with a bunch of projects due at once and my in-laws visiting. So they never noticed that I neglected to vacuum the house before they came…I met most of my deadlines! But I have a HUGE one coming up on Friday involving…SOCK PUPPETS…a $6 million budget…and somebody from a Robert Zemeckis movie!! (I know, I know…it’s a looong story. Don’t ask.;-)
 source unknown
Ain’t that the truth??! So onto DIY and other awesomeness…

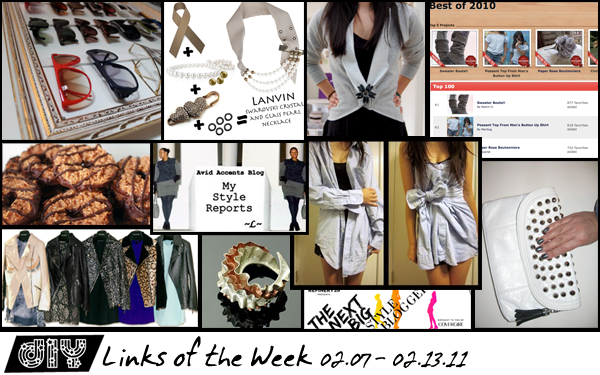
DIY Lanvin Necklace by Chic Intuition. Love the safety-pin through the grommets!

Refinery29 is searching for The Next Big Style Blogger! Could that be you? Enter and find out!
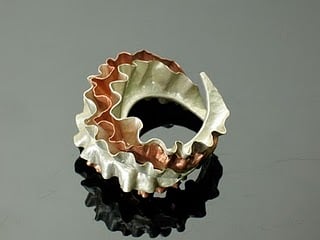
Stina Jimerson created a ring inspired by my DIY Edwardian Cuffs! It’s so amazingly textural and feminine – yet so strong at the same time. Definitely scroll through her blog and check out the rest of her amazing work!!
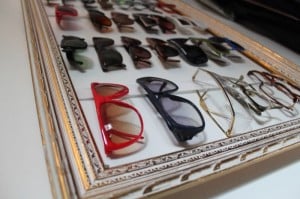
And, a cool project from a blog run by a MALE DIY-er (Andrew from Pull Teeth…and lord knows there’s two few of you guys out there making non-techy DIY projects!!): a DIY Sunglasses Holder. Check out all his other DIY projects and inspirational photography on his blog here!
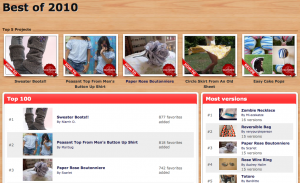
Cut Out + Keep‘s Best 100 Projects of 2010 (as ranked by most favorited). My Men’s Shirt to Ruffled Shirt tutorial was #13!! (And check out their Best 100 Projects of 2009 compilation as well…4 of my projects made it to the list at #39, #72, #77, and #88.) I’m so flattered that so many people favorited my projects – and there’s so many amazing projects to look through, one could get lost in the DIY for days…;-)

~L~ from Avid Accents posted a great series called “Shopping 101” in which she offers some great tips to make your buying decisions more informed, less impulsive, and into decisions that truly round out your wardrobe. First you need to Know Your Style, then Know What You Have, and finally, Know What You Need before hitting the mall. Invaluable!

DIY Girl Scout cookies. You can buy the real ones online to support the organization if you want to…or if you don’t have access to them, want to have more, or just want to try your own hand at making them…here’s how.

I’ve just discovered a new DIY fashion blog called Studs and Pearls. Check out her DIY faux blazer – refashioned from a Hanes sweatshirt and a beautiful brooch!
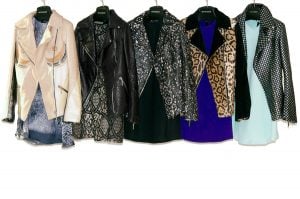
Luxirare made her own dress + jacket pairing for all 5 days of the week in a variety of luxurious fabrics, leathers, colors, and textures. Not DIY so much as just straight-out off-the-hook design + planning + execution. It’s amazing that she is able to sew those garments so skillfully without multiple samples/prototypes. As always, I am in awe.

I’m loving this No Sew DIY Shirt Dress as posted on Cut Out + Keep by user selena. So simple…so pretty…so love! So if you’re not into sewing your shirts into dresses, you can definitely get beautiful results by just tying strategically.

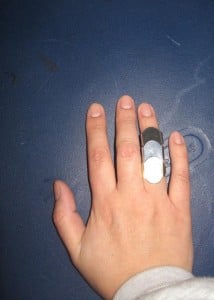
Maya from Soccer Mom Style created these two fabulous projects: her “White Swan Gone Bad” studded clutch, and a DIY Armor Knuckle Ring. I’m officially drooling over both – she’s so talented! And check out her blog for many other great DIYs as well!
Recent favorite affordable and cute shopping destinations:

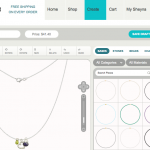
(And Sheyna.com is also a DIY Link of the Week – since it offers jewelry that you can customize into literally hundreds of combinations, choosing gold or silver, gemstone briolettes, chains, etc. – to make your own, one-of-a-kind DIY jewelry piece!)
And since I’m not doing my DIY Roundups anymore, if you have a DIY project, tutorial, or creation that you’d like to see featured on Chic Steals, please email me at carlyjcais at chic-steals dot com – and I’ll feature it in one of my Links of the Week posts!
xoxox
Carly
-all photos copyright their respective authors; photo array by me-
~If you liked this post, please share it!~
Leave Comment
Feb 14, 2011 | DIY

Though I rarely cover non-wearable DIY’s on this blog, I’ve been struggling with what to showcase for V-day for awhile. In the past I’ve found that making non-edibles for my guy has not gone over well. In Hub’s case, he has always thanked me sincerely, and then proceeded to never wear or use whatever I have funneled hours into making. The sweater I hand-knitted him sat in the closet for 9 years until he finally admitted he wasn’t really a “sweater-person” and I finally gave it to Goodwill. The notebook I made, with the cover fashioned from one of his favorite shirts that he threw out, and then hand-bound…gathering dust in the bottom of his desk drawer. Yet everything edible I’ve ever made him he’s devoured within 24 hours, and loved. (Do you know any guys like that? I think maybe it’s a guy-thing.) So I was going back and forth between making something for my husband to wear (that he won’t) and showcasing it on this blog…since this is a wearables DIY blog…or making him something to eat and mentioning it.
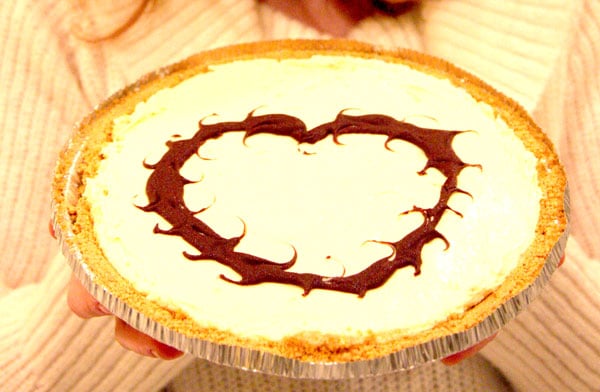
So after many nights in thought I decided to forget the wearables idea (since I hate creating useless things more than anything)…and made Hub his favorite dessert: cheesecake, with chocolate swirls.
 But…I made something else, too…for Lil Tot. Erasers…in the shape of chocolates! I made them using a make-your-own-erasers kit bought in Japan (but it’s also available on Etsy here, shipped straight from Japan to you.)
Sometimes I enjoy fiddly, time-consuming crafts like clay crafting and deko-sweets, and because these kits come with plastic molds in them, making tiny chocolates, donuts, cakes, and ice cream is super-simple! Then you dump the finished piece into the included box, add water, and zap in the microwave for about 3 minutes to let the binding agents evaporate.* Allow to cool and you have a fully usable eraser!
 This eraser clay is soooo fun, and already I’m thinking of new tiny edibles to create with the remaining colors. And think of the trading potential at your little ones’ schools! (I hear those food-shaped eraser packs are the new tradeables among the Elementary set lately…)
 I made a swirl chocolate with a dollop of whipped cream, a heart-shaped chocolate, and a chocolate square with icing lines and an almond on top.
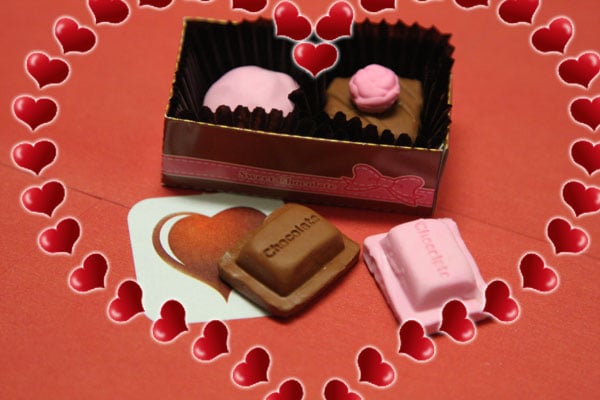 I also made a pink chocolate truffle, a chocolate square with a pink heart, and two chocolate pieces that look like they were snapped off of a chocolate bar.
They’re so adorable it seems like almost a shame to use them!
If you’d rather not order kits like this from Japan, Sculpey also manufactures Eraser Clay that cures by being baked in the oven – so you can create your own erasers in a variety of different shapes and colors. However, if you want to create chocolates, you’d have to buy either the 8-bar Set
 or the Shape and Bake Kit
 since the 6-packs don’t contain brown. (And you can’t make delicious-looking chocolate without brown!!;-) I haven’t used this stuff before so can’t recommend it one way or the other…has anyone else played around with the Sculpey brand of eraser clay?
Tomorrow I’ll be taking the in-laws to the slopes of Mt. Hood…and Lil Tot will have his first-ever skiing adventure! I’ll be stiff and sore from attempting to ski for the first time in…oh, 9 years or so…and looking extremely unfashionable as all my ski-wear is circa 1992 and I just haven’t seen the need to update it since. (Likely photos from tomorrow I’ll be keeping under lock and key lest word get out I have a neon…multicolored….ski…poncho. Yikes!!!) And since I posted about the V-day erasers today, tomorrow I’ll also be sharing my DIY Links of the Week from the past week…and there’s some great ones, so stay tuned!
Hope everyone had a lovely day – whether you celebrated the holiday or not! * x */ (That’s a kiss – kinda;-)
xoxox
Carly
*since U.S. microwaves tend to be 1000+ KiloWatts and Japanese microwaves are either 500KW or 600KW, I adjust the microwave times by subtracting about 10 – 30 seconds off the times recommended in the kits.
Leave Comment


 photo from Etsy store










