Jun 3, 2015 | By Carly J. Cais, Life
 Hello friends!
I’ve had a ton of things going on, been revamping my life, and doing a lot of soul-searching lately, as well as diving into new, exciting (and a little scary) projects. I teased the above image out on my Instagram awhile ago, and I’m finally getting close to launching my new line of handmade, edgy boho chic jewelry.
Glitterthorn has launched!
What do you guys think?
Stay tuned for more…coming oh so soon! I can’t wait to share with all of you 🙂
xo
Carly
Leave Comment
May 28, 2015 | Fashion
FTC Disclosure: This post contains affiliate links and I will be compensated if you make a purchase after clicking through my links. For my full Disclosure Policy, click here.

It’s a pool party over at ModCloth, and you’re invited! With so many bikinis and one pieces to pick from, you’re bound to find a standout look that suits your style. And while you’re at it, check out ModCloth’s exploration of so-called “ideal” beach bodies in their new Swim-fographic! It’s an intriguing look at how arbitrarily beauty standards have changed over time. Of course, ModCloth knows that every body is a beach body — the only requirements are a beach, your bod, and a swimsuit you can’t wait to flaunt!
Swim-fographic Link: http://blog.modcloth.com/2015/05/11/swim-infographic/
Swim Story Link:http://www.modcloth.com/shop/swimwear
xo
Carly
Leave Comment
May 27, 2015 | Media
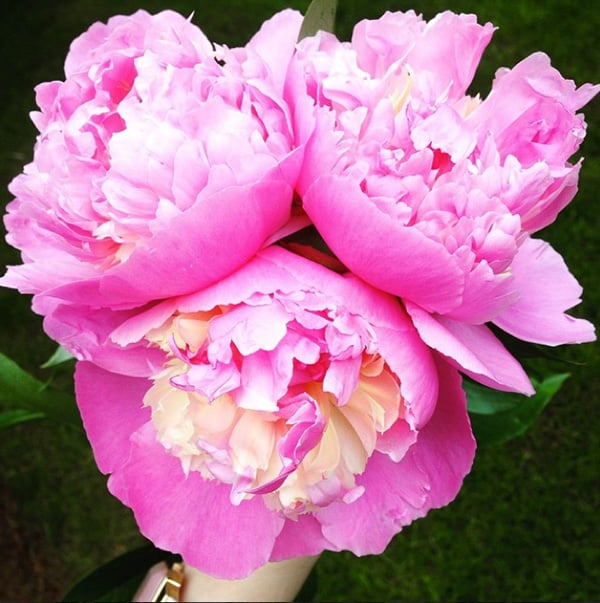
from my Instagram: my sorbet peonies in my backyard bloomed! So gorgeous.
Follow me on InstagramHello again, friends!
I hope everyone had a wonderful week, and a Happy Memorial Day (if you celebrate it).
I have been without Internet for almost a full week…since last Monday there was a lightning storm, lightning struck near my house, made a surge, and apparently fried the circuitboard in my home’s cable junction box. And Frontier couldn’t get someone out to look at it until Friday afternoon. For someone who lives most of their life online, it was extremely hard to figure out how to deal with getting my work done when I had no internet from home…and was maxed out on my data plan on my cell phone for the month. XP
But now I’m back, with some cool links of note from last week. IFB again was kind enough to include my DIY Pearl and Spike Chain Choker in the link roundup…so here are other cool links of note:
Links à la Mode: May 21
SPONSOR: East Dane: Ferragamo Shoes, Superga, Furla, C/Meo Collective, Baggu, Citrine Swim, Black leather booties, Veda, Wrap & Cotton dresses
xo
Carly
Leave Comment
May 18, 2015 | Blogging, DIY
 My tutorial on how to take headshot photos that reflect your blog’s brand was just included in the weekly round-up of Links a la Mode on IFB!
There are a bunch more links – and many EXCELLENT DIY tutorials as well, so clicky clicky to visit all those included and say hi!
Thanks for the inclusion!
xo
Carly
Links à la Mode: May 14
SPONSOR: East Dane: Red Heels, Sensi Studio, Katie Diamond, Gray Malin, Vermilion Dresses, Deux Lux, Brooklyn Tailors, Veda, 70s looks & Chaser Clothing
Leave Comment
May 11, 2015 | DIY
 Sometimes you’re feeling a little ladylike…and a little edgy at the same time. This pearl and chain choker pairs so well with both demure outfits and darker streetwear easily. All you need is aluminum chain, glass beads, jumprings, and a closure.
  And of course some hematite spike beads for that necessary wild child. Here’s how to make your own with some affordable supplies from PandaHall: (and a brush up on How to Use Crimp Beads, below)
You Need:
aluminum twisted curb chain (5 mm wide) // silver color aluminum twisted curb chain (5 mm wide) // 6mm white glass imitation pearl beads // non-magnetic hematite rectangle beads / matching jumprings (6 medium, can all be the same size) // 2 crimp beads // 2 (two) 3-strand necklace ends // Beadalon nylon stringing cord // chain cutting pliers // crimp pliers // jump ring tool (or another set of pliers)
How To:
1. Attach one end of the chain to one of the necklace ends with a jumpring.
2. Hold the flat curb chain against your neck and decide how long you want it (mine was 14″). Use the chain cutting pliers to cut it at that point.
3. Attach that end to the other necklace end, being careful to keep the chain flat.
4. Attach the next oval link chain in the same way, making a little longer than the first so it will drape lower and lay flat.
How to Finish a Necklace Using Crimp Beads
5. Crimp beads are an easy, clean way to finish a cord necklace, and they look really great. Thread one crimp bead onto the end of your Beadalon cord, leaving about 1″.
6. Thread a jumpring onto the end.
7. Curve the cord around the jumpring and back into the crimp bead. Make sure the loop around the jump ring is small.
8. Use crimping pliers to first smash the crimp bead flat (in the grooves closest to the plier center), then bend the flattened ends towards each other (in the hole closest to the plier tips). You’ll make the crimp bead into a flattened hot dog shape.

Voila!
9. Attach the jumpring onto the final loop of the necklace clasp, below the chains.
10. Estimate how long you need and cut the wire a little longer than the length of the longest chain.
11. Start threadiing pearls onto the wire. Use the first pearl/s to hide the end of the wire.
12. When you are close to where the center of the wire would be, start adding hematite spike beads.
13. Add a spike bead, a pearl, and another spike bead in a graduated manner.
14. Continue adding pearls once the center spikes are finished. Once your strand of pearls is as long as you want it (slightly longer than the bottom chain so it hangs below it), add a crimp bead.
15. Be careful to hold the crimp bead close to the last pearl, and finish the end of the wire as before. Tuck the long end into the last pearl bead/s.
16. Use a jumpring to attach to the remaining open loop in the necklace closure.
And that’s it! 
It’s a little fiddly and something you’ll want to do while watching your fave TV show to pass the time…but once done this 3-strand sophisticated choker has maximum impact.
You can make your own just by checking out PandaHall.com for the best beading supplies!
Happy DIY’ing!
xo
Carly
FTC Disclosure: Pandall.com provided me with the craft supplies featured in this post for me to make a fun DIY with. I have received no other compensation. The opinions above are my own. For my full Disclosure Policy, click here.
Save
Leave Comment











