Jan 12, 2012 | Fashion
Hi everybody – just wanted to let you guys know my blog is bugging out right now.
I tried installing the Facebook comment box option and now it messed up my entire blog’s commenting system and you can’t leave a comment on any post!
Well, you can, it just isn’t saved on the post. Either in the Facebook comment box or on my blog’s comments.
I’m really sorry and I’m working to fix this!
If you left a comment for me in the last 3 days – it was probably deleted…I apologize.
Thanks for your patience while I fix this issue!
xoxox
Carly
Leave Comment
Jan 11, 2012 | Fashion
 Hair: side braid with Prisila Mecha Raku Ekusute in Otome-Maki Long
Peter Pan Collar: handmade by me using Chic Steals Pattern A1101
Batwing Ala Mode Golden Yellow Top: Volcom (a recent HauteLook purchase; also avail. here)
Black Large Silicone Slap Watch : Acczilla
Clear plastic tote with chain handles: c/o Nordstrom Rack, received at their local Grand Opening back in September
Long-sleeved black top: UNIQLO HeatTech
Tummy-covering tanktop: Victoria’s Secret
Skinny dark-rinse jeggings: UNIQLO
Amrit Boot in Black: NineWest
Monday was my first day back at school for my classes, which I’m attending part-time again this semester.
(more…)
Leave Comment
Jan 11, 2012 | Fashion
 I’ve been hard at work over the last month or so putting together – you guessed it – a line of DIY printable patterns!
What I truly loved about designing my own line – 5 years ago now! – was thinking up ideas, but the actual manufacturing of a clothing line (in multiples) to sell in stores was where the headaches started. It was such a huge expense to do, and at the end of it when things didn’t sell, I was left with excess inventory that no one wanted. All that money, time, and skills wasted; all the fabric and notions no longer usable. This is an affliction that all clothing lines have, as long as they’re operating via the push manufacturing model; that is, they manufacture the clothing first, and then push it on the consumer after they have the stock and hope that it sells out. Retailers as big as Forever 21 and The Gap are, season after season, stuck with excess inventory and styles than don’t sell, ultimately to be sold at below cost (less than what it cost to manufacture), donated, or even destroyed (as in the case of H&M). It’s a huge waste of time, not to mention resources.
I think a different model is what many people are looking for. Patterns that you can print at home, and either make yourself or bring to a tailor, truly make the experience of creating clothing uniquely personalized to everyone. It requires a higher investment of time and effort, but in the end you are rewarded with something that you made yourself, that has created little if no fabric waste, and has no leftover unsold pieces at the end of the season. It can be something you love because of that extra investment, and you can even create it repeatedly, in numerous colors/style for yourself, with minimal cost to you each time.
Thus I decided to launch a line of printable patterns, focused on bringing current trends to all, offering up numerous Variations and Design Ideas for each piece, and making the instructions as easy to follow as possible. You don’t have to wait for these pieces to come to a store near you…they’re here now, and available at your fingertips. The only thing missing is a little dose of YOU into each project!
First up:
 The Removable Peter Pan Collar
4 Patterns Included
6 Collar Variations (with instructions for each)
Numerous Design Ideas for each Variation (embellishment, material, and construction ideas)
—->Hundreds of Possibilities!
For this particular pattern, I’ve created 6 Variations with the How-To (& photos):
 The Lace Collar
{A single layer of lace with ribbon tie}
 The Overlay Collar
{Crochet layered over a fabric backing, with woven tie}

The Embellished Collar
{Fabric collar constructed to hold the weight of embellishments, with front closure}

The Finished Fabric Collar
{Fabric collar with finished sewn edge and front closure}
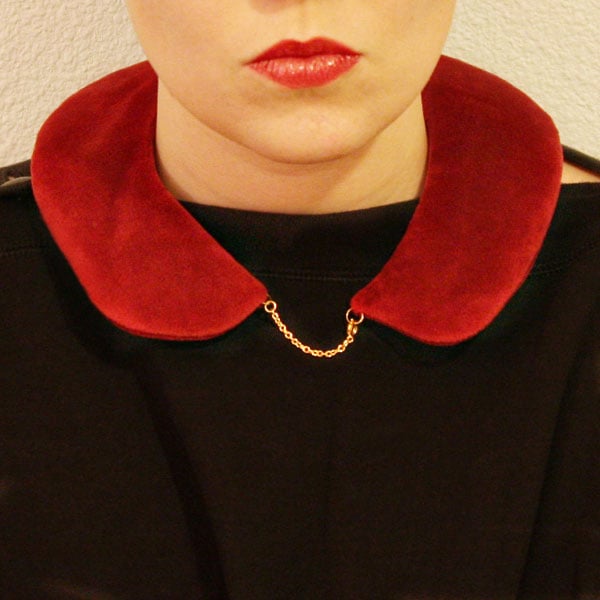
The Open-Front Fabric Collar
{fabric collar with finished sewn edge and center chain closure}

The Oversized Fabric Collar
{Fabric collar with finished sewn edge, slightly larger than the other Variations, with front closure}
The sizing is one-size-fits-all [up to a 15 3/4″ circumference neck].
Right now I’m beginning the line with accessories, and hope to move on to offer graded patterns at some point in the future. Here are some features of my line of patterns that differentiate them from the other patterns out there on the market:
- Current, on-trend styles
- Meticulous instructions with accompanying photographs
- Always include a number of variation instructions for each pattern (other patterns usually only offer 1 or 2 variations per pattern)
- Accurate, vector-based patterns (nothing hand-drawn, sketchy, or lopsided)
- Affordable prices on-par with other downloadable patterns
- Licenses available for purchase so that you can use these patterns to create your own line of finished pieces and sell them (like in an Etsy store!)
This pattern (for home usage) is now available for purchase in my Etsy store for $5.00. Within 24 hours of your purchase I will email you the pattern and instructions in PDF format. I’m also available for any questions or support if you run into any issues with your purchased pattern.
Buy Now!
I’d love to know what you, my lovely readers, think! Please let me know!
xoxox
Carly
~If you liked this post, please share it!~
Leave Comment
Jan 9, 2012 | By Carly J. Cais, Life
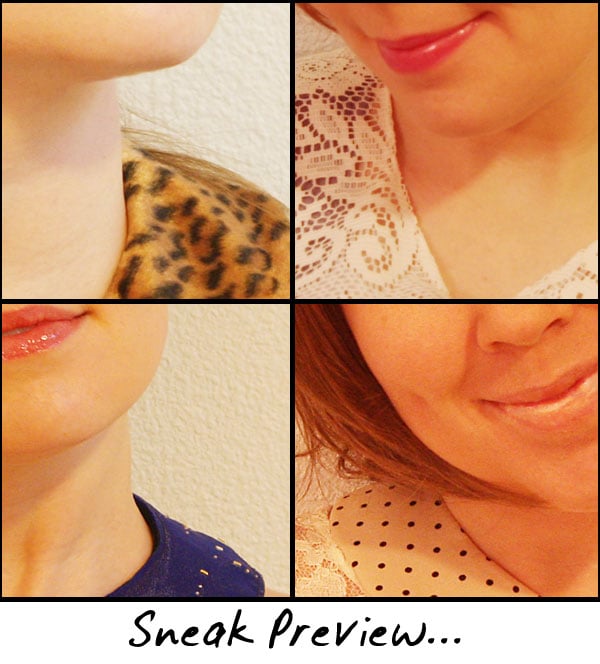 I’ve been hard at work on a little personal project that I can’t wait to share with all of you. If everything goes well and I can finish wrapping this up…I’ll be done and launching it tomorrow.
Hope you guys like it!
xoxox
Carly
~If you liked this post, please share it!~
Leave Comment
Jan 9, 2012 | Fashion
 January always tends to signal a lull in fashion trends; perhaps it’s the post-holiday slowdown, the lack of major events in the fashion world, or the halfway-between-Spring-and-Winter offerings that abound at local retailers. (Resort pieces, anyone? No?) But if you live in a cold climate, this month likely indicates the most frigid of Winter – and that there still remains a few more months until temps truly break into something balmy. Get rid of the Winter Blahs by mixing a few on-trend pieces into your wardrobe to shake things up when you get into a style rut:
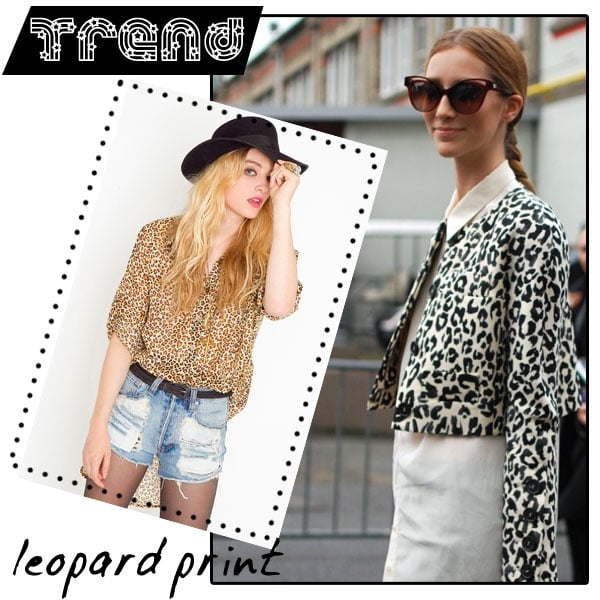
1. Leopard
photo source
Leopard anything: as an accessory, accent, or even full-on piece is being treated as the new neutral of 2012. Mix and match with anything, even florals (see below), for a new look all your own! Try: Leopard Tail Shirt, $58, NastyGal.com.
2. Skinny Colored Jeans (or Pants)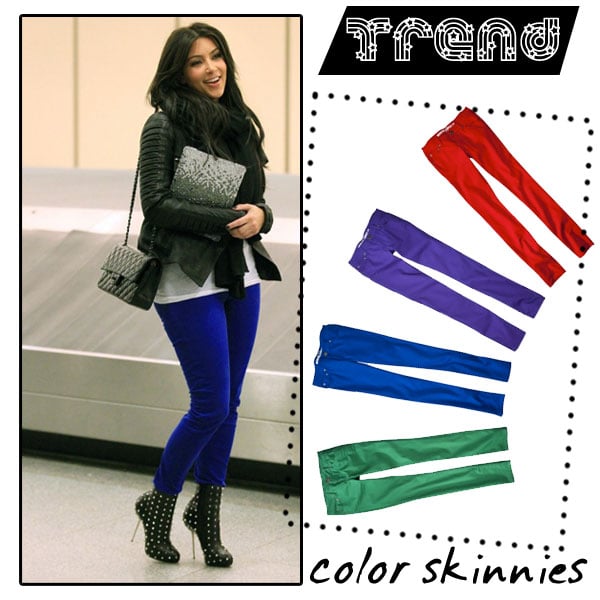
photo source
Sometimes when gray is all around a little pop of bright can make your day. Try a pair from Target (they actually have a variety of colors, in bright red, blue, purple, coral, and green, that mimic the high-end J. Brand colored skinnies) that can add a dose of fun into an otherwise standard outfit. Try: Mossimo Supply Skinny Denim, $22.99, avail. in-store only.
3. A Cape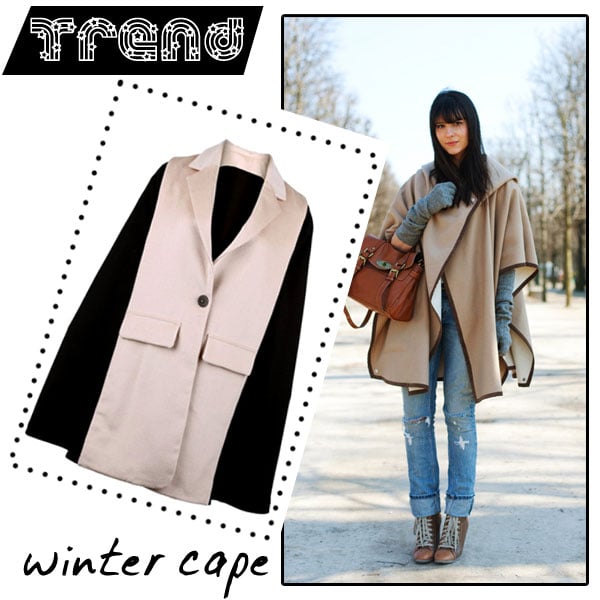
photo source
No, not just for Batman! This great shape as a winter coat works best when paired with a slimmer bottom half, lest you look like you’re starring in a period drama. The Cape brings enough drama on its own! Try: Color Block Cream-Black Cape, $99.99 (sale), Romwe.com.
4. Big, Dangly Earrings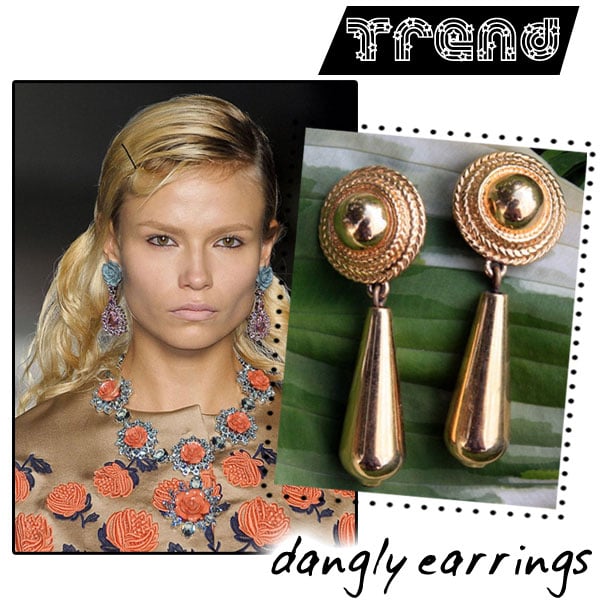
photo source; Earrings source
80’s trends have been back for awhile, and oversized dangles are being dug out of jewelry boxes everywhere to dress up lobes (note Prada S/S 2012 runway, shown above). If the look its too literal for you, try a smaller size for a bit of understatement. Try: Vintage Earrings on Ebay or a search at your local Goodwill store. If your find is for pierced ears, make sure to disinfect before wearing; clip-ons may be a more hygenic option and better suited to hold the weight of larger pieces.
5. Pearls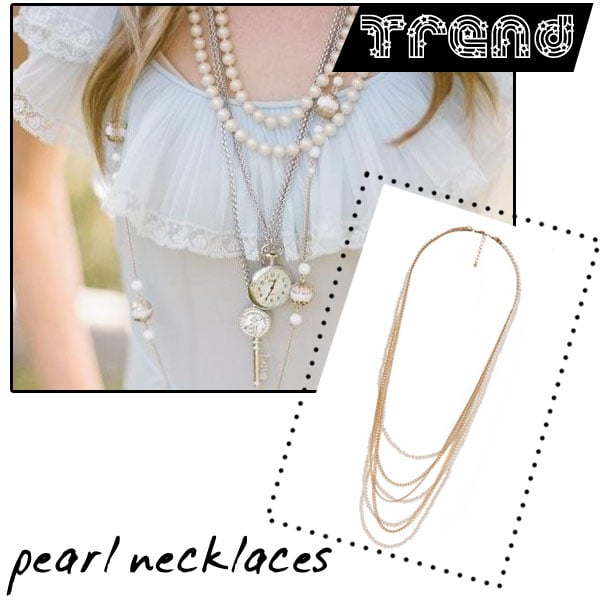
photo source
Strings of pearls thrown over casual outfits dress up anything with a ladylike vibe. Long and loose paired with other necklaces or chokers can also look chic when you’re going for more is more. Try: Pearlescent Chains Necklace, $8.80, Forever 21.
6. Floral Patterns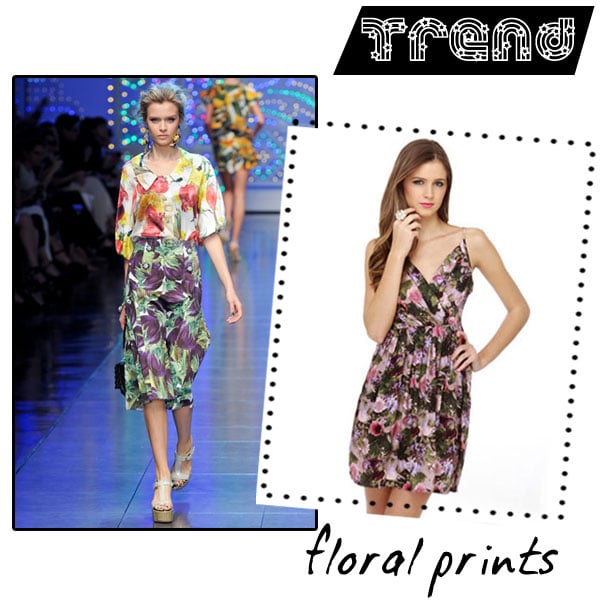
photo source
One piece or even many, mixed into any outfit, forecasts Spring’s arrival with bright and fabulous blooms (see Dolce & Gabbana’s S/S 2012 runway collection, pictured above). When mixing different florals, try to keep the patterns within the same color family to look less thrift store junkie and more Vogue. Try: BB Dakota by Jack Magdalena Floral Print Dress, $58, Lulus.com.
7. Belt It!
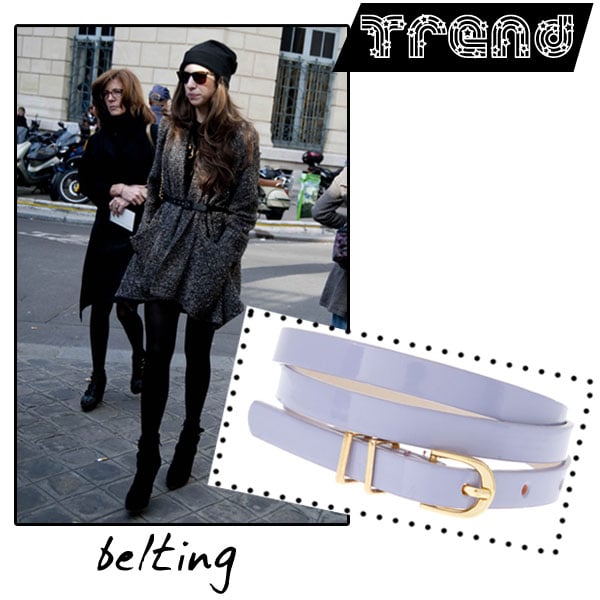
photo source
Belts are suddenly everywhere this season, and they’re thrown over just about everything: capes, coats, sweaters, and dresses. Try wearing two skinny belts at once, knotting the ends of a belt in a bow, or trying a wide obi belt on over your heavy Winter coat for some more variety. Try: Pastel Metal Keeper Super Skinny Belt, $10.91, ASOS.com.
xoxox
Carly
Product photos from their respective websites; photo arrays by me.
~If you liked this post, please share it!~
Leave Comment
Jan 6, 2012 | Fashion
 Hair: top-bun with my Odango Cushion (just use a sock for the same effect)
Gold spike earrings: Forever 21 (similar here )
)
Peach shimmer Slouchy Stretch Sweater: Forever 21
Gold-studded belt: Forever 21 (similar here)
Faux croc laptop tote: Target
Long-sleeved shirt: Victoria Secret
Polyester textured crop pants: ASOS (similar blue pants here)
PATCHI Cylindrical Heel Platform High Shoe: ASOS
Last time I posted an outfit I wore to a job interview, it was August 2010. August 2010, people. Yikes! (more…)
Leave Comment
Jan 5, 2012 | DIY
 From time to time I get “how do I DIY this…?” questions from my readers, and I’m always glad to help out! Though I may not be able to actually make the item in question (due to time or materials constraints), hopefully I can at least offer up some advice to put you on the right path to making it yourself. I received this question on one of my posts from last week:
I have a request, since you are the best of the best, could you maybe make one of these?
Well I don’t know about the best of the best <*blushes*> but I do know how to translate high-priced into DIY-able!! And for $518, that Marcus Lupfer sweater is just begging for it!!;-)
The absolute easiest way to DIY this? Find a sequined handbag and sew it onto your sweater. Seriously! This would give you a working purse attached to your clothing – how neat. Also, since it’s after the holiday season, many sequined evening bags are on sale. Ebay is also a great source for the sequined, vintage-style pouches that this one looks like.
If you don’t want to literally sew a bag onto your sweater…when it comes to sequined and beaded stuff, there often isn’t a way to do-it-yourself with sequins…unless you want to sew all those little sequins on yourself. (I did this for a top I wanted to DIY, and it took forever.) The results are indistinguishable from the original because of the handiwork, but I think it’s a contradiction of the idea of quick-and-easy DIY.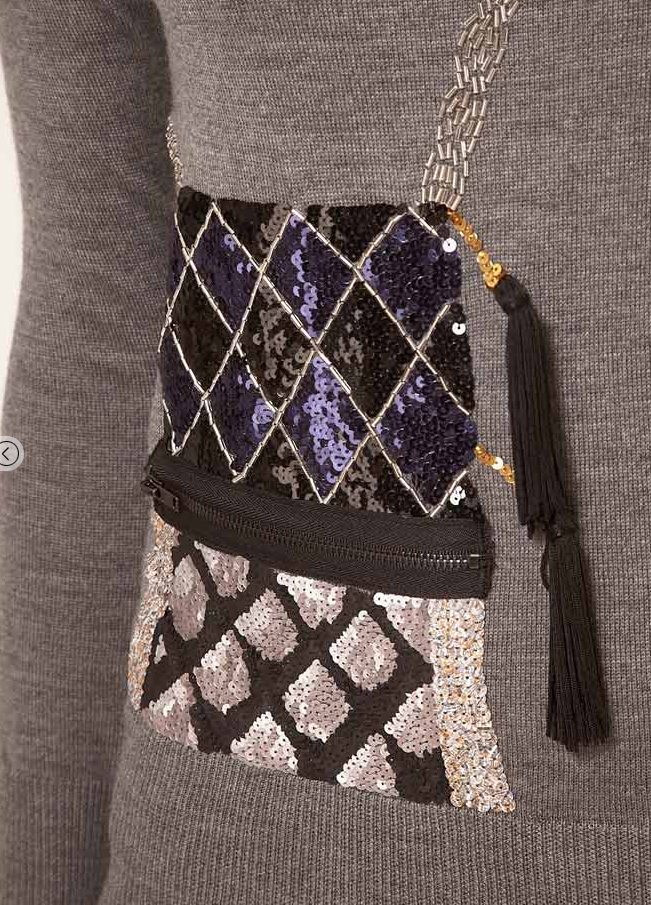
So to DIY this relatively quickly, but still as faithfully as possible to the original, you’ll have to compromise a bit. There’s still a lot of hand-sewing involved…and you potentially could stick a lot of this on using Jewel It! Embellishing Glue…but I’d really recommend sewing as much of it as you possibly can, unless you want stuff peeling off your sweater as your wearing it. Also, because of all the beaded and sequin trims involved, collecting all the materials for this could get pretty expensive. Here’s my list of recommended materials and how to:
Materials:
*gray sweater
*2 black tassels
*1 short plastic-tooth black zipper
*stretchy sequin trim in black, silver, and purple (I’ve used this before in my Sequin Bow Belt Tutorial)
*lightweight gold curb chain
*silver beaded trim (I think this trim from M&J Trimming is a pretty good match!)
*pre-strung silver bugle beads (not the kind loose in the bag; to save you some trouble)
*black acrylic paint

How-To:
1. Use marking chalk to sketch out the size and shape of your bag on the sweater, and mark where the zipper would go.
2. Hand-sew the silver beaded trim from the top of the bag diagonally towards the shoulder, and also on the other side of the bag under the arm.
3. Hand-sew the silver sequin trim to the area below where the zipper will be. Cut short strips and place them vertically, slightly overlapping.
4. Use the acrylic paint to color in some of the sequins in a quilting pattern. Allow to dry.
5. Take strips of the black and the purple sequin trim and weave them together (like a basket-weave) to make an interlocking diamond pattern. Hand-stitch at the overlapping areas to secure.
6. Hand-stitch this interlocked rectangle to the top part of the bag area on the sweater.
7. Cut the top of the zipper accordingly, and hand-stitch the shortened zipper to the sweater, covering up the edges of both areas of sequins.
8. Attach a tassel to each end of the gold chain, cut the chain in half, and-stitch to one side of the bag.
9. Hand-stitch strings of bugle beads in-between the colors in the top part of the bag.
If anybody else out there has a “How do I DIY…?” let me know in the comments, or ask away on Formspring.me! (leave the URL of the inspiration piece, please!)
Thanks for your question – hope that helped!
xoxox
Carly
~If you liked this post, please share it!~
Leave Comment
Jan 4, 2012 | Blogging
 I was working furiously on a DIY Links of the Week Roundup this evening when I realized I still have to put Lil Tot in his bath and get him ready for bed, and by the time I’ve done all that I’ll probably be too tired to stay up and keep at it. Ahh, the life of a woman with a 6-year old! I always find myself completely spent by 9 PM…
So, in order to post something to make up for my lack of posting these past two days…here are some crazy comments I’ve received on some of my posts throughout the last four years of my blog being online. Trolls, foot fetishists, Anonymous mean stuff, overly praiseful Spam, and just plain nutty (literally in some cases)…hope you guys get a laugh out of these!!:-D
{clicky click on each image for larger}
(more…)
Leave Comment
Jan 1, 2012 | Fashion
testing testing
Leave Comment
Jan 1, 2012 | DIY
 Happy New Year!!
As I do every New Year’s Eve, I planned to stay up late last night, watching old Law & Order reruns, and combing back through my blog archives to list out all the DIYs I’ve shared in the past year. But it didn’t happen this year; what with the dog howling continuously at the noise from the neighbor’s fireworks, and my husband sleeping downstairs in hopes that his presence would calm the dog, it was not an environment conducive to getting anything done except throwing the covers over my head, plugging my ears, and trying to go to sleep. So here I am posting all this today instead!
Clothing
Woven Ribbon Sweater
Chiffon Bow Blouse
Corseted Tee
Peter Som Fabric-Embellished Cardigan
Starburst Safety Pin Blazer
3 Men’s Shirts to Convertible Skirt
Jil Sander Maxi-Skirt
Mesh Insert Sweater
1 and 2/3 yd. Easy Summer Lace Dress
Screenprinted Tree Skirt
Bead-Edged Cut-Out Top
Accessories
Alexander Wang Stirrup Socks
J. Crew Flowered Neckpiece
Sequin Bow Belt
Alexander Wang Wool Glasses
Zac Posen Fruit Brooch
Marc Jacobs Colored Sunhat
Patriotic Pinwheel Corsage
Leopard T-Shirt No-Sew Scarf
Bead-and-Ribbon Fishnet Necklace
Sparkly Beaded Hairclip
Dyed Fabric Loop Scarf
Jewelry
Cage Cuff
Acrylic Bib Necklace
Woven Chain-and-Ribbon Earrings
Mesh Rhinestone Earrings
Gossip Girl Crochet Necklace
Pamela Love Arrowhead Ring
Bling-Bling Two-Finger Ring
Pamela Love Crystal Crescent Necklace
Ribbon-Wrapped Bracelet
Handbags
Pink Leopard-Print Luggage
I Love NY Tote Bag
DIY Colorblock Bag
Glitter Zebra Clutch
Shoes
Miu Miu Rhinestone-Embellished Flats
Balenciaga Cut-Out Boots
Painted Suede Heels
Glitter Faux Litas
Beauty
Sally Hansen Salon Effects Nail Polish Strips Manicure
Eyelash Extensions
Minx Manicure with Nail Rocks Nail Wraps
Candy Cane Nails
Sequin Nails
Recipes
Hamburger Cookies
Meatloaf Cupcakes
(46 in total!!)
If you’d like to see the full yearly compilation of my DIY’s from other years, you can also check out:
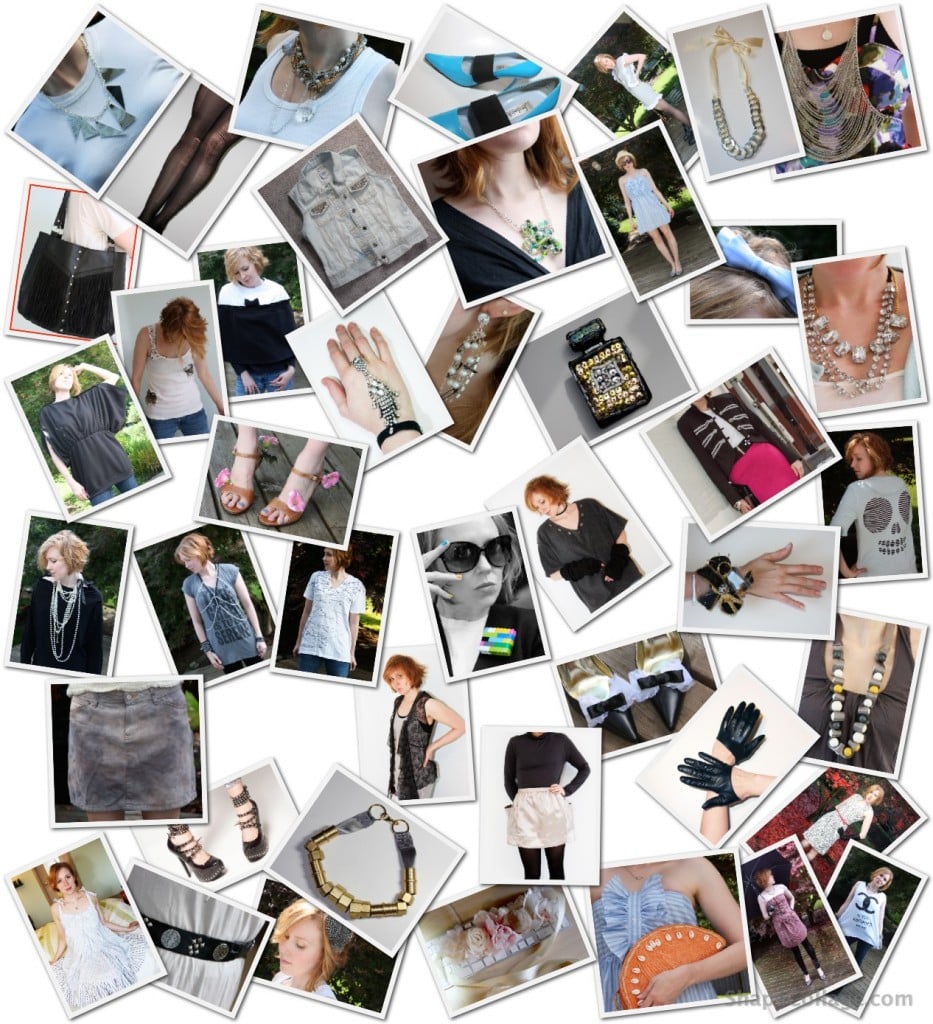
(some of them may be missing photos b/c of my move to WordPress last year – if you see any posts missing photos, please let me know! {Leave a comment on the post} Thanks so much!)
So, as I raise my glass of sparkling grape juice this morning, I wish all of you a very Happy New Year! May 2012 bring even more wonderful things for everyone~
xoxox
Carly
~If you liked this post, please share it!~
Leave Comment











