Dec 29, 2011 | DIY
 I hate settling for something in a different color when the color I want is sold out. Take these faux-suede shoes, for example. I could only find them in a tan color (from UrbanOg.com, sold out now), but I wanted them in a dusky rose color. I already have a pair of tan suede heels, for goodness’ sakes!! And I wanted that pinkish color desperately. With leather, you can paint it…but with [faux] suede?
If you want to do it the right way, there are actual suede and nubuck dyes out there, but I wanted a faded , vintage-style look. This was accomplished easily and quickly with a marker.
Ideally I probably should have used a fabric marker, but I didn’t have one in this exact hue…and I did have a COPIC marker. So I filled in the parts I wanted pink, and paused every so often to rub the excess color off and massage it into the fabric fibers further.
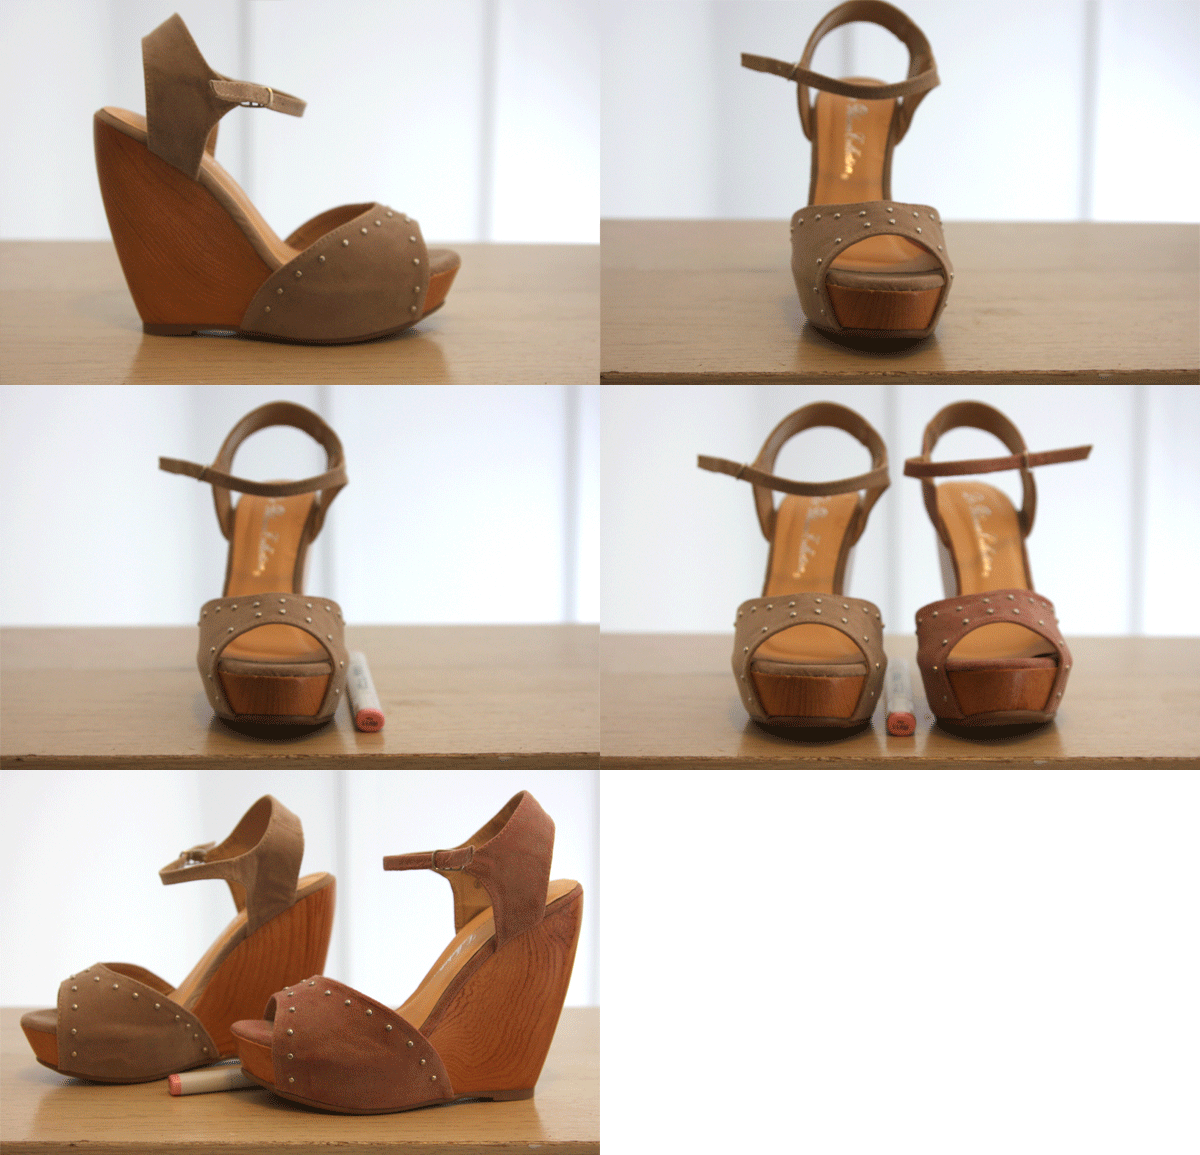 And now I have pink shoes…until it rains the next time, I suppose!
xoxox
Carly
~If you liked this post, please share it!~
Save
Leave Comment
Dec 28, 2011 | Life

From a recent Container Store flyer. Click on any photo to enlarge.
As the year draws to close, I attempt what I always do every year-end…a major closet cleanout.
 From the same flyer…and no, this isn’t my closet!!! I wish!
This year I’m being particularly ruthless about it, and really taking a long and hard look at what takes up my most precious closet real-estate, and getting rid of things that I don’t wear, will not wear, and that just aren’t who I am anymore.

From a Spring 2011 Spiegel catalog.
 From Lucky Magazine April (I think?) 2011.
I’m almost embarrassed to admit to the sheer amount of stuff that I’ve been hoarding for years, and never once wore. I have to finally come to terms with the fact that these pieces were never really “me,” and I was trying to embrace a trend I could never figure out how to style properly in any other way. My Keep It or Toss It Rules?
Keep It or Toss It? 7 Ways to Create a Curated Closet
{And when I write TOSS, I mean sell, exchange, or donate! Or upcycle with some DIY only if you will wear it after its makeover…}
1. Keep only ONE item that is a certain shape, style and color, unless this one item is your signature piece.** (More on “signature pieces” below.) If you never wear capes, how many gray capes do you need? KEEP one, TOSS the others.
2. TOSS all your “skinny clothes” except for ONE or TWO pieces that you love and you want to keep as a goal. (If you end up getting down to that size again in the future, you’ll want to buy all new things then in order to show the new you off!!) In the same vein, TOSS all your fat clothes, except ONE to remind you of how far you’ve come. Put both the fat and the skinny clothes in a box, out of sight…unless you want a daily reminder hitting you in the face every time you open your closet. (Could be useful for inspiration…?)
3. TOSS all the clothes that are more than 2 sizes bigger or smaller than what you are now. Or have them altered so you can still wear them.
4. KEEP basics, as long as they aren’t ripped or stained. Ripped – TOSS! Stained – re-purpose as workout clothes, DIY, or TOSS. Try to pare down your basics to ONE or TWO of each kind (TWO white tight-fitting t-shirts, ONE white loose-fitting t-shirt etc.)
5. For every single piece in your closet, you must be able to visualize at least 3 different ways to style it (that you would actually wear!) If you’re having trouble coming up with different ways to wear it, then you should probably TOSS it.
6. Make sure that every piece you KEEP is special in some way…either it has a little detail, or a pretty print, or color that looks fabulous on you. The stuff that you don’t love to death but has a special story behind it and you just can’t bear to part with it? …Box it with your skinny clothes.
7. Stand back often and assess what’s left in your wardrobe. Sometimes it helps to pull everything out and only put back items you love…but for me, there was just too much stuff! Standing back from everything gives me a little perspective.


**And finally, to create your own identity within a mass of clothes and other items…
Develop your signature: a piece of clothing, jewelry, or accessory that is something you love and is uniquely YOU. Though I have a ton of earrings, I always wear a bunch of mismatched gemstone studs in different colors and sizes. It’s just something I’ve been doing this year that I’ve really begun to like, and if I lose one…hey! I have a whole bunch more that I can replace it with.
Also: a valet bar is a must! Some people call them an “edit bar,” but even a hook will suffice. Just somewhere you can stick clothes to put together outfits before putting everything on. It seriously saves time!
Since I have limited space, I actually hang vests and button-front shirts on the same hangers as dresses and blouses! Each item on a shirt hanger in my closet also gets a necklace, because I have a huge necklace collection and always forget what I own. I have to see it or I will forget about it completely.
I’m currently being inspired by well-organized closets (cue Ikea and The Container Store catalogs), and beautiful photos of airy, dreamy spaces to house all one’s accoutrements.

From the Ikea.com US website.
A Pair and a Spare has a great series on paring down (see what I did there?;-) your own wardrobe to pieces that you love, and maybe, as FashionISing wrote, the current covetable closet is a well-edited and curated one?
I’m still working on that, but I’ll be at least a couple steps closer come this New Year.
xoxox
Carly
~If you liked this post, please share it!~
Leave Comment
Dec 27, 2011 | Fashion
 I hope all of you had a lovely holiday! Mine was great, and could only have been improved by me not being sick. I came down with a horrible cold on Christmas Day (probably staying up too late wrapping all those presents??!). Anyway, I’m going to make an early night of it tonight, and hope that tomorrow will bring some improvement in my sore throat and aching joints. Ugh.
In any case, there’s been some great DIY’s floating around the Internet, so if any of you are feeling more chipper (and healthier) than me, have at!
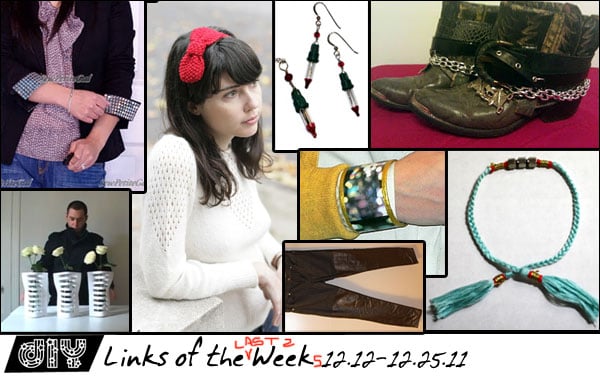
Wax-coated jeans (for that leather-like look without the leather) are all the rage lately, and Taylor & Demolish did her own DIY pair of wax-coated jeans using paint and gel gloss. You could also conceivably use real wax (Otter wax, made in Portland, OR!!) like Jennine from The Coveted did in this video. I love this on-trend look without the high pricetag!
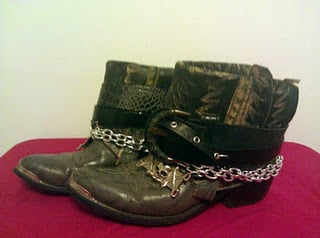
Remember those gorgeous folded over cowboy boots from Free People? Jen Ell from Jen Ell’s Revenge made her own, and shared the how-to here. Her version is super-cool; love the chains!
Removable collars have been trending lately as a way to dress up any outfit…how about trying some removable cuffs instead? SewPetiteGal has a great tutorial for some DIY studded cuffs that will dress up any shirt, jacket, or dress.
If you can knit and like bows, try out Craft Magazine‘s Knitted Bow Headband (pattern included). Sooooo cute!
Smart n Snazzy has been super-busy with her DIY’s (just scroll through her archive for all the creativity!). Check out her Kate Spade-inspired City Lights Bracelet, that uses a pretty photo Mod Podged onto a ribbon spool. And you could use any photo you want – as long as the backing is strong enough! (Try affixing one to a simple gold cuff for a metallic version!)
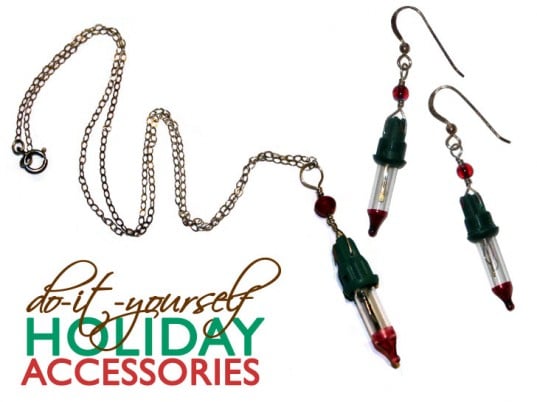
Christmas lights broke? Don’t throw them away…recycle them into quirky-fabulous jewelry! Ecouterre has the how-to.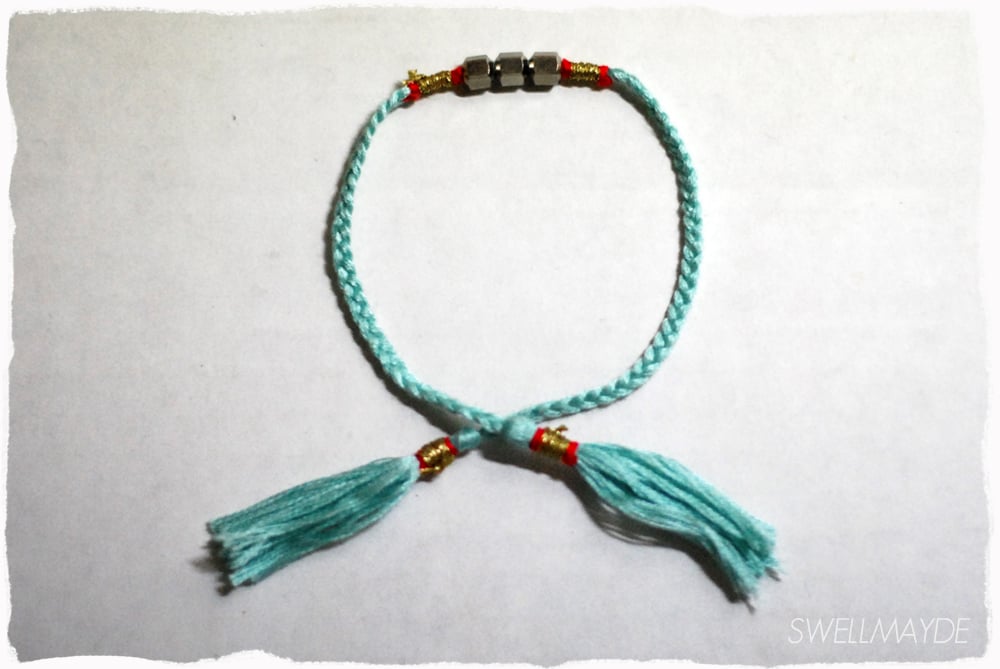
Swellmayde has a quick’n’easy tutorial on a DIY Honorine Jewels Braided Bracelet; a new take on the friendship bracelet that’s been going around awhile. Just lovely!
Though I normally stick to clothing/accessory projects in my LOTW, I couldn’t resist including this fabulous video from LOTA Design on Youtube. 8 Design Projects done in Less Than a Minute Each are all quick, simple, and uber-minimalist decor accents for your home, and I can’t wait to try some of them! Found via Craft Magazine.
If your project was featured above, feel free to grab a button and share the DIY!

<a href=”https://chiccreativelife.com/category/links-of-the-week”><img src=”https://chiccreativelife.com/wp-content/uploads/2011/12/diylotwfeaturedbutton-2.png” /></a>
If you have a DIY how-to or tutorial that you’d like to see featured on Chic Steals, please email me at carlyjcais at chic-steals dot com – and I’ll try to squeeze it in to one of my Links of the Week posts! (Tutorials/how-to’s with steps and photos included please! So everyone can share in the DIY goodness:-)
xoxox
Carly
-all photos copyright their respective authors; photo array by me-
~If you liked this post, please share it!~
Leave Comment
Dec 25, 2011 | Life
 img source
To all my wonderful readers: whether you celebrate today or another holiday during this season, or even nothing at all, I wish you all the very best and brightest of days!
Merry Christmas, Happy Kwanzaa, Happy Chanukah, and to everyone:

source
Thanks so much for reading~
xoxox
Carly
Leave Comment
Dec 24, 2011 | DIY, Media
Nuno Magazine is a quarterly digital publication that showcases craft projects and creative ideas, all of which are eco-friendly, recycled, or upcycled. Its projects have an indie, homemade, Anthropologie-style feel to them, and they’re a great idea if you want to add some decor or try something different wrapping your presents this evening.
The PDF download for the full-length magazine is $5.00, and you can buy their latest issue (and back-issues) here.
xoxox
Carly
~If you liked this post, please share it!~
Leave Comment
Dec 21, 2011 | By Carly J. Cais
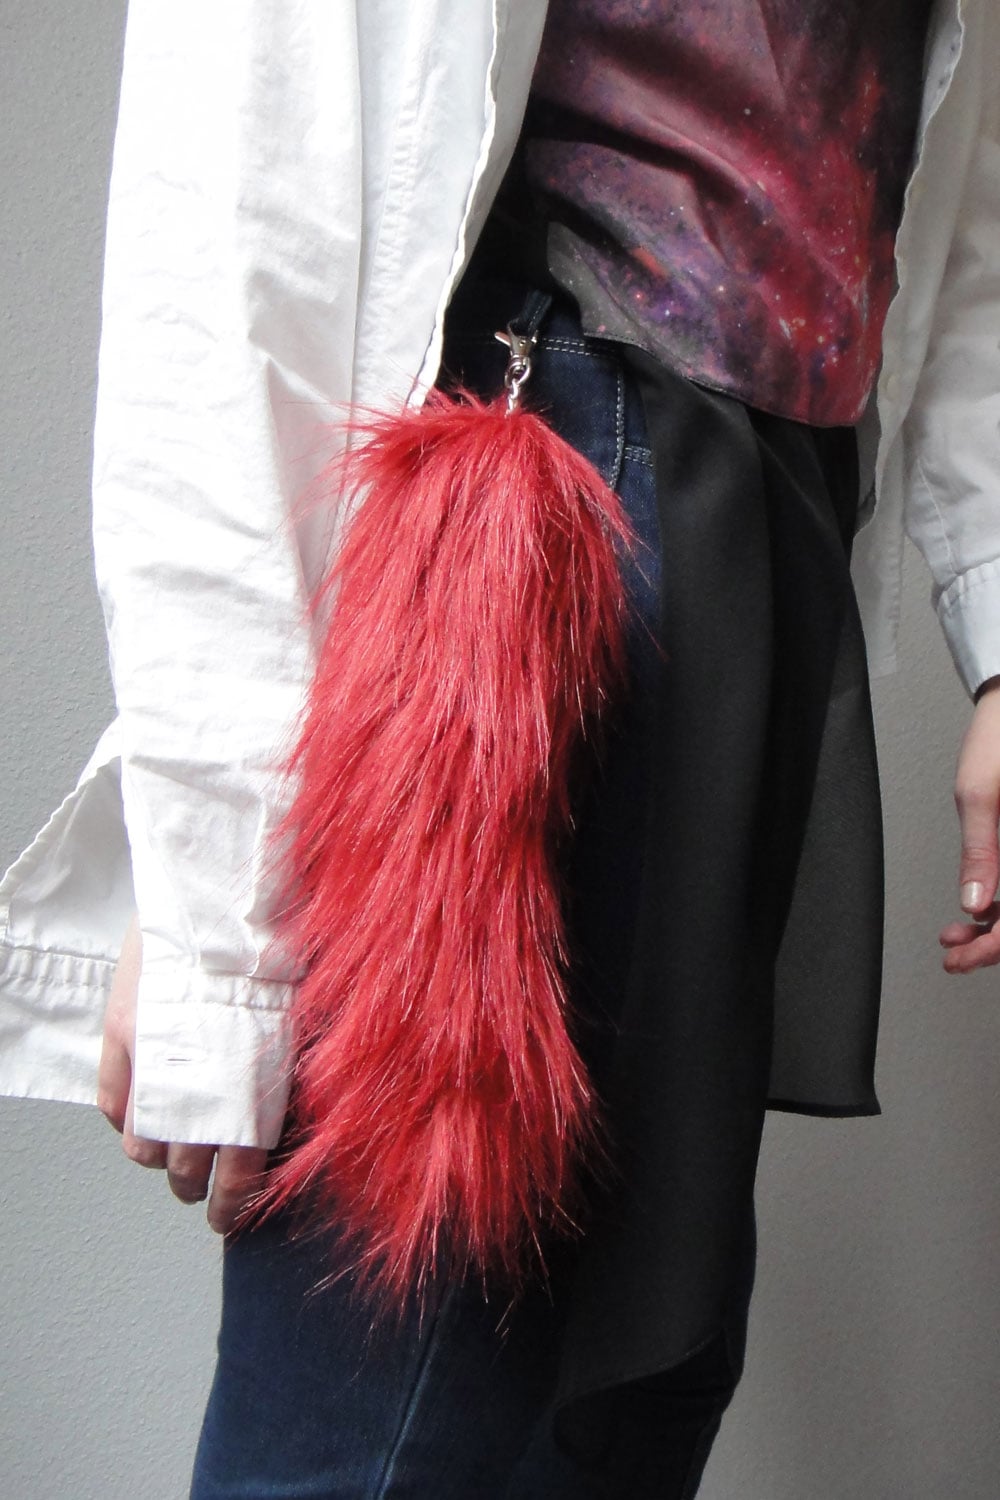 Yes, that’s right – I’ve added TWO new colors to the range of faux furs I stock for my tails and puffs in my Etsy store. (And coming in the New Year…BAGS!!)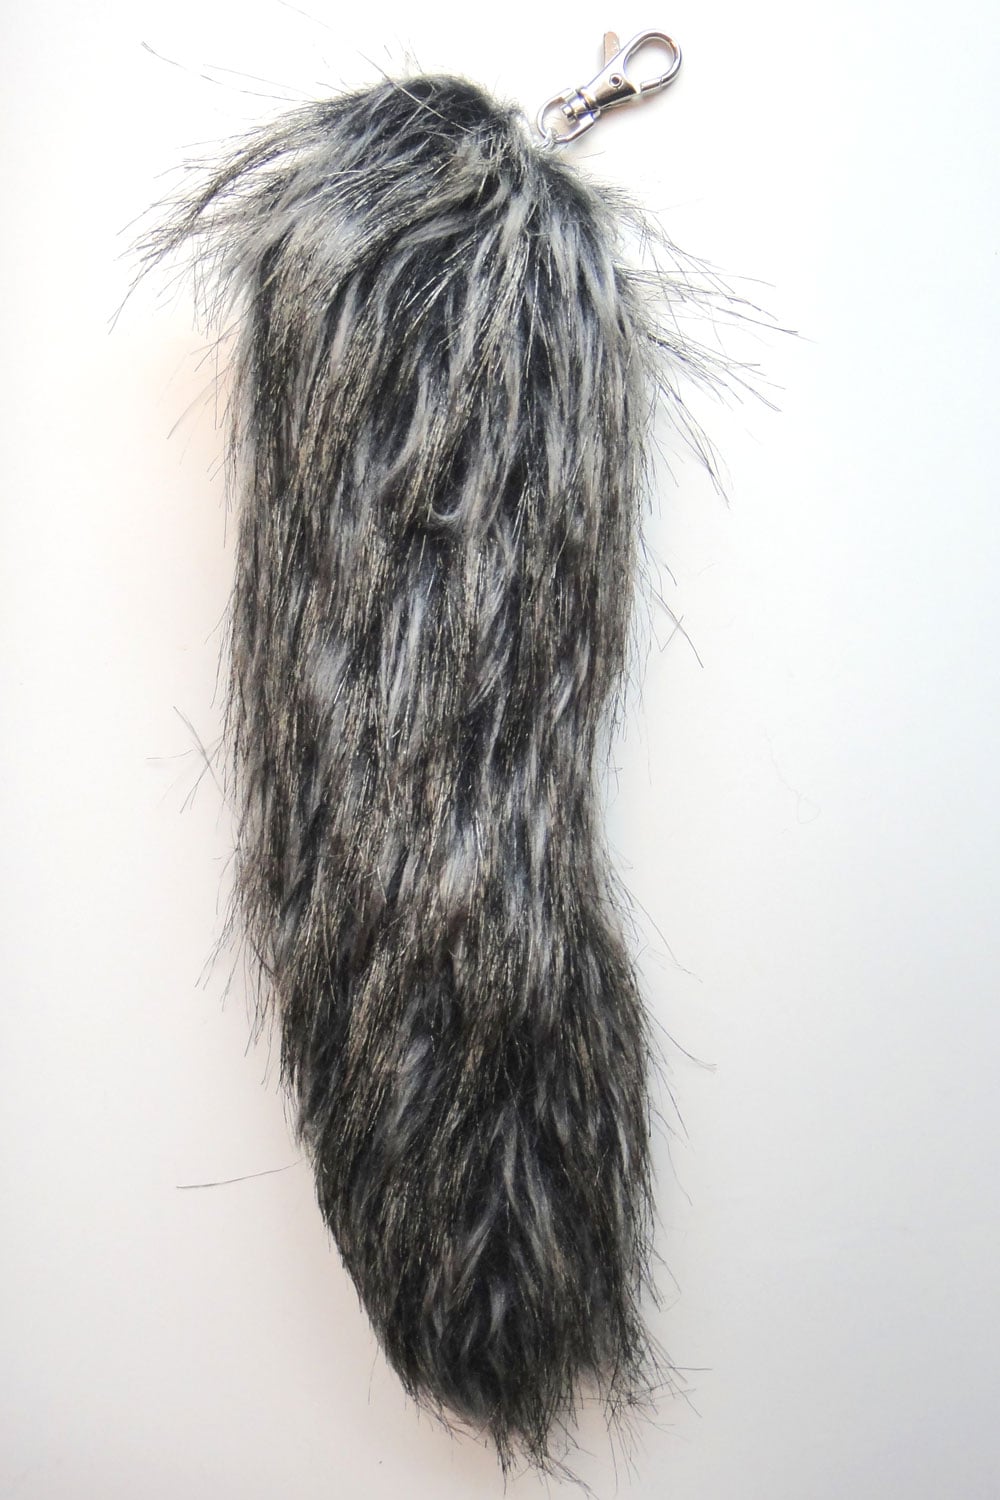
So many customers have requested black fur, but I haven’t found a pure black faux fur that is as high-quality as my other furs. What I could find, however, is a fur that has a midnight black fuzzy base, with longer light brown/blond hairs sprinkled throughout. It’s very plush and realistic.
 Inspired by Prada’s line of brightly-colored fur accessories, I’ve also stocked a Limited-Edition Crimson fur for the holidays! I only have 1 yard of this, so when it’s gone, it’s gone! It’s of the same style of fur as my White tails, with long, wispy hairs. It’s very light and airy.
I’m now offering Puffs, Medium-sized Tails, and Full-Sized Tails in my Etsy shop, in all 6 colors including the new Black and Crimson. 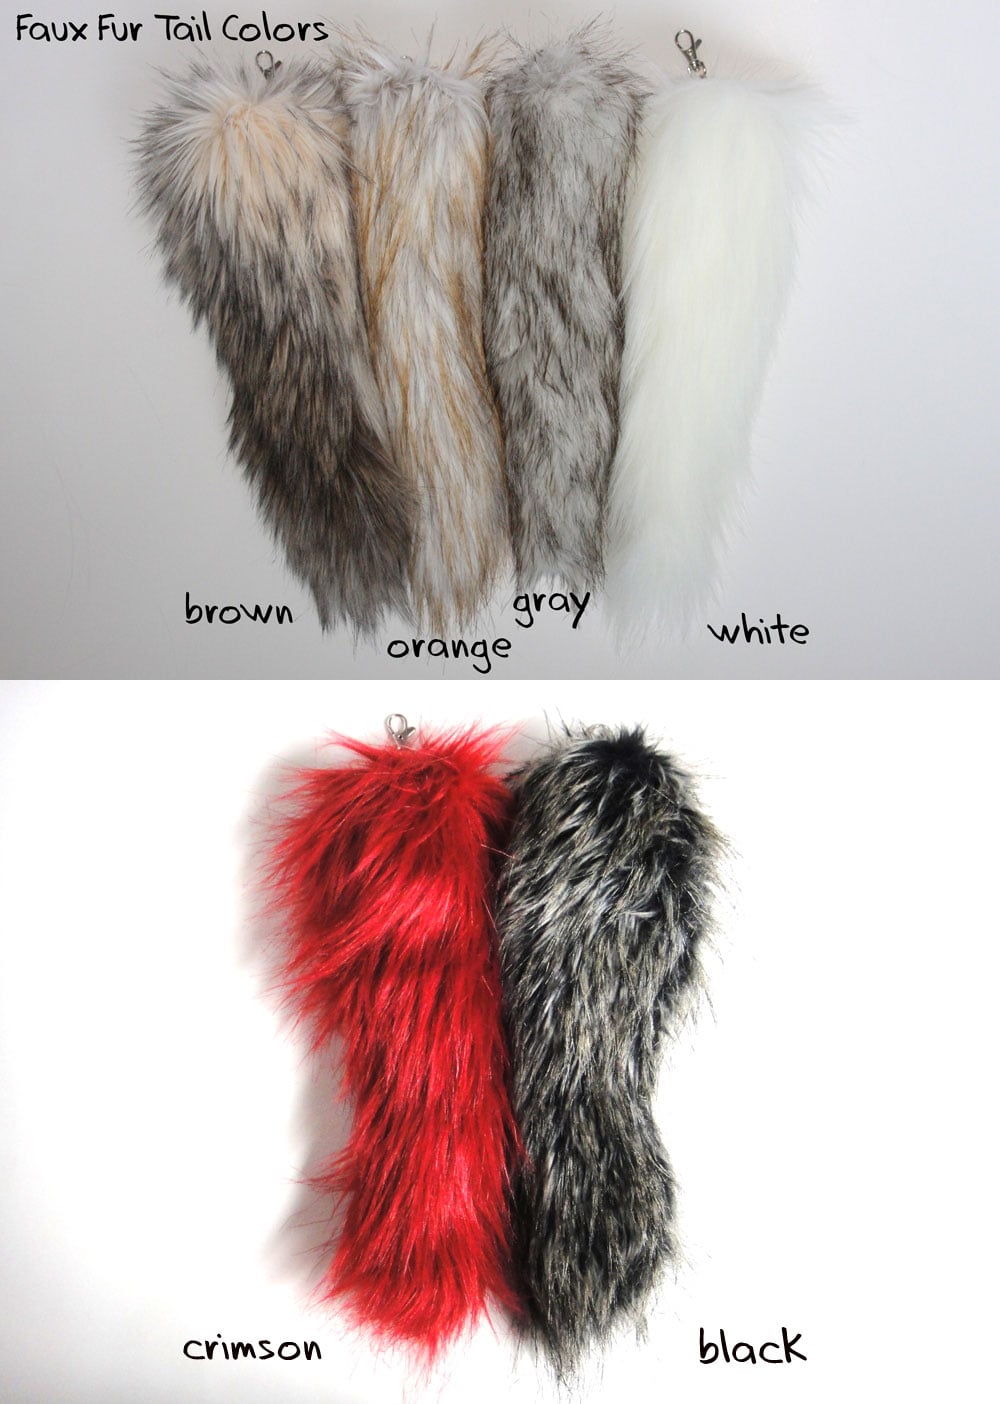

Please check it out – or send it to your friends if you think they’d be interested!
xoxox
Carly
~If you liked this post, please share it!~
Leave Comment
Dec 20, 2011 | DIY
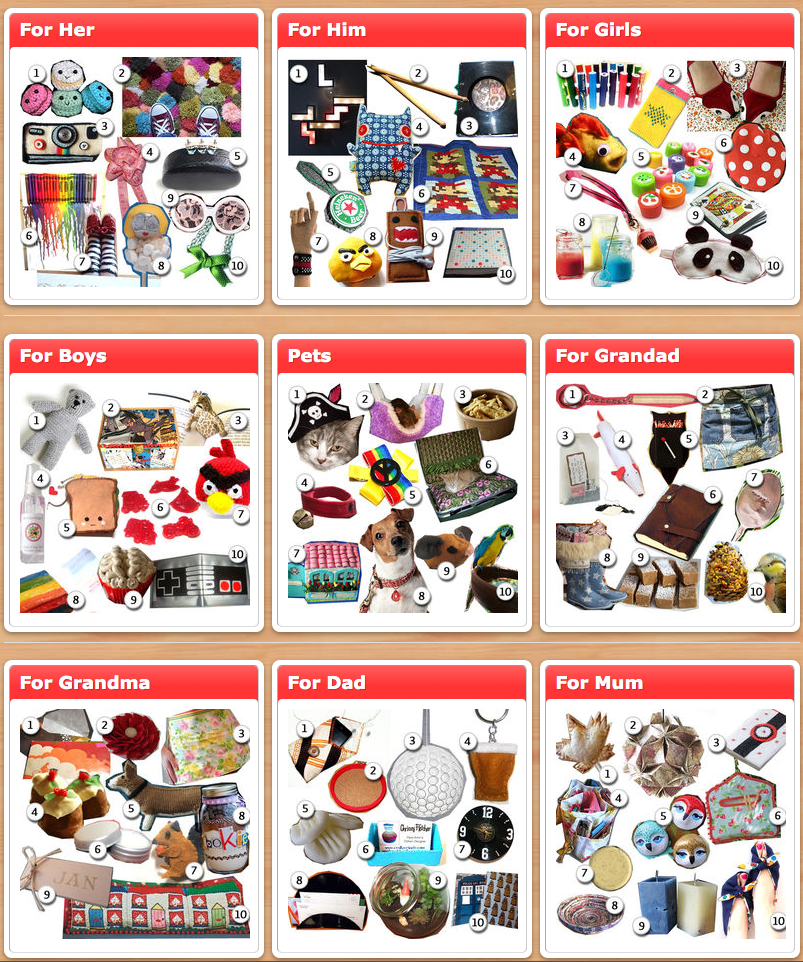 Every year I’ll do a DIY gift guide for my blog, but this year, I may just not get around to it. However, crafty sharing community Cut Out + Keep has got a leg up on me with their NINE fabulous guides for DIY gifts for everyone in your life. From Grandma to your kids (and even your cat!) Check out their great ideas for making it a Handmade Holiday:
I’m feeling so inspired just browsing – and now wish I had seen these before I sent all my Xmas packages out! (But of course all these gifts could just as easily be made for another event…Valentine’s Day, Easter, birthday, anniversary…)
xoxox
Carly
~If you liked this post, please share it!~
Leave Comment
Dec 20, 2011 | Fashion
 Every year I always make a slew of treats around Christmastime to give to various people in my life: the neighbors, my son’s teachers, the mail lady etc. This year I tried my hand at making Chocolate Fudge with Walnuts (above left), and was surprised at how simple it was! (I bought Nestle Carnation’s Famous Fudge Kit from the supermarket and I think it was the most hassle-free holiday recipe I’ve ever made! Just add 2 T of butter, mix up the ingredients in the box, and it’s done! Genius.) I added some chopped walnuts for texture and it came out beautifully.
I also made Double-Chocolate Peppermint Bark (above right), which I make every year. This year I tinted the white chocolate green to make it a little more fun and Grinch-like. Recipe is here.
I also made Double-Ginger Mango Shortbread, which I haven’t made since we were living in Hawaii 4 years ago and I found the recipe on the side of a butter box. I used Bob’s Red Mill gluten-free shortbread cookie mix, which did simplify the recipe a bit, but still…the worst thing about making shortbread is the endless creaming of the butter (I don’t have a stand mixer, so have to do it all by hand). I guess because of the gluten-free-ness, it came out a bit dry and crumbly, but the cookies melt in your mouth with the tiniest hint of ginger and chewy bits of mango in them. I thought I took photos but now I can’t find them; trust me when I write they looked (and tasted) as good as they sound!
Tomorrow: homemade gingerbread cookies, following this recipe and subbing in molasses for corn syrup, as well as adding 1/4 tsp allspice…they always come out perfect and gingerbready when I do that. 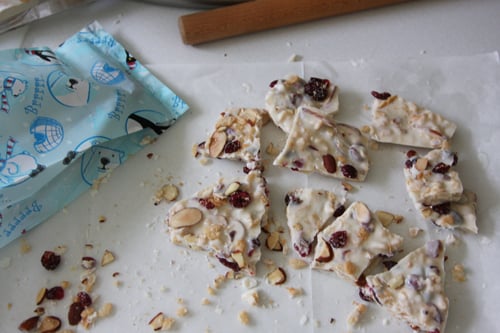 Also: White Chocolate Cranberry-Almond Bark, some of which I’ll give to the neighbors (and some of which I’ll keep for myself!!), and white-chocolate-dipped ginger cookies (I just buy the ginger cookies but they’re still delicious dipped in chocolate!)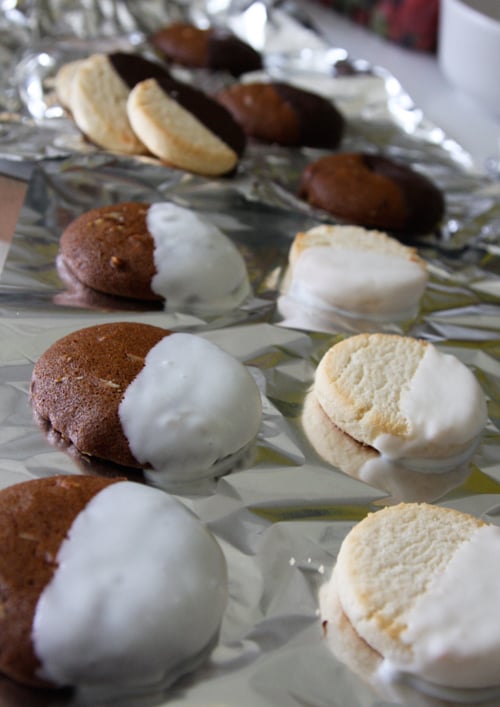
In other news, my little boy lost his very first tooth yesterday, and was thrilled to wake up to 2 quarters under his pillow in the little fabric bag he had placed his tooth in the night before. Because of the missing tooth (and another loose one on the bottom), he’s been having some trouble eating, so hasn’t been able to enjoy all the treats I’m making as much as he wants to, poor thing.:-(
What’s YOUR favorite holiday recipe?
xoxox
Carly
~If you liked this post, please share it!~
Leave Comment
Dec 17, 2011 | Fashion
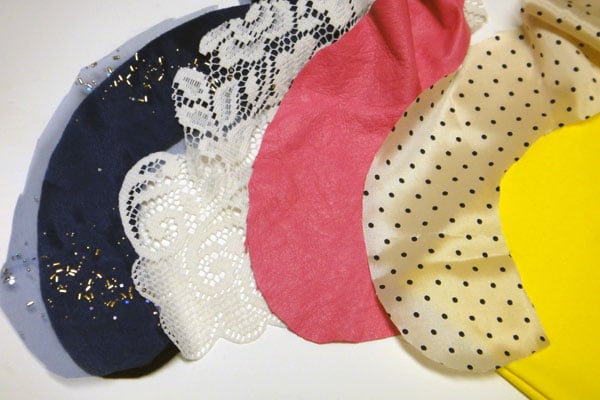 Hi everybody! So it may have seemed that I dropped off the face of the Earth for a couple days…but in reality I was just working like a banshee on my final projects for my classes. I had a final exam today, and yesterday I had multiple final projects due…one of which took me over 30 hours to complete. Needless to say, for a few days this week I was wandering around with my shirt half-buttoned, wearing mismatched socks, and trying to figure out how I could possibly cram a month’s worth of work into 48 hours.
Amazingly, I did it, finished my projects, did my exam, and I think I did okay.
In other news, I’ve also been working on a new DIY project…a launch of sorts, that I’m really trying to complete and post by Christmas. (photo above) I think you guys are really going to like it!
So please forgive me while I run around crazily to get the last lot of Christmas cards sent off, baking done, gifts shopped for and wrapped, my DIY launch items finished, and take care of everything else that’s going on. My posting *may* be a little spotty for the next week or so, but I am stilll here!
Hope everyone else is staying on top of (or already done with) all you have to get done this time of year…
xoxox
Carly
~If you liked this post, please share it!~
Leave Comment
Dec 14, 2011 | DIY
 I don’t know about you, but I have a lot of trouble drawing straight lines with my non-dominant hand. Whenever I attempt some nail art with straight lines, my efforts on one hand turn out perfect, and the other hand looks all wonky and wiggly. I figured a template or stencil would be the best way to combat this – so I thought why not DIY? These candy cane striped nails are actually a cinch to do, and if you’re using sticky color dots (found at any office supply store), they’re also cheap! No striper brushes or special nail polish required. Here’s how:
You Need: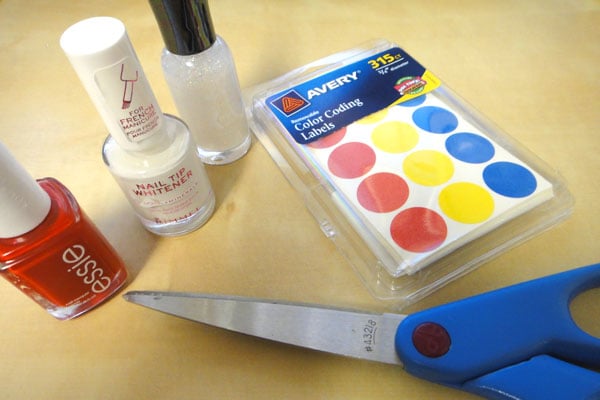
*sticky dots (or you can using sticky labels, or even tape…anything that will stick to your nails will work)
*base nail polish color (I’m using Essie’s Russian Roulette from my Secret Santa Miranda from the Portland Blogger Meetup)
*contrast nail polish color (I’m using white, from a Rimmel French Nail Polish Set)
*glitter nail polish/topcoat (I’m using Sally Hansen Hard as Nails in Disco Ball , which contains little holographic flecks)
And…
*scissors
How-To: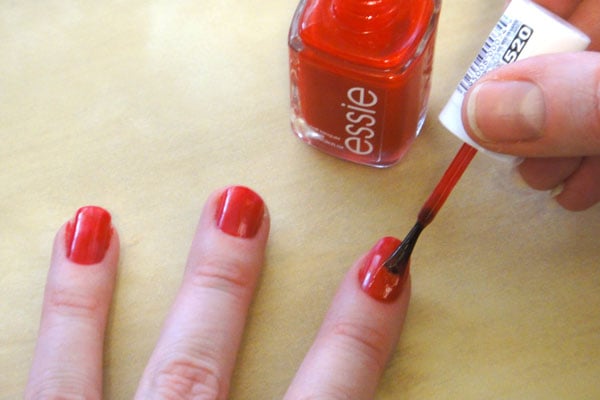
1. Paint the base color onto your nails. I had to do two coats to achieve uniform coverage. Allow to dry completely before going on to Step 3). (I couldn’t wait, so ended up making things a bit messy.)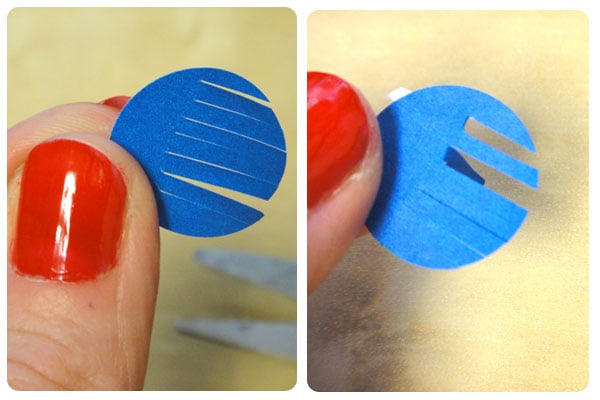
2. Remove 5 dot stickers from the package. Cut each of them into a fringe, stopping the cuts before the edge of the circle. 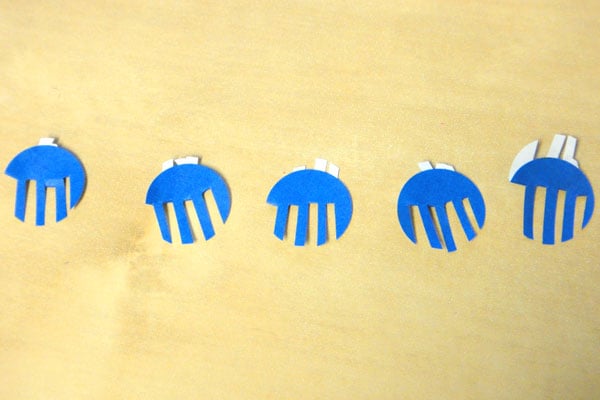 Fold every other fringe strip under itself…this will become the stripe stencil for your nails.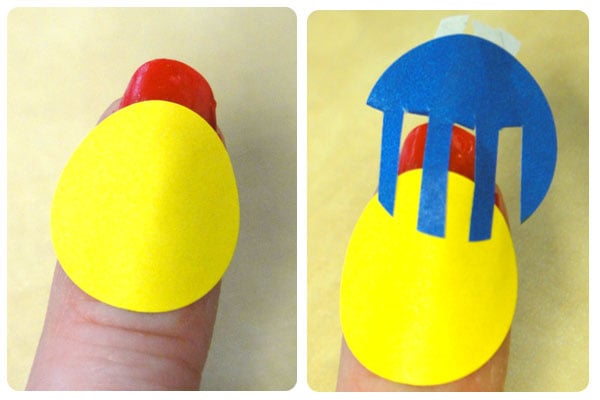
3. After your base color is completely dry, place the dots onto your nails, positioning the stripes how you like. For my shorter nails I made my stripes diagonal, like a candy cane, and for my longer nails I used an uncut dot to create the curve of the tip, and then placed the cut dot with the stripes going up-and-down on the tips only. Have fun with it and mix it up!
4. Use your contrasting color of nail polish to paint the stripes. You may have to do two coats for complete coverage. Make sure the stripes are strongly stuck onto your nails or else you’ll get leakage around the edges!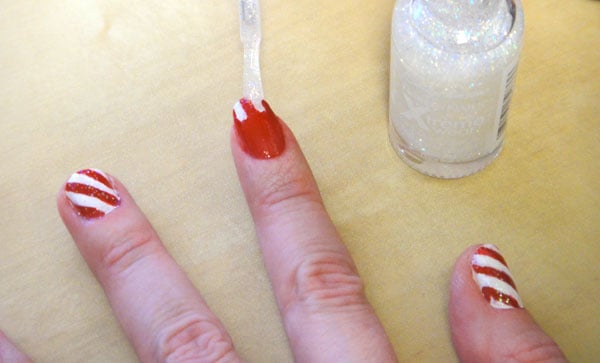
5. After the polish is dry, remove the stencils and finish with a swipe of glitter.
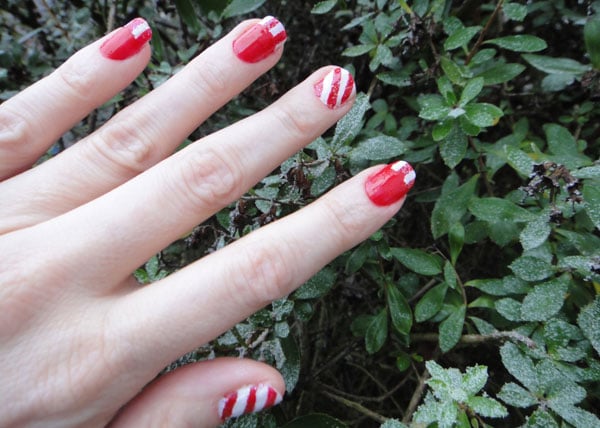
Now if only I had peppermint-scented nail polish…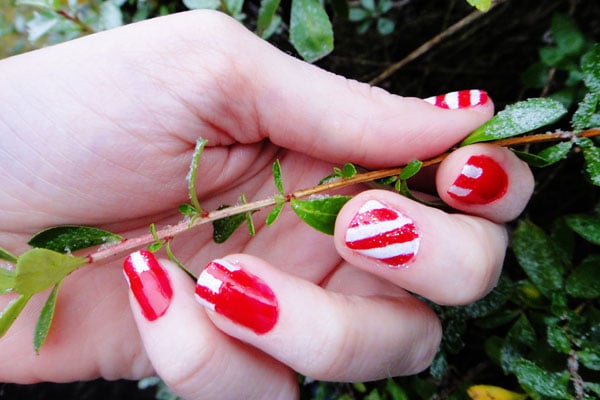
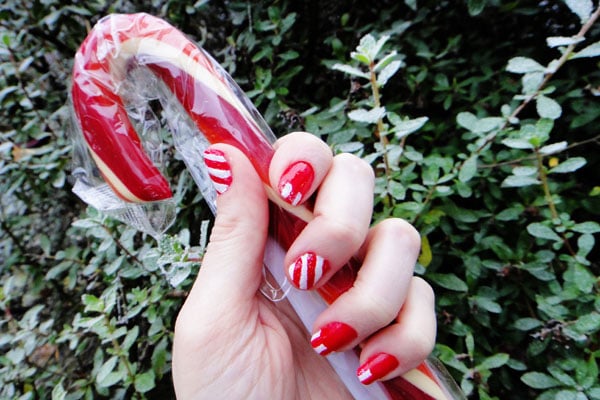 Happy Holidays, everyone!
xoxox
Carly
~If you liked this post, please share it!~
Save
Leave Comment











