Jan 17, 2011 | Blogging
It’s my 3-year blogiversary! I can’t believe Chic Steals is now 3 years old. It’s been an amazing journey, and I’m hoping the best is still yet to come! Thank you all for being on this journey with me – your readership and support has been invaluable as I’ve found my voice and discovered what it is I can contribute to that great wide (virtual) world.
So changes are now in the air! After many years on Blogspot I’ve finally decided to take the plunge and move this blog over to WordPress. I have no idea how long this will take me, though I’m going to try to get it done this week. As a result, there may be times when you try to access my site and find it down, with broken links, or the RSS feed doesn’t show up. Please bear with me…I will get it fixed eventually!
So thanks for an amazing 3 years…and here’s to 3…13…30…more!!
xoxox
Carly
~If you liked this post, please share it!~
Leave Comment
Jan 16, 2011 | Life, Score!
If you want $50 to spend on any of the amazing designer pieces featured on Wardrobe Ave, don’t forget to enter the giveaway! Entry period ends tonight at 11:59 PM PST, so get those entries in while you still can!
xoxox
Carly
~If you liked this post, please share it!~
Leave Comment
Jan 16, 2011 | DIY
I spied this in the store the other day and promptly snapped up 2 to try!
I’ve bought the Nail Rocks nail sheets (that need to be set with the heat of a dryer, which I haven’t experimented with just yet), and tried out the Incoco-brand Color Enamel Strips in the past, which I enjoyed but were a bit tough to apply.
Look at all the beautiful colors and patterns the Salon Effects come in!
The Sally Hansen version of this idea takes the difficult application inherent with other brands and makes it super-easy, with an orange stick and nail file included in each set. And what I haven’t seen before with these stick-on nailpolish sheets is the amazing range of colors: Sally Hansen is offering glitter, photo-realistic effects, fun patterns, and bright colors. And they’re super-easy to use!
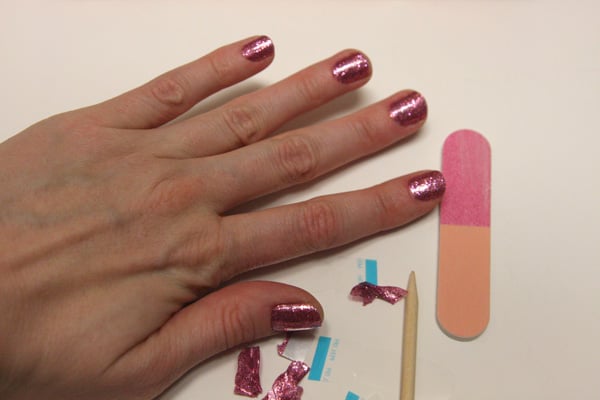
There are 16 sheets in a packet (and though you could probably use a single sheet for 2 nails if you were super-careful and enterprising); they’re meant to be used one sticker = one nail. You need to find stickers that approximate the shape of your nail bed, peel off the protective coat, peel off the back, snap off the paper tip (I found it easier to do the last two steps in reverse order), and place onto your nail.
You use an orange stick (included in the set) to press down the edges, and then the included nail file to crease the sticker sharply at the nail tip, and the sticker rips off.
Pros: Easy to use, fast (once you get the hang of it), brilliant colors and effects, long-lasting (I hope – the package says 10 days!), no drying time required, no need for other things to buy to do your manicure (topcoat, base coat, etc), no bumpiness to the glitter; DBP, toluene and formaldehyde-free.
Cons: A little smelly (like real nailpolish), packs come vacuum-sealed so they’re kind of hard to rip into, stickers prone to ripping if you press too hard with the orange stick, difficulty in finding a shape match to your nail bed, waste of sticker part that you rip off, a little pricey.
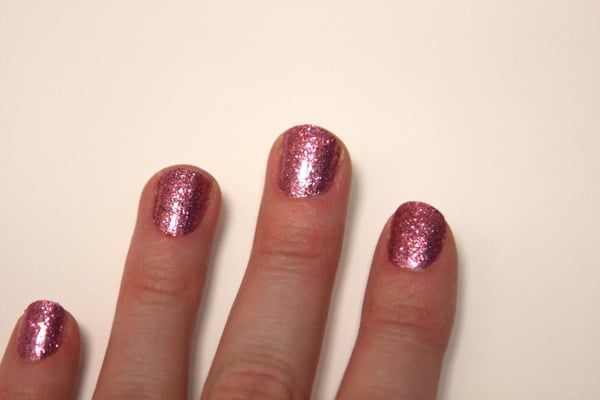
At about $9.99 a pack they’re a little more expensive than your average nailpolish, and they’re only single-use, so once they’re done, they’re done. But the effects are amazingly bright, pure color, with a streak-free and consistent finish, and the tops are smooth without the need for a topcoat!
Right now I’m trying out the pink glitter (“Bling It On”) and the blue glitter (“Blue Ice”) is next on my list!
Already in stores like Walgreen, Target, and CVS, this product is supposed to be available throughout drugstores in the U.S. by February 2011.
What do you guys think? Something cool you’d like to try? Or a little too pricey and bothersome to mess around with?
xoxox
Carly
~If you liked this post, please share it!~
Save
Leave Comment
Jan 14, 2011 | By Carly J. Cais, Media
Etsy user TaMuidBeo featured my Rose and Lava Bead Jumble Necklace in her Etsy Treasury Hot Lava (top row, 2nd from right in photo). I’m loving all the other lava pieces…it’s such a fun, organic material to work with! Thanks TMuidBeo!!
xoxox
Carly
~If you liked this post, please share it!~
Leave Comment
Jan 14, 2011 | DIY
Seen on the runway in John Galliano’s Christian Dior Fall 2010 RTW Collection were whimsical, feminine knitwear pieces with satin ribbons woven and braided throughout.
Photos: Monica Feudi, GoRunway.com
Within weeks of appearing on the runway, many Japanese clothing brands picked up on the design, re-interpreting the idea and selling them en masse to a demanding public, creating a micro-trend stat.
In the U.S. I haven’t seen any clothing brands create their own version of this – which is just begging to be DIY’d! (Check out Outsapop and A Pair and a Spare for their coverage of this idea; and The Hearabouts’ DIY version.) It’s amazingly simple, and the best part is that next year when fashion marches on…you can just pull out the ribbon, fluff out the yarns in your sweater, and nothing’s the worse for wear. The only thing that’s better than a DIY is a DIY that is only permanent as long as you need it to be!
Difficulty: (Easy/Beginner)
You Need:
*chunky-knit sweater (I chose one with cabling, from YesStyle.com. If you can find something with mohair or angora blended in, it adds a soft femininity to the piece.)
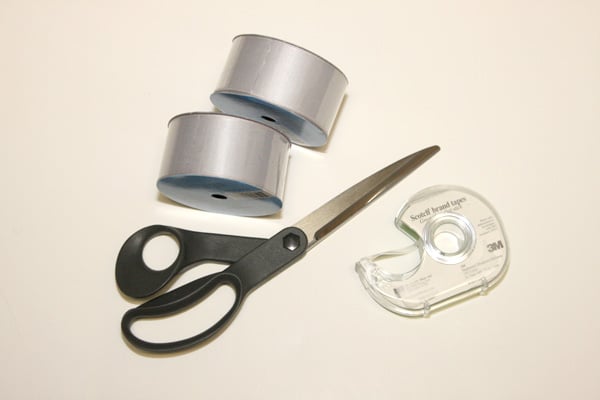
*double-face satin ribbon (I chose 1.5″ wide)
*tape
And…
*scissors
*measuring tape
*hand-sewing needle & matching thread (not pictured)
How To:
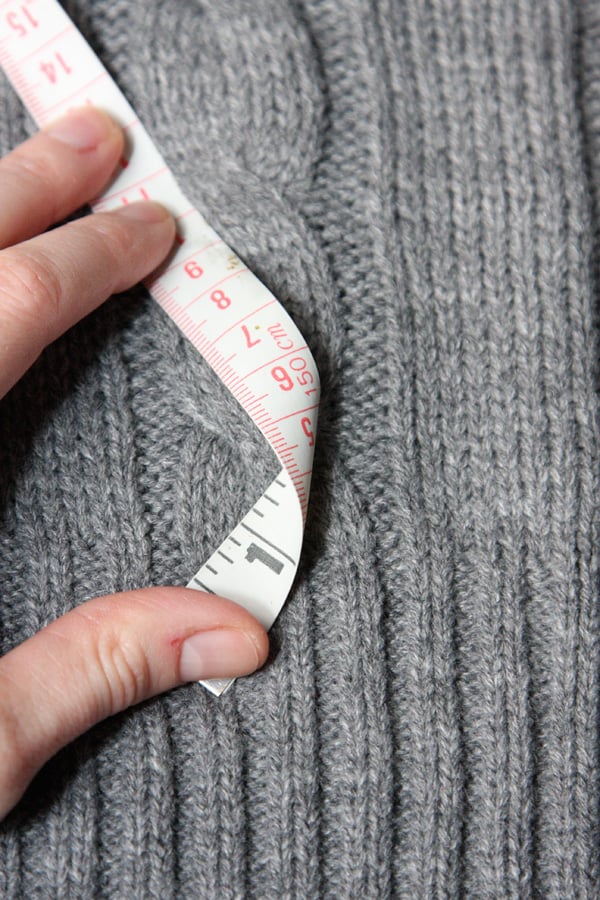
1. First, even before buying your ribbon, you need to measure your sweater to find out how much you will need. Use a flexible measuring tape and, starting at the bottom of the sweater, start measuring upwards, zigzagging the tape back and forth to mimic how the ribbon will cross over once woven.
At the top of the track of weaving, note the measurement on the tape. Double it to get the full length of ribbon for the weaving part.
If you are going to create bows at the bottom of the weaving track, create a bow in the measuring tape and add that length to the total length of the track. That is the entire length of ribbon you will need for one woven area. I chose 2 areas of ribbon; thus I doubled the measurement for the total amount of ribbon I needed to buy. (But since I’ll be doing two rows, I’ll need 2 continuous lengths for each track – something to keep in mind when you’re doing your calculations.)
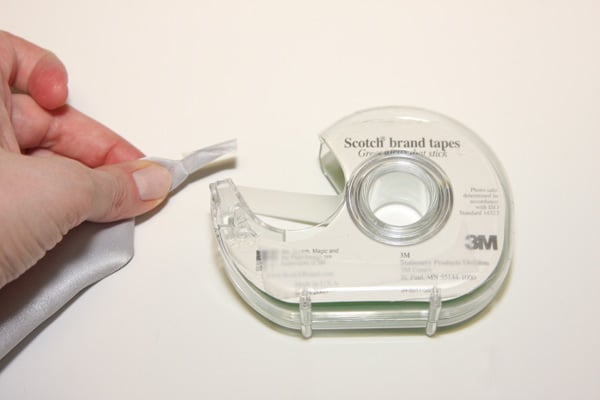
2. Cut your ribbon into the length you need for one row of weaving (+ a little more if you can). Wrap a piece of tape around both cut ends tightly, into a cone shape. This should work in place of a needle for your ribbon (though you can use a large-eye needle, yarn needle, or a safety-pin for your ribbon if you want).
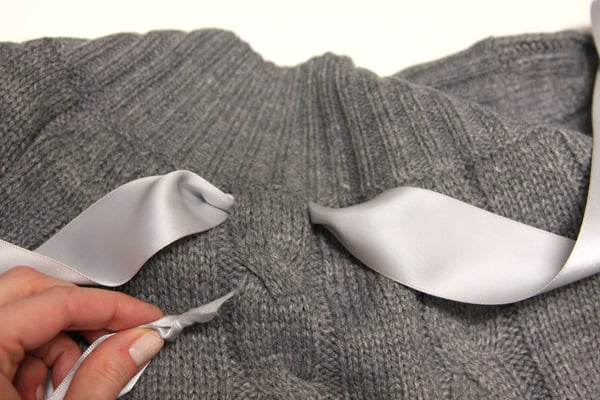
3. Start at the top of the woven row, in the center of one of the cables, from the back of the sweater. Poke a small hole between the knit on either side of the cable, and bring the ends of the ribbon to the front of the sweater.
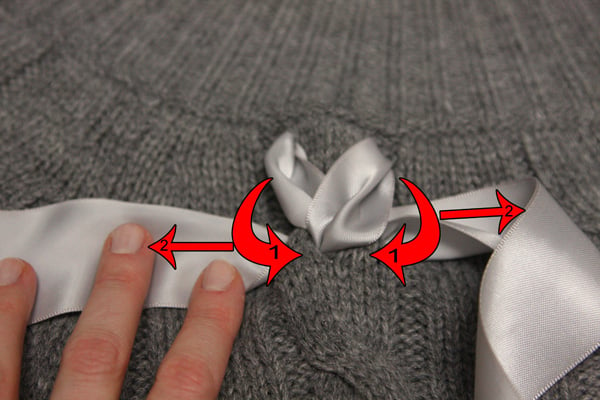
4. Poke a small hole at the bottom of the first cable knot, in the center. Bring both the ribbon ends into the hole and to the inside of the sweater.
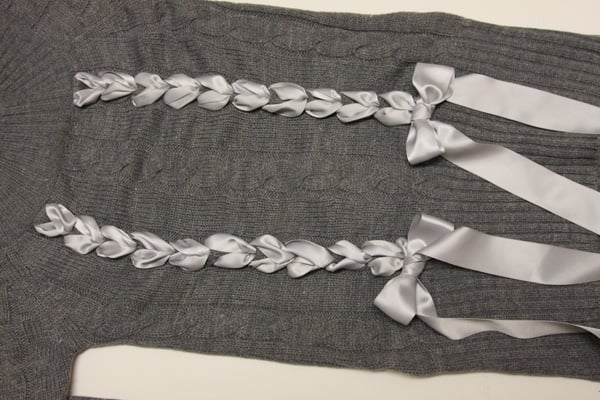
5. Repeat to create a ladder of “V’s”, made in ribbon, down the front of the sweater. As you go, fluff out the ribbon that shows on the front periodically, and flatten the sweater so that you aren’t “scrunching” the cable too much.
6. At the bottom of the row, tie ribbon into a bow.
7. Repeat for the other side.
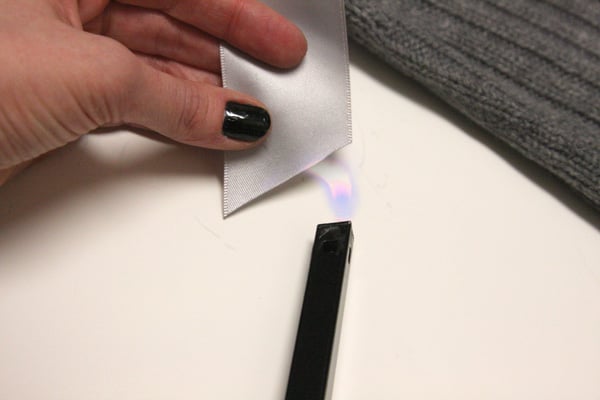
8. Try your piece on, and eyeball where you want the ribbon ends to fall. Cut, and then seal the cut ends with a flame.
9. To make the bows more permanent, hand-sew a couple stitches into the backs of the bows so they don’t loosen on you as you wear it. Hand-wash and lay flat to dry when it’s time for the laundry.;-)
Pretty easy, right?
Let me know if you try this out…I’d love to see your version!
Happy DIY’ing!
xoxox
Carly
~If you liked this post, please share it!~
Leave Comment
Jan 13, 2011 | Fashion
I was floored by this video of Suzzanne Lee’s efforts into creating textiles utilizing bacterial cellulose (formed by fermentation in kombucha tea). Yup, “fabric” – well, more like leather – from BACTERIA.
What an amazing step forward in technology – I’m super-interested to see where this innovation will go once more R&D labs get ahold of it.
So this also begs the question: If they worked out the kinks in the fabric weight and texture…Would you wear clothing made by bacteria?
found via GirlieGirl Army
xoxox
Carly
~If you liked this post, please share it!~
Leave Comment
Jan 12, 2011 | DIY, Life
Well, since there were only 3 projects submitted to my last DIY Roundup, they’re all everyone’s favorites! I had a great time visiting all your blogs and checking out your pieces. You’re all so creative! Here they are, just to recap:
Katarina from She sells sea shells made an amazing statement necklace, inspired by Lauren Manoogian’s designs. You’d never think that this beautiful piece was crafted from paperclips and textile tape!
#2: Monika’s Plait Scarf
I tried very hard to find this tutorial; I really did. There’s no direct link to it, the forum is in Polish, and the site won’t let me search through anything without logging in. What I can tell from the thumbnail is that it looks like a braided rug. If anyone had any more success with finding this tutorial, I’d love to link to it!
Edit 1/20: Monika left a nice comment on this post explaining that it was a plait scarf project that she had finished but hadn’t linked a tutorial to it. Sorry I thought it was a rug – it looks very sweet all the same!!:-)
Teresa crafted her own pair of glitter heels: a breathtaking modern version of Dorothy’s ruby slippers. (The trick is to use tacky glue and spray adhesive – and you have yourself a pair of shoes that could rival the coolest Louboutins!)
Thank you so much for sharing everyone!
If your project has been featured above, feel free to grab the button below.
xoxox
Carly
~If you liked this post, please share it!~
Leave Comment
Jan 9, 2011 | Beauty, From You
from Formspring.me:
Hi Carly! I just found your blog yesterday and I loved it so much I have been going through all your old posts! (Is that creepy? haha) This may seem a bit strange, but I was wondering if you are Irish. I LOVE your red hair!
The Internet is probably the best place for creepiness! Thanks for your kind words about my blog:-)
I am ethnically Scottish/Danish/Norwegian/Czechoslovakian. (“Cais” is a Czech name.) But both my parents are Australians and I was born in the U.S., so I was originally American/Australian… Well, technically American now since I dropped the Australian nationality off my passport (I have only visited there a couple times and though all my relatives are there, I really just identify as American).
The red hair probably comes from the Scottish and the Czech sides of my family; apparently I have a second cousin in the Czech Republic who has hair the exact same color as mine. It’s tough to keep vibrant during the winter – and as the years go by!! :..(
Leave Comment
Jan 9, 2011 | DIY, Media
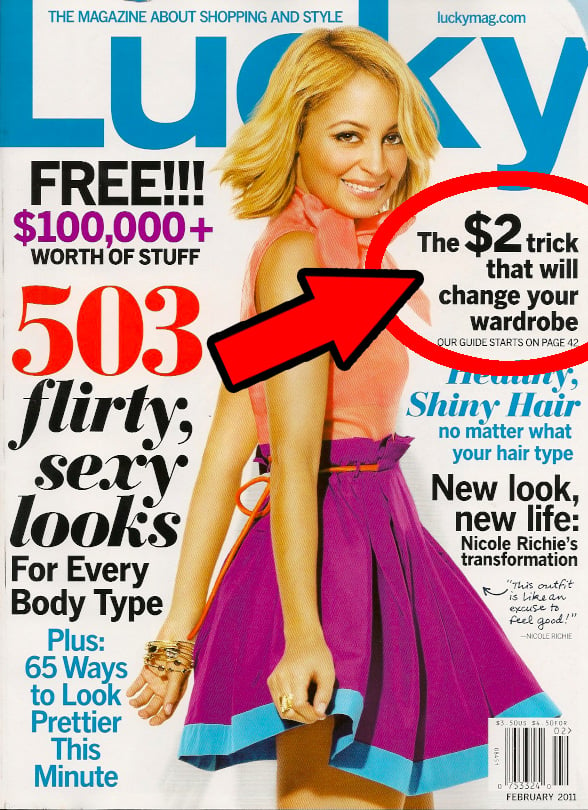
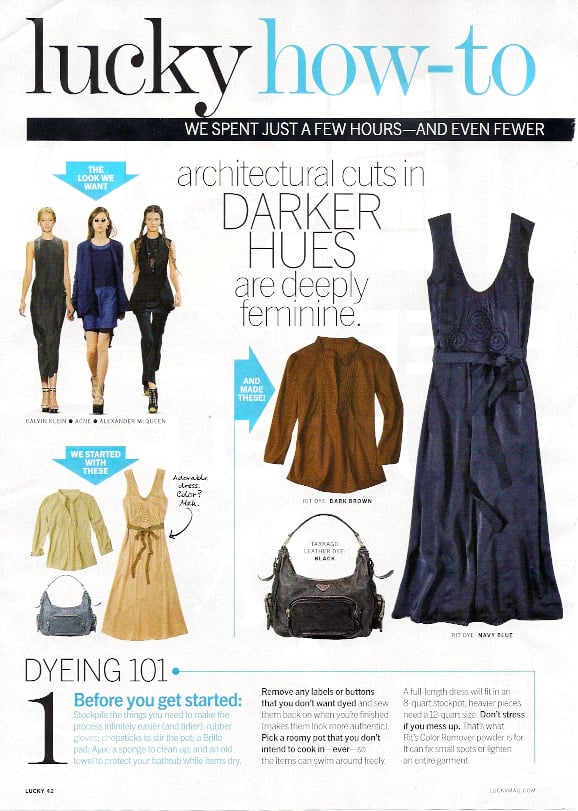
Unlike the New York Times, who doesn’t seem to understand what DIY actually is, Lucky Magazine gets it. They really get it! I was simply floored by their feature on dyeing pieces in your wardrobe to give them new life, featured in their February 2011 issue.
Utilizing Rit Fabric Dye , Jacquard dye
 , and Tarrago leather dye, you too can make over a number of items in your closet and dye them to suit your needs. (“The $2 Trick that Will Change Your Wardrobe!” reads the title.)
Though yes, dye is cheap, the prep and process time for dyeing something can be a few hours to a few days, so it’s not cheap time-investment-wise. But as the article points out, you can achieve dramatic results if you put in the effort to dye something correctly and carefully.
However, most of the pieces in the article appear to be new, which is why the dyeing works so darn well…when you’re dealing with items that have wear, stains, detergents, or distressing on them, your results may be very different. Dyeing something is never a guaranteed process…it’s fairly hit and miss (which is what many people love about it!). Don’t start off with trying to dye your favorite dress in the whole wide world…start smaller, and don’t forget the steps necessary to prep the piece to take the dye.

Dyeing leather is absolutely fantastic and utterly addicting, though again, some leathers will or won’t react with the dye, depending on finishing, tanning method, wear, surface coats, etc. Also: I couldn’t find the leather dye kit the magazine recommends buying from WardrobeSupplies.com – they only sell Tarrago-brand leather polish, which is not the same as dye. I’d recommend Angelus-brand leather dye, as I’ve worked with that before and it is extremely high-quality. If you’d prefer the Tarrago-brand, you can buy it here on a different site…or even buy the kit on Ebay.
They even put together a little video as a quick how-to for the dyeing process for cotton/silk/synthetic fabrics – where Fashion News Director Jen Ford dyes a Barbara Bui dress:
Their other video for how to dye leather isn’t up yet.
I’m so thrilled to see a mainstream mag really try to break the process of dyeing down and inspire people to try it out!
How about you guys? Are you thinking of dyeing a couple pieces in your wardrobe to liven things up a little?
xoxox
Carly
~If you liked this post, please share it!~
Leave Comment
Jan 7, 2011 | Fashion, Score!
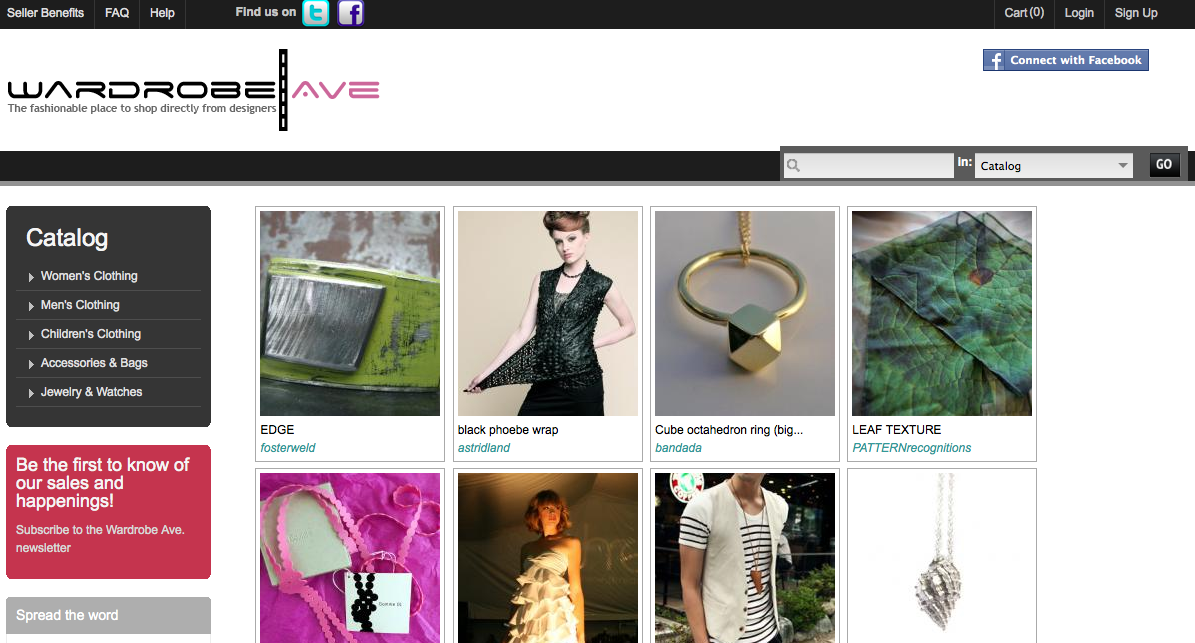
Heard of Wardrobe Ave? New on the scene of e-commerce sites selling direct from designers, this growing e-tailer has something for everyone on its pages.
They sell an array of chic and covetable items, all from independent designers, small boutiques and vintage sellers. The platform allows you to shop directly from the designers or shops, and they ship worldwide.
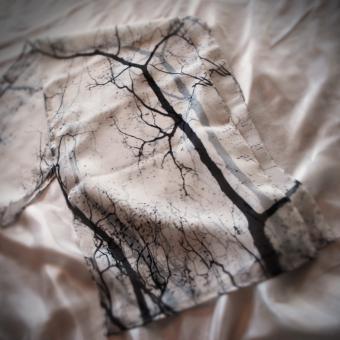
I, for one, am drooling more than a bit over the JANICE white ruffled dress and the Tree Branches Chiffon Scarf.
To help ring in the New Year, Wardrobe Ave has graciously partnered with Chic Steals to offer a $50 credit to their site to one lucky winner!
One lucky Chic Steals reader will win a $50 in credits to WardrobeAve.com!
How to Enter
1. Visit WardrobeAve.com and leave a comment on this post telling me what you’d buy if you won. (1 entry)
ADDITIONAL ENTRIES:
2. Tweet this giveaway. Leave a SEPARATE comment on this post with the link to your tweet! (tweet as many times as you’d like for additional entries)
However, if you do not keep your additional entry comments separate from your required entry comment, they WILL NOT BE COUNTED.
Giveaway open to anyone in the world!!
Giveaway period is open from today until Sunday, Jan. 16, 11:59 PM PST.
Winner chosen by Random.org and notified by email.
Also: Wardrobe Ave is currently running a 20% OFF Coupon Code promotion:
Take 20% off their ENTIRE store using code WARDROBE through now through January 31!
Good luck in the giveaway! and even if you aren’t the lucky winner there’s still that promo to take advantage of!
xoxox
Carly
~If you liked this post, please share it!~
Leave Comment