Jan 6, 2011 | DIY
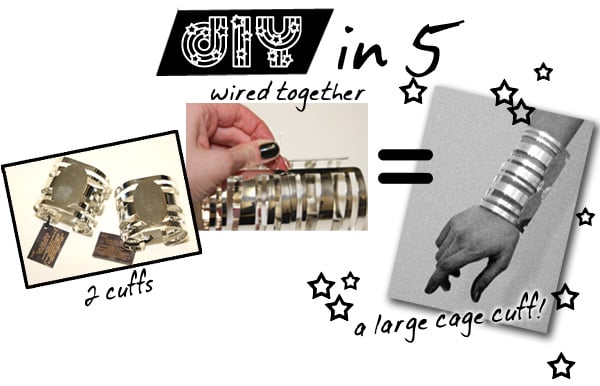
Yesterday I mentioned it as a more realistic alternative project to the New York Times‘ labor-intensive 3-hour DIY (!), so today I’m going to show you how to make it. It’s DIY in 5 – minutes, that is. The easiest, quickest ways to take a piece from blah to fab and update it to current trends.
Wherever I go I’m always on the lookout for clothing, accessory, or jewelry components that can be used in quick ‘n’ simple DIYs. That’s why
these silver cuffs I spotted in the jewelry-making section at Jo-Ann Fabrics, from the brand-new
Dazzling Geodes line of findings (from Plaid Enterprises) caught my eye. (Technically they’re supposed to be used as a base for adding geode slices and embellishments.) And incidentally, like most of the fashion- and culinary-obsessed, I am a frequent visitor to Luxirare.com. and the Dazzling Geodes cuffs reminded me a lot of
the arm-cuffs she sells in her web-store.
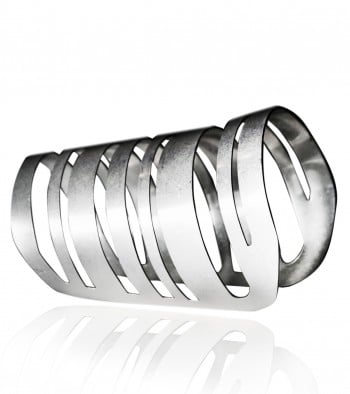
A Luxirare Cuff.
$95 for one of these cuffs is pretty reasonable considering she designed these and has these custom-cast with embossed LUXIRARE logo, and they look pretty hefty and durable…but if you’re in the market for something similar you can use 2 of these affordable findings to make your own version.
You Need:

*2 silver cuffs from the Dazzling Geodes line (available at Jo-Ann Fabrics & Crafts stores)
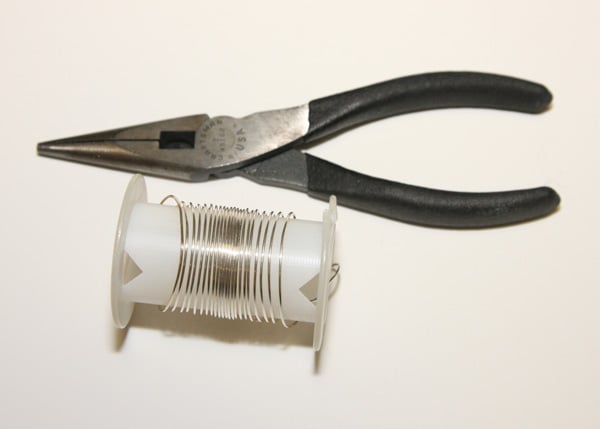 *silver-colored dead-soft jewelry wire
*wire cutters/pliers
How-To:
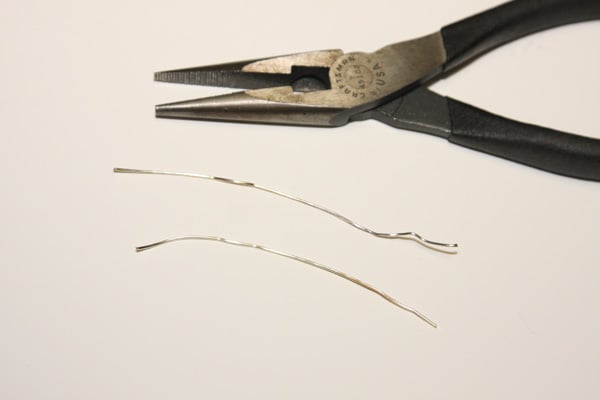 1. Cut 2 short pieces of wire.
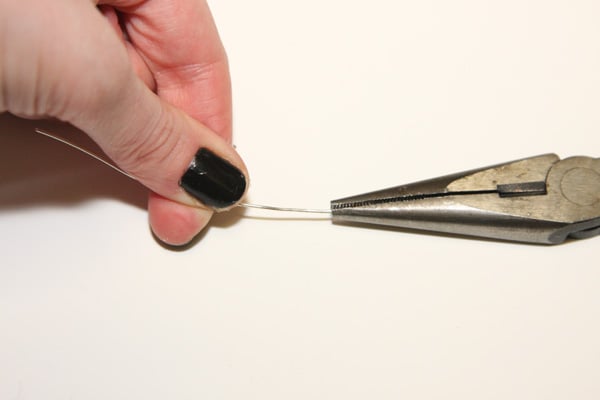 If your wire is kinked at all, close the pliers on it and drag in order to straighten it.
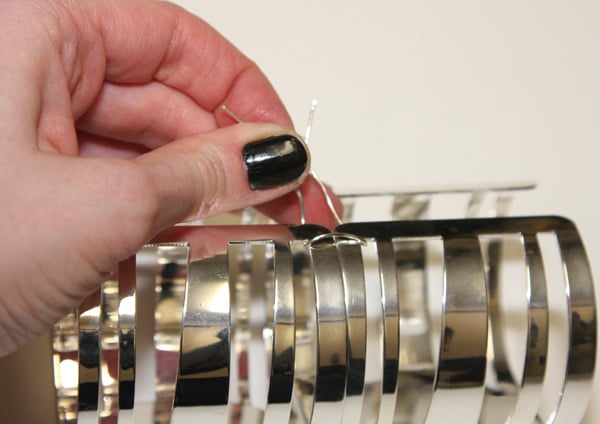 2. Line the cuffs up side-by-side and wrap a wire piece around the outer edges where the two cuffs meet.
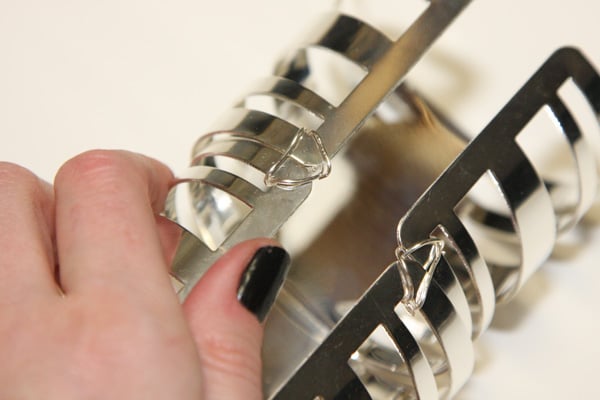 3. Weave the wire around the edges (I made a “V” shape as I wrapped), trim the ends down, and use the pliers to push the sharp ends back out towards the outside of the cuff so they won’t scratch you.
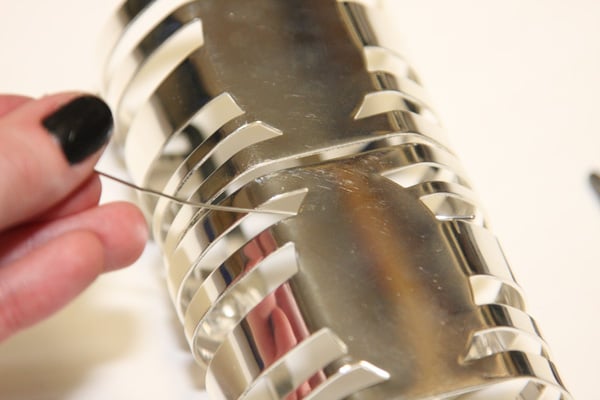 3. Cut a longer piece of wire and secure the center of where the cuffs meet. Twist the ends around each other on the inside, pull ends towards the outside and trim appropriately.
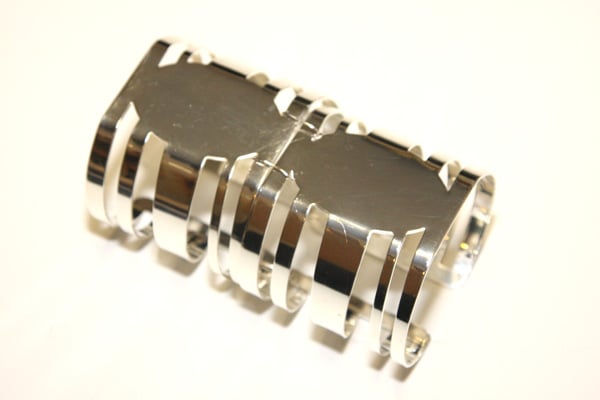 You’re done! And it may have taken you all of 10 minutes.;-)
Wear with minimalist clothing, sharp contrasts, and architectural details…and stay cool, calm, and cagey with this on your wrist.
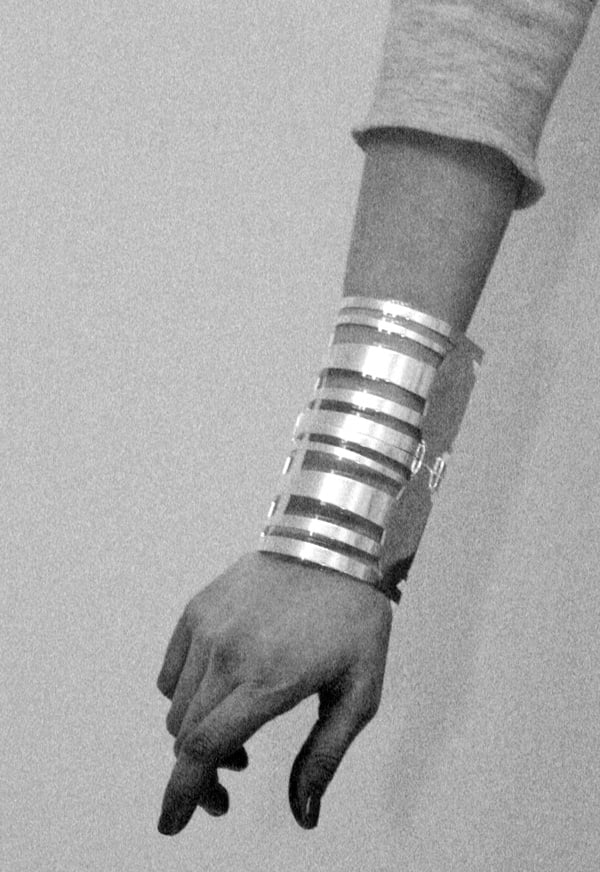 Happy DIY’ing!
xoxox
Carly
~If you liked this post, please share it!~
Save
Leave Comment
Jan 5, 2011 | Media
all photos by Kava Gorna, NYTimes.com
Or at least the blame shall fall to Chelsea Zalopany, who wrote the Dec. 30 article “Feathered Friends / D.I.Y. Headbands.”
Oh, New York Times. I appreciate your efforts to make DIY more accessible to everyone, I truly do. But you’re approaching it wrong.
To make DIY appeal to a large audience, you need to showcase something that’s easy and that anyone can do (at least to start off with; though you can totally go off on a tangent into cray-cray complicated projects once you’ve whet the appetite).
The opening paragraph is almost a contradiction in terms. How many of you spend the time between Christmas and New Year’s “just sitting around?” Me, I spend it with family, running to New Year’s get-togethers, send out thank-you cards for Christmas presents, exchanging gifts that were the wrong size or broken when I opened the box, cleaning out my email inbox, taking down the decorations, throwing out all the extra Christmas cookies…and that’s just for starters. But even in the spare time I do have…if I’m considering a DIY project, well…
It takes Behr three hours to create each spring 2011 twig headpiece, and she’s broken it down into four easy steps. Now that’s time well spent.
Now there’s one sentence guaranteed to strike fear into the hearts of anyone even dabbling in DIY…and enough to send me back to my Christmas cookies.
Why spend 3 hours on a single hand-dyed, hand-shaped, hand-wrapped feather headpiece? (Unless you enjoy the process that much.) I’d rather use those 3 hours to make:
*2 Polka-Dot Shoe-Clips
*1 Magazine Clutch
*1 Cage Cuff
*2 Scroll Earrings
*and a Woven Ribbon Bow Tunic
Kind of like the 12 Days of Christmas. You can even set it to music (start with the tune from the “5 Golden rings” part), if you like.;-) [And all these quick-and-easy projects are coming up here on Chic Steals…stay tuned!]
And all that will probably only take an hour and a half, so you can also make a feathered headband using my tutorial here, just for good measure.:-) [Use a “hat pad” instead of hand-gluing all the feathers like I did; there’s some great choices here.)
So leave the involved, 4-step process using unbleached coq feathers, setting with vinegar, drying with a hair-dryer, steaming over a kitchen teakettle, hand-stripping, and hand-wrapping painstakingly in wire…to the experts. That’s what you pay $148 for. (But if you ever wanted to attempt it, now you know how the designer actually does it.)
The NYTimes also needs to interview someone who actually understands how to translate a hand-crafted, couture piece into something satisfyingly simple (and cheap!) to replicate. (Probably not the original designer of the piece, unless they can design for the budget market. It’s a different skill-set to address the questions of “how can we imitate the luxe look and where can we cut corners? How can someone make this at home easily, with readily-available materials?” These aren’t usually questions up-market designers are asking themselves as they design, which makes someone like this probably not the best source when it comes to a post-holiday DIY.)
And for the love of Mike, have someone modeling the finished product. A designer (and writer!) should know that the hesitant reader (and DIY’er looking for her next project to tempt her away from those cookies) can be swayed by a well-executed $$$money shot.
What do you guys think? Are you DYING to try this 3-hour DIY? Or does it negate the meaning of D.I.Y….a veritable contradiction-in-terms, if you will?
xoxox
Carly
P.S. Thank you all for your kind words and well-wishes to my mother during this difficult time for her and our family. Regularly-scheduled blog content will return tomorrow. Thank you.
~If you liked this post, please share it!~
Save
Leave Comment
Jan 3, 2011 | Life
A bit of a depressing post; you’ve been forewarned…
Do any of you know someone who is a perfectly good person but who just seems to attract bad luck? I do.
She’s a well-meaning, kind-hearted woman who could never be cruel, vindictive, or deceptive towards anyone, yet tragedy always seems to befall her. Whenever something seems to go well for her, life steps in and gives her a good kick, as if to say “And you thought you were going to be happy.” It’s some cruel joke, some sort of effort the Forces that Be constantly make in order to cut down someone who really did nothing except maybe be a little naive and believe that this thing called Life was finally working out for her.
This woman has had so many tragedies in her life it seems that if one were to write them into a script, it would instantly be rejected by Hollywood, with everyone saying “This is so unbelievable!! You can’t have this many things go wrong in a person’s life! It’s impossible.” But it indeed is very possible.
That person is my mother. Someone very near and dear to her just died today, after a sudden diagnosis of cancer and 6 weeks in and out of the hospital.
Needless to say I am not feeling particularly able to blog much right now.
xoxox
Carly
Leave Comment
Jan 1, 2011 | DIY
Now with almost midnight and 2011, while catching up on Gossip Girl episodes and eating peppermint ice cream, I just wanted to take a look back at 2010 and all the DIY tutorials I’ve shared here (and elsewhere). Missed any? Here they are, one more time:
Hair Accessories
Accessories
Jewelry
Clothing
Men’s Clothing Remakes
Shoes
Home Decor
Recipes
Wow, it’s a lot when you look at them all like that! 63 tutorials and how-tos (and I only did 51 in 2009). I hope this last year has been a wonderful, amazing year for everyone, filled with happiness and DIY!
Here’s hoping that 2011 is even better!
Happy New Year to all my wonderful readers, friends, fellow bloggers, and family!
xoxox
Carly
~If you liked this post, please share it!~
Leave Comment
Dec 31, 2010 | From You
Leave Comment
Dec 31, 2010 | DIY
Project in progress.
Whew! The holidays are going by FAST and it’s time for another DIY Roundup! I was hoping I’d have a project to share with you, but alas…hopefully it’ll be done by tomorrow. (There’s a little teaser for you above.:-) After Christmas = Procrastination for me! How about you? Have you made anything you’d like to share in the past weeks? If so, please add it to DIY Roundup 9!
So now you get to share your own DIY’s! If you have a DIY project or tutorial that you’d like to share, please feel free to link below! (However you can only link YOUR OWN PROJECT. Please do not link others’ projects!)
If you’ve linked up your project to the Roundup, feel free to grab the button below.
Can’t wait to see everyone’s projects!
xoxox
Carly
~If you liked this post, please share it!~
Leave Comment
Dec 31, 2010 | By Carly J. Cais
Speaking of Etsy…
A few people have asked me about offering my faux fur tails in different colors, so I’ve spent the last several days making up new ones, in two BRAND NEW colors I just received in the mail. One is a “fox”-like color: cream with orange-tipped fur. The other is a “raccoon”-like color: tan with brown-tipped fur and stripes. (see above)
I also have a one-of-a-kind dip-dye pink-to-white tail (purely accidental, since I was trying to dye the tip black) that I posted for sale.
I’ve also added a couple of “puffball” charms if you prefer something smaller and not so “tail”-like.
I’d love to hear your feedback!
xoxox
Carly
~If you liked this post, please share it!~
Leave Comment
Dec 30, 2010 | DIY, Life
Thanks so much for submitting your projects into my last DIY Roundup! I had a great time visiting all your blogs and checking out your pieces. You’re all so creative! Here are the top 3 projects:
From Samantha over at Dollar Store Crafts, this woven rope necklace looks so high fashion! (And it’s made from two jumpropes – can you believe it???) I’m dying to make one of my own!!
Sarah from Simply Step Back made a beautiful stretchy jersey scarf (from her mom’s old tee) with a pretty fabric corsage as a bonus. Just in time for the cold winter months – and I love the stripes!
Stacie from Stars for Streetlights gave a pair of boots a new life by gluing scrap leather circles over them. You’d never know that she didn’t buy them like that – so boho chic!
Thank you so much for sharing everyone!
If your project has been featured above, feel free to grab the button below.
xoxox
Carly
~If you liked this post, please share it!~
Leave Comment
Dec 29, 2010 | Media
[youtube]AVmq9dq6Nsg[/youtube]
I never knew what Portland, OR was like until I moved here. See for yourself above…
This video had me cracking up.:-D It’s a pretty accurate portrayal of Portland…though that’s not a bad thing! (I really like living here, maybe because I missed the first half of the American 90’s experience since I was living in Japan.)
Now I have this song stuck in my head!!
xoxox
Carly
~If you liked this post, please share it!~
Leave Comment
Dec 28, 2010 | Fashion
I was so impressed with this innovation that I had to share with all of you.
I never thought I would see the day that one could try on clothing “virtually”…but it’s here.
Miss Selfridge has implemented an online application where you can snap a photo of yourself and overlay their clothing onto your photo…all on their website platform. (Up until now this was more than possible if you felt like messing about in Photoshop or some other graphic-editing program [i.e., taking a photo of yourself, then downloading product photos from your favorite online store and layering the items over your body in the program]. But to have this functionality self-hosted on a clothing e-tailer’s site, especially one as big as Miss Selfridge, is huge. I hope other sites jump on this bandwagon stat!)

You need to first wear a neutral-colored, tight-fitting sheath. You position your computer’s camera device so that you are about 3 steps away from it, and align the dress that appears onscreen with your body. Using the touch-sensitive virtual buttons that appear to be suspended in midair on your screen, you resize the dress so it fits the lines of your body, and then choose the camera button, which snaps a photo that you can then share on Facebook.
Pros:
Fun! It’s really neat to see how a piece of clothing will look on you before you actually buy it, and once you get the hang of it, it’s quick to try different pieces out. Saves the hassle of putting on and taking off clothes entirely. Plus, it helps with the decision-making…for instance, that beige dress I tried on above I really didn’t like until I tried it on…and now, I’m more inclined to get it since I thought it surprisingly flattering for my body type.
Cons:
1.) Doesn’t work in Firefox (I have the latest version). I had to use Safari as my browser to allow the application to work.
2.) The Resize and Camera (“take a photo) buttons have an extremely tiny area of sensitivity. You have to fumble about in midair for awhile until buttons respond – and sometimes they don’t at all. I found that I could get the buttons to respond only by moving super-close to my camera and trying to “touch” the buttons with my head. Only then would they respond and I had to rush back to the exact spot where the dress was aligned in time for the photo to be snapped. AND, you can’t use the mouse to click on the buttons when they don’t respond to touch. MAJOR programming drawback.
3.) Building off 2.), the application takes photos too quickly. I had trouble fitting my pose and the dress size correctly with only a 3-second countdown.
4.) You can’t take a photo to share on email, or save on your computer, or in an online MissSelfridge.com account. You can only post them on your Facebook profile, and the photos that you can post end up SUPER-TINY. In order to share the above with you, I had to take a screenshot (of the photo of me wearing the dresses, that for some reason the application tilts, shrinks, and adds a polaroid-style border to – MOST ANNOYING). Thus, you only have small photos of my 20-minute try-on session to look at.
5) I noticed at least one of the dresses was a different version when you go to buy it – the peacock-print caftan does not have a cut-out shoulder in the version that’s available on the MissSelfridge.com site. Consistency, please!
6) You can’t try on separates. Forget about creating whole outfits…and the dresses you can try on are just a tiny fraction of all the pieces they offer for sale online anyway.
7) Unless you have really good lighting, your photos will be really dark and grainy. The more neutral the background, the easier to see as well.
You may or may not have seen this already, but Wieden + Kennedy Tokyo’s ad for Google search employs a similar technique…though not necessarily usable unless you have a projector.
If you have a spare 15-20 minutes to play around, this is a super-fun way to spend it! (I just hope they address some of the technology issues and add more clothing pieces to “try on” soon!)
xoxox
Carly
~If you liked this post, please share it!~
Leave Comment


 1. Cut 2 short pieces of wire.
 2. Line the cuffs up side-by-side and wrap a wire piece around the outer edges where the two cuffs meet.
 Happy DIY’ing!