May 14, 2014 | DIY
 Now I’m sure you guys have heard of that amazing crafting supply that does practically everything: Mod Podge. There are major devotees to this glue/decoupage medium/finisher, and for good reason! Because it’s nontoxic, cheap, provides a variety of finishes, and it just plain flat-out works!
Amy Amderson, the amazing and multi-talented blogger brand representative of Mod Podge (and the brainchild behind the cool blog Mod Podge Rocks!) sent me a package from her brand-new Mod Podge Peel & Stick Stencils line, designed exclusively for PLAID Enterprises. I had a blast playing with the stencil, and I fashioned this chic patterned update to an old photo frame I had. Check out how I did it:
You Need:
photo frame / Mod Podge Peel & Stick stencil (mine is in Tangier) / foam pouncer / Mod Podge (matte) / silver leaf / gloss spray acrylic sealer / paintbrush (not pictured)
How To:
1. Place your stencil onto your photo frame. (If your photo frame is very smooth, you may need to rub it with fine grit sandpaper to give it some surface to the Mod Podge to stick evenly on to.)
2. Pour out some Mod Podge and dip the foam pouncer into it, wiping off excess.
3. Dab the pouncer on top of the stencil.
4. Peel off the stencil and allow the Mod Podge to sit for a few minutes to become tacky.
5. Place some silver leaf onto where the Mod Podge was applied.
6. Use a soft, dry paintbrush to remove the excess silver leaf.
7. Once one side is fully leafed, repeat placing the stencil, applying the Mod Podge, and applying the silver leaf in sections across the photo frame.
8. Finish wish a spray of acrylic sealant to keep that silver leaf looking gorgeous!

And that’s it! I love how designer-y and high-end the photo frame now looks…even though it was a super-cheap piece from IKEA. I also love the worn look of the silver leaf and the great pattern that emerged as I applied it. The stencil was super-easy to work with, and sticky enough that I could wipe it off each time and re-use it on different parts of the frame, no problem. The perfect addition to this frame was a photo of Lil Tot practicing his best flying ninja stab jump with my rake. Stab that leaf pile!!
You can find Mod Podge Rocks! Peel & Stick Stencils in craft stores such as Jo-Ann Fabrics and Michael’s, or at the PLAID store online here. I guarantee, they will take your Mod Podge projects to the next level!
 Thanks Amy and the team at PLAID! It was so fun to make this little project 🙂
Happy DIY’ing!
xo
Carly
FTC Disclosure: I was sent a Mod Podge stencil, 2 small tubes of glitter, and 2 foam pouncers courtesy of PLAID Enterprises. I have received no compensation for this post. The above opinions are my own. To read my full Disclosure Policy, click here.
Save
May 12, 2014 | DIY, Fashion
 Welcome to the first installment of DIY That Style! I actually used to do a version of this as “Steal That Style” …this is basically the same thing, just renamed. And made a little cooler, with more of a focus on DIY.
For the first breakdown, I’m going to take a look at Diane Kruger‘s recent chic nautical Spring shopping ensemble – which can be easily re-created at home. Love all that navy!
For this dotty statement blazer, I’d personally go with a pair of red pants and totally red-white-and-blue it up!
What would YOU rock this polka dot blazer with?
xo
Carly
Photo source
FTC Disclosure: This post contains affiliate links, which means I receive a small commission if you click on a link and purchase something. To read my full Disclosure Policy, click here.
May 4, 2014 | DIY
 *This is a project I shared in Snippets Magazine: The New York Issue on Cut Out + Keep in 2010, and am re-posting here on my blog.

 Serena sported this beautiful vintage-style necklace in an early episode of the addictive Gossip Girl TV series. Its charm was its modern take on the beautiful art of crochet – and the delicate balance between darkness and fragility. Plus, with some appliques from the sewing store it’s a cinch to make. Here’s how:
(more…)
Apr 26, 2014 | DIY
 1 / 2 / 3 / 4 / 5 / 6 / 7 / 8 / 9 / 10 / 11 / 12
Earlier I shared my must-have list for jewelry DIY projects. And now I’m following up with this list for sewing DIY projects! (These Must-Have Tools for DIY lists are on my DIY Resources page if you’re looking for them.)
My mother taught me to sew back when I was 8 or 9 or so. My first project was a lopsided white stuffed bear with a face that looked both happy and sad at the same time. Since then, I’ve graduated to using and eventually purchasing a serger, learning how to use an industrial sewing machine, and even sewing my prototypes for my short-lived clothing line back in 2007. I love using patterns and making patterns, stitching things together from scratch and upcycling pieces, and basically letting my imagination run wild. Some of my favorite projects that I’ve shared on this blog have been my Cute Summer ShirtDress (the very project that launched my focus on DIY here on Chic Steals!), my Men’s XLSweatshirts to Blouson Top project, and more recently my Ballroom Skirt from a Shower Curtain. Here is my recommended list of really great tools for DIY Sewing Projects:
1. Seam Ripper
You.Must.Have.A.Seam.Ripper. You need it to rip back or to take apart pieces to be cannibalized, to fix stitches…this is vital to creating a perfectly-sewn piece (even if it didn’t work out the first time around).
2. Rotary Cutter
Perfect for cutting uber-straight lines, this is my favorite tool to get things cut out in a flash. (Don’t forget the cutting mat to go with it!) I like the OLFA but Fiskars makes a good version too.
3. Chalk Pencil
This marking pencil is my absolute favorite since it makes super-precise lines and works just like a mechanical pencil. LOVE.
4. Extra Bobbins + Bobbin Case
Who ever has enough bobbins when they’re sewing?? (I’ve been known to wind a new color thread on top of a half-filled bobbin when I’ve run it…which is definitely not a best practice.) Though you of course have to get the correct type for your machine, these ones are my favorite for my Singer. Plus a little case to keep them in will keep them neat and tidy instead of a tangled mess!
5. Sharp, Sharp Sewing Scissors
El-cheapo scissors won’t cut it (literally) if you do a lot of cutting and sewing. Prepare to spend around $30+ for an excellent pair of Gingher or Singer scissors, and they will last you a lifetime. (Just never, ever, EVER cut anything else besides fabric with them [especially paper]…this will dull them like nobody’s business.
6. Sharp, Sharp Pins + Emery-filled Pincushion
I’ve found that certain “decorative”-style pins aren’t all that sharp, and the round-headed ones tend to cause bumps when pinning a pattern to fabric in order to cut. I prefer the extra-sharp flower-headed pins so the pattern isn’t puckering and lifting, and they don’t get in the way of the machine foot so much. Plus an emery-filled pincushion to keep them all corralled is a must. You can also DIY your emery pincushion by following a tutorial here.
7. Hem Tape
Though I prefer to sew whenever possible, some stitchery DIY’s can be accomplished quite easily with permanent Hem Tape instead. (See my DIY J. Crew Sporty Pants and my DIY Windowpane Sweatshirt for example.) This hem tape is just great.
8. Curved Nail Scissors
I love love love these scissors! (They also appear on my Must-Have Tools for Jewelry DIY’ing list.) That’s how much I love them! They work great as thread snips if you don’t feel like investing in those, and help you poke holes and cut perfect buttonholes (just be careful of the curved edges).
9. Pattern Notcher
I fell in love with this tool when creating my clothing line, and again at the clothing factory I interned at in Portland. Normally you’d notch your patterns and fabric at center front and center back, and when matching sleeves. I don’t like using the scissors to notch, because often the cut is not easily visible in the fabric, and sometimes I notch too deeply, straight through the line of stitching. NOT GOOD. With a pattern notcher, it goes through the fabric in a lovely V- or rectangle shape and won’t go deeper than 1/4″, so no chance of ruining your stitching. It’s easy to see and looks professional, plus it can be used to notch the seam allowance of curved stitching. I LOVE IT and highly recommend it.
10. Pattern Weights
Usually I’d use any old thing laying around (my water glass, the sleeping dog, my glasses, the very scissors I actually need to cut with)…but having a group of dedicated pattern weights is extremely useful. You could of course DIY them and make them utterly cute, too.
11. Variety of Machine Feet
Though the project will often dictate what feet you need, I find myself reaching for the same ones over and over again. My Zipper Foot, Ruffler, Narrow Hem Foot, Butttonholer, and Teflon Foot (for leather/suede) help me stitch up a variety of projects with professional results. (the pack pictured is for low-shank machines)
12. Turn-It-All
I absolutely adore this kit I bought awhile ago. It’s for turning thin tubes of fabric (like for spaghetti straps, waist-ties, decorative tubing, and more). I often use the long thin metal rod in place of an awl for holding fabric under my machine foot, and for poking corners out and turning pieces right-side-out in general. I highly recommend this!
Any extra sewing tools that you can’t live without? Let me know in the comments!
xo
Carly
*This post contains affiliate links. For my full Disclosure Policy, click here.
Apr 23, 2014 | DIY
 Hello lovely readers! Today I’d like to share the DIY tutorial for the Gem Pendant Necklace I designed for Wander & Hunt. It was inspired by an over-the-top, bejeweled and utterly gorgeous Dannijo pendant – and so I couldn’t help myself but re-create all that glittery goodness.
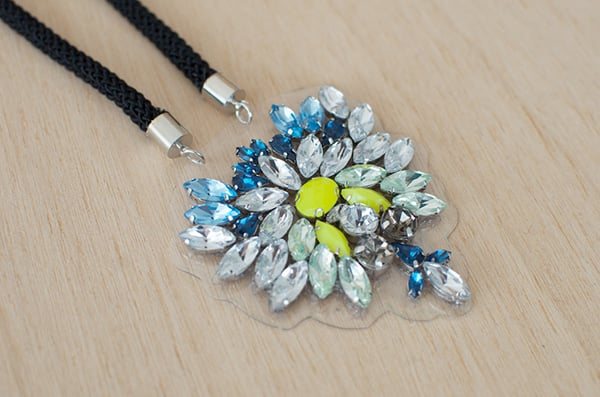 Here’s how:
You Need: (more…)
Apr 15, 2014 | DIY
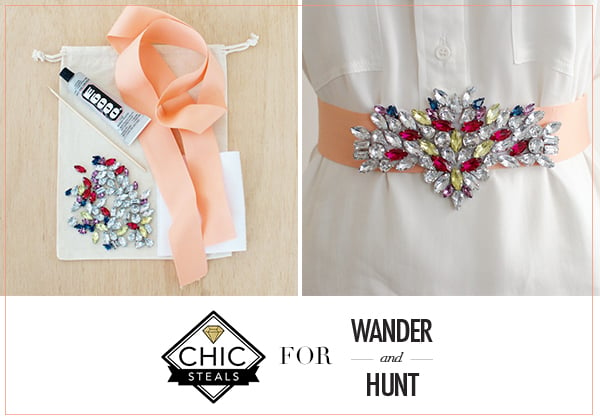
Hello friends! Today I am sharing the DIY tutorial for the Radiant Rhinestone Belt kit I designed for Wander & Hunt. It’s a fun little project with maximum impact, and you can place your stones however you like to get totally different looks. 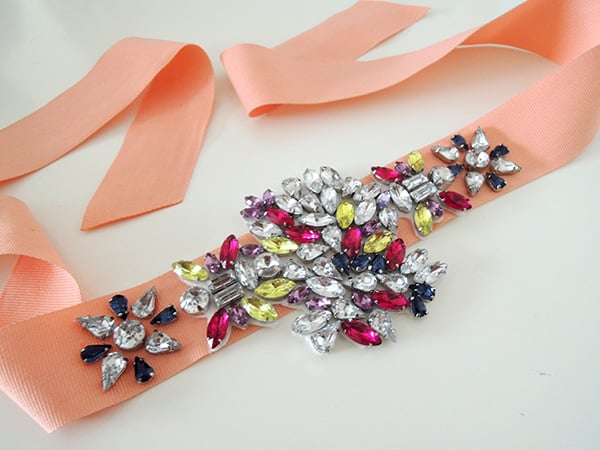 (My version is less symmetrical and more random, as you can see.) Here’s how:
You Need: (more…)











