Oct 29, 2012 | DIY, Fashion
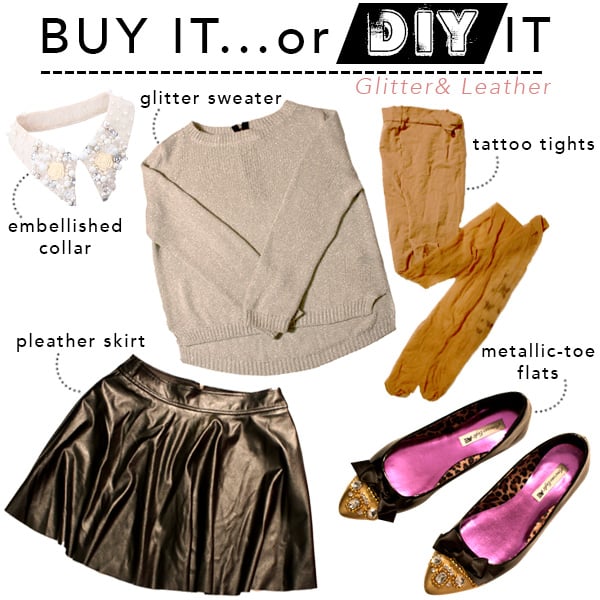 Now at the end of October the leaves are still heading down, November rains are on their way, and the weather’s getting chilly. Warm up in the perfect Fall outfit: a cozy sweater (pre-blinged for the holidays!), a decorative collar, a sassy little pleather skater skirt, and illusion tattoo tights that could pass for bare legs. (And save yourself a major investment by trying your hand at DIY’ing some of these pieces to add to your wardrobe!)
Decorative Collar: Buy It Here for $27.50, or DIY it here
Glittery Sweater: Buy It Here or DIY it here
Pleather Circle Skirt: Buy It Here for $22.99, or DIY it here
Tattoo Tights: Buy It Here or DIY it here
Metallic Cap-Toe Flats: Buy It Here for $66.84, or DIY it here
xoxox
Carly
Leave Comment
Oct 26, 2012 | DIY

Now that the weather’s cooling down, I want a cute little hat to wear – not something chunky and heavy just yet, but something that adds just a little bit of warmth. Something polished, and maybe even a bit kitschy.
And I just LOVE me some kittehs! I am such a crazy cat lady. I used to volunteer in Hawaii trapping feral cats and adopting the kittens out to loving homes. Then I got Cat Scratch Fever. True story. Anyway.

Cat-themed merch was all over the runways and is now in stores for Fall (check out this lovely printed Wildfox sweater and Romwe’s
 knockoff oh-so-similar version). So, inspired by berets I’ve been seeing in my Japanese magazines, I decided to create my own Kitty version. And it’s my first foray into wet wool felting and hat-making. So stick with me and I’ll show you how!
You Need: (more…)
Leave Comment
Oct 18, 2012 | DIY, Life
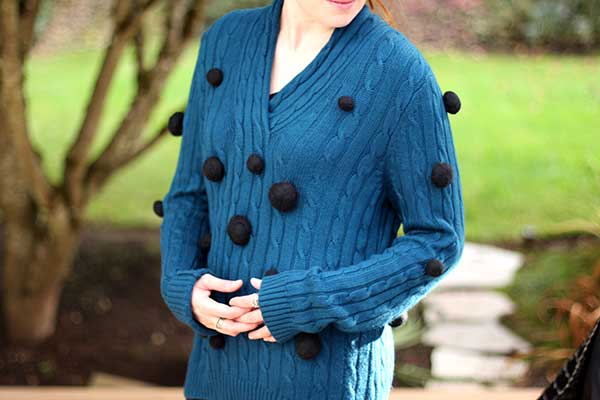 As some of you may recall, in early Spring this year I attempted to DIY a puffball sweater I saw in Vivi Magazine.
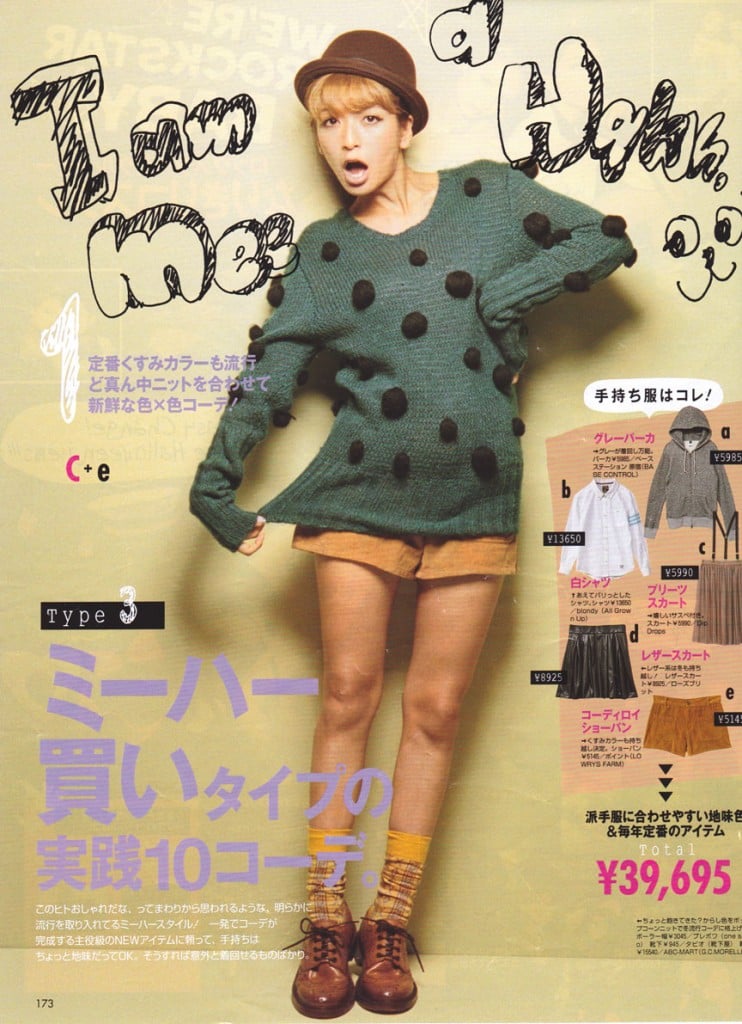
This is what I was trying to dupe.

This is what I ended up with.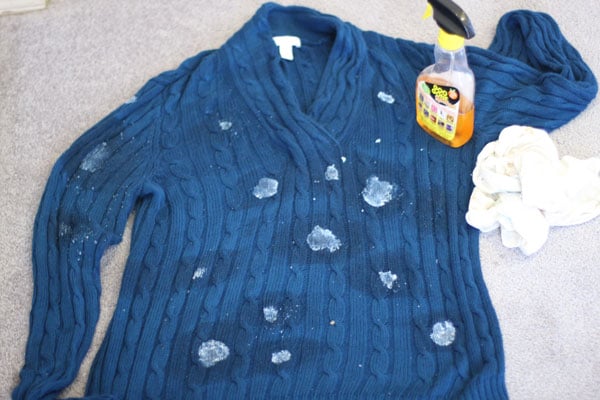
Why did it happen?
Well, I chose my materials badly. I figured this was just a pompon sweater, so I used acrylic pompons out of a bag I bought at Jo-Ann’s, in the doll-making and felt section.
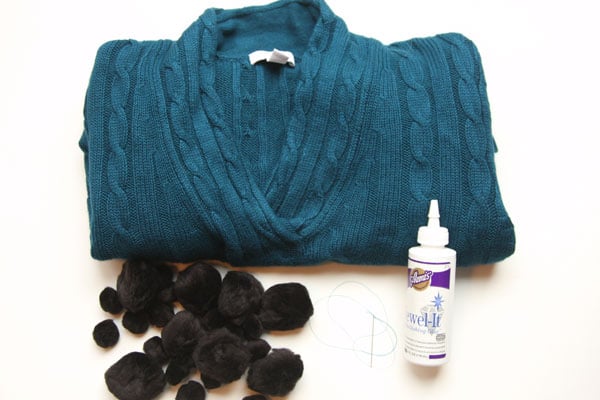
BIG mistake. If you look closely at my inspiration photo, the balls are actually felted wool balls, all a little rough-looking and slightly different in size. I thought the sweater was super-cute with those pompons on it…but failed to realize that it was the material of the pompons that took it from a kid’s craft project to something a grownup could wear. (Okay, I know some people might debate me on that, but still!!)
AND I chose the wrong method for the job. As I was gluing down the pompons, I was feeling that it wasn’t looking as cool as in the picture. The pompons weren’t attached properly, and the glue was seeping and soaking in all over the place. It was visible even around my pompons, leaving a ring of WHITE hardened glue. I did the front of the sweater and one sleeve, then let it dry overnight to see if I felt any better about it in the morning.
I didn’t. I then ripped all the pompons off, out of the hardened glue, and tried to peel off the glue. After pulling and peeling and ripping for over an hour, I had a blistered thumb and only managed to remove the outer layer of a couple glue blobs. I was frantic. I really liked the sweater; it was soft, the color was perfect, and it was an amazing bargain at my local Goodwill for only $4.99. I didn’t want to let it go!! So I soaked the sweater in water and delicates to detergent to see if the glue would soften up. More pilling and crumbling glue ensued, but I still couldn’t get it off. The next day I called the Customer Service line for the glue product and asked how to get it out of my sweater. There was a pause. “Well, it’s permanent. You can’t really ‘get it out.'” I finally got a “well, you could try Goo Gone on it, some of our customers have said they’ve had some success with that.” So I sprayed Goo Gone on all the spots (which you can see in the above photo). Oh my. Petrochemicals all over my sweater. It smelled like GASOLINE. The fumes were heinous. I had to lock it in the laundry closet to sit or else I would have gotten high from it. I let the Goo Gone soak in overnight and found that it had hardly done anything. I was back to pulling and peeling and ripping – though now everything was slimy and smelly from the Goo Gone and the glue spots were exceedingly difficult to grasp. I managed to get one spot off completely after pulling at it for 45 minutes. Some of the others I was able to remove 30-60% of the glue. But at that point, after 4 hours of working on it, I threw in the towel (figuratively) and threw the sweater in (literally) to the wash. I had to launder it twice to get the stench out. And I was still left with a sweater with hardened spots of glue all over it. Oh what a tragic story!!
So why do DIY FAILS happen? Here are the 3 main reasons:
FAIL REASON #1:
You choose materials that look too cheap.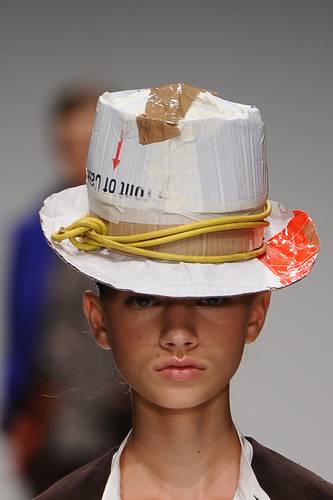
Materials that are cheap are a totally different story. There are so many ways to get your hands on affordable raw materials – from shopping Goodwill for pristine-condition clothing to use as your starting point, using online coupons to shop M&J Trimming or Jo-Ann Fabrics, sourcing embellishments and trims from pieces you have in your closet already, swapping with a friend, or buying wholesale and in bulk. The great thing about DIY’ing is that so many of the raw materials are so affordable, much more so than the finished product. However, if you choose materials that look cheap, no matter what their actual price point, your entire project will be dragged down. Tip: Don’t ever choose materials that you’ve seen on kids’ accessories (no plastic rhinestones, EVER!), or in Halloween costumes. The only thing that can save latex, lame, spandex, and medium-weight poly/cotton jersey is the cutting and the silhouette…and unless you’re fairly adept at those things, best to stay away (unless it actually is Halloween!)
FAIL REASON #2:
You chose the wrong [or too cheap] tool for the job.
There are so many different ways of getting from point A to point B in a DIY project, and sometimes our decisions on what method or tool to use are based solely on “what will be fastest?” Sometimes you’re guessing, saying “I think I can do this and get the same result as my inspiration.” Both methods are certainly legit and are ways of evaluating your project and how to do it. It all depends on what you’re going for – and if quick and easy are what you want then by all means choose the quickest way and the tools you have at your disposal. But sometimes the best method isn’t necessarily the fastest, and sometimes using a certain tool can absolutely NOT replicate using the right tool for the job. Sometimes you do have to study up on how similar pieces are made, like checking out what’s on the shelves at stores or on websites instructing industry professionals how to make that piece. Sometimes you do have to be the expert in order to get your finished piece to look professional, polished, long-lasting, and rivaling anything you see on the market. In my Spore Sweater FAIL I thought gluing the pompons on would be fastest; the glue was too messy, and was IMPOSSIBLE to remove fully from the sweater when I wanted a do-over. Even though sewing the balls on took way longer, that’s probably how the original sweater was made…and that technique makes my re-do look a heck of a lot more finished than by gluing. Tip: Brush up on your techniques so you know what to do, and actively learn about the different tools you can use for the job. (E6000 glue vs. 2-part Devcon epoxy, overlocker vs. regular sewing machine, awl vs. X-acto blade.) Check out what other people use to do the job, and mimic their techniques. And definitely get the best tools you can afford; this is not the place to skimp on quality!
FAIL REASON #3:
You actually, truly messed up.
Whether it be sewing a line crooked, cutting off part of a skirt unintentionally, or painting acrylic paint globby, sometimes it can be lack of a skillset or just a plain ol’ mistake that creates disaster. You can always improve your skills by mere practice, or by taking classes (locally or even online). However, if you have enough ability to fix your mistake , fix it immediately, while still in the process. And know how to fix it – always have a Plan B just in case!! If fixing it is beyond your abilities, try camouflaging it or changing your design a bit to make it look intentional. Remember, the greatest art comes from the worst mistakes. And DIY’ing definitely is an art! Tip: Take every opportunity to improve your skills in order to not mess up again. Pick an expert’s brain, take a class, practice creative problem-solving to transform a bummer project into a stunner project.
Needless to say, I re-evaluated my materials, hand-made better, more organic-looking pompons, and attached them to my sweater more professionally.
Plus the new felted wool balls cover up all the spots of glue I couldn’t get off the sweater…camouflaging my mistake!
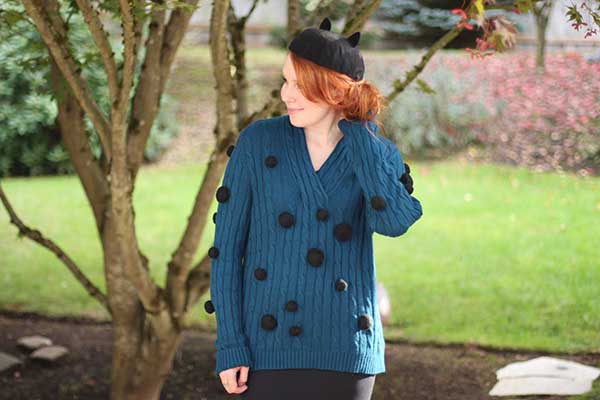
Hope that helps you guys proactively prevent DIY FAILs before they happen…and make every project you do something you’re proud of!
xoxox
Carly
P.S. DIY tutorials for Hand-Felted Wool Balls and Cute Kitty Beret coming soon!
Photo sources: 1 (and for the record these hats were made by Stephen Jones for the Kinder Aggugini S/S 2011 show as runway statement pieces, and I do think they work pretty well in that very specific context; however they are indeed made of cheap materials and duct tape looks like duct tape no matter what you do.), 2, 3
Leave Comment
Oct 15, 2012 | DIY, Fashion
 Fall is my favorite time of year, especially October that culminates in the spooky, cool holiday of Halloween.
Gothic-inspired black becomes commonplace this time of year; crosses and skull jewelry abound, and crazy, dark makeup looks hardly out of place. But why buy when you can DIY? Here are some ideas for must-have pieces this time of year…that can still be worn beyond the holiday, and that are all easily duped with a little creativity:
I WANT: Chunky Skull Jewelry
BUY: Chibi Jewels Tiny Skull Stud Earrings, $45 / Karma Mantra Crystal Skull Bhaala Bracelet , $48
, $48
…or DIY: Fire Mountain Gems Bead Mix, Imitation Howlite, $7.40 / Oriental Trading Co. Silvertone Skull Charms, $4.99
I WANT: Gothic Printed Clothing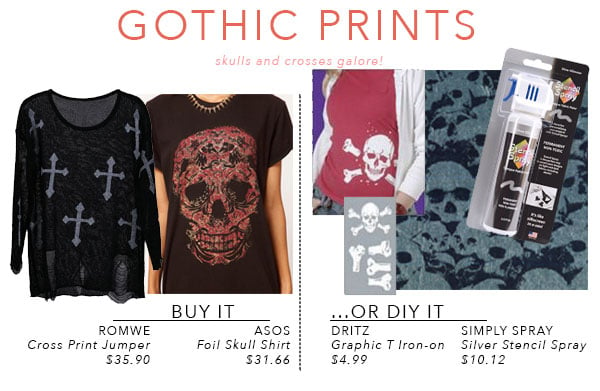
BUY: Romwe Cross-Print Distressed Jumper, $35.90 / ASOS Foil Tapestry Skull Shirt , $31.66
…or DIY: use my Alexander McQueen-Inspired Skull-Print Scarf Tutorial as inspiration, but cut a cross stencil and use Simply Spray in Silver Glimmer , $10.12 on a sweater instead / Dritz Graphic T Flock Iron-On Skull-and-Crossbones in White, $4.99 / Halloween Spirit Collection Foil Skulls on Black Fabric, $6.79
I WANT: Tights That Make Me Shudder
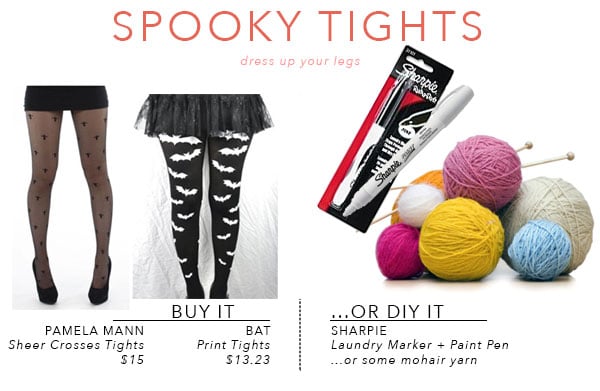
BUY: Pamela Mann Sheer Crosses Tights, $15 / BAT Print Tights, $13.23
…or DIY: use my Super-Easy Tattoo Tights Tutorial and draw your favorite shapes on yourself! Laundry Sharpie Marker & White Sharpie Paint Marker / use Six Six Sick’s DIY Rodarte 3 Ways Tutorial for a spooky spiderwebby look to your tights, and use Mary Maxim Mohair Glitter Yarn, or some other non-scratchy soft mohair yarn if you’re dying for a knitting project
Yarn photo source
I WANT: A Dark Cut-Out Dress

BUY: Shakuhachi NY Sweat Dress, $158 / Roped MaxiDress, $88
…or DIY: Take a long T-shirt and do this to it. Hanes Beefy T Adult Short-Sleeved T-Shirt, $10.50.
Scissors photo source
I WANT: Deep Oxblood-Colored Lipstick
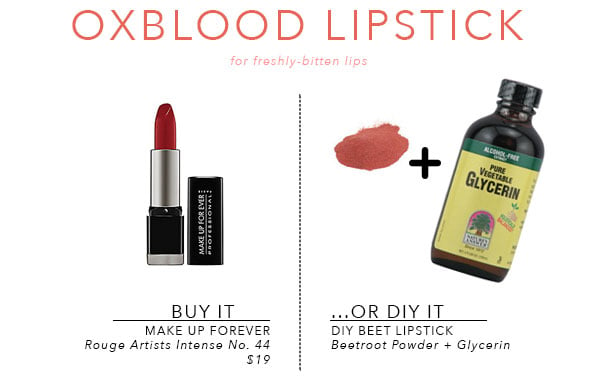
BUY: Makeup Forever No. 44 Rouge Artist Intense Lipstick, $19
…or DIY: Beetroot Lipstick: 1 tablespoon beetroot powder, 1 tablespoon vegetable glycerin (or regular glycerin if you are okay with using animal products), 1/2 teaspoon vitamin E oil or olive oil. 1) Put the vegetable glycerin and beetroot powder in a saucer and stir the mixture until it’s smooth. 2) Add the vitamin E oil and apply. [source: Guardian News and Media]
Any Halloween-style projects you’re inspired to do this time of year?
xoxox
Carly
Leave Comment
Oct 5, 2012 | DIY, Media
 I’m such a hoarder.
Ever since the year 1998 or so, I have kept every magazine I ever bought/received/got in a subscription…to some degree or another. As I read each glossy I turn down the corner of each page where I see something I like – either something as a piece of design inspiration, a possible “I’m gonna make this!” for the future, or simply because I just want to buy it. I may re-read a favorite magazine again soon after the first reading, but usually I let it sit for a month or so. Then in one afternoon of feverish scissoring, I cut out every picture I marked or page I dogeared, stack them together, insert the stack into a manila envelope, and write on the envelope what magazine, and from what month and year, is broken down in there. Then I recycle the rest of mag.
 I can usually fit the clippings of around 15-25 magazines in one envelope, depending on how inspirational and covetable their products seem to me at the time (Lucky Magazine and Vivi Magazine are my biggest bang-for-the-buck glossies, providing me thick piles of clippings ripe with possible DIYs and design inspiration, amazing trends and items I just can’t live without…Vogue offers up only the occasional “I could make that!” photo, for instance).
Over the years the clippings have increased in number, the manila envelopes multiplied…and now I have an entire banker’s box filled to the brim with manila envelopes bursting with clippings (and if the truth be known, I bust out of that box with my envelopes 2 years or so ago). These manila envelopes (well, a singular envelope in the beginning) have traveled with me from Japan to Vermont to Virginia to Philadelphia to Honolulu and now here to Oregon. I call them “the archives.”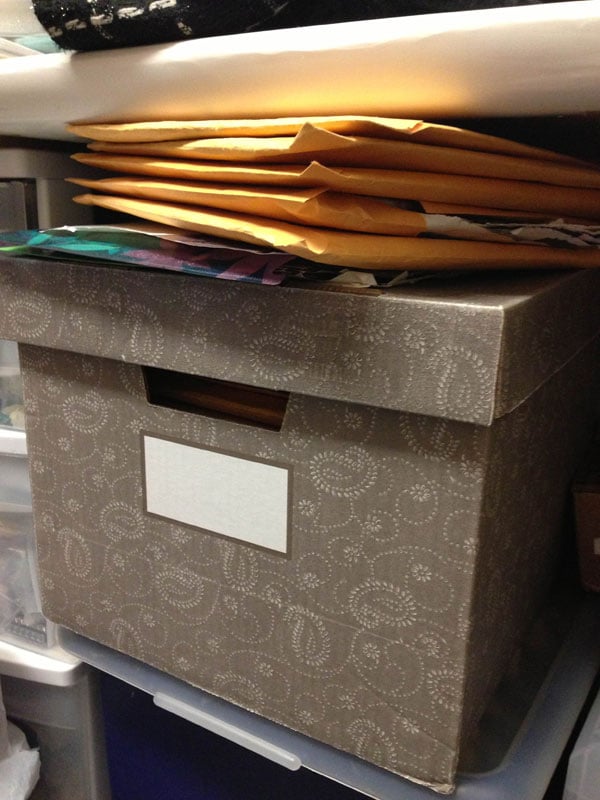
And yes, I do often go back to them to find new DIY ideas, re-examine a trend, or in search of an item I suddenly want RIGHT NOW but can’t remember exactly where I saw it. And I have enough of a system so that I can usually find a tiny 1″ clipping inside that huge pile of paper – exactly where it should be.
So to share with all of you some ideas I’ve pulled out lately (and to kick off a running article series here on my blog), I’d like to introduce you to:
FROM THE ARCHIVES
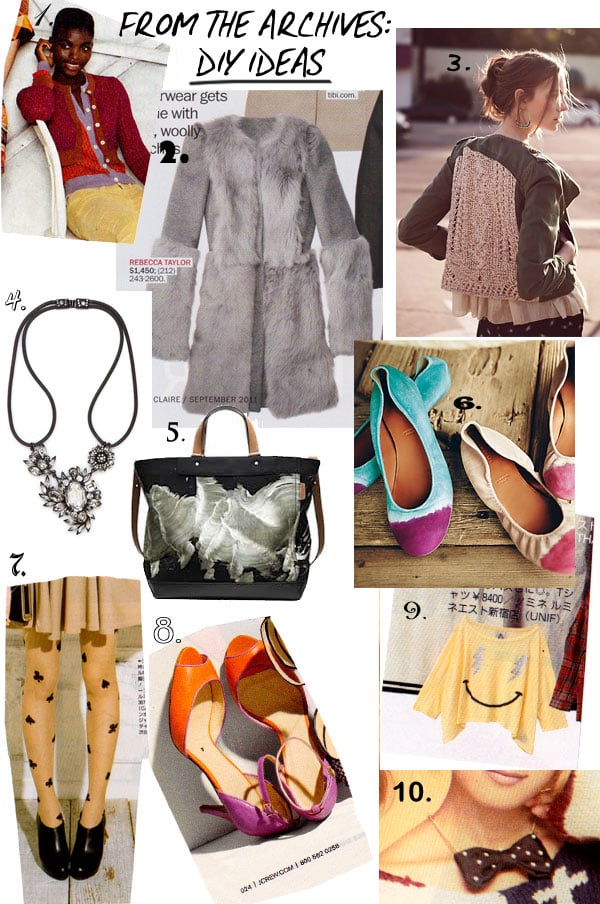
<The photos are not arranged according to any theme, date, or trend – just how they come.>
1. Check out that double layered cardigan from Anthropologie (I believe)…just stitch together two thrifted cardigans at the seams!
2. A furry Rebecca Taylor coat is an easy DIY adding some faux fur to the sleeves. In fact, I think Lipglossandblack shared a tutorial on how to do that.
3. This pretty army jacket from Anthropologie may only be $79.95, but you could easily save yourself most of that by cutting out the back of the jacket and adding a sweater back instead.
4. This Erickson Beamon + Bauble Bar Dirty Glam Necklace is no longer available, so you might as well just hook together 3 vintage brooches, and hang your homemade bauble from black silk rattail cord.
5. At $798, this James Nares for Coach Tote could be had for a steal with a little white paint, a wide paintbrush, and a fearless hand.
6. Hand-paint your colored suede ballet flats like these Taika Flats from Anthropologie…and yup, there’s a tutorial for that too (I know I’ve seen it…or linked to it on my blog…but can’t remember where…)
7. Stamp or stencil a pair of nude tights or pantyhose in card suits (like in my tutorial here!)
8. Create some colorblocking like on these J. Crew Heels with some Angelus leather paint.
9. This cute take on the smiley-face tee by UNIF is totally do-able with some metallic foil transfer sheets (available at Jo-Ann’s, Michael’s, or other craft stores).
10. How cute is this pearl-studded bow-tie necklace from Japanese brand MIIA? Find a man’s bow-tie, and some chain to the sides, hand-stitch some pearls on, and voila! A sweet little accessory.
Hope they provide some great ideas for DIY for all of you!
xoxo
Carly
Leave Comment
Oct 1, 2012 | DIY
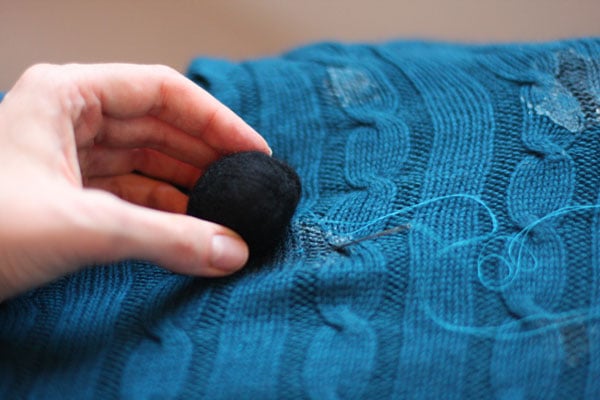 So I totally messed up on a DIY of a pompon sweater I saw in a Japanese magazine back in March…and I was left with a sad, soggy sweater all covered in patches of glue, reeking of Goo Gone (i.e., the lovely odors of petrochemicals), and flaky bits of sticky glue I’d managed to scrape off.
 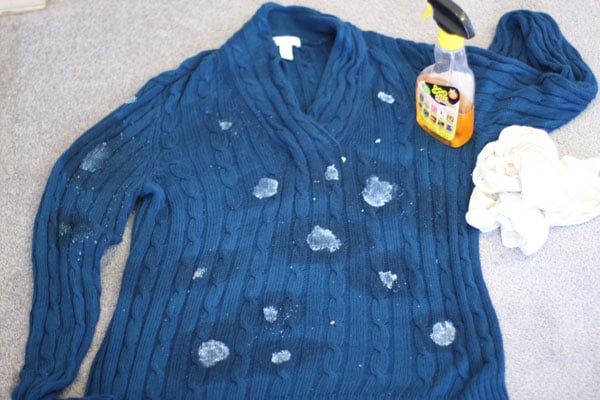 What an unhappy mess!
But, like most of my DIY projects, I refused to give up…
…and I removed as much of the glue as I could…
…but when I couldn’t remove everything decided to try the DIY again…

…And after crafting my own pompons from felted wool roving (a fun process I can’t wait to share with you all!)…
…I have about 20 pompons to sew on and then I think I’m back in business.
All hail the Resurrected Pompon Spore Sweater! The finished product soon to be shared, promise…;-)
xoxox
Carly
Leave Comment











