Aug 5, 2012 | DIY, Fashion

I am on so many catalog mailing lists just for the inspiration! I love window-shopping more than anything: collecting ideas, re-mixing, thinking, “Hey, I could DIY that!” Rather than actually shopping the products, I’m scouting for DIY inspo, and here are some ideas I’ve formulated from J. Crew’s latest catalog: (which, by the way, I always adore the styling of)
J. Crew Style Guide August 2012 (more…)
Leave Comment
Jul 30, 2012 | DIY
 I wanted some neon color on my fingertips, but wanted to be subtle about it. What could be better than bright neon on black, reminiscent of cool Summer nights at the carnival? Give your tips a hot neon makeover with a little paint and patience (and no airbrush to have to bother with for this art). Here’s how:
You Need: (more…)
Leave Comment
Jul 25, 2012 | DIY
 Can you believe the month of July is almost over?? This Summer is just barrelling along! While we’re undergoing a renovation at work (7-day workweek, anyone?;-) the rest of the blogosphere has been busy whipping up some fabulous projects. Here are a few:
I love things that are visual and even though everyone’s gravitating to Pinterest these days, sometimes collaging is just as fun. Check out these DIY Polyvore Sets (remember Polyvore?) for some make-it-yourself inspo!
Did you know? Cat Morley, from the amazing Cut Out + Keep tutorial site, is now Crafter to the Stars! She sewed up a sequined cat-shaped fascinator for Audrey Kitching. See the full tutorial here.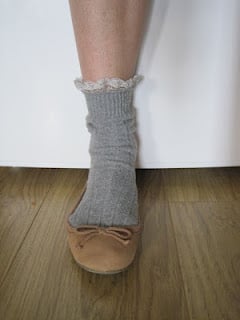
Check out a new DIY blog I discovered; Greenie Dresses for Less! Lots of easy and cute DIY tutorials, like her Lace Edged Socks that add a bit of sweetness and whimsey to an otherwise standard pair of footwear.
I do love a man’s shirt makeover! Try this DIY Men’s Shirt into a Cut-Out Dress upcycle from Chictopians Lipglossandblack, and get through the rest of Summer with a bit of buttoned-down style.
 Need something easy and breezy for those super-hot days? How about a DIY Maxi, from 10 Summer Perfect DIY Maxi Dresses, by All Women Stalk. Love that geometric piece!
Short of Something posted a great tutorial for a pair of DIY Shorts with a sweet polka-dot pattern. Fabric paint, a skewer, a ruler, and a little bit of patience is all you need for this makeover!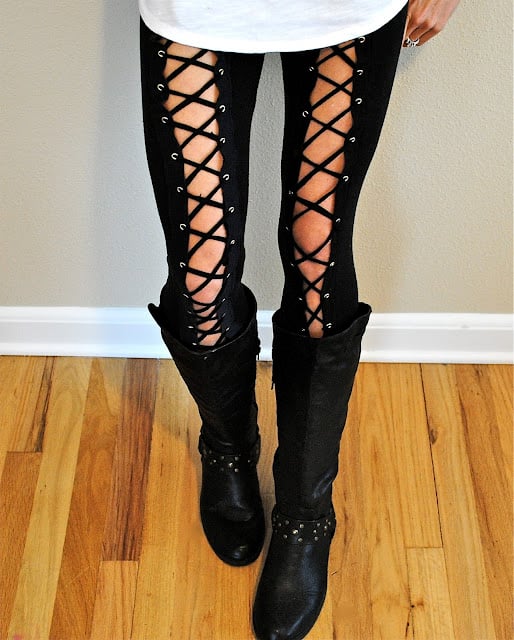
It’s about time someone DIY’d those vaguely Stylestalker-esque Grommet Leggings! Trash to Couture‘s version is spot-on and uber-sexy. Her handiwork is just amazing!
And, for all those low-backed tops and dresses that are probably already in heavy rotation in your Summer wardrobe…try this DIY 5 Minute Low-Back Bra tutorial from Tights and Tea. No need to buy a different or convertible bra!
If your project was featured above, feel free to grab a button and share the DIY!

<a href=”https://chiccreativelife.com/category/links-of-the-week”><img src=”https://chiccreativelife.com/wp-content/uploads/2012/08/diylotwfeaturedbutton-1.png” />
If you have a DIY how-to or tutorial that you’d like to see featured on Chic Steals, please email me at carlyjcais at chic-steals dot com – and I’ll try to squeeze it in to one of my Links of the Week posts! (Tutorials/how-to’s with steps and photos included please! So everyone can share in the DIY goodness:-)
xoxox
Carly
-all photos copyright their respective authors; photo array by me-
~If you liked this post, please share it!~
Leave Comment
Jul 20, 2012 | DIY

Combine the sleeves of one button-down with the body of a different button-down; wear a bustier top over it like a piece from the Altuzurra Resort 2013 Collection.
I keep a huge folder on my computer chock-full of DIY ideas as I come across them – and unfortunately there are just not enough hours in the day, days in the week, weeks in the month, or space in my closet to possibly make all of them. So here’s another photo dump of ideas for you guys to try out. Maybe something in there will spark your next must-do project?? (more…)
Leave Comment
Jul 17, 2012 | DIY
 It’s getting super-hot out here in Portland, and I’ve graduated to as little clothing as possible during these sweltering afternoons. T-shirts? Check. Short-shorts? Check. Drapey dresses? Check. And fun accessories? In abundance! Here are a couple tutorials that have been on my radar this week, that can all help add to your Summer wardrobe:
About time someone DIY’d that Neon Cambridge Satchel that’s been making the street style photo rounds! Tutorial from Glitter ‘N Glue, and boy is bright, fun, and perfect for Summer!
And speaking of neon, try out this Neon Shirt Dress by The Fuji Files. It’s a great way to upcycle a boring old button-down blouse!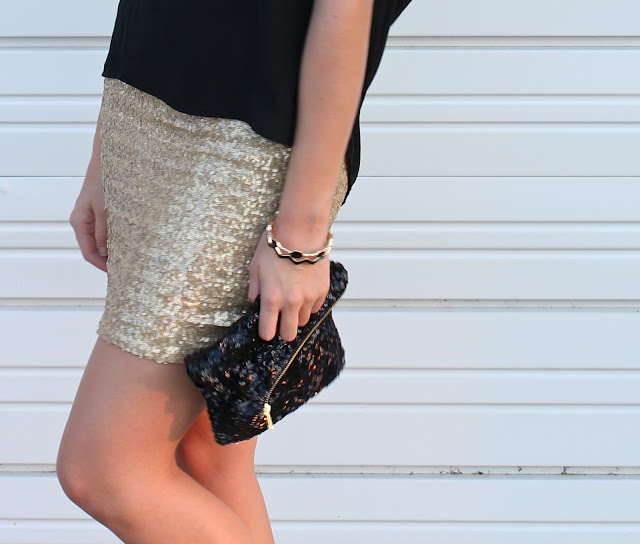
Sweet Verbena has a beautifully-photographed tutorial for a DIY Sequin Mini Skirt. So disco fab!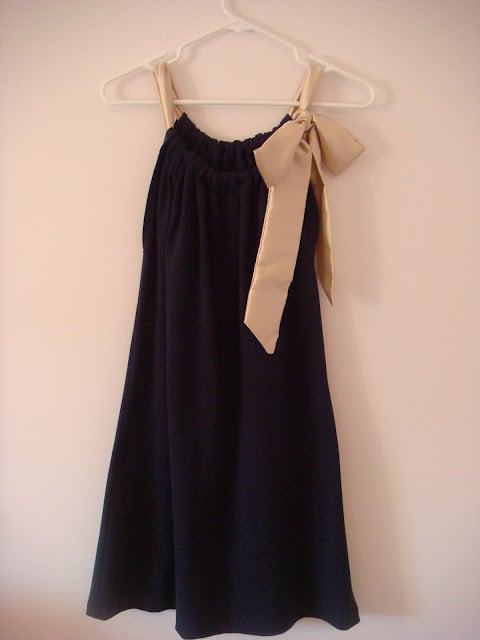
Looks Like Spilt Milk also posted her version of a Knit Jersey Dress with Satin Tie (from an original tutorial by Sweet Verbena). It looks so easy but beautifully chic!
For more lovely dresses, try this Side Tulip Hemline Tunic Tutorial by Merrick’s Art. Drafted from a shirt you may already have in your closet, this is a great go-to for days you want to be comfy but look a little polished, too.
Turn a polo shirt into a chic little skirt with this T-Shirt to Skirt Refashion tutorial by Second Chances by Susan. What an ingenious idea, to turn the shirt upside-down and use the neckline for the back slit!
DIY 10 Minute Cardigan from Sweater by Vanilla Joy is a great little project using hem tape for a quick finished cardigan upgrade to an old sweater.
Looking for something to keep you dry during those sudden Summer showers? Look no further than A Pair & A Spare‘s DIY Transparent Cape! How cool is that project (made with the help of Scotch Duct Tape)? And check out all the other Scotch tape DIYs on their website as well while you’re at it!
If your project was featured above, feel free to grab a button and share the DIY!

<a href=”https://chiccreativelife.com/category/links-of-the-week”><img src=”https://chiccreativelife.com/wp-content/uploads/2012/07/diylotwfeaturedbutton-2.png” /></a>
If you have a DIY how-to or tutorial that you’d like to see featured on Chic Steals, please email me at carlyjcais at chic-steals dot com – and I’ll try to squeeze it in to one of my Links of the Week posts! (Tutorials/how-to’s with steps and photos included please! So everyone can share in the DIY goodness:-)
xoxox
Carly
-all photos copyright their respective authors; photo array by me-
~If you liked this post, please share it!~
Leave Comment
Jul 15, 2012 | DIY

A few of you asked for the instructions for making the milk carton bird feeder I featured in this post, so I scanned the original instructions from Parents Magazine to share with all of you.
How to Make a DIY Bird Feeder Out of an Upcycled Milk Carton

{click on photo to enlarge}
Tips They Didn’t Include:
*Although it doesn’t mention this in the instructions, it is extremely difficult to paint over a milk carton with acrylic paint. It took me 5 coats to even get to the opacity shown above!! (I swear, I studied that photo for near to 15 minutes trying to figure out how they got it that opaque-looking.) I’d highly recommend either lightly sanding the surface, or ideally, applying a coat of primer first and then doing your acrylic paint. That way it should be much easier to get a solid color to the feeder.
*Although this isn’t mentioned in the instructions either, since this bird feeder is probably going to be used outside (right?) a good coating of spray sealant is highly recommended. Once my sprinklers hit it that acrylic paint cracked up completely.
How to Get Birds to Come to Your DIY Milk Carton Bird Feeder:
*place it slightly at or above (an adult’s) eye level, in a sheltered area
*place it away from squirrels, cats, or other predators that may scare away the birds
*make the opening only large enough for the type of bird you’re looking to feed (not large enough for squirrels or crows, etc)
*essentially it’s not the color of the feeder that attracts the birds, it’s more the location, accessibility, and food. (Except for hummingbirds, who are attracted to the color red.)
*place something shiny, like a piece of metal, on the feeder. Birds love shiny objects!
Source
Hope that works for you guys! It’s a super-fun craft to do with your kids (or even by yourself for your garden, deck, or patio!) – so definitely try it out. Ours is drawing a number of birds to it every morning!
Happy DIY’ing!
xoxox
Carly
~If you liked this craft, please share it!~
Leave Comment











