Mar 7, 2011 | DIY, Life
There are a number of pieces that have been on my mind for awhile but I’ve been unable to devote the DIY time since this project for my class is threatening to eat me alive. These items, however, are burned into my brain…and are on deck for some upcoming tutorials…

2 T-shirts made into a dress
(found on Outsapop)
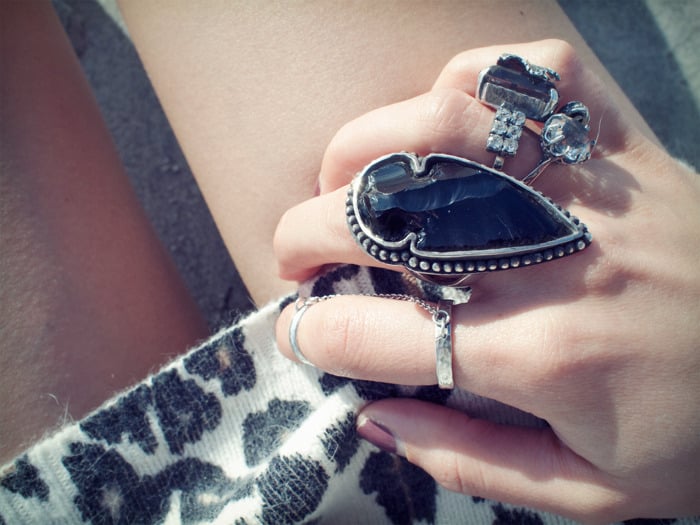 Pamela Love Arrowhead Ring
(photo from FashionToast…I think)
(photo from Nastygal.com)
 Alexander Wang One-Shouldered Sports Bra
(photo from Style.com)
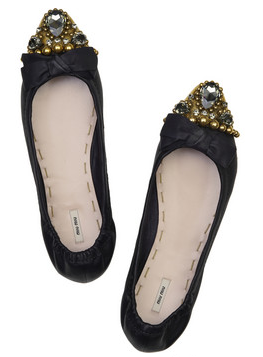 Miu Miu Embellished Flats
(photo from Net-a-porter.com)
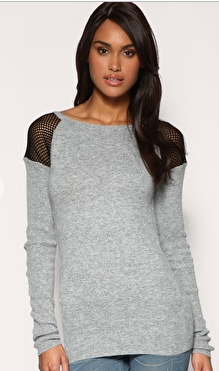 Alexander Wang Mesh Shoulder Insert Top
(photo from Shopbop.com) …(can you tell I like Alexander Wang??;-)
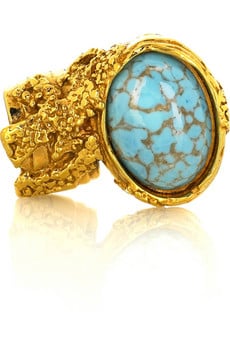 Yves St. Laurent Arty Oval Ring
(photo from Net-a-porter)
xoxox
Carly
~If you liked this post, please share it!~
Leave Comment
Mar 5, 2011 | DIY
 My hubby has a ton of white shirts that have seen better days…and sometimes I steal one or two of them to makeover for myself. But men’s shirts are so shapeless and boxy, and I want something that isn’t as boring as it looks straight out of the package! With a few strategically-placed hooks and some elastic cord, this is a quick DIY makeover that will turn any boxy and shapeless top into a form-fitting gathered tunic or dress. Minimalist sex-appeal at its best!
You Need:
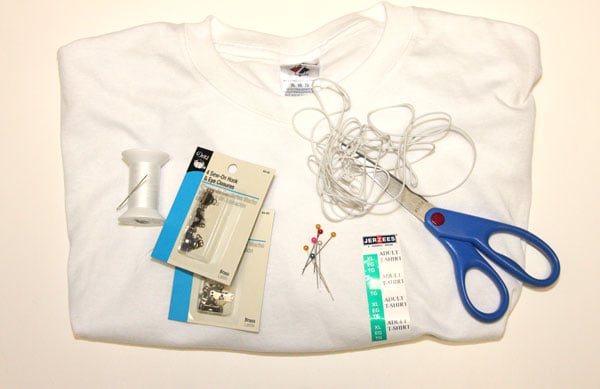 *white tunic-length t-shirt (mine is XXL)
*8 hooks from sew-on hook-and-eye sets
*white thread & hand-sewing needle
*white elastic cord
*marking chalk (not shown)
*measuring tape or ruler
How To:
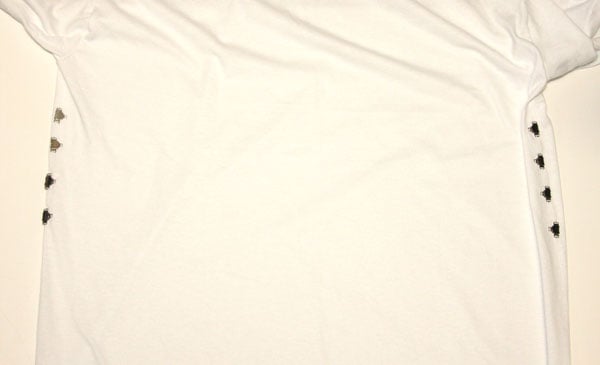
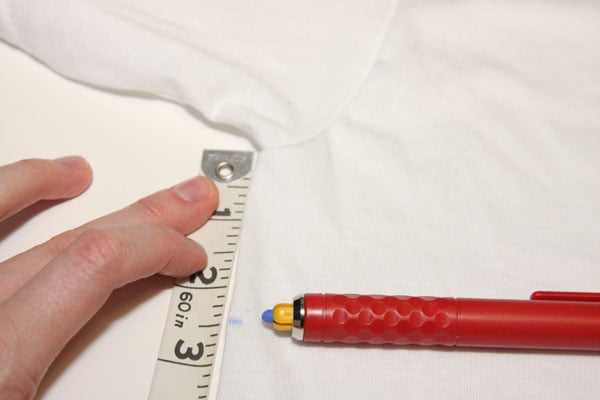 1. Lay your t-shirt flat, back side up. Measure about 2.5″ down from below where the sleeves meet the sides. (This is what worked for me – you may want to try the shirt on you to make sure this is the area where you want the corseting to end.) Mark.
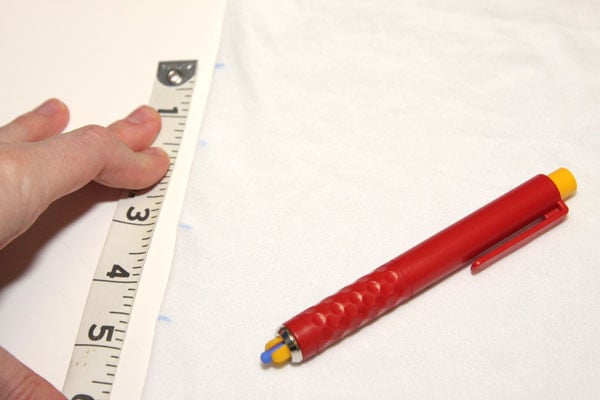 2. Measure below that mark 1.5″ and make another mark at each side. Repeat twice so you have 4 marks total, evenly-spaced at 1.5″ apart.
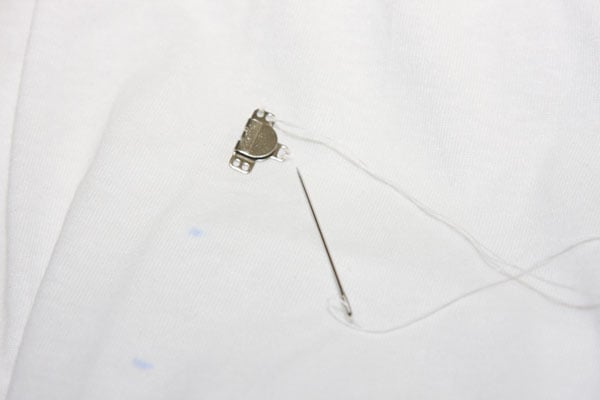 3. Hand-sew the hooks on at each part. Since we’re sewing onto the back and the t-shirt fabric will be pulled to the front, make sure the hooks are facing outwards.
 4. Try the shirt on. Take the elastic cord , fold it in half, and match its center to your bellybutton. Keep these lined up, thread either side of the cord into the bottom hook on either side of the shirt.
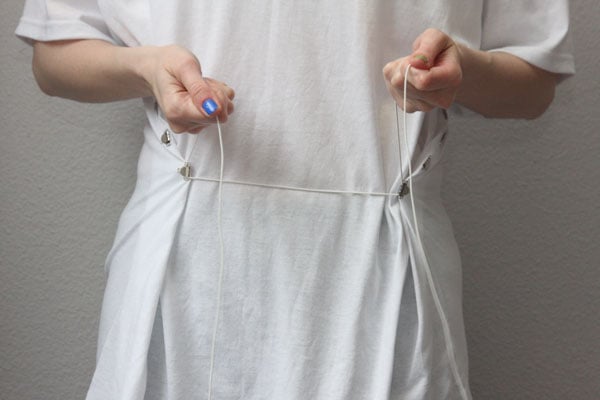 5. Pull to the front, pulling the shirt fabric with it. Cross the cord over at your center, then back into the next hooks above.
 Continue to lace the corset-front in this manner, and rearrange the extra fabric of the tee as you go to look neater and more tucked-in to the corset area.
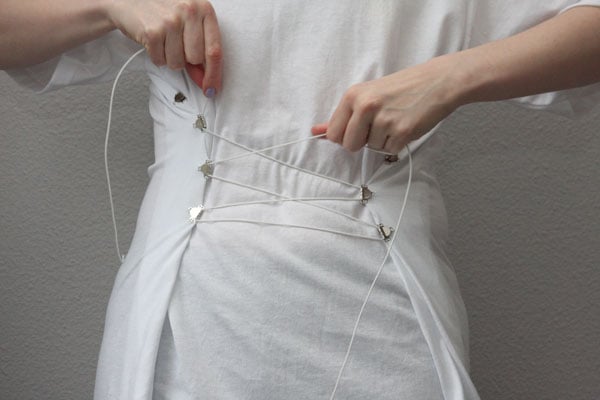

 6. Tie the ends of the cords at the top of the corseting in a bow; trim the ends.
Wear with something not overtly sexy – this shirt has all the sex appeal you need!
This project was featured in a recent Crafty Superstar interview on the tutorial-sharing site Cut Out + Keep…
click here to read the interview questionnaire & my other projects!
 (I’ll be re-posting all of them here on my blog soon.)
Thanks to Cat and the whole COAK team for the interview! I’m so flattered to have been featured:-)
Happy DIY’ing!
xoxox
Carly
~If you liked this post, please share it!~
Leave Comment
Mar 2, 2011 | DIY
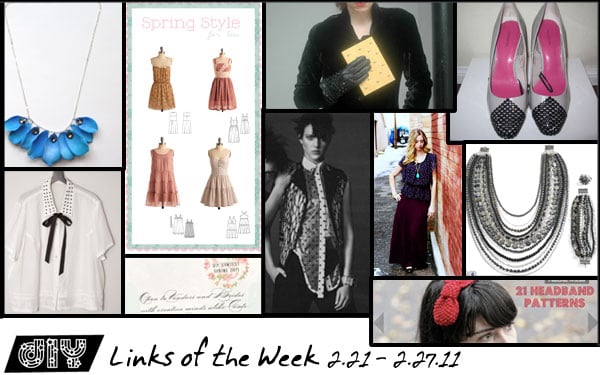 Wow, March already! February always seems to fly by as if on rails, and this year was no exception. I spent a lot of time with my family this month; Hub’s parents came to visit, we went skiing and my son had his first-ever skiing adventure, we played in the snow in the backyard and went sledding on the first Snow Day of the school year, and then we wrapped it up with my son having his adenoids out yesterday, which involved a lot of crying and anxiety leading up to it, but he’s now on the mend and installed in front of the TV once again. (Okay, yesterday was March 1, but still..)
So now it’s March and it’s Annual Craft Month!! I’m so excited – and can’t wait to peruse all the cool crafts and projects that are popping up on Craftzine, ILovetoCreate, HowAboutOrange, One Pretty Thing, BurdaStyle, Angry Chicken, Martha Stewart, and DesignSponge…and the coupons from Jo-Ann’s and Michael’s are sorely tempting me…
Exactly!! So onto the Links of the Week…
 Studs and Sequins DIY’d a Lanvin Necklace with her own version: the Watercolor Petal Necklace! Beautiful, dreamy, and feminine…
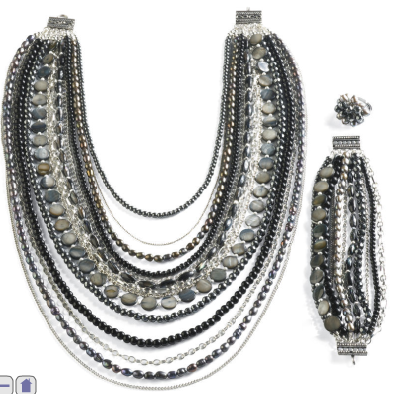 There are so many great projects over at Michaels.com. This Long Layers Jewelry Set is fantastic – and imagine the possibilities if you replaced the pearls with crosses, or spikes, or skulls, or other hard-edged things…or tried silk flowers, jumbled coral, colorful beads… Also check out the many hundreds of projects they have available on the site for some major creative inspiration!
 TipJunkie posted 21 Free Tutorials for Making Headbands. Flowered, sequined, knitted, Anthropologie…check it out if you love headgear!
 Ah, Outsapop. Constant and amazing source of DIY inspiration. Love her DIY Balenciaga Shirt idea…so simple, yet so perfect.
 New fabulous DIY Blog Alert! Rar Traum Store: haunting, fetishist, bizarre, addictive DIY and inspiration. Check out her Givenchy-inspired Clutch Box attached to glove…and scroll back through her posts for a Pierrot Neckpiece, mesh shades, and off-the-hook embellished punk jacket. (I fell in for a couple of hours, I have to admit…;-)
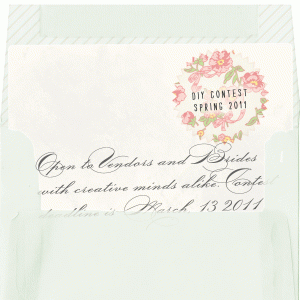 Ruffled is doing a DIY Wedding Favors Contest. Submit your best handmade wedding favor project ideas here until March 13, and be eligible to win up to $400 in cash prizes!
 Maxi skirts are in right now and Sew Much Ado shared her tutorial for making a triple-tiered maxi skirt. She looks beautiful in it!
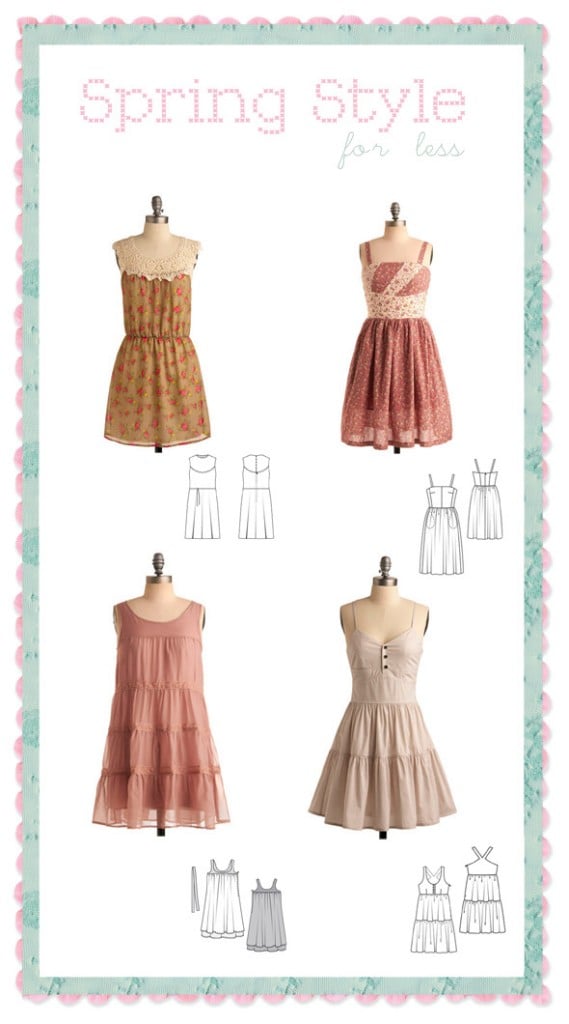 Sweetie Pie Bakery shared her advice on Designing for Less: how to look at the clothing you want and find and alter patterns to make it yourself instead of buying it. Which is a thought-process that I am always, always using when I look at items in stores…and essential to a DIY frame of mind!
 Modanista Junkie made some super-cute sparkly toe-cap pumps. Just adding some rhinestones can make any shoe look expenive (even when they originally weren’t) and cover up any scratches or damage! A great idea.
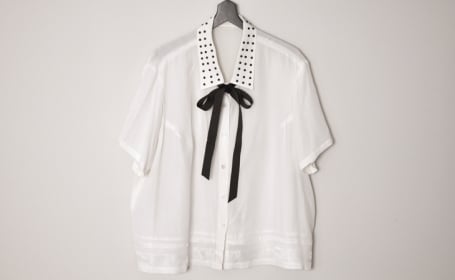 Blogger Phosphene revamped an old blouse using iron-on dome nailheads and grosgrain ribbon on the M&J Trimming Blog. What a fantastic way to add some edgy and on-trend details to your clothing! (And check out her Tulle Brooch and Gold Pompon Headband too!)
Recent favorite affordable and cute shopping destinations:



I’m loving all of the fashionable indie finds on Moxsie.com…and drooling over the affordable but incredibly chic jewelry on RachelRachelRoy. Yummy!
And since I’m not doing my DIY Roundups anymore, if you have a DIY project, tutorial, or creation that you’d like to see featured on Chic Steals, please email me at carlyjcais at chic-steals dot com – and I’ll feature it in one of my Links of the Week posts!
xoxox
Carly
-all photos copyright their respective authors; photo array by me-
~If you liked this post, please share it!~
Leave Comment
Feb 25, 2011 | DIY
 One day I was browsing in my usual drugstore in Hawaii, Lil Tot in tow, when I spied something in the Sally Hansen nail products aisle
that stopped me in my tracks. Ardell Duralash Eyelash Extension Kit. DIY eyelash extensions???!
It was mid-2007, Talika Lipocils seemed to be taking over the world, and I was toying with the idea of forking over the $40 for a tube. I’ve always had sparse, light brown lashes with blonde roots – so I’ve had to gunk on tons of mascara to get full coverage all the way to my eyelids to completely disguise the blonde part. (Which I’ve found almost impossible anyway.) I’d considered getting them dyed before, but the side effects and potential for disaster (blindness, anyone?) had scared me off. After having my son, I noticed my eyelashes were falling out about the same time the hair on my head was [if you didn’t know, about 6 weeks – 4 months after having a baby your body begins shedding all the hair that it held onto during pregnancy; normally you lose about 100 hairs a day but during pregnancy your hair does not shed at the same rate – we’ve all heard that your hair gets thick and luscious during pregnancy, right? It’s in part due to less shedding…which commences abruptly and often in large clumps after delivery, just FYI]. So I was looking to do something about the situation…and being such a do-it-yourselfing frugalista, I figured I wouldn’t be stepping into a salon anytime soon.
I was so intrigued by the concept of the eyelash extension kit, I just had to try them. They were pretty affordable, too – at around $11 for a pack. So I took them home, and after my son was asleep for the night I spent about an hour and a half grappling with them and applying them.
The next day, it was amazing. I got so many compliments wherever I went – from the women in my Mom’s Club asking: “Did you do something different?” to the lady at the grocery checkout line telling me I had beautiful eyes. Amazing!! And even more amazing, the lashes I had applied so painstakingly over that hour-and-a-half lasted….3 and a half WEEKS. Absolutely incredible.
So since then, I’ve been hooked on  Ardell Duralash. Not too long afterwards I started seeing ads for expertly-applied eyelash extensions in the Japanese magazines I was reading, and eventually went to a salon in Tokyo to have them applied ($84 for 120 lashes!!…back in 2008, though it’s more pricey now). But since I don’t go to Tokyo more than once a year (and salons that apply extensions here in the U.S. are few and far between and AMAZINGLY expensive at $150 – $400 for a full set of extensions) this DIY version is much more doable.
Now, eyelash extensions are not something that should be worn continuously. As your natural eyelashes grow, the extensions start to twist in different directions and poke you in the eye, or get matted in the corners of your eyes. The glue is annoying and crusty, and visible in closeups (unless you get them done by an expert). You don’t ever want to get the glue in your eyes or on your eyelids, since it will burn and possibly cause damage. You can’t rub your eyes or else you run the risk of pulling the extensions off. You can’t wear mascara or eyelash conditioner on your lashes at the glueline since both will dissolve the glue. And with extended weight on your eyelashes for long periods of time, your natural eyelashes can become brittle and prone to breaking off. You will want to give your eyelashes a “rest” in-between wearing the extensions, so they can get healthy and flourish during their natural growing cycle, and you may have to regularly use an eyelash conditioner to undo the damage. Plus, I’m not an expert and am not dispensing medical advice – if you choose to follow, please do so at your own risk!!
So, if you do want to try out Ardell Durlash, they are available online where I’ve linked above, and in the Sally Hansen/false eyelash section of your drugstore (at least here in the States, I’m not sure about internationally). The only version I’ve seen for years includes eyelashes that are wide, fanning clumps – not the kind they used to have (the slimline, bundled clump which I used in the below tutorial). But the application method is the same: (WARNING: There’s a lot of close-up photos of my eye in the tute below, so if you find close-up photos of [my] eyes gross, skip it!)
You Need:
 *Ardell Duralash Eyelash Extension Kit (my old kit is on the left; currently sold kit is on the right)
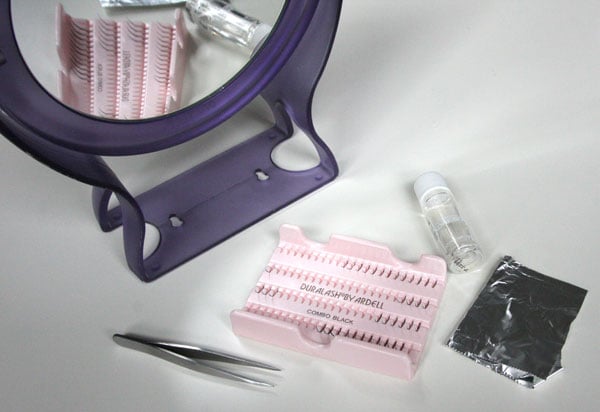 *magnifying stand mirror (it’s sooooo much easier when your mirror is on a stand!!)
*small pieces of foil
*tiny scissors (optional), not pictured
*tissue (optional), not pictured
*lampstand if you need more light, not pictured
[The tweezers, LashTite adhesive, and set of lashes are all included in the kit.]
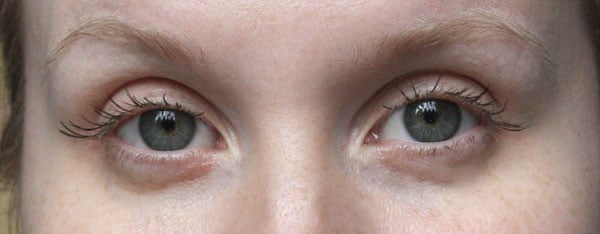
 The Before photo. I was startled by how much I look like Steve Buscemi in the above photo. :-/
How To:
1. Open up the kit, pull out the tweezers and Eyelash Adhesive. Fold the piece of foil so it’s doubled-over.
 2. Pour a small amount of the adhesive onto the foil (about the size of a pea).
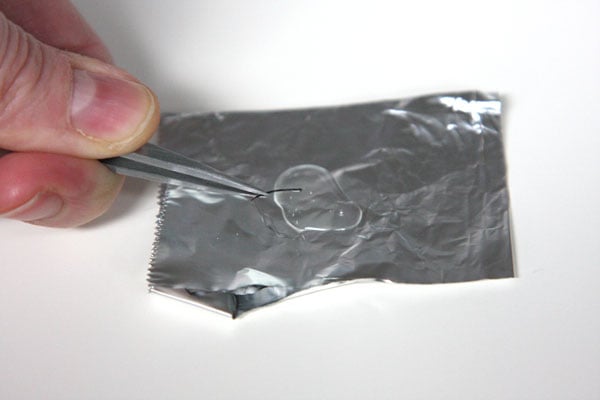 Grasp one of the shorter eyelashes near the end (just beyond the curve in the center) with the tweezers, and dip the knotted end into the adhesive. Allow a tiny bead of adhesive to form on the underside of the knot before you apply.
 3. Close one eye and use your other hand to hold the eyelid taut while you are applying. (I like to start in the middle of my eye and fan out from there, but it’s up to you.) Carefully place the lash ON TOP of your top lashes.
 Use the tweezers to squeeze the lash onto your natural lashes, and open your eye and squeeze the lashes together (being careful not to touch the gluey end). Wait for a few seconds, and the glue should dry and adhere to your natural lashes. DON’T touch or try to shift the extension lashes at all after a few seconds, or else you could pull them off.
 4. Repeat with the shorter lashes, applying in towards your nose, and then outwards towards the outer corner of your eye.
 Change to the medium- or even the longer-length lashes near and at the outer corners of your eyes for a natural look.
 5. If you find the application doesn’t look as “full” as you like, go back in and apply the shorter lashes in-between what you’ve already applied. If you drop the lashes or the glue dries too fast before you can place them on your natural lashes, you can wait a few seconds, and use your fingers to “ball up” the glue and pull it off the lashes, and then re-apply glue and start over. If you get glue on your natural lashes where you aren’t applying the extensions, pull off the glue as quickly as you can before it dries using your fingers (you can also use Adhesive Remover, included in the kit, on a tissue to remove extra gobs of glue). I also find that as I’m going back in and filling in the lashes, I can use my fingers to grasp the lashes and then “squeeze” them onto my lashline since I have all the applied lashes to grip and press against.
 6. Once you’re happy with one eye, count the number of lashes you end up applying. Then apply the same amount and sizes to the other eye so they match. For me (since I’ve done this many, many times), the whole process takes about 30 minutes, and I usually do it while watching some bad late-night TV.
 7. (Optional) I find that straight out of the kit the lashes are a little long for me for daily wear, so I like to trim them with nail scissors. DON’T simply cut the ends straight up or else they’ll look weird; you want to half-close the scissors and pull the blades down the length of each clump of the lashes so they snip the ends at different lengths (kind of like how you would “feather” your bangs or hair if you were cutting it). Always snip just a little – you can go back and cut more if you want. And DON’T cut your natural lashes!!
Once all dry, take care of them – no scrubbing or pulling; avoid contact with soaps/makeup/makeup remover; and be extra careful when you wake up in the morning and want to rub the “grit” out of your eyes – because a lot of it is GLUE that needs to be there!! Your natural lashes will shed as time goes on, and the glue will weaken and the extensions fall off, so you can choose to re-apply more, or use the Remover that was in the kit to remove them all.
 No more Steve Buscemi! And the best thing is, I wake up in the morning, look in the mirror, and feel pretty immediately…without makeup, without washing my face or doing my hair…it’s truly amazing what a different a pair of lashes make!
But they’re still long-lasting lash extensions for a fraction of the cost!
I know, I know – here I am advocating poking at your eye with sharp instruments and a pair of scissors, not to mention toxic, smelly glue and bristly clumps of eyelashes. FOLLOW AT YOUR OWN RISK!!
 Happy DIY’ing!
xoxox
Carly
Leave Comment
Feb 23, 2011 | DIY
I’m getting behind! Hopefully in the coming week Ill be able to post this on Monday…when I intended to. And the NYFW Fall 2011 runway collections are over?? Already???!
 image by me.
Sometimes it’s harder to go simple and let your greatness speak for itself.;-)

I’ve been nominated for an About.com award in the DIY Fashion Blog category!
Vote for your favorite blogs (you have until March 8) – and it will only take a second
>>click here to vote<<

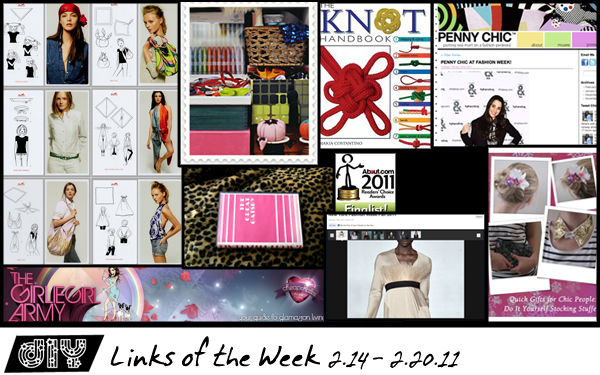
These Hermes Knotting Cards from MaiTai’s Picture Book are super-duper helpful. All the ideas! All the DIY possibilities! How many of you are running to your closet to pull out all your scarves and try this out? I am!

Speaking of knots, I’m also drooling over this knot book! Just think of all the belts…brooches…barrettes…earrings…rings…and other numerous accessories you could fashion out of knots!! Really, REALLY early birthday present, pretty please?
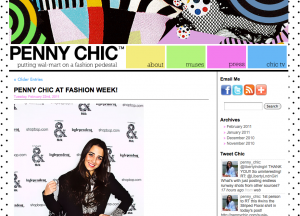
I’ve just discovered this fashion blog that focuses on the cheap, but chic: the creator only showcases outfits bought at Wal-Mart…yes, I said “Wal-Mart“! Check it here at PennyChic.com
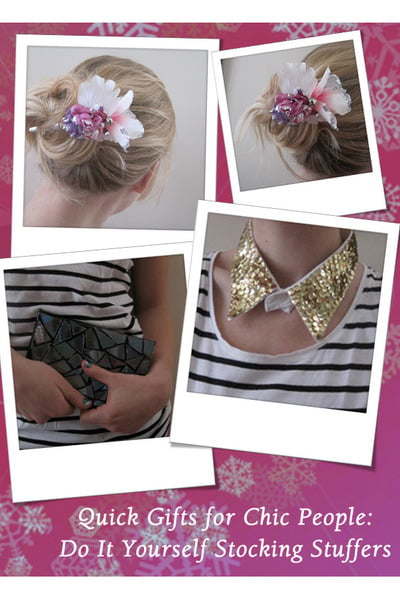 DIY: Quick Gifts for Chic People posted by Chictopia user Le Petit Lapin. LOVE the sequined collar and bag covered with cut-up CD’s. What great ideas!
 Maegan from …love, Maegan has launched a new series called “Maeg it Yourself,” where she DIY’s items suggested by her readers. Go here and let her know what you’d like her to make, and you could even win her creation!

Samantha Baldwin (AKA blogger Bromeliad) of the Examiner.com has posted oodles and oodles of DIY inspiration from New York Fashion Week for Fall 2011. Phillip Lim? Alexander Wang? Betsey Johnson? It’s all there, ready for the DIY’ing.
Plus she also posted a great tutorial for a DIY book clutch, inspired by Kate Spade. The cover is interchangeable = ingenious!!

I’m loving Girlie Girl Army‘s comprehensive list of Vegan/Eco Shoe, Handbag, and Clothing Lines. Since oftentimes “Vegan” is synonymous with “affordable”…there’s a lot of great chic and cheap shopping gems on that list!
Recent favorite affordable and cute shopping destinations:



(Right now I can’t get enough of SockTheory‘s crocheted anklets, rugby striped overknees, and pothole backseam stockings! Plus, you can use coupon code PERFECT10 for 10% off your entire order, and get $3.99 shipping (and free shipping on orders over $50!) to a US address!)
 And, if you haven’t already – don’t forget to enter the Dahlia Soleil x Chic Steals Giveaway of a beautiful crocheted slouchy hat! The giveaway is open to readers worldwide…so head on over and leave your comment to enter!
xoxox
Carly
-all photos copyright their respective authors; photo array by me-
~If you liked this post, please share it!~
Leave Comment
Feb 17, 2011 | DIY

Yesterday I coveted it, so today I’m going to show you how to make it. It’s DIY in 5 – minutes, that is. The easiest, quickest ways to take a piece from blah to fab and update it to current trends.
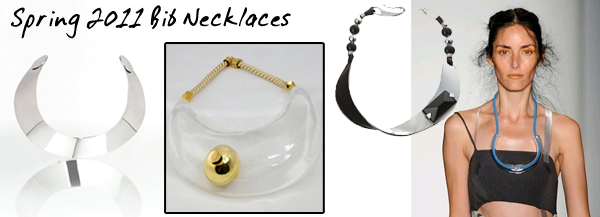
From left to right: Giambattista Valli, Alexis Bittar, Giorgio Armani, VPL Victoria Bartlett.
photo credits: Style.com, Wireimage.com; photo array by me.
With the coming of Spring, jewelry tends to go lighter, translucent, and more plastic-y…and the bib necklace is no exception. But finding just the right clear acrylic piece for a necklace is pretty tough; jewelry supply stores usually don’t sell large bib-style acrylic pieces, for one thing. You could always design it yourself and have it cut by Ponoko.com – but there’s a steep learning curve for the design software, usually multiple prototypes are necessary before you reach your final design, the service is pretty expensive for just once, and hiring out lasercutting seems a bit over-the-top for just a single piece for yourself. No, fast, cheap, and easy is the name of the game, so when I spied a set of acrylic purse handles at Jo-Ann Fabrics and Crafts store, I figured one would be perfect for a necklace.
Project Difficulty: (Easy/Beginner)
You Need:
 *1 acrylic purse-handle
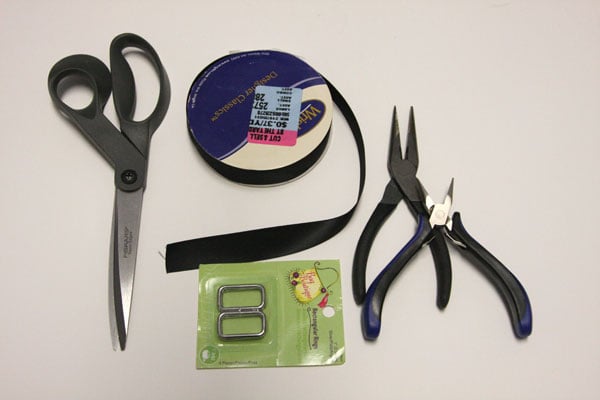
*2 silvertone rectangle rings or D-rings (also found in purse-making section)
*1/2″ wide satin ribbon
*2 silvertone scrapbooking brads (not pictured)
And…
*pliers (optional: wirecutting pliers)
*scissors
*awl
*lighter/flame
How-To:
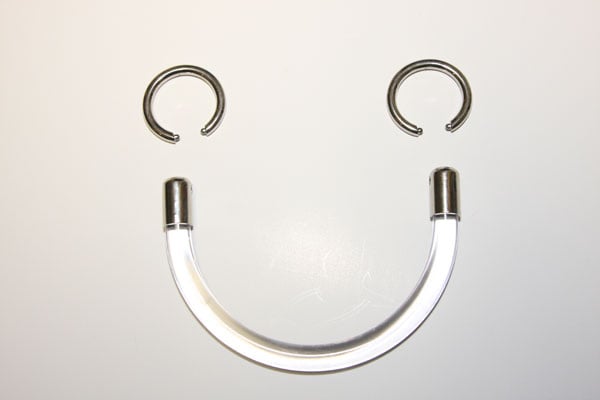 I love how it looks like the purse handle is smiling at you. Happy Handle!:-D
1. Use the pliers to remove the top rings from the handle – usually I find these rings, being sized for purses, are too big and bulky in relation to the size of the handle to use as-is for a necklace. (It literally looks like you’ve slung a purse handle around your neck…something I don’t want to be too obvious in the finished piece.)
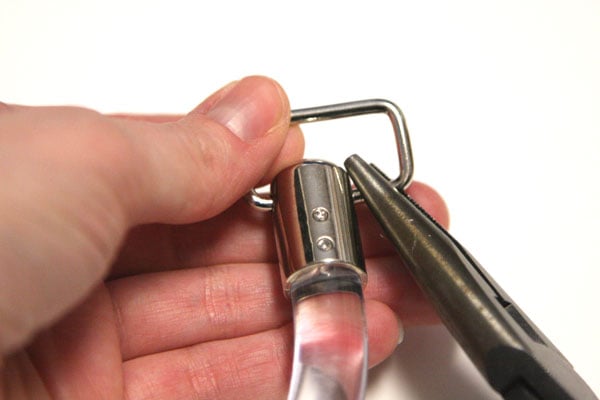
2. Attach the rectangles or D-rings that you got separately to the ends of the handle with the pliers – twisting apart and then re-closing like a jump ring with 2 sets of pliers. (If you couldn’t find any rings or don’t like that look, you can always skip this step and just thread the ribbon ends through the holes in the ends of the handle instead.)
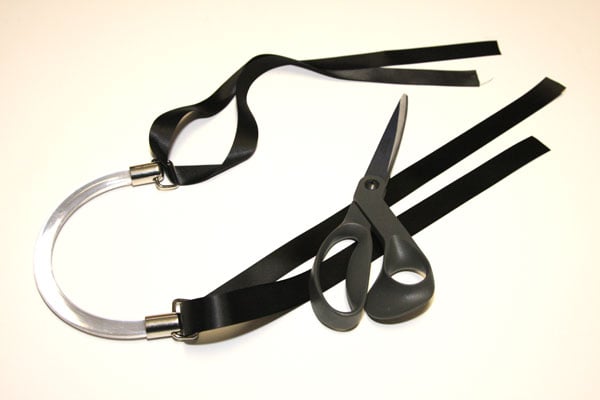
3. Cut two long pieces of ribbon and thread each through the rectangles/D-rings. (Make sure each ribbon piece when doubled-over, is still long enough to tie behind your neck.)
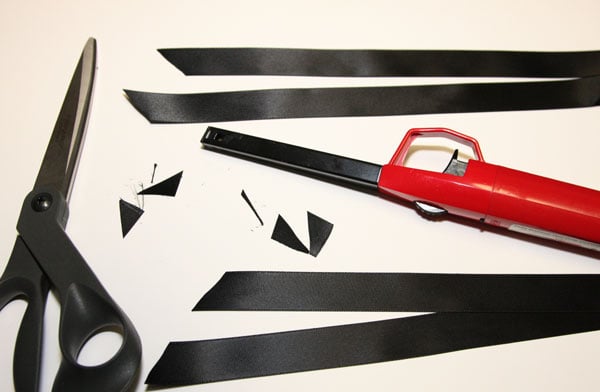
Cut the ends at an angle and heat-seal them with a lighter or open flame.

4. Use an awl or the scissors to poke a hole through the ribbon center near the rectangle/D-rings. Attach a scrapbooking brad through the hole and fold over the brad legs. (You can also trim them if they stick out beyond the width of the ribbon by using wirecutting pliers.)
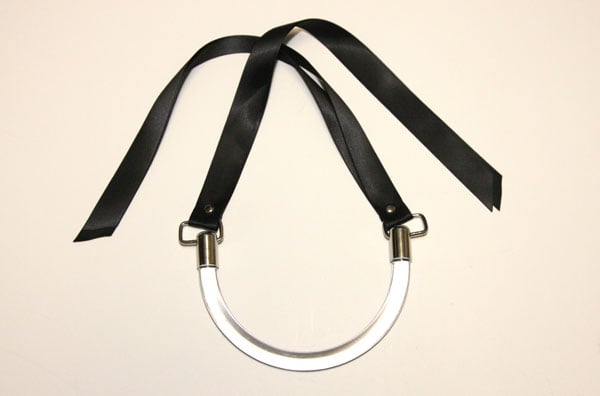
The doubled ribbon ends you then tie behind your neck in a knot or a bow depending on your preference.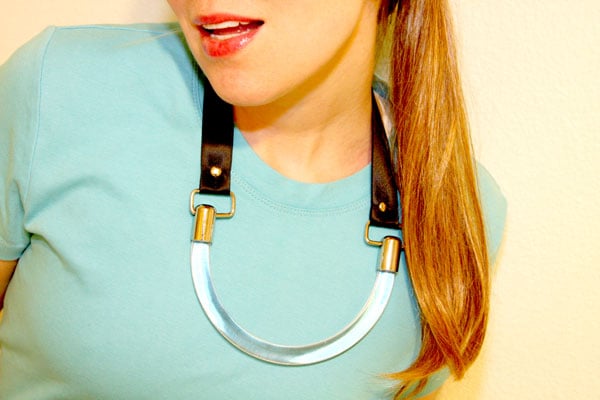
Wear paired with brighter-than-bright colors for a Spring 2011 feel, or over bare skin for a more upscale vibe.
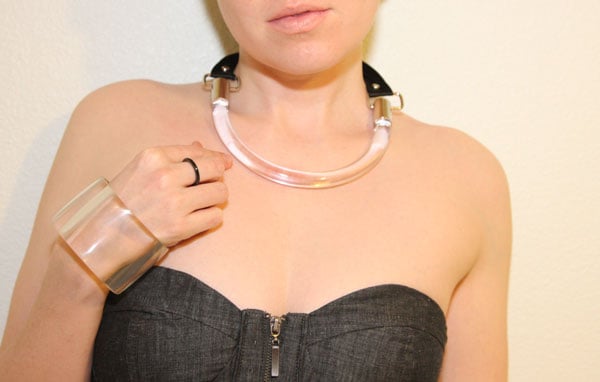
Happy DIY’ing!
xoxox
Carly
~If you liked this post, please share it!~
Save
Leave Comment

 Stylestalker Tentacle Skirt
 img
img 











