Feb 15, 2011 | DIY
 A week that had me scrambling with a bunch of projects due at once and my in-laws visiting. So they never noticed that I neglected to vacuum the house before they came…I met most of my deadlines! But I have a HUGE one coming up on Friday involving…SOCK PUPPETS…a $6 million budget…and somebody from a Robert Zemeckis movie!! (I know, I know…it’s a looong story. Don’t ask.;-)
 source unknown
Ain’t that the truth??! So onto DIY and other awesomeness…

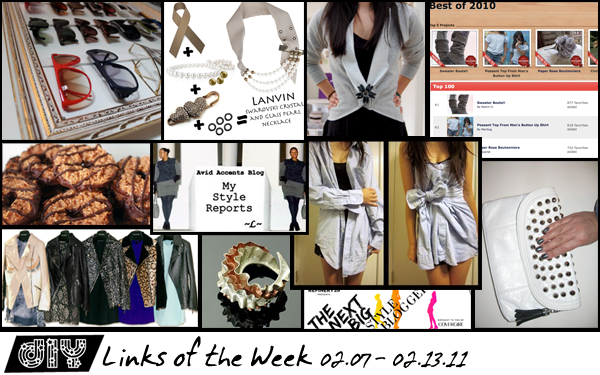
DIY Lanvin Necklace by Chic Intuition. Love the safety-pin through the grommets!

Refinery29 is searching for The Next Big Style Blogger! Could that be you? Enter and find out!
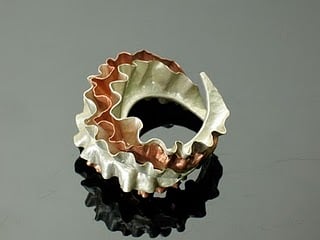
Stina Jimerson created a ring inspired by my DIY Edwardian Cuffs! It’s so amazingly textural and feminine – yet so strong at the same time. Definitely scroll through her blog and check out the rest of her amazing work!!
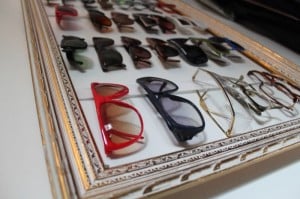
And, a cool project from a blog run by a MALE DIY-er (Andrew from Pull Teeth…and lord knows there’s two few of you guys out there making non-techy DIY projects!!): a DIY Sunglasses Holder. Check out all his other DIY projects and inspirational photography on his blog here!
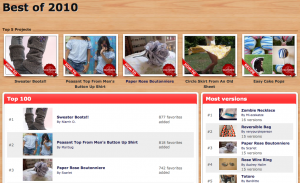
Cut Out + Keep‘s Best 100 Projects of 2010 (as ranked by most favorited). My Men’s Shirt to Ruffled Shirt tutorial was #13!! (And check out their Best 100 Projects of 2009 compilation as well…4 of my projects made it to the list at #39, #72, #77, and #88.) I’m so flattered that so many people favorited my projects – and there’s so many amazing projects to look through, one could get lost in the DIY for days…;-)

~L~ from Avid Accents posted a great series called “Shopping 101” in which she offers some great tips to make your buying decisions more informed, less impulsive, and into decisions that truly round out your wardrobe. First you need to Know Your Style, then Know What You Have, and finally, Know What You Need before hitting the mall. Invaluable!

DIY Girl Scout cookies. You can buy the real ones online to support the organization if you want to…or if you don’t have access to them, want to have more, or just want to try your own hand at making them…here’s how.

I’ve just discovered a new DIY fashion blog called Studs and Pearls. Check out her DIY faux blazer – refashioned from a Hanes sweatshirt and a beautiful brooch!
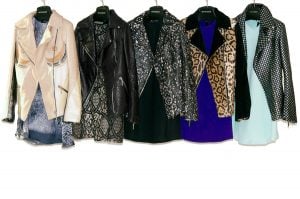
Luxirare made her own dress + jacket pairing for all 5 days of the week in a variety of luxurious fabrics, leathers, colors, and textures. Not DIY so much as just straight-out off-the-hook design + planning + execution. It’s amazing that she is able to sew those garments so skillfully without multiple samples/prototypes. As always, I am in awe.

I’m loving this No Sew DIY Shirt Dress as posted on Cut Out + Keep by user selena. So simple…so pretty…so love! So if you’re not into sewing your shirts into dresses, you can definitely get beautiful results by just tying strategically.

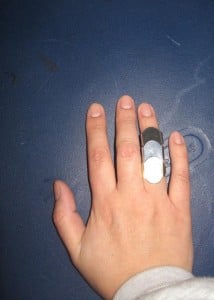
Maya from Soccer Mom Style created these two fabulous projects: her “White Swan Gone Bad” studded clutch, and a DIY Armor Knuckle Ring. I’m officially drooling over both – she’s so talented! And check out her blog for many other great DIYs as well!
Recent favorite affordable and cute shopping destinations:

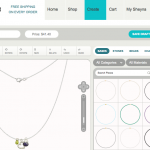
(And Sheyna.com is also a DIY Link of the Week – since it offers jewelry that you can customize into literally hundreds of combinations, choosing gold or silver, gemstone briolettes, chains, etc. – to make your own, one-of-a-kind DIY jewelry piece!)
And since I’m not doing my DIY Roundups anymore, if you have a DIY project, tutorial, or creation that you’d like to see featured on Chic Steals, please email me at carlyjcais at chic-steals dot com – and I’ll feature it in one of my Links of the Week posts!
xoxox
Carly
-all photos copyright their respective authors; photo array by me-
~If you liked this post, please share it!~
Leave Comment
Feb 14, 2011 | DIY

Though I rarely cover non-wearable DIY’s on this blog, I’ve been struggling with what to showcase for V-day for awhile. In the past I’ve found that making non-edibles for my guy has not gone over well. In Hub’s case, he has always thanked me sincerely, and then proceeded to never wear or use whatever I have funneled hours into making. The sweater I hand-knitted him sat in the closet for 9 years until he finally admitted he wasn’t really a “sweater-person” and I finally gave it to Goodwill. The notebook I made, with the cover fashioned from one of his favorite shirts that he threw out, and then hand-bound…gathering dust in the bottom of his desk drawer. Yet everything edible I’ve ever made him he’s devoured within 24 hours, and loved. (Do you know any guys like that? I think maybe it’s a guy-thing.) So I was going back and forth between making something for my husband to wear (that he won’t) and showcasing it on this blog…since this is a wearables DIY blog…or making him something to eat and mentioning it.
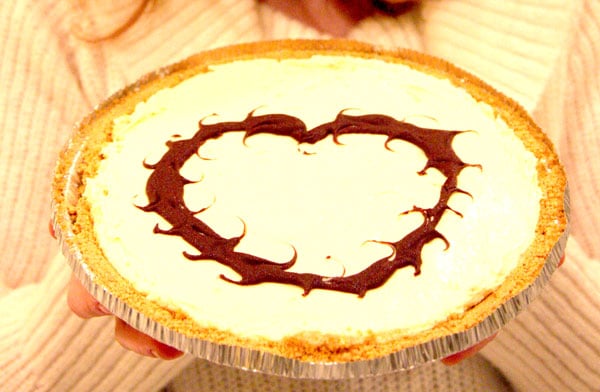
So after many nights in thought I decided to forget the wearables idea (since I hate creating useless things more than anything)…and made Hub his favorite dessert: cheesecake, with chocolate swirls.
 But…I made something else, too…for Lil Tot. Erasers…in the shape of chocolates! I made them using a make-your-own-erasers kit bought in Japan (but it’s also available on Etsy here, shipped straight from Japan to you.)
Sometimes I enjoy fiddly, time-consuming crafts like clay crafting and deko-sweets, and because these kits come with plastic molds in them, making tiny chocolates, donuts, cakes, and ice cream is super-simple! Then you dump the finished piece into the included box, add water, and zap in the microwave for about 3 minutes to let the binding agents evaporate.* Allow to cool and you have a fully usable eraser!
 This eraser clay is soooo fun, and already I’m thinking of new tiny edibles to create with the remaining colors. And think of the trading potential at your little ones’ schools! (I hear those food-shaped eraser packs are the new tradeables among the Elementary set lately…)
 I made a swirl chocolate with a dollop of whipped cream, a heart-shaped chocolate, and a chocolate square with icing lines and an almond on top.
 I also made a pink chocolate truffle, a chocolate square with a pink heart, and two chocolate pieces that look like they were snapped off of a chocolate bar.
They’re so adorable it seems like almost a shame to use them!
If you’d rather not order kits like this from Japan, Sculpey also manufactures Eraser Clay that cures by being baked in the oven – so you can create your own erasers in a variety of different shapes and colors. However, if you want to create chocolates, you’d have to buy either the 8-bar Set
 or the Shape and Bake Kit
 since the 6-packs don’t contain brown. (And you can’t make delicious-looking chocolate without brown!!;-) I haven’t used this stuff before so can’t recommend it one way or the other…has anyone else played around with the Sculpey brand of eraser clay?
Tomorrow I’ll be taking the in-laws to the slopes of Mt. Hood…and Lil Tot will have his first-ever skiing adventure! I’ll be stiff and sore from attempting to ski for the first time in…oh, 9 years or so…and looking extremely unfashionable as all my ski-wear is circa 1992 and I just haven’t seen the need to update it since. (Likely photos from tomorrow I’ll be keeping under lock and key lest word get out I have a neon…multicolored….ski…poncho. Yikes!!!) And since I posted about the V-day erasers today, tomorrow I’ll also be sharing my DIY Links of the Week from the past week…and there’s some great ones, so stay tuned!
Hope everyone had a lovely day – whether you celebrated the holiday or not! * x */ (That’s a kiss – kinda;-)
xoxox
Carly
*since U.S. microwaves tend to be 1000+ KiloWatts and Japanese microwaves are either 500KW or 600KW, I adjust the microwave times by subtracting about 10 – 30 seconds off the times recommended in the kits.
Leave Comment
Feb 12, 2011 | DIY
So Mercedes-Benz New York Fashion Week Fall 2011/12 has commenced and the shows are now well underway…and I’m following the coverage as it breaks. I’m a little sorry I can’t make it out there this time around, but there’s so much going on here I just can’t tear myself away. For now, following from a distance will just have to do…and I’m beginning to formulate some ideas for DIY’s straight off the runways for the upcoming Fall season.
However, as Spring is just around the corner here are some luxury-label pieces that have caught my eye…and that you could totally D.I.Y. Here’s the five-second rundown:
Marc Jacobs Tape Sweater
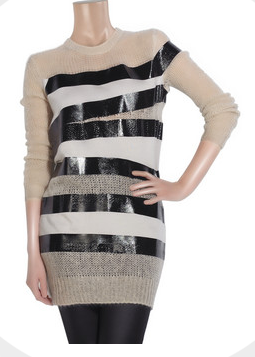 Quick How-To: Attach pieces of white sweatshirt fabric onto the front and back of a loose-knit beige sweater. Use black Duck Tape
 to disguise the edges of the sweatshirt pieces (and tape another piece on the inside so it won’t stick to your skin through the loose-knit). Never wash this sweater again!
Miu Miu Tiered Lace Dress

Quick How-To: Take any mini sleeveless LBD sheath and stitch tiers of lace trim around it. (I believe this type of lace is called “Venise/Venice Lace” or “Guipure Lace.”) Sure, it’s fiddly, but it will get you exactly the same look for a whole lot less!
Coach Tangle Ball-Chain Framed Small Bag
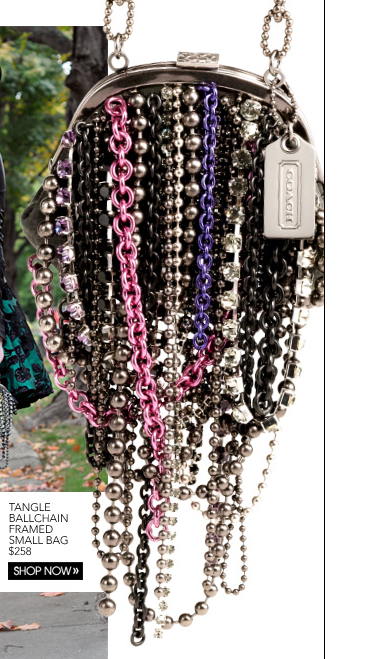
Quick How-To: Use a small clutch purse frame that has holes in it for sewing onto your bag, and attach different types of ball chain, colored chains, oxidized chains, and rhinestone chains to the holes as you sew the bag body onto it. Alternatively, just use a clutch purse that has the style of frame you like, and attach the chains near the frame using jump rings or threading jewelry wire into the purse body to hold them on.
 Quick How-To: Pick a pair of neutral pumps and add a thick layer of hot glue [gluesticks for general purpose, or for fabric/vinyl crafts if you can find it], pressing tiny shells like these and these into it before it dries. Do a single small area at a time since the hot glue dries super-fast! (Yes, this is one of the few times I will actually advocate using hot-glue in a wearable DIY! Also allowed in hair accessories and brooches.;-)
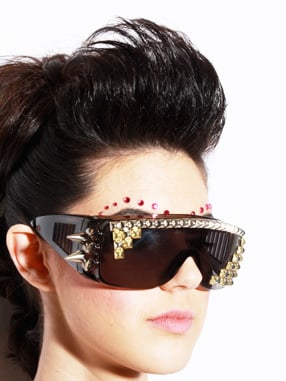 Quick How-To: Attach stick-on pyramid nailhead trim around a pair of old-school visor-style sunglasses
 . Poke holes with an awl into the sides and add cone spikes through the holes.
Alexander Wang Plastic Necklace

Quick How-To: Two pieces of Crystal Clear shrink plastic, colored with a thin coat of green acrylic paint, cut into a collar-shape and attached with jump rings and chains. Easy-peasy!
Christian Dior Haute Couture Flocked Dress
 Quick How-To: Take a vintage, long-sleeved dress (that’s already stiff) and add colored Craft Flock Fibers to one side of it to get this lovely textural feel. Trial and error is the name of the game!
See any brand-name items that you’re wondering how to DIY? Hit me up at carlyjcais at chic-steals dot com and lmk! I’ll include them in the next round of High-Fashion DIY’s!
xoxox
Carly
photo credits: net-a-porter.com, Fashionising.com, KeikoLynn.com, StantonJames.com, thefashionspot, wireimage.
~If you liked this post, please share it!~
Leave Comment
Feb 8, 2011 | DIY

runway photos: Marcio Madeira, Style.com; photo array by me.
Seen on the Spring 2010 runways (more than a year and a half ago, would you believe?) these stirrup socks, gaiters, or whatever you wanted to call them were the quintessential accessory for Alexander Wang‘s 2010 football-inspired sporty-girly aesthetic. With a little hand-stitchery and some Stop Fraying sealant, they’re a breeze to make.
You Need: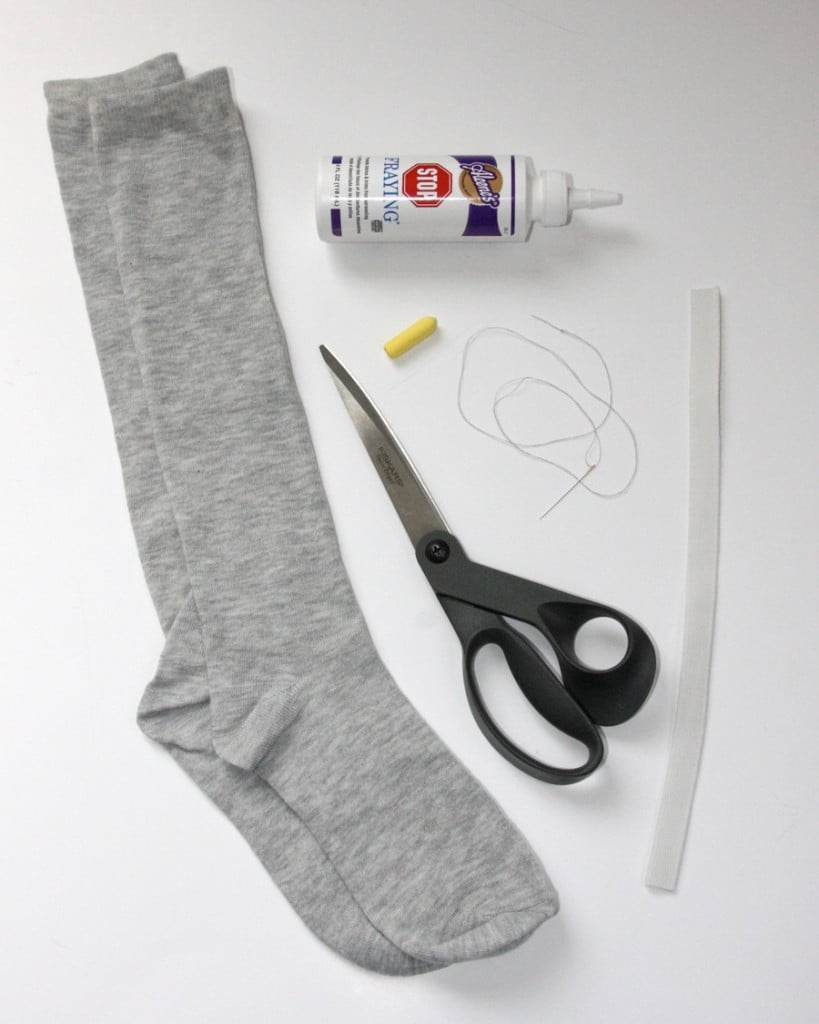
*pair of knee-high socks
*marking chalk
*white 1/2″ wide soft, lightweight elastic
*matching thread & hand-sewing needle
*fabric scissors
*Aleene’s Stop Fraying fabric sealant
How-To:
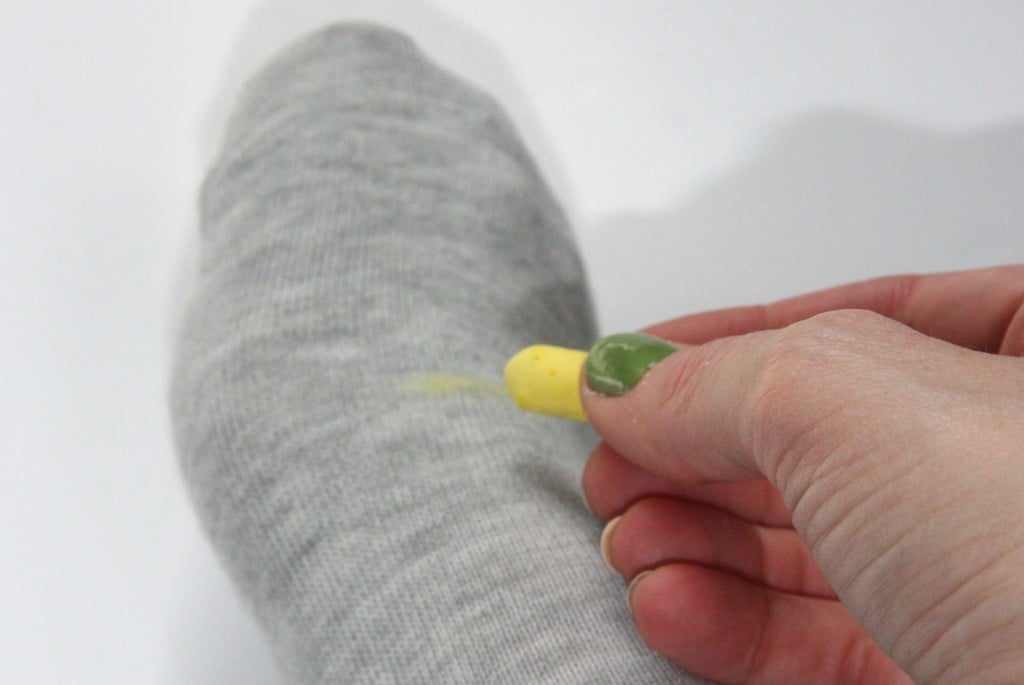
1. Try one sock on, and mark where you want to cut off the toe.
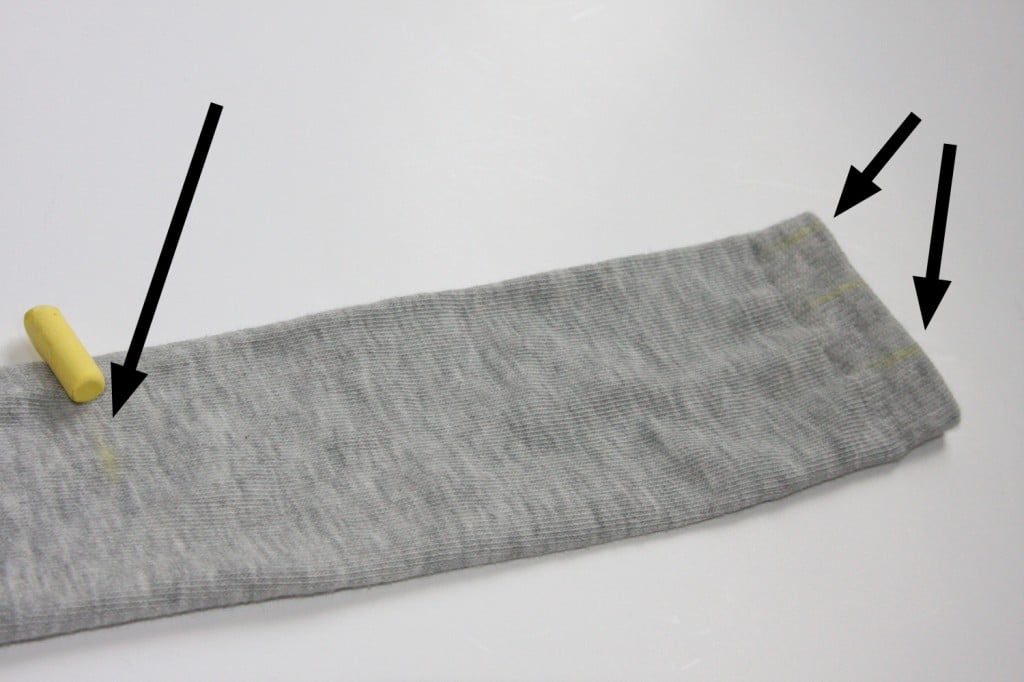
Also mark the back of the sock at the widest points you want your cut-out to be…and at the lowest point you want it to reach.
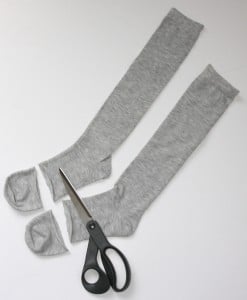
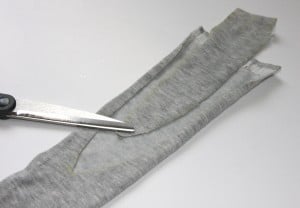
2. Take off sock and cut off toe, straight across. Draw a curve on the marks you made at the back of the sock in the previous step, and cut out along the curve.
Cut the other sock in the exact same way.
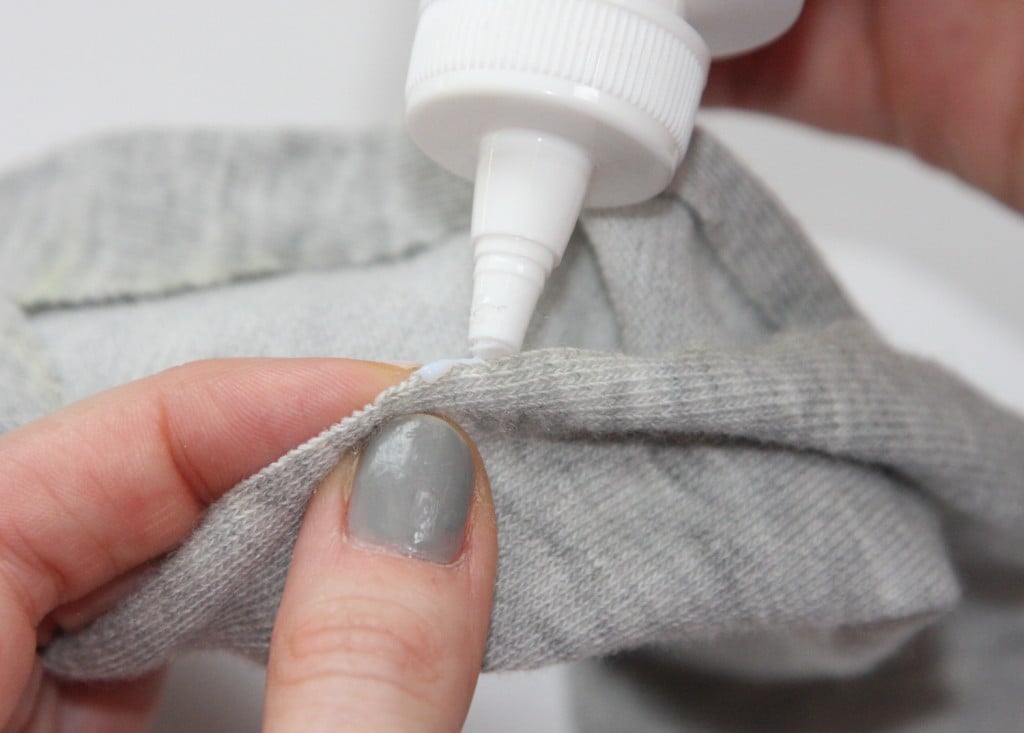
3. Apply Stop Fraying to cut edges and allow to dry according to instructions. (If you can use a sewing machine or overlocker, overlocking the edges will create a permanent, washable piece! With the fabric sealant these are more special-occasion-only socks, and probably won’t stand up to much washing.)

4. Sew one end of elastic to one side of the cut part of the sock. Try on sock again to see the fit, and stretch the elastic to the other side of the cut. Anchor elastic with your needle and take off the sock again. Sew other side of elastic down.
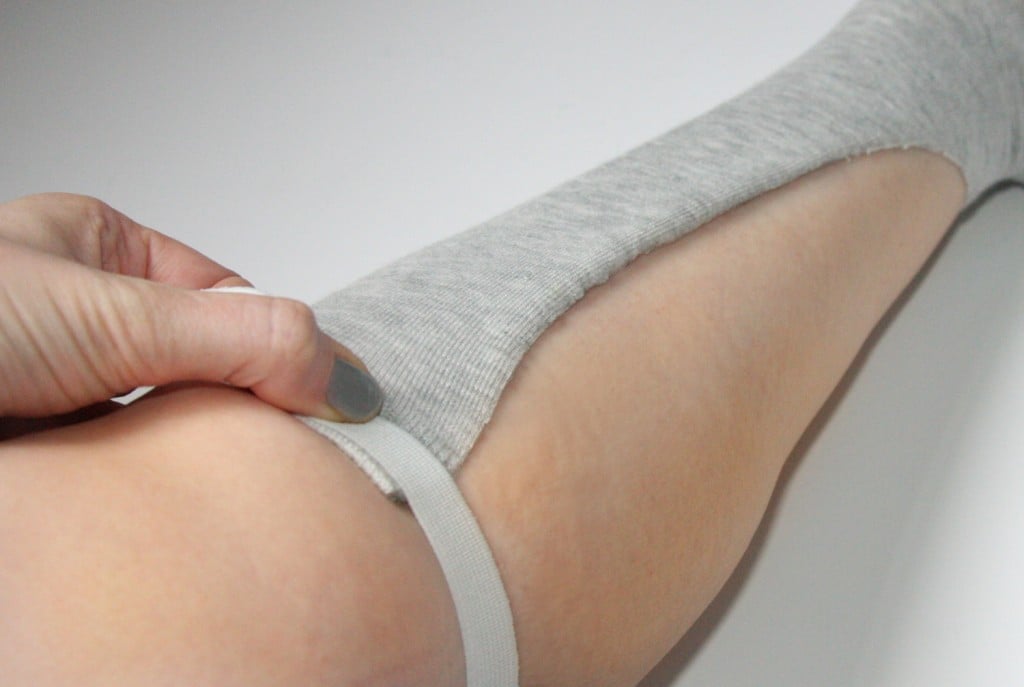
5. Trim elastic. Cut other piece of elastic the same length and sew both sides to the other sock.


Wear with a pair of clogs, mules, oxfords, sandals, or anything that acts as a straight-laced counterpart to this sporty legwear.


Happy DIY’ing!
xoxox
Carly
*I actually wrote this tutorial for Foam Magazine online, in May 2010. It unfortunately has been lost somewhere out on the Internet…if anyone has seen it, please let me know! I also found another tutorial for these exact same stirrup socks, done by the fabulous Jazzi McG, long, loooong prior to me ever doing mine…which I was totally unaware of when Foam asked me to do a tutorial for these socks. So sorry, Jazzi – you deserve the credit for first DIY!
**and thanks to reader Ejiro for reminding me to post this!
Save
Leave Comment
Feb 7, 2011 | DIY
Hello again, everyone!
I’m sorry for the long silence – I just haven’t been able to post anything while my blog was in-between platforms. I think, however, that the migration to WordPress is finally complete!
These past couple days without posting have felt very strange, to say the least. They’ve helped me reflect on a few things and really think about what to cover and share here on Chic Steals.
source unknown
So, first things first, I’ve decided I’m not going to continue doing my DIY Roundups. Low participation was what prompted me to start considering it, but really the deciding factor was that the link party service, InLinkz, is only allowing photo thumbnails with their paid service. I paid for one month and then decided it maybe wasn’t worth it. So I will continue posting DIY Links of the Week (DIY-related things, inspiring projects, ideas, and high-fashion meets crafty stuff that I’ve noticed while browsing on the internet), but I still want a way for all of you to be able to show off your own DIY projects and creations!
So…if you have a DIY project, tutorial, or creation that you’d like to see featured on Chic Steals, please email me at carlyjcais at chic-steals dot com – and I’ll feature it in one of my Links of the Week posts!
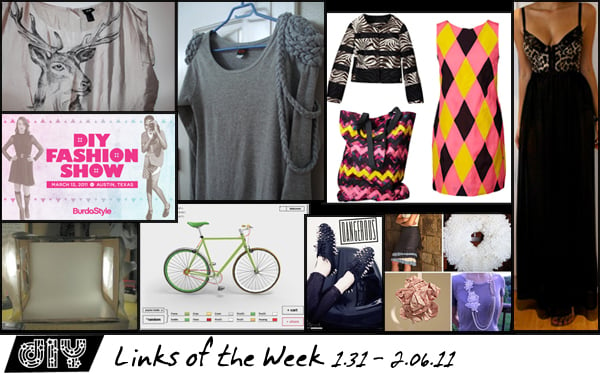
So without further ado, fun DIY-related things I’ve found this week:
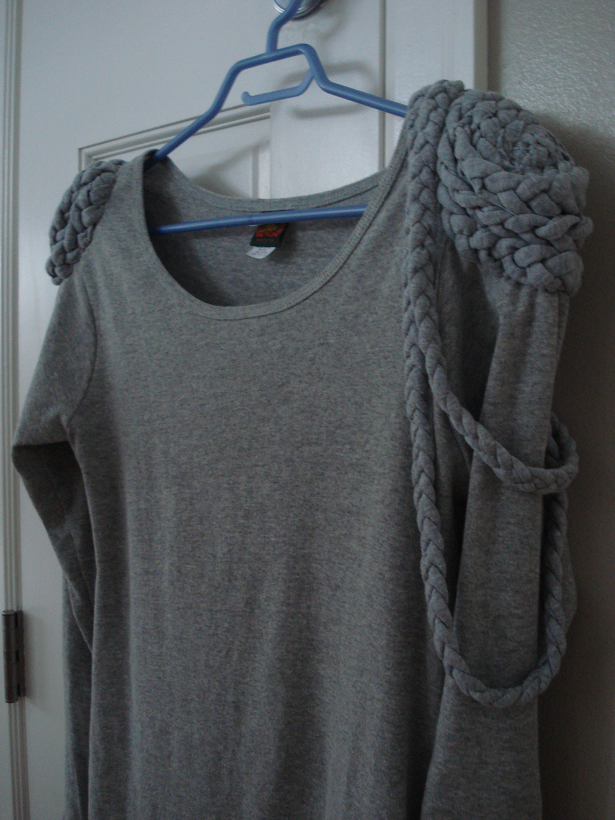
Nice and Shiny made this cool braided-embellishment epaulet tunic. It looks amaaaazing and I love the braided detail!
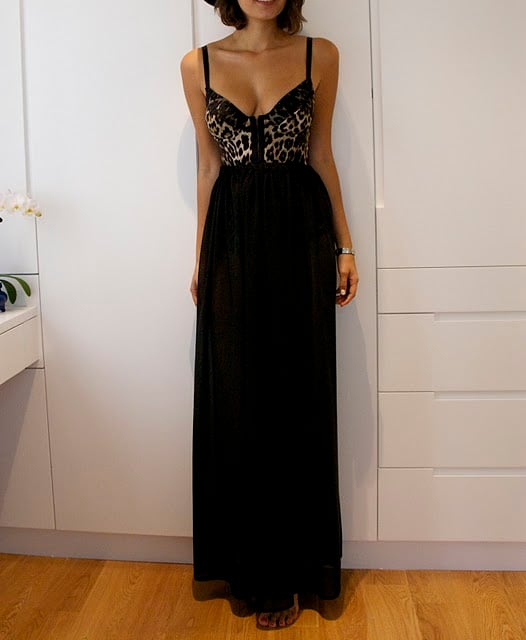 Have you seen A Pair and a Spare‘s tutorial for making your own sheer maxi skirt? It seems so easy and she looks fabulous in it. It’s inspired me to make my own version! And that bustier she’s wearing! Yowza.

Burdastyle and Etsy are sponsoring a DIY Fashion Show in Austin, TX on March 13, 2011! I would love to go but alas, I don’t think it’s in the cards..but if you’re a DIYer, blogger, or craftsperson this is a must-see event!
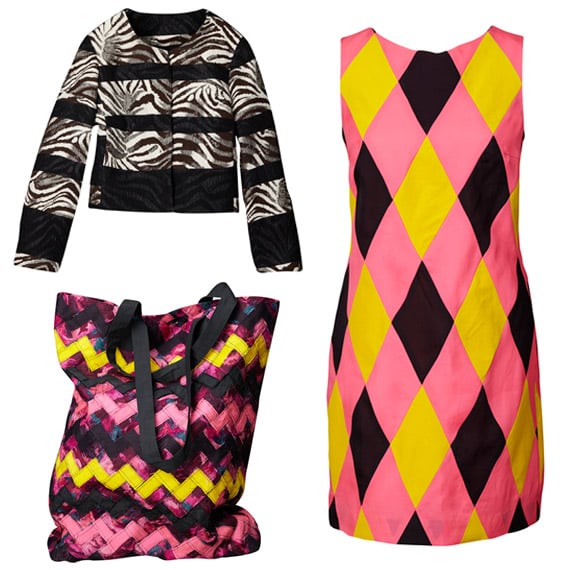
Fabric scraps from the Lanvin for H&M collection are still littering a number of H&M stores. So instead of discarding or destroying them (as H&M was accused of doing to their unsold clothing back in January 2010 ), they decided to re-use them…in a collection aptly called Waste (ironic at all?), soon to be available at select H&M’s worldwide.
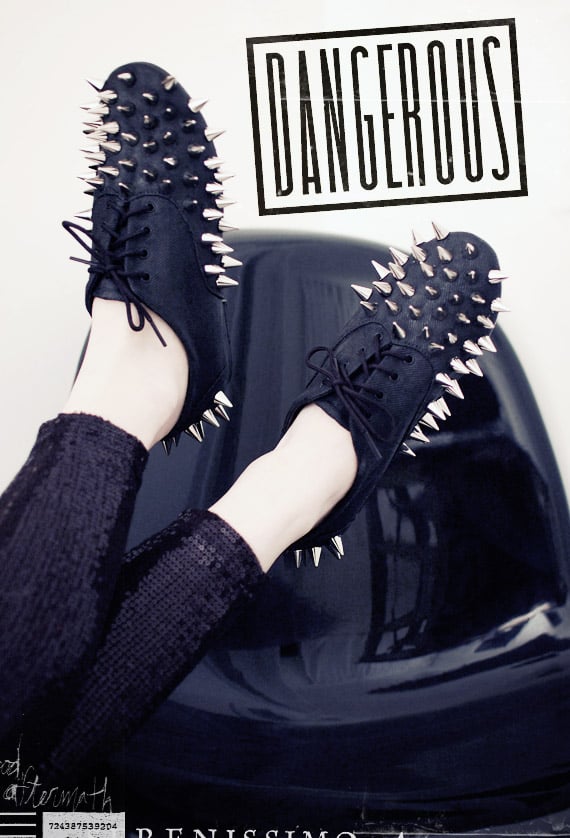
Nubby Twiglet’s “Dangerous” DIY studded sneakers are to die for! Made by her friend Joey, they’re delicious…and spiky.

I found Katjusha’s Sketchbook on Les Mads (German site) and love all of her DIY’s so much! Of special note: her Handpainted Deer Dress and Embellished Collar Necklace (with scrapbooking stickers).

Anthropologie items I find quaint, sweet, with a bit of a homemade-feel, and many are just begging to be DIY’d. Check out TipJunkie‘s list of 10 Anthropologie-Inspired DIYs to get those creative juices flowing!

DIY Lightbox over at CrazySexyFrugal! If you ever have to photograph products, crafts, or small items that needs beautiful lighting…this is a MUST. And sooo cheap too!
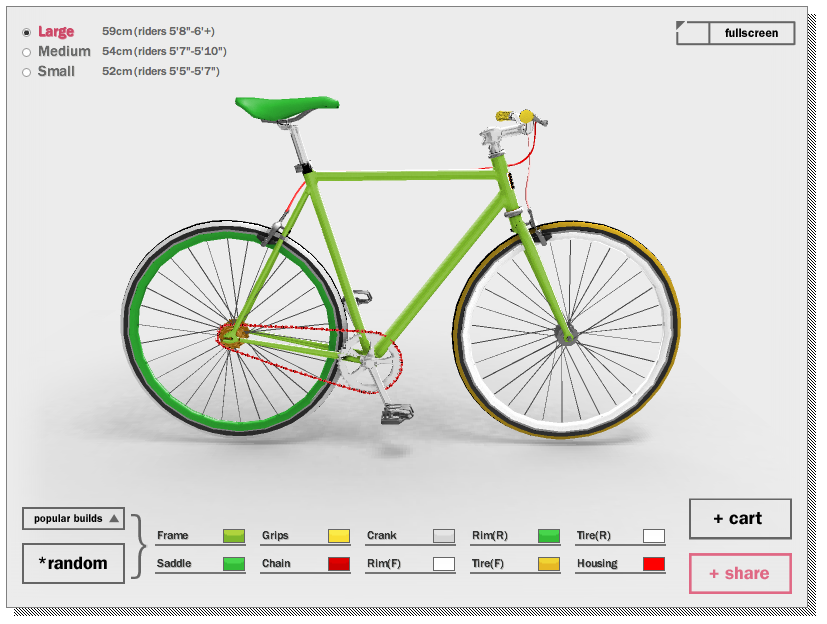
Urban Outfitters has also dove headfirst into offering customers customized goods: their Custom Shoppe – where you can choose from UO-exclusive graphics to add to their tees or upload your own! They’ve also teamed up with Republic Bike to offer the UO Bike Shop – where shoppers can customize their own bicycles.
Recent favorite affordable and cute shopping destinations:

xoxox
Carly
-all photos copyright their respective authors; photo array by me-
~If you liked this post, please share it!~
Leave Comment
Jan 16, 2011 | DIY
I spied this in the store the other day and promptly snapped up 2 to try!
I’ve bought the Nail Rocks nail sheets (that need to be set with the heat of a dryer, which I haven’t experimented with just yet), and tried out the Incoco-brand Color Enamel Strips in the past, which I enjoyed but were a bit tough to apply.
Look at all the beautiful colors and patterns the Salon Effects come in!
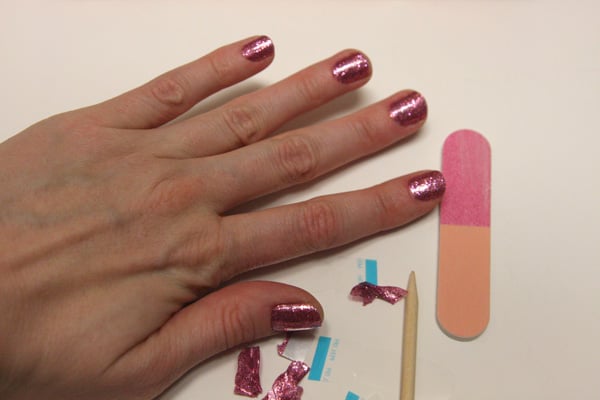
The Sally Hansen version of this idea takes the difficult application inherent with other brands and makes it super-easy, with an orange stick and nail file included in each set. And what I haven’t seen before with these stick-on nailpolish sheets is the amazing range of colors: Sally Hansen is offering glitter, photo-realistic effects, fun patterns, and bright colors. And they’re super-easy to use!
There are 16 sheets in a packet (and though you could probably use a single sheet for 2 nails if you were super-careful and enterprising); they’re meant to be used one sticker = one nail. You need to find stickers that approximate the shape of your nail bed, peel off the protective coat, peel off the back, snap off the paper tip (I found it easier to do the last two steps in reverse order), and place onto your nail.
You use an orange stick (included in the set) to press down the edges, and then the included nail file to crease the sticker sharply at the nail tip, and the sticker rips off.
Pros: Easy to use, fast (once you get the hang of it), brilliant colors and effects, long-lasting (I hope – the package says 10 days!), no drying time required, no need for other things to buy to do your manicure (topcoat, base coat, etc), no bumpiness to the glitter; DBP, toluene and formaldehyde-free.
Cons: A little smelly (like real nailpolish), packs come vacuum-sealed so they’re kind of hard to rip into, stickers prone to ripping if you press too hard with the orange stick, difficulty in finding a shape match to your nail bed, waste of sticker part that you rip off, a little pricey.
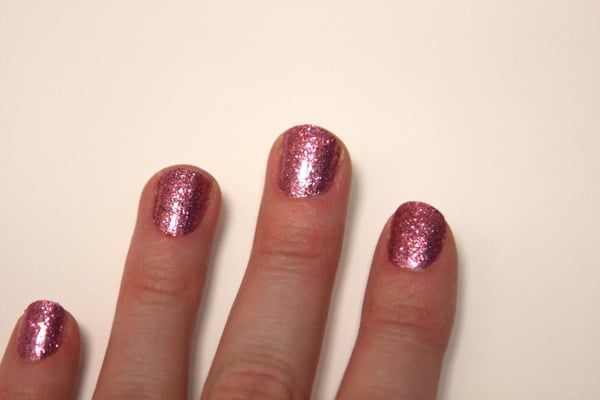
At about $9.99 a pack they’re a little more expensive than your average nailpolish, and they’re only single-use, so once they’re done, they’re done. But the effects are amazingly bright, pure color, with a streak-free and consistent finish, and the tops are smooth without the need for a topcoat!
Right now I’m trying out the pink glitter (“Bling It On”) and the blue glitter (“Blue Ice”) is next on my list!
Already in stores like Walgreen, Target, and CVS, this product is supposed to be available throughout drugstores in the U.S. by February 2011.
What do you guys think? Something cool you’d like to try? Or a little too pricey and bothersome to mess around with?
xoxox
Carly
~If you liked this post, please share it!~
Save
Leave Comment


 Modcloth
  photo from Etsy store