Jan 14, 2011 | DIY
Seen on the runway in John Galliano’s Christian Dior Fall 2010 RTW Collection were whimsical, feminine knitwear pieces with satin ribbons woven and braided throughout.
Photos: Monica Feudi, GoRunway.com
Within weeks of appearing on the runway, many Japanese clothing brands picked up on the design, re-interpreting the idea and selling them en masse to a demanding public, creating a micro-trend stat.
In the U.S. I haven’t seen any clothing brands create their own version of this – which is just begging to be DIY’d! (Check out Outsapop and A Pair and a Spare for their coverage of this idea; and The Hearabouts’ DIY version.) It’s amazingly simple, and the best part is that next year when fashion marches on…you can just pull out the ribbon, fluff out the yarns in your sweater, and nothing’s the worse for wear. The only thing that’s better than a DIY is a DIY that is only permanent as long as you need it to be!
Difficulty: (Easy/Beginner)
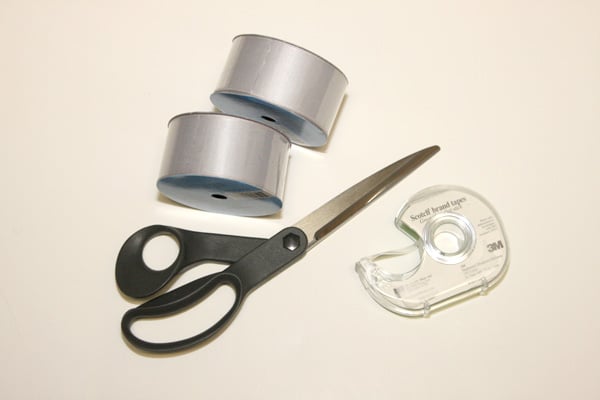
You Need:
*chunky-knit sweater (I chose one with cabling, from YesStyle.com. If you can find something with mohair or angora blended in, it adds a soft femininity to the piece.)
*double-face satin ribbon (I chose 1.5″ wide)
*tape
And…
*scissors
*measuring tape
*hand-sewing needle & matching thread (not pictured)
How To:
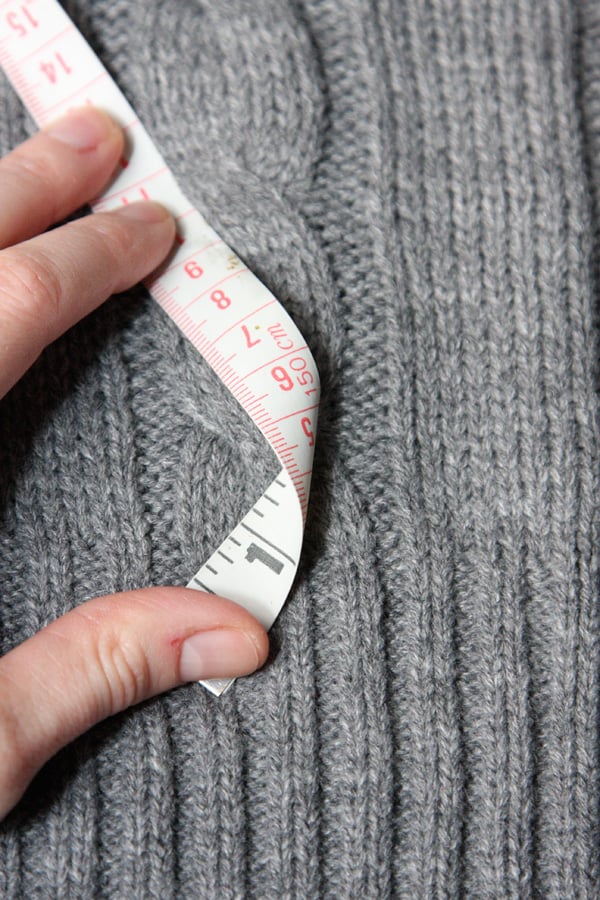
1. First, even before buying your ribbon, you need to measure your sweater to find out how much you will need. Use a flexible measuring tape and, starting at the bottom of the sweater, start measuring upwards, zigzagging the tape back and forth to mimic how the ribbon will cross over once woven.
At the top of the track of weaving, note the measurement on the tape. Double it to get the full length of ribbon for the weaving part.
If you are going to create bows at the bottom of the weaving track, create a bow in the measuring tape and add that length to the total length of the track. That is the entire length of ribbon you will need for one woven area. I chose 2 areas of ribbon; thus I doubled the measurement for the total amount of ribbon I needed to buy. (But since I’ll be doing two rows, I’ll need 2 continuous lengths for each track – something to keep in mind when you’re doing your calculations.)
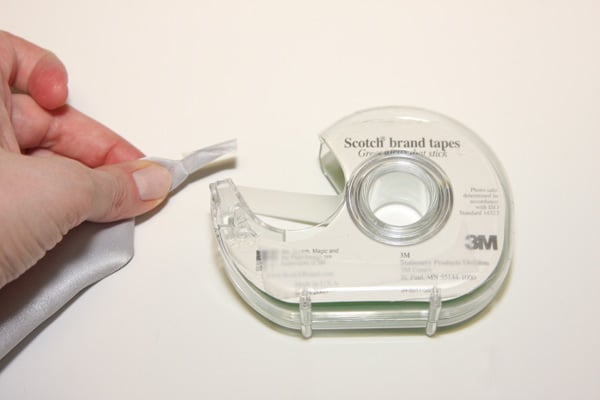
2. Cut your ribbon into the length you need for one row of weaving (+ a little more if you can). Wrap a piece of tape around both cut ends tightly, into a cone shape. This should work in place of a needle for your ribbon (though you can use a large-eye needle, yarn needle, or a safety-pin for your ribbon if you want).
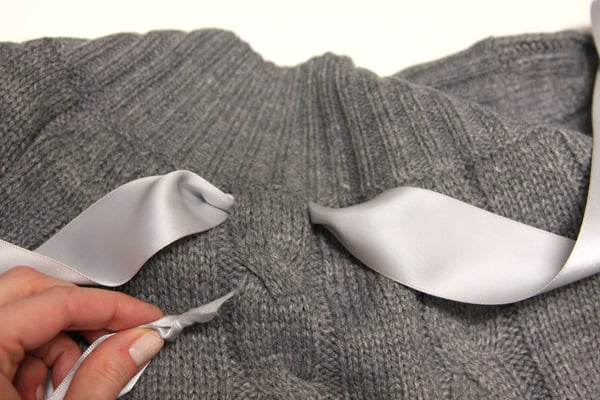
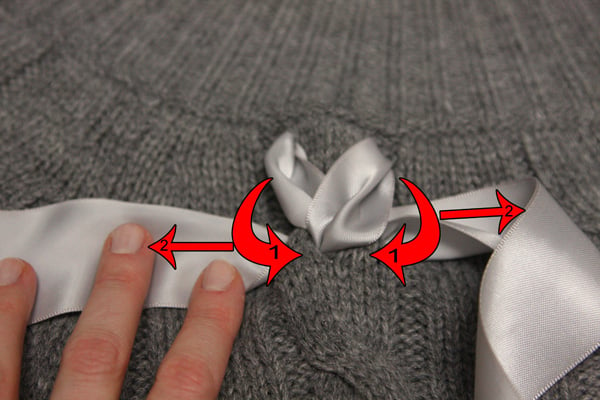
3. Start at the top of the woven row, in the center of one of the cables, from the back of the sweater. Poke a small hole between the knit on either side of the cable, and bring the ends of the ribbon to the front of the sweater.
4. Poke a small hole at the bottom of the first cable knot, in the center. Bring both the ribbon ends into the hole and to the inside of the sweater.
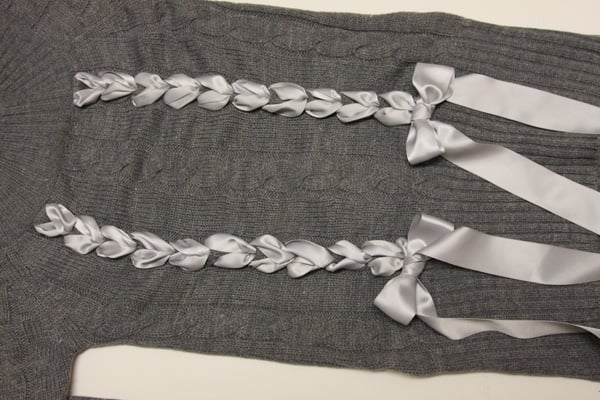
5. Repeat to create a ladder of “V’s”, made in ribbon, down the front of the sweater. As you go, fluff out the ribbon that shows on the front periodically, and flatten the sweater so that you aren’t “scrunching” the cable too much.
6. At the bottom of the row, tie ribbon into a bow.
7. Repeat for the other side.
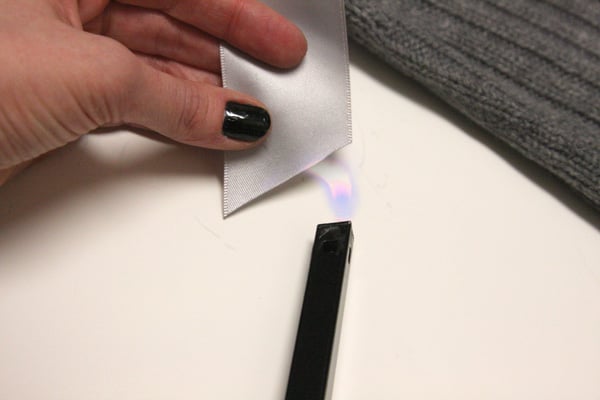
8. Try your piece on, and eyeball where you want the ribbon ends to fall. Cut, and then seal the cut ends with a flame.
9. To make the bows more permanent, hand-sew a couple stitches into the backs of the bows so they don’t loosen on you as you wear it. Hand-wash and lay flat to dry when it’s time for the laundry.;-)
Pretty easy, right?
Let me know if you try this out…I’d love to see your version!
Happy DIY’ing!
xoxox
Carly
~If you liked this post, please share it!~
Leave Comment
Jan 12, 2011 | DIY, Life
Well, since there were only 3 projects submitted to my last DIY Roundup, they’re all everyone’s favorites! I had a great time visiting all your blogs and checking out your pieces. You’re all so creative! Here they are, just to recap:
Katarina from She sells sea shells made an amazing statement necklace, inspired by Lauren Manoogian’s designs. You’d never think that this beautiful piece was crafted from paperclips and textile tape!
#2: Monika’s Plait Scarf
I tried very hard to find this tutorial; I really did. There’s no direct link to it, the forum is in Polish, and the site won’t let me search through anything without logging in. What I can tell from the thumbnail is that it looks like a braided rug. If anyone had any more success with finding this tutorial, I’d love to link to it!
Edit 1/20: Monika left a nice comment on this post explaining that it was a plait scarf project that she had finished but hadn’t linked a tutorial to it. Sorry I thought it was a rug – it looks very sweet all the same!!:-)
Teresa crafted her own pair of glitter heels: a breathtaking modern version of Dorothy’s ruby slippers. (The trick is to use tacky glue and spray adhesive – and you have yourself a pair of shoes that could rival the coolest Louboutins!)
Thank you so much for sharing everyone!
If your project has been featured above, feel free to grab the button below.
xoxox
Carly
~If you liked this post, please share it!~
Leave Comment
Jan 9, 2011 | DIY, Media
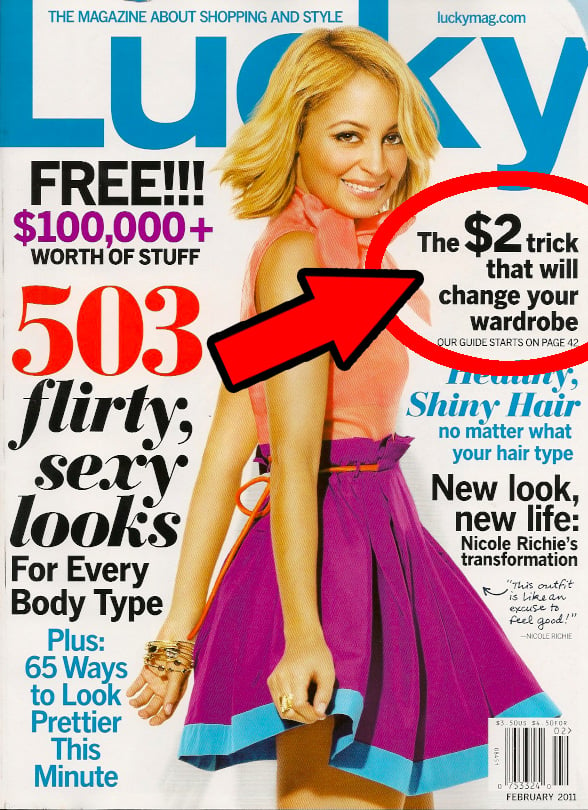
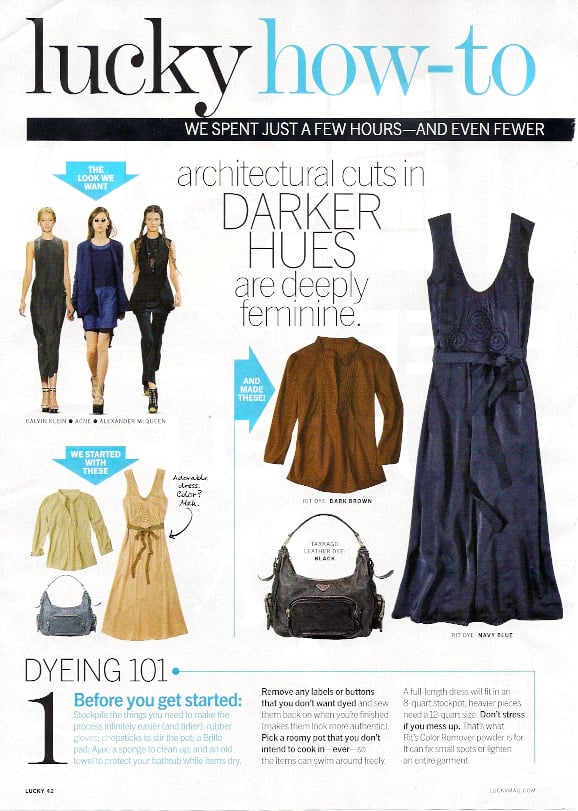
Unlike the New York Times, who doesn’t seem to understand what DIY actually is, Lucky Magazine gets it. They really get it! I was simply floored by their feature on dyeing pieces in your wardrobe to give them new life, featured in their February 2011 issue.
Utilizing Rit Fabric Dye , Jacquard dye
 , and Tarrago leather dye, you too can make over a number of items in your closet and dye them to suit your needs. (“The $2 Trick that Will Change Your Wardrobe!” reads the title.)
Though yes, dye is cheap, the prep and process time for dyeing something can be a few hours to a few days, so it’s not cheap time-investment-wise. But as the article points out, you can achieve dramatic results if you put in the effort to dye something correctly and carefully.
However, most of the pieces in the article appear to be new, which is why the dyeing works so darn well…when you’re dealing with items that have wear, stains, detergents, or distressing on them, your results may be very different. Dyeing something is never a guaranteed process…it’s fairly hit and miss (which is what many people love about it!). Don’t start off with trying to dye your favorite dress in the whole wide world…start smaller, and don’t forget the steps necessary to prep the piece to take the dye.

Dyeing leather is absolutely fantastic and utterly addicting, though again, some leathers will or won’t react with the dye, depending on finishing, tanning method, wear, surface coats, etc. Also: I couldn’t find the leather dye kit the magazine recommends buying from WardrobeSupplies.com – they only sell Tarrago-brand leather polish, which is not the same as dye. I’d recommend Angelus-brand leather dye, as I’ve worked with that before and it is extremely high-quality. If you’d prefer the Tarrago-brand, you can buy it here on a different site…or even buy the kit on Ebay.
They even put together a little video as a quick how-to for the dyeing process for cotton/silk/synthetic fabrics – where Fashion News Director Jen Ford dyes a Barbara Bui dress:
Their other video for how to dye leather isn’t up yet.
I’m so thrilled to see a mainstream mag really try to break the process of dyeing down and inspire people to try it out!
How about you guys? Are you thinking of dyeing a couple pieces in your wardrobe to liven things up a little?
xoxox
Carly
~If you liked this post, please share it!~
Leave Comment
Jan 6, 2011 | DIY
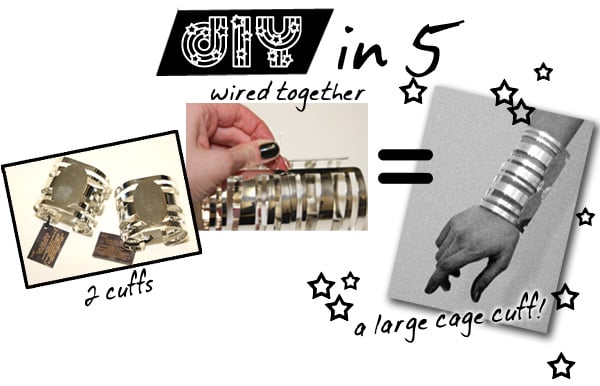
Yesterday I mentioned it as a more realistic alternative project to the New York Times‘ labor-intensive 3-hour DIY (!), so today I’m going to show you how to make it. It’s DIY in 5 – minutes, that is. The easiest, quickest ways to take a piece from blah to fab and update it to current trends.
Wherever I go I’m always on the lookout for clothing, accessory, or jewelry components that can be used in quick ‘n’ simple DIYs. That’s why
these silver cuffs I spotted in the jewelry-making section at Jo-Ann Fabrics, from the brand-new
Dazzling Geodes line of findings (from Plaid Enterprises) caught my eye. (Technically they’re supposed to be used as a base for adding geode slices and embellishments.) And incidentally, like most of the fashion- and culinary-obsessed, I am a frequent visitor to Luxirare.com. and the Dazzling Geodes cuffs reminded me a lot of
the arm-cuffs she sells in her web-store.
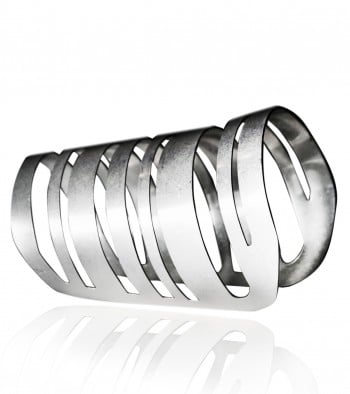
A Luxirare Cuff.
$95 for one of these cuffs is pretty reasonable considering she designed these and has these custom-cast with embossed LUXIRARE logo, and they look pretty hefty and durable…but if you’re in the market for something similar you can use 2 of these affordable findings to make your own version.
You Need:

*2 silver cuffs from the Dazzling Geodes line (available at Jo-Ann Fabrics & Crafts stores)
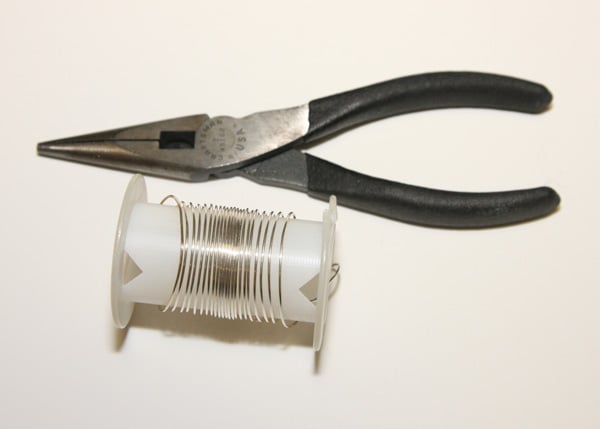 *silver-colored dead-soft jewelry wire
*wire cutters/pliers
How-To:
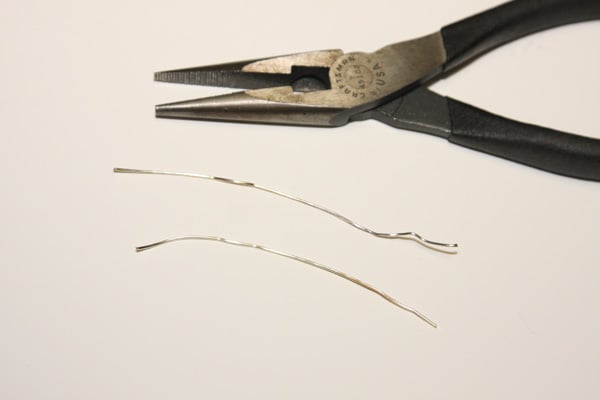 1. Cut 2 short pieces of wire.
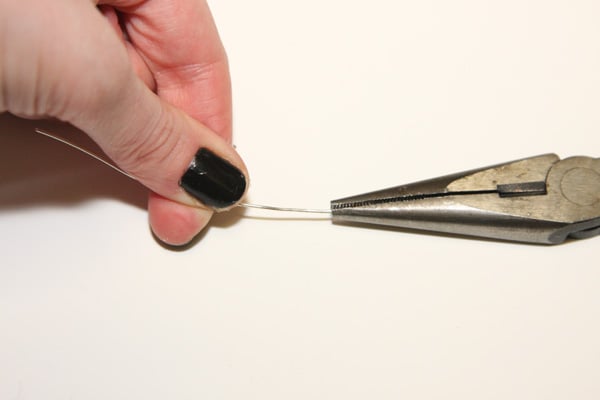 If your wire is kinked at all, close the pliers on it and drag in order to straighten it.
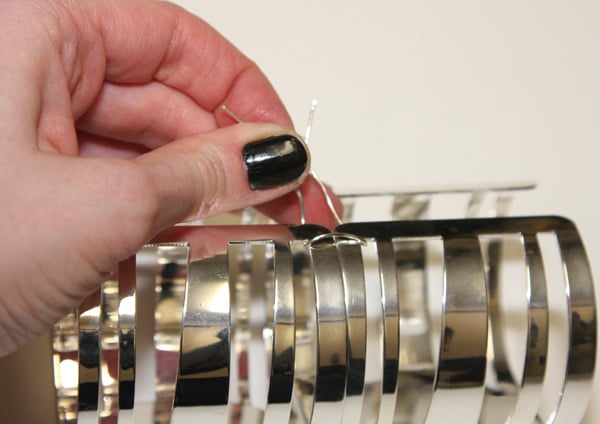 2. Line the cuffs up side-by-side and wrap a wire piece around the outer edges where the two cuffs meet.
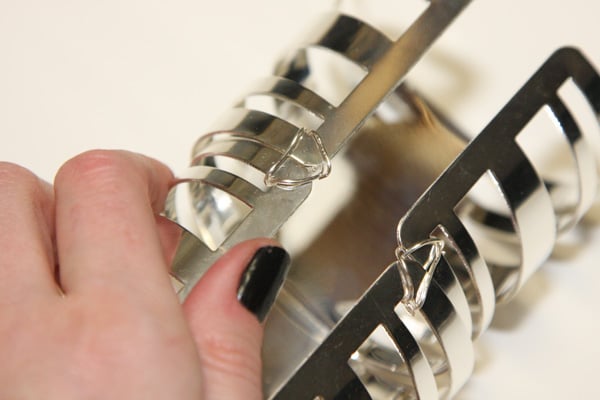 3. Weave the wire around the edges (I made a “V” shape as I wrapped), trim the ends down, and use the pliers to push the sharp ends back out towards the outside of the cuff so they won’t scratch you.
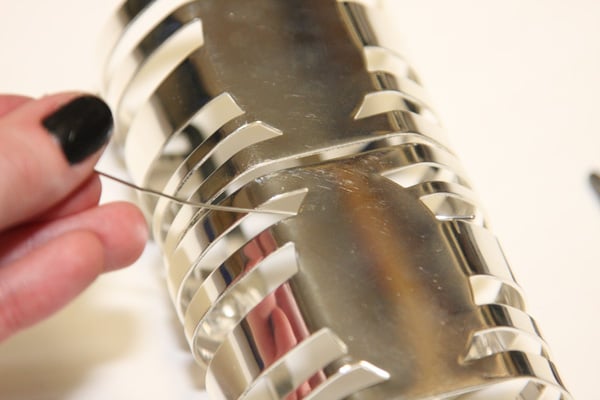 3. Cut a longer piece of wire and secure the center of where the cuffs meet. Twist the ends around each other on the inside, pull ends towards the outside and trim appropriately.
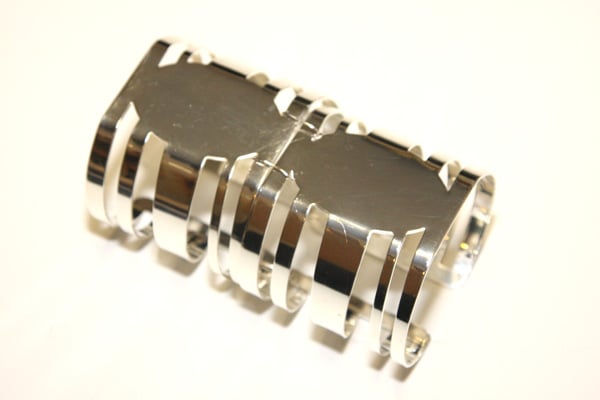 You’re done! And it may have taken you all of 10 minutes.;-)
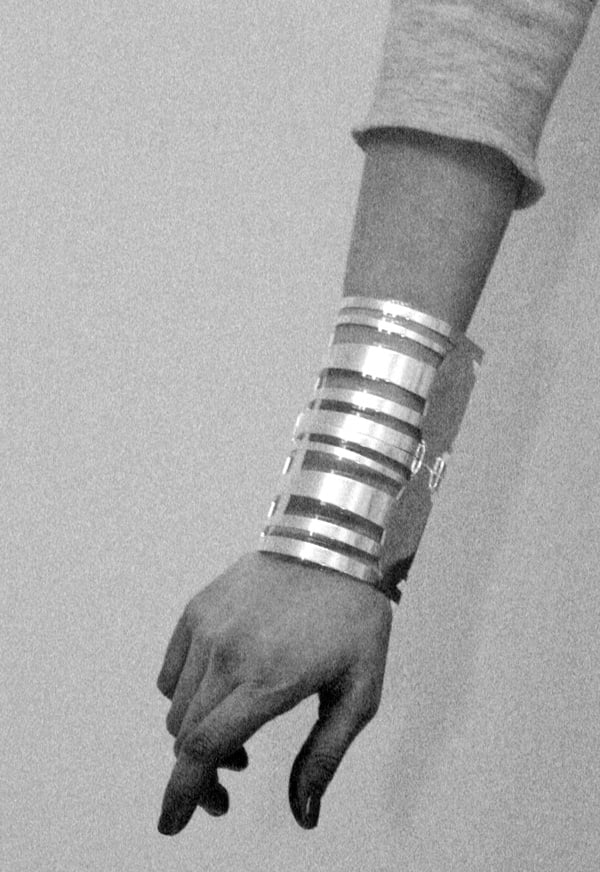
Wear with minimalist clothing, sharp contrasts, and architectural details…and stay cool, calm, and cagey with this on your wrist.
 Happy DIY’ing!
xoxox
Carly
~If you liked this post, please share it!~
Save
Leave Comment
Jan 1, 2011 | DIY
Now with almost midnight and 2011, while catching up on Gossip Girl episodes and eating peppermint ice cream, I just wanted to take a look back at 2010 and all the DIY tutorials I’ve shared here (and elsewhere). Missed any? Here they are, one more time:
Hair Accessories
Accessories
Jewelry
Clothing
Men’s Clothing Remakes
Shoes
Home Decor
Recipes
Wow, it’s a lot when you look at them all like that! 63 tutorials and how-tos (and I only did 51 in 2009). I hope this last year has been a wonderful, amazing year for everyone, filled with happiness and DIY!
Here’s hoping that 2011 is even better!
Happy New Year to all my wonderful readers, friends, fellow bloggers, and family!
xoxox
Carly
~If you liked this post, please share it!~
Leave Comment
Dec 31, 2010 | DIY
Project in progress.
Whew! The holidays are going by FAST and it’s time for another DIY Roundup! I was hoping I’d have a project to share with you, but alas…hopefully it’ll be done by tomorrow. (There’s a little teaser for you above.:-) After Christmas = Procrastination for me! How about you? Have you made anything you’d like to share in the past weeks? If so, please add it to DIY Roundup 9!
So now you get to share your own DIY’s! If you have a DIY project or tutorial that you’d like to share, please feel free to link below! (However you can only link YOUR OWN PROJECT. Please do not link others’ projects!)
If you’ve linked up your project to the Roundup, feel free to grab the button below.
Can’t wait to see everyone’s projects!
xoxox
Carly
~If you liked this post, please share it!~
Leave Comment