Oct 14, 2010 | DIY, Life
This week has felt like it’s crept by for me…which is strange because I’ve been super-busy every day! And Paris tomorrow….oh, I’m so excited!!
Nonetheless, I had a great time visiting all your blogs and checking out your pieces. You’re all so creative! Here are the top 3 projects:
Silence Sweetheart made this fabulous “Galaxy”-style t-shirt – with some bleach and acrylic paints. Talk about a PERFECT rendition!
And it’s Katarina from She sells Seashells ranked in the top 3 again…this time with a beautiful floating stud ring reminiscent of those “connector rings” sold at Forever 21 lately. Using plaster to fill the negative space of the stud backs is ingenious!
By my favorite gal Stacie at Stars for Streetlights…just painting the toes of these wedges gives them a distinct Chanel-esque feel. Sweet and simple:-)
Thank you so much for sharing, and please enter any other projects you have in my next DIY roundup (starting Thursday Oct. 21 – I’ll be skipping a week while I’m away;-)!
If your project has been featured above, feel free to grab the button below.
xoxox
Carly
~If you liked this post, please share it!~
Leave Comment
Oct 11, 2010 | DIY
Just some DIY- and fashion-related stuff I’ve noticed around the past week…and a couple other links that caught my eye.
*Stuck for a Halloween costume? Try one of Flavorpill’s Pop Culture & TV-themed ones. (Partial nudity & strong language warning!) They also have a guide for Musician-inspired costumes, which gave me a laugh, too.
*365 days in a year – 365 brand-new dresses…each fashioned from a $1 thrift store dress. Get some great ideas for refashioning and altering what you already have into stuff that’s cute and wearable at NewDressaDay.com.
*Shwin and Shwin is a new DIY blog I’ve discovered, full of crafty ideas, dresses from scratch (make-it-yourself patterns!), and handmade goodies for the kiddos.
*Why is Eco-Fashion So Expensive? ecouterre spells it out with the help of Bodkin designer Eviana Hartman.
*I’m still wrestling with the idea of getting more personal on my blog but having trouble with it (I mean, who actually wants to see photos of me in my bra anyway??! LOL) and ProBlogger has some great advice regarding that. Not about photos of me in my bra, I mean.;-)
*Sea of Shoes is having a Spring Fashion Art Contest. Perhaps I’ll enter some of my fashion illustrations – and if you’re an illustrator, please enter too! (Deadline= Nov. 1)
*Have you heard of the label DIYCouture? It’s a clothing collection that provides you with no clothing (!), just a book with instructions on how to make each piece. The 12 patterns are easy, and you can custom-fit them to your size, choose your own fabrics and notions, and essentially make each piece exactly how you want it. Stressing that when you make something yourself you value it more, this label strives to bring fashion directly to the consumers and eliminate the disposable nature of mass market clothing. (And at around $14, the book for each pattern is about what I pay at the sewing store for my patterns anyway!)
*On another note, I totally have Portland artist Jon Garcia‘s “The Wedding Song” stuck in my head. He’s got such a fabulous voice!
xoxox
Carly
~If you liked this post, please share it!~
Leave Comment
Oct 7, 2010 | DIY
DIY rose hoop-and-chain earrings.
Thanks so much for everyone’s recent feedback regarding my DIY Roundups. I’m glad to know that many of you enjoy them! But every week does seem a bit much, so I’m going to take Bromeliad’s suggestion (thanks, btw!) and try these Roundups every 2 weeks so that people can link up more of their projects. Sometimes we just can’t get enough done in a week (as I’ve definitely experienced lately!;-)

Since I haven’t finished photographing everything this week, I’ll share with you a pair of DIY earrings I made awhile ago. I just bought a pair of cheap gold hoops from Claire’s and some tiny silk roses from Michael’s. I removed the stems from the roses but kept the petals bunched together, and threaded two roses onto each hoop. I then added some dangling pieces of chain in the center for a pair of sexy, feminine rose-and-chain hoop earrings. (You may have seen some similar types of earrings for sale in retail stores lately, utilizing silk orchids, daisies, or other flowers, and chain, beads, and other dangles. I was also wearing these earrings in one of the photos from the Tigard/Tualatin/Beaverton Valley Times’ shoot🙂
photo by Jaime Valdez
So welcome to DIY Roundup 6! If you’re unsure how to link up your tutorial (or finished project), here’s how:
Just click the light blue “Ad Your Link” button that appears to the bottom left below. Follow the instructions in the Inlinkz window, pasting in the URL of your project or tutorial (from your own blog, Facebook page, Flickr account, Craftster.org, CutOutandKeep.net, etc). Don’t forget to write the NAME/DESCRIPTION of your project – like “Bow T-Shirt” or “DIY Lanvin Necklace” – not your own name or your blog’s name!!! You can link up any piece you’ve made or tutorial you’ve written from any time, not just in the last two weeks (though it would be nice if it’s a recent project, just to keep the content fresh). It’s all about sharing and bringing in more like-minded visitors to your site!
So now you get to share your own DIY’s! If you have a DIY project or tutorial that you’d like to share, please feel free to link below! (However you can only link YOUR OWN PROJECT. Please do not link others’ projects!)
If you’ve linked up your project to the Roundup, feel free to grab the button below.
Can’t wait to see everyone’s projects!
xoxox
Carly
~If you liked this post, please share it!~
Leave Comment
Oct 6, 2010 | DIY

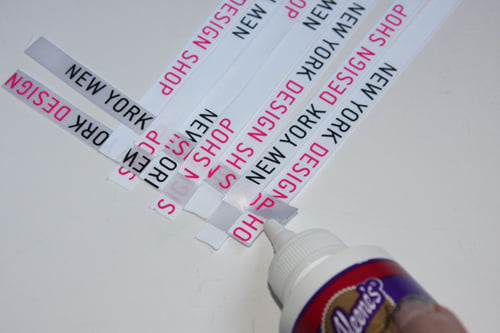
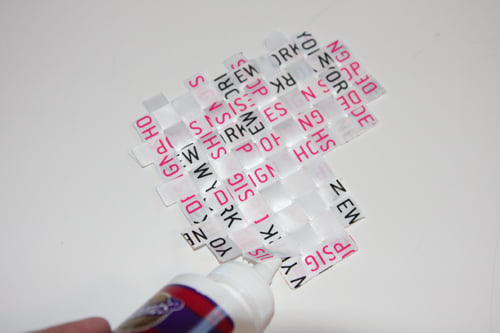
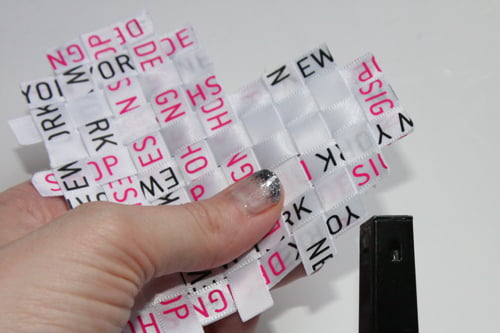
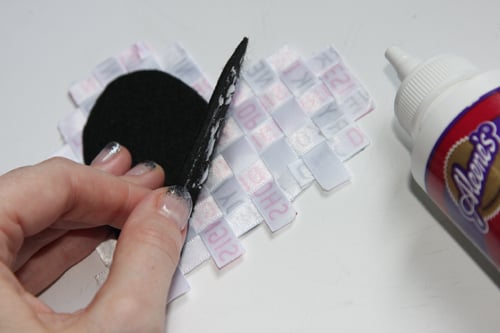
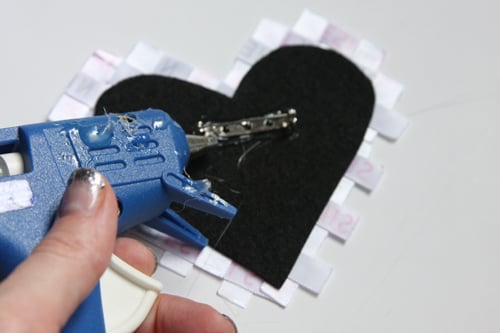
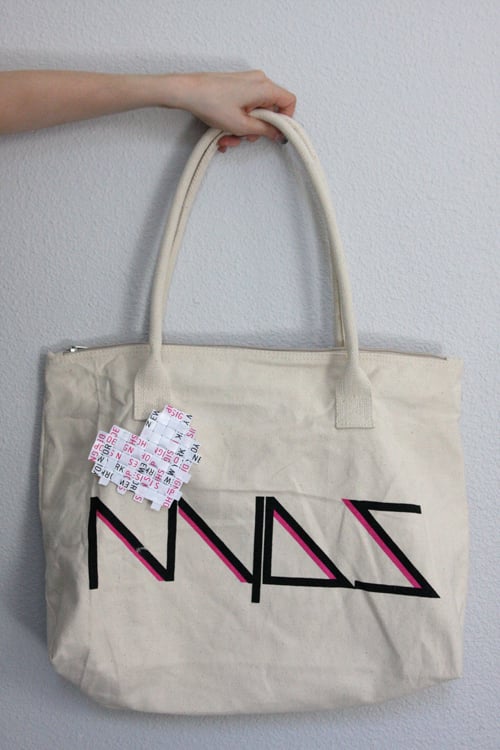
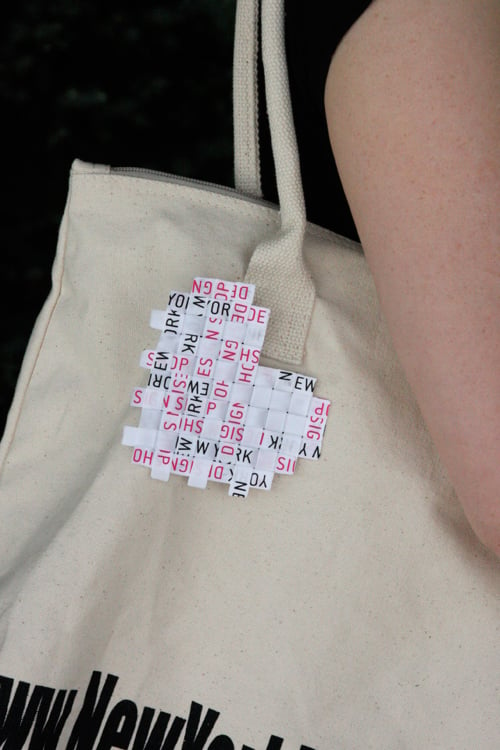
So this is the last of my submissions for Style Sample Magazine and New York Design Shop’s Create Couture Challenge back in early August! Whew! Can’t believe it’s taken me this long to post them all…I wanted to make a final DIY piece from the box of materials I received and my eye lit upon the beautiful “NEW YORK DESIGN SHOP” printed ribbon. I love white, pink, and black together! So I crafted up this sweet, modernist design pin – that could easily be used as a hair accessory, bag charm, ring, you name it – just by varying the size, shape, and finishing. (The weaving of the ribbon does take awhile, but the results are fantastic!
You Need:
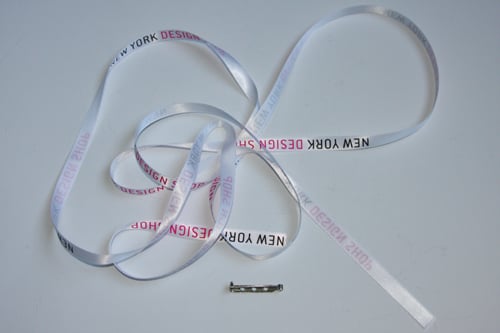
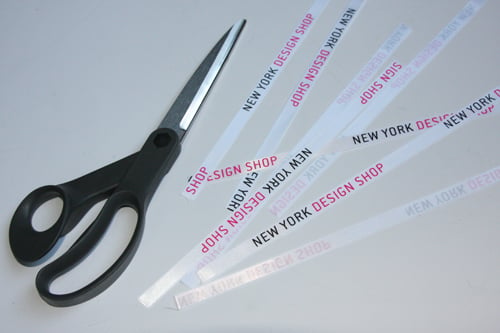
*NYDS Branded Ribbon (or any 1/4″ wide satin ribbon) – the NYDS-branded ribbon comes wrapped around the box when you place an order with New York Design Shop!
Additional Tools/Materials:
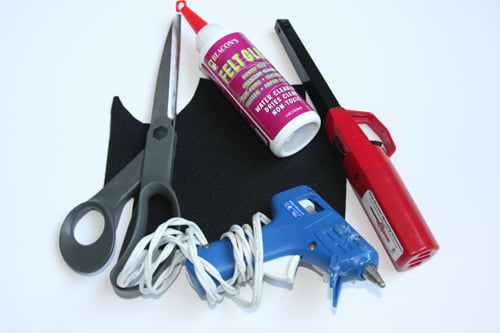
*scissors
*fabric glue
*stiff felt
*pin back
*lighter
*iron (optional)
*piece of paper (optional)
[prep: iron ribbon if kinked or curled; draw a shape as a template on a piece of paper]
How to:
1. Cut ribbon into eighths to start out.
2. Seal ends of two of the ribbons with an open flame.
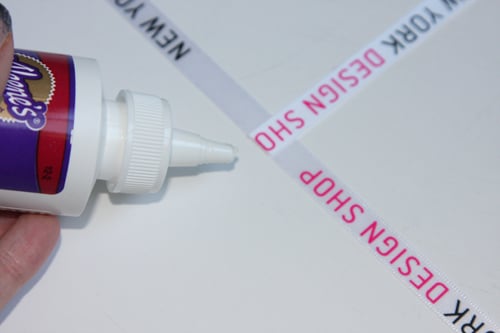
3. Glue two ends of ribbons together, overlapping them at a right angle.
4. Seal the ends of more of the ribbons, and glue them parallel to the first ribbon, alternating the underlap and overlap of their edges.
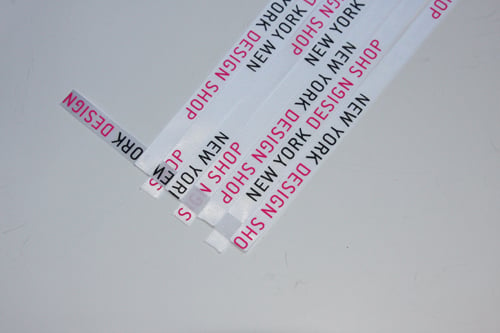
5. When you have enough ribbons to work with, start weaving in ribbons in the opposite direction, heat-sealing and gluing down the ends as you add them in.
6. When you’ve run out of ribbons, start trimming the ones you’ve already woven, in order to create the desired shape.
7. Continue with trimming, heat-sealing, gluing, and weaving until your shape is what you like. Make sure all edges are glued together.
8. Cut piece of felt slightly smaller than your woven shape, and glue together with fabric glue.
9. Hot-glue pin back to wrong side.
Now anyone can wear their heart on their sleeve…or on their NYDS-branded tote!!
xoxox
Carly
Save
Leave Comment
Oct 3, 2010 | DIY
I had purchased a bag of Bing cherries a little while ago, and they languished in my fridge for awhile. I guess I kind of forgot about them.
So when I pulled them out I realized that I had to use them up fast since they were turning a little brown here and there.
I made this Berry Cherry Pie to use them up.
I love that it doesn’t use canned pie filling (I like some cherry pie filling but not all – many are super-sweet and too syrupy, and make my throat hurt). Since this version uses fresh cherries, it has an interesting, subtle taste. And it doesn’t need a lot of sugar either – which is why I’m sharing with all of you! (As you may have noticed – the recipes I’ve begun to share here are basically adapted recipes of sweet and decadent things…just made lower in fat and sugar and better for you. I love my sweets – but I love them even more when they have more “good” than “bad”!)
Here is the recipe, which I found on Recipezaar.com (now Food.com) and adapted.
DIY Low-Sugar Berry Cherry Pie Recipe
(serves 8)
Ingredients:
*1 store-bought frozen pie crust
Filling:
*4 c berries (I used cherries and frozen blueberries that I thawed in the microwave)
*1/2 c sugar (or you can use powdered fructose, but decrease to 1/3 c OR to taste)
*1/4 c water (I used the juice that drained off the blueberries when I thawed them)
*2 T cornstarch
*1 T lemon juice
*1 T vanilla
*1 dash salt
Topping:
*1/2 tsp cinnamon
*1/2 c brown sugar
*1/2 c flour
*1/2 c oats
*1/4 c butter, melted
1. Bake the pie crust according to directions for a “one-crust filled pie” (usually 400 degrees for 10 minutes). DO NOT PIERCE PIE CRUST WITH A FORK PRIOR TO BAKING – if bubbles form, push them back down.
2. Meanwhile, cook all the ingredients to the Filling EXCEPT the berries together in a saucepan on medium heat, whisking, until well-blended (about 5-7 min).
3. Stir in the berries.
4. Fill baked pie crust with Filling. Preheat oven to 375 degrees.
5. Stir all the ingredients for the Topping together EXCEPT for the butter.
6. Add the butter to the Topping and combine.
7. Sprinkle the Topping over the pie so there are no gaps.
8. Place some tinfoil around the edges of the pie crust to prevent browning and bake for about 45 minutes until Topping is golden and crunchy, and filling congealed.
Hope you try this some time when you have a lot of berries, fresh or frozen (strawberries? blueberries? blackberries?) to use up!
xo
Carly
Leave Comment
Oct 2, 2010 | DIY, Life
Projects I’m working on.
Currently, I’m working on a ton of things, and they’ve all been at various stages of completion for awhile. I was pretty busy this week with stuff from Lil Tot’s school, job-searching, and general organization, so I’ve been putting these projects off.
From top, counterclockwise: vinyl Goth-style Bunny Bag still in pieces, bronzed leaf head garland, silky polka-dot scallop shorts, Tiny Crosses Necklace and Dangle Cross Earrings for my Etsy shop (haven’t photographed or listed yet), DIY Vita Fede ring that doesn’t look as nice as I’d like. I’m not sure whether to deem it a FAIL and scrap it, or forge on. Anyway.
I also didn’t end up posting a DIY Roundup this week for a couple reasons: one, I just didn’t get to it, and two, the number of submissions for my DIY Roundups is slowly tapering off.
This makes me think that it’s not something that you guys want to read about here – so I’d like to hear what you really think of it!
Thanks so much!
xoxox
Carly
~If you liked this post, please share it!~
Leave Comment