Jul 25, 2010 | DIY, From You, Life
from formspring.me:
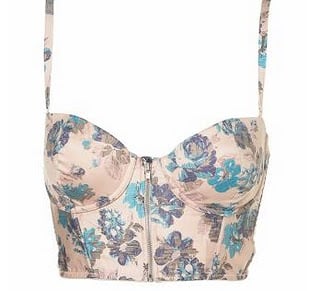
Hey I wondered if you could help me with making one of these “bralets”, do you know how to make a pettern for them? http://api.ning.com/files/zcwHPg1VgsLUzsS1e99DsdD4ZlRqQdct0bCSs9*1rseLJIAKirKx55a0ARHDEJCLVDBdi8fpp9Gn0zIw37Jm5Vb-jsk5K1bz/bralet.jpg
Jul 24, 2010 | DIY, Score!
Sponsored by New York Design Shop and Style Sample Magazine, this DIY competition pits 10 selected crafty blogs against one another – with the challenge of creating some crafty pieces and sharing them on the NYDS blog. We’ve each been sent the same package of DIY must-haves (courtesy of NYDS) and have been set the task of making something with the contents.
A box brimming with lovely, tactile embellishments and trims!
Announced on page 3 of the latest issue of Style Sample Magazine, and on the NYDS Blog in a “Meet the Bloggers” feature, I’m up against the likes of …love, Maegan, Fvncy, and Alisa Burke!
All the projects and finished DIY’s that each blogger submits will be posted on the New York Design Shop’s blogs (I’ll post the link once it’s up)…and then it’s up to you, lovely readers, to have your say and give your input!! The competition is decided by VIEWER VOTE – that is, you all get to decide who YOU think should be the blogger to win the entire competition!
The prize is an Alternative Apparel dress, $50 worth of DIY materials –ooh, think of what I could do with that!!—, assorted accessories from New York Design Shop, and most importantly to me: a FEATURE INTERVIEW in the September/October issue in Style Sample Magazine! This is what I’m really shooting for; I so want to return to designing accessories {at least to start} on a more permanent basis, and exposure like an interview in such a widely-read online magazine would be a dream come true to help me reach out to women who might want to wear my jewelry and accessories. The potential exposure for a struggling designer like me is what makes this prize priceless!
Also, just by commenting on any of the projects submitted, YOU TOO will be entered to win a finished project by the winning blogger! (Anyone want a free piece of clothing or an accessory to start off the school year with?? Sounds good to me!)
So the deadline for entries (Sunday) is drawing near and I’m working hard on all my DIY’s…having just arrived back from Tokyo on Monday, I’ve had less than a week to get this all done! I’m hitting my stride, though, and hope to have all my photos and everything done by tomorrow. Whew*.*
Once everything’s been submitted and the voting’s open, I’d be honored for my readers to check it out! And if you like what I make, I’d love to have your vote too!;-)
Oh…and the competition guidelines said “make one or more projects with these materials.” We aren’t allowed to use any other trims (besides chain) than what we were sent above, though we were encouraged to use a non-kit item as a “base,” like a shirt or a pair of flip flops etc.
I was so jetlagged and busy after we got back I wasn’t able to start actually making anything until Thursday of this week!
So the question is…
How many DIY creations and projects did I make with the stuff that I got in the box above???
Remember, I could only use the trims/embellishments from the box – and once they ran out, that was it!
Edit 7/26: I’ve submitted all my projects and will be announcing the winner shortly! You don’t need to leave your best guess in the comments section anymore:-)
The first person who correctly guesses how many finished projects I submitted in time (using the above materials) will get a little surprise from me in the mail! (Won’t say what it is just yet…you’ll have to wait and see!;-)
So – take your best guess!
How many creations + tutorials did I make in 3 days?
I MADE 12!
xoxox
Carly
Jul 23, 2010 | DIY, From You
from formspring.me:
Hi! Do you have any tips on how to recreate this necklace? http://img824.imageshack.us/img824/5264/dsc0749.jpg Thanks!
Jul 21, 2010 | DIY
Thank you all for submitting your projects into my last DIY Roundup! I know I’m a little late in posting this…but I’ve had trouble staying on track with the ol’ bloggy blog while in Japan, what with the time difference, having to share the computer with 4 other people, and trying to deal with annoying JIS-standard keyboard, which had the apostrophe above the 7 key and the @ mark over on one of the brackets keys. A very weird setup.
Regardless, I had a great time visiting all your blogs and checking out your pieces. You’re all so creative! Here are the top 3, as measured by user clicks:’
I love how incredibly sexy and tough this is. And her tutorial is so detailed that anyone can make one for themselves!
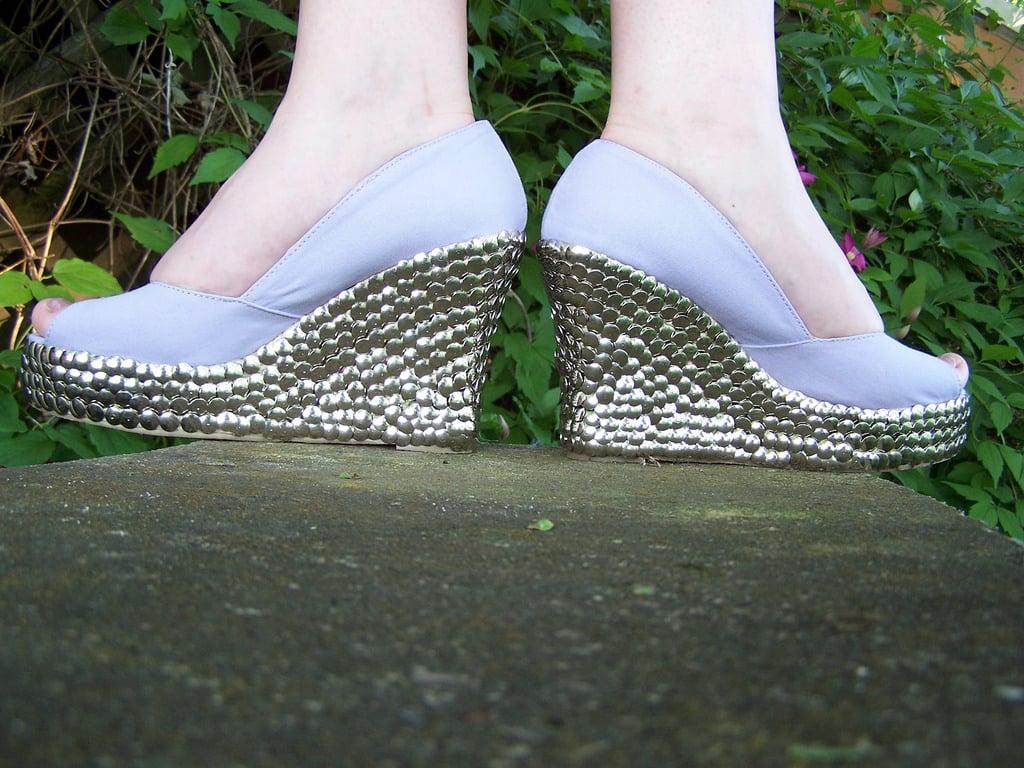
Gorgeous! The lavender canvas gives them this sweet girly vibe. But holy heck, that’s a lot of tacks!
and, for the top slot,
This is so incredibly like the original I had to look twice. What a fabulous job!!
Thank you so much for sharing, and please enter any other projects you have in my next DIY roundup!
If your project has been featured above, feel free to grab the button below.
xoxo
Carly
Jul 16, 2010 | DIY
To continue on in the theme of strange things to wear on your wrists…
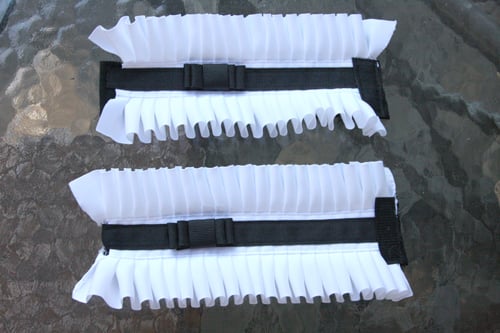
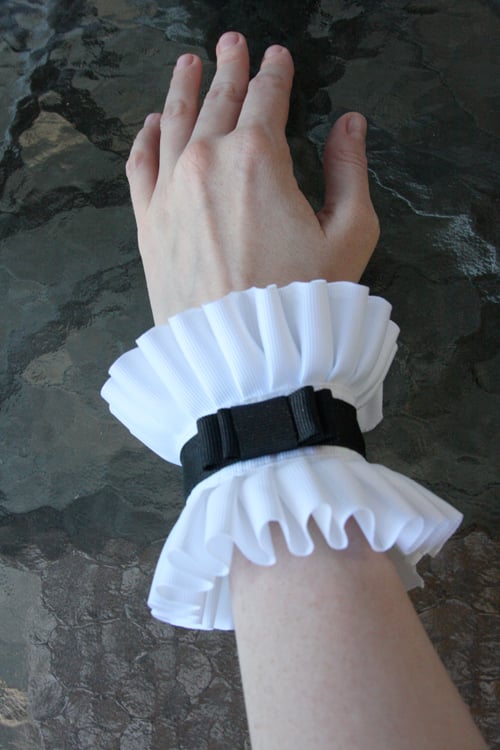
I’d like to share with you how to make your very own pair of pleated wrist cuffs.
As an accessory they may be somewhat unusual – but maybe you noticed them on China Chow from a previous episode of Bravo’s Work of Art? (Episode 3; the one where the artists have to create a piece of art for a book cover; I can’t find the screencap from Bravotv.com. She’s wearing them though!!)
They’ve been seen on celebrities such as Audrina Patridge and Brooke Hogan, courtesy of Cuffs Couture, but at $58-$90 for a single cuff I find this brand a bit out of my budget.
I actually saw the cuffs I got the idea from in a February 2010 issue of Vivi magazine, and thought they were a great idea to wear with bare arms to add a bit of romance to an outfit.
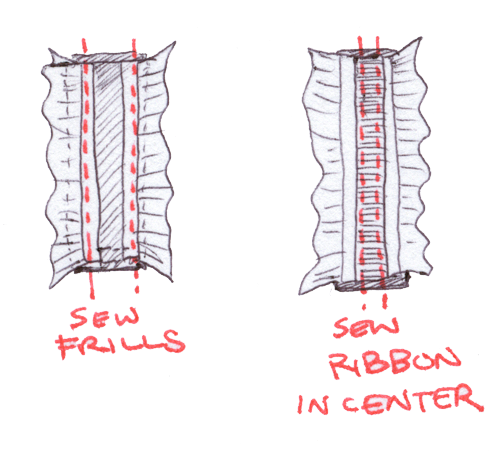
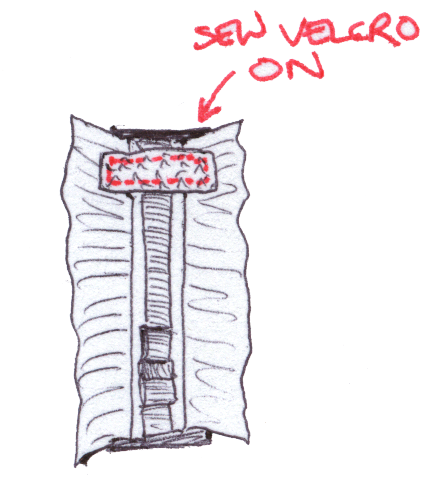
You Need: (sorry for the hand-drawings, I didn’t photograph the step-by-step)
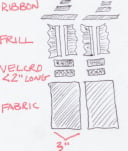
*2 pieces of black woven fabric, each about 3″ wide and long enough to wrap loosely around one wrist with about a 2″ overlap
*2 sets of black velcro strips (the furry side and the hooked side = 1 set), each about 2″ long
pleated white trim (mine was grosgrain ribbon trim I found at Jo-Ann’s Fabrics, though if you can find pleated silk or cotton that would be soooo much better)
*black grosgrain ribbon, 1/2″ wideAnd…
*fabric scissors
*flame
*sewing machine and needle for wovens
*hand-sewing needle
*black thread
*white thread
*fabric glueHow To:
1. Turn under all the raw edges of each fabric piece about 1/2″, and sew.
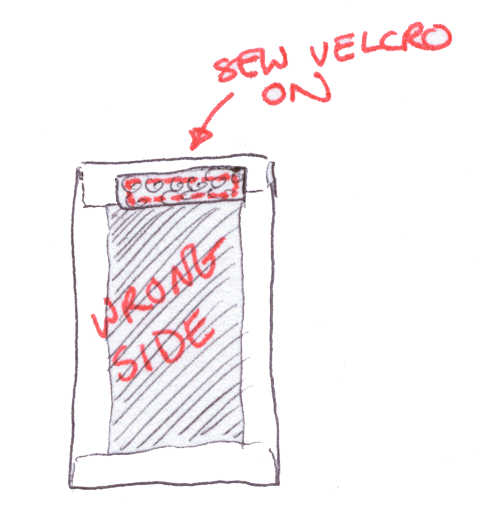
2. On the underside of one of the smaller ends of a fabric piece, sew a piece of velcro (the furry side out). Do the same for the other fabric piece.
3. Cut 2 pieces of your black grosgrain ribbon and 4 pieces of pleated trim to the same length as your finished fabric pieces.
Use an open flame to heat-seal the edges if they are synthetic fibers; if cotton you will have to either fold the raw edges under or seal them with Fray-Check.
4. Sew 2 pleated trim pieces onto each long side of one of the fabric pieces. Place them just far apart enough so that the 1/2″ wide ribbon placed in-between them will just overlap them in the center. Do the same for the other fabric piece and remaining pleated trim.
5. Sew each piece of black grosgrain ribbon down in the center of the fabric pieces.
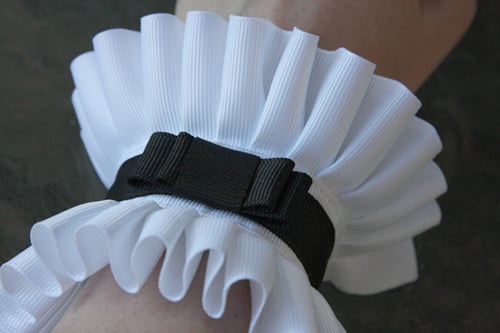
6. Make the bow: (For my bow I made two loops; one a little smaller than the other, and placed them on top of each other, gluing the top loop onto the bottom one, then wrapping the center and securing with stitching underneath. You can make two or one or however many loops you want! The methodology is the same anyway. The following directions are for a single-loop bow🙂
*Cut a 2.5″-long piece and a 1.5″ piece of grosgrain ribbon. Double-thread your hand-sewing needle with black thread, and double-knot the end.
*Create a loop with the longer piece of ribbon, underlapping the ends.
*Push your needle into the underlapped pieces to the inside of the loop, then back through and out, pulling the knot tight onto the ribbon underside.
*Pierce the end of the smaller piece of ribbon and push it all the way down to anchor it onto the underside of the loop you just made.
*Curl the small ribbon around the loop, and anchor the other side of it with the needle and thread.
*Sew an X through all layers except for the tops of the loops, knot, and cut the thread.
*Make one more bow.
7. Use a dab of fabric glue to glue each bow onto the center ribbon of each cuff.
8. Sew the other velcro strips onto the opposite ends of the fabric cuffs, onto the right sides, the hooked side facing outwards.
Each cuff is fastened by pressing the strips of velcro together on the underside of your wrists.
The stiffness of the ribbon pleats makes it stand out from the wrist more than I had hoped, thus something that is softer or thinner would be a better choice for the pleating. You could even make the pleating by hand (with the help of an iron) if you were particularly hardcore.
I think they look equally as good with a casual ensemble as with a slinky LBD!
Hope this has inspired you to make your own!
Happy DIY’ing!
xoxox
Carly
~If you liked this post, please share it!~
Save
Jul 15, 2010 | DIY
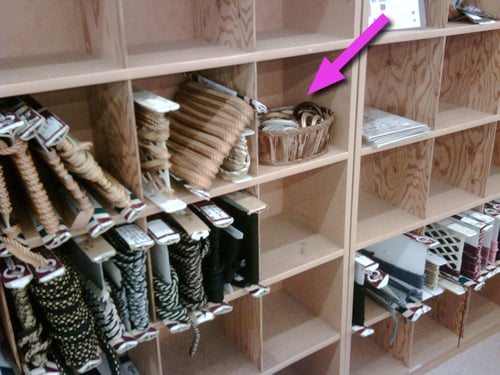
The other day I was just browsing in my local fabric and notions store, and something in the interior fabrics and curtains section caught my eye.
Yes, this little basket. Full of wooden and antiqued curtain rings for super-large curtain rods.
Gold, bronze, and bone craquel enamel carved rings, and dark wooden rings.
It was like a basket full of happiness.
Not that I was really looking for curtain rings. I just had my cheapskate ‘n’ DIY thinking cap on.
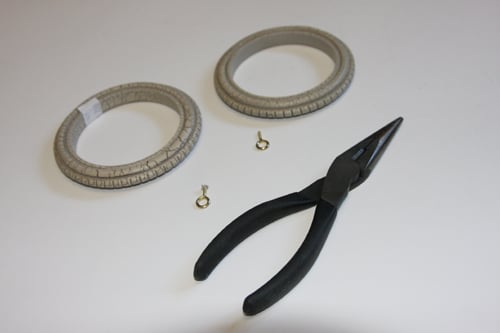
These curtain rings are so beautifully unique with the enamel craquelure! I’ll just remove the eye screws…
And now I have a one-of-a-kind pair of boho bangles!
You can also find large rod curtain rings in flea markets, antique stores, and interior hardware shops, so keep an eye out and your cheapskate cap on…
Though at $2.50 apiece maybe Forever21 is cheaper??
xoxox
Carly