Jul 8, 2010 | DIY
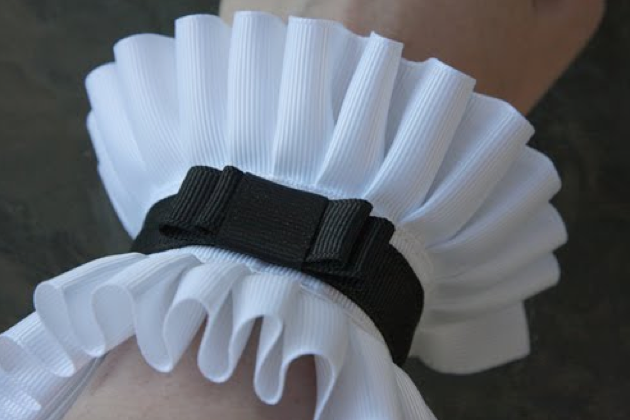
Well everybody, since I’m on the other side of the world I have no idea what time it is – but I have the feeling it’s time for another DIY Roundup! First let me share with you a recent piece I made (tutorial coming soon). It’s a cuff made of pleated trim and grosgrain ribbon – and it’s a cute little accessory that adds a touch of femnine whimsy to an otherwise plain outfit.
So now you get to share your own DIY’s! If you have a DIY project or tutorial, please feel free to link below! (However you can only link YOUR OWN PROJECT. Please do not link others’ projects!)
If you’ve linked up your project to the Roundup, feel free to grab the button below.
Can’t wait to see everyone’s projects!
xoxox
Carly
Jul 8, 2010 | DIY, From You
from formspring.me:
Any suggestion to DIYing something like Sergio Rossi’s Powder suede and nappa silk fishnet booties with crystals? http://www.sergiorossi.com/us/en/eStore/women/women-shoes-SpringSummer2010-Collection/Boots/P-PELLE-Powder-Suede-Nappa-Silk-Fishnet-Bootie-C
Jul 8, 2010 | DIY, Media
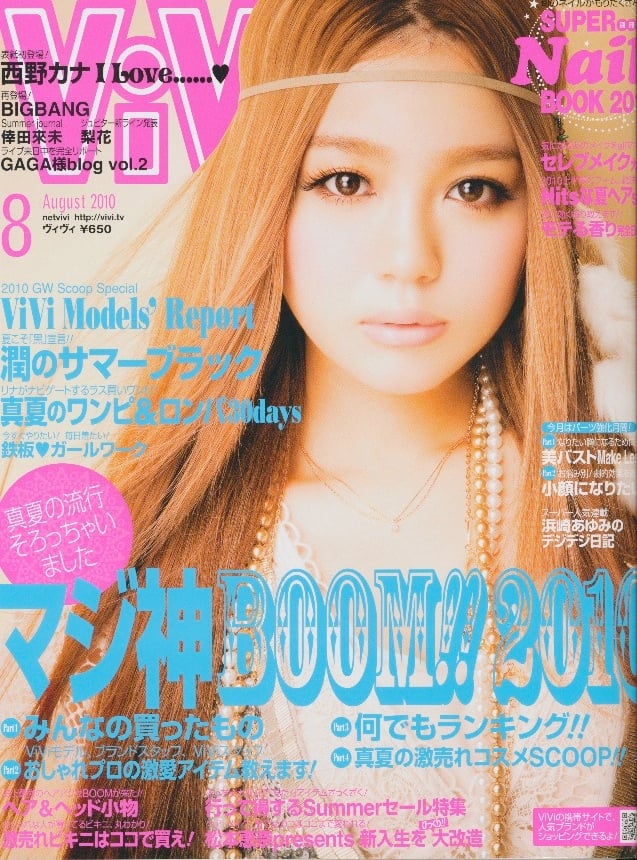
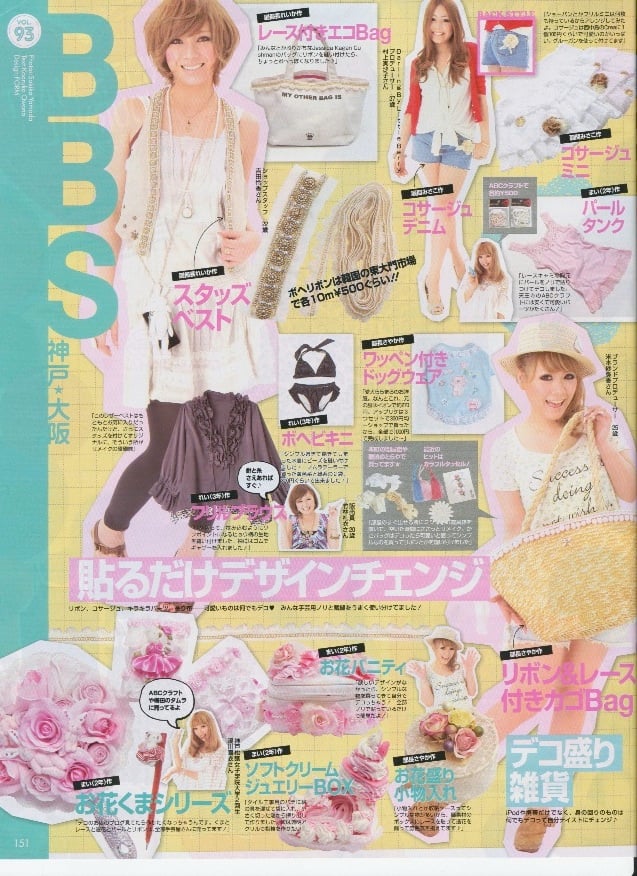
Not, not of me. (I wish!!) I was very surprised to see in the August issue of Vivi magazine, no less than TWO DIY features! They call it “Deko” (short for “decoration”)…but it’s DIY, to be sure.
Times are totally a-changing!
Yup, that model on the far left is part of the DIYers since she actually painted on her Balenciaga. The heart trembles.
If you’re familiar with Vivi, it’s a fashion-forward, extremely trendy Japanese magazine (kind of like Marie Claire…kinda…but with few written features, crammed with product shots and street style photos, as well as the same familiar models wearing the latest and trendiest) – and it’s packed to the gills with trendy photos of all the latest clothing, shoes, and accessories. It’s a consumer’s heaven!
Unlike the Gothic and Lolita movements in Japan, where many followers are extremely crafty and make their clothing, accessories, jewelry, and bags from scratch (and there are many magazines devoted to this…my fave is ‘Gosu Rori‘), the trendy “Gal” – style has never espoused making anything yourself…unless it’s wildly complicated nail art, or maybe, recently, adding Swarovski crystals and deco objects to your cell phone, compact mirror, pen, business card holder, or date planner. (“Deko”; i.e., “deco”rating your accessories with crystals and plastic objects, has been a trend for the last two years, but it didn’t seem to reach beyond the ream of blinging out your accessories.) Nope, its mantra was “buy, buy BUY!” and where to buy, what’s the newest, what’s selling the most, how to navigate a sale, etc.
Above, from right to left: Frill Socks by adding lace; Super Destroyed Denim by cutting and bleaching: M.J.-Style Oxfords by adding crystals; Studded Vest by ironing on stud trim
Since the mid-nineties (or even earlier), there has been a “remake” subculture, mostly centered around Harajuku, where girls and guys would refashion their clothing and accessories – upcycle them, if you will. Many shops in that area solely deal in used clothing and upcycled clothing, and there are quite a few brands that create fashion-forward, gorgeous pieces using only recycled materials. (guriguri is one of my ABSOLUTE FAVES – their bags are to die for, and with a price tag to match.;-)
Above, from right to left: Fabric-Lined Basket Bag; Lace-Trimmed Shirt; Metallic Trim Headband; Lace-Inset Tee
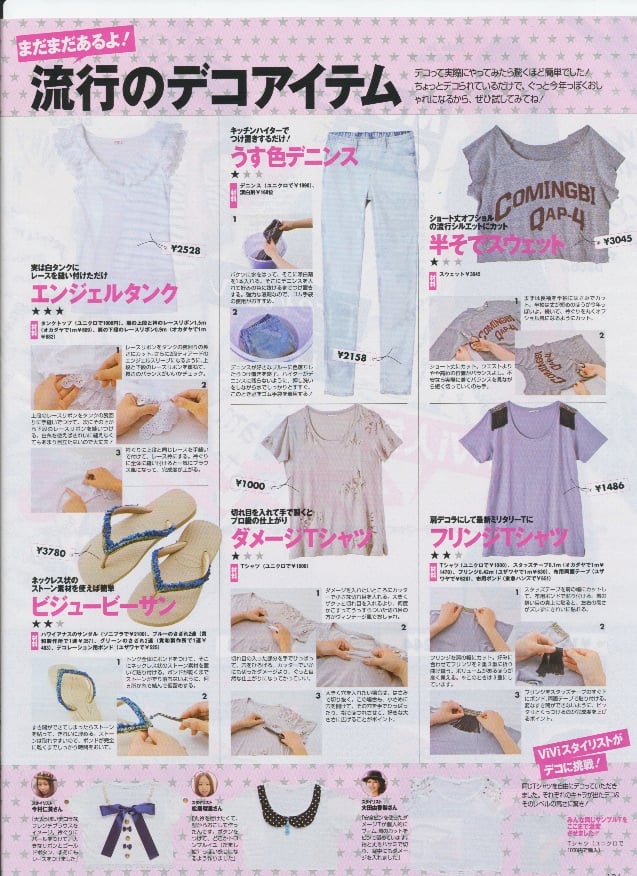
But this is not making items from scratch, like the Gothic Lolitas; nor is it upcycling, really. It’s unequivocally D.I.Y.: i.e., adding low-cost embellishments and using a variety of techniques to add value and trendy style to a piece.
“Trendy DIYs”: (clockwise from top right) Short-Sleeve Sweatshirt; Fringe-Shoulder Tee; Damaged T-Shirt aka the Balmain; Bejeweled Sandals; Frilly Lace Angel Tank; Bleached Denim.
Bottom Row, left to right: “3 stylists take on a plain white T”: French Blouse with pearls, ribbon, and gold buttons; Fabric-Collared Button Tee; Shredded and Safety-Pinned
So this is HUGE for all this to be in such a mainstream mag. The projects are cute and still look “Japanese” (though many of us out there who’ve been following the DIY movement on the internet and blogosphere can say that we’ve seen a lot of this already)…but this is a huge leap forward in terms of attitude and fashion-consciousness for this style. It is yet anther facet of consumer culture (instead of buying the piece ready-made, you now have to amass the tools and materials to add to the store-bought item), so it may indeed start spreading through this subculture, so focused as it is on “new” and “trendy” and “pretty/sexy.” I am so keeping tabs on this!
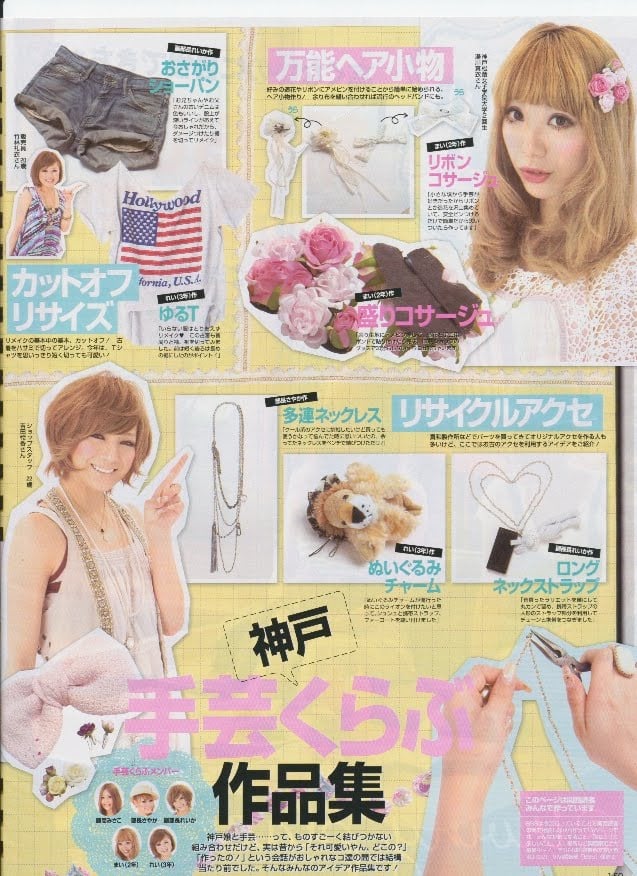
The second feature in the magazine: reader-submitted “Kobe Craft Club” (a group of girls who get together to do DIYs – like the Japanese version of the SixSixSick girls?!): (from top left, clockwise) CUT OFF/RESIZED DIYs: Loose Denim Shorts; Loose T; GENERAL HAIR ACCESSORIES: Ribbon Corsage; Flowered Corsage; RECYCLED ACCESSORIES: Triple-Chain Necklace; Stuffed Animal Charm; Long Necklace Strap
I do wish that one of the features had made mention of these projects that have already been shared on the internet by many other crafters, and offered no resources for people who are interested in DIY’ing more. And I certainly doubt Tavi, Keiko Lynn, and Julia Frakes being icons of DIY – though all their blogs are arresting and creative for other reasons. Another disconnect that Japanese pop culture seems to have with the rest of the world. Ah well. Things are definitely moving forward!
from top left, clockwise: Lace on a Canvas Tote; Corsage Denim Shorts; Corsage Mini Skirt; Pearl-Embellished Tank; Applique Patch Dog Clothing; Ribbon & Lace Dresses Basket Handbag; Flowered Box; Softserve Ice Cream Jewelry Box [the epitome of the
Sweets Deko movement of the last 2 years]; Flower Makeup Pouch; Flower Bear Series mirrors; Frill Blouse w/ Leopard Hem; Beaded Bikini; Studded Leather Vest
I also found a book at the bookstore called “Deko Remake” which appears to be the official designation for DIY’ing your clothing and accessories (thus distinguishing it from the Japanese “Deko” bling embellishment movement and from the “remake” or upcycle movement)…more on this book and its contents later.
xoxox
Carly
Jul 7, 2010 | DIY
After a fairly uneventful flight (no passing out in the aisle this time; the only thing that happened was the entire left side of the plane from row 35 back had no armrest power – so no light, no attendant call button, no radio, and no sound to the overhead movies, which made passing the 10 hours on the plane pretty much like pulling teeth)…I have finally arrived in Japan. It’s like wall-to-wall humidity that plasters your hair to your face and has mosquitoes swarming on you the moment you step out the door. Lil Tot has, amazingly, suddenly become incredibly talkative and can actually carry on an intelligent, logical conversation in the 2 weeks he’s been here. His comprehension, vocabulary, and maturity skyrockets whenever he spends time here.
Anyway, I wanted to share with you what I made before I left Oregon.
I was playing around on the computer the other day and made these.
I’ve had a pack (a measly 3 sheets for $10!!) of printable inkjet tattoo paper for awhile and had been undecided on what to make. (I’m not really a tattoo person – I’ve always felt that since I have freckles I really don’t need any more marks on my body;-) …But once in awhile I’ve liked wearing a stick-on tattoo, just to change things up.) 
Collage from Fashiontribes.com
Since the Fall ’09 Chanel Couture Runway show, I’ve been coveting those pearl necklace and chain bracelet tattoos…but there’s no way I’m going to blow $75 on the set now available at retail.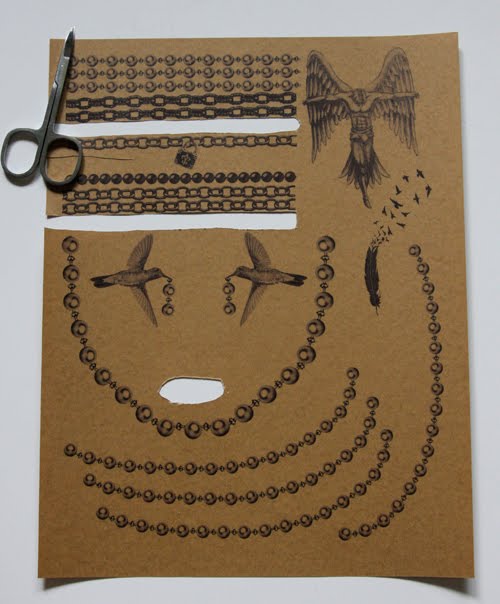 So… (surprise, surprise) I decided to make my own with the printable tattoo paper. I found some tattoo images online here at Inkwear Tattoos, and collaged them together with other images from the Inkwear catalog.
I was sooooo psyched since the final printed product looked pretty awesome. But my good mood ended when I cut out the tattoos and tried to apply them.
I always thought that if I ever did decide to get a tattoo, I would have the word *lifeline* tattooed on my right wrist. My hands are the source of all my creativity!
They’re stickers. No matter how closely you trim the tattoo, it’s made up of this clear film that’s extremely obvious and tacky. (Also visible in any gaps in the image.) White spaces will of course, not print. You do not apply with water – you just peel and stick – which means that they will come of the next time you take a shower. Oh, and you can’t get any water or moisture on the image because, since it’s inkjet ink, it will just smudge.
You can see the edges lifting up already.
What a junky product! As I wore throughout the day, the stickers just got increasingly wrinkled and lifted up at the edges, snagging in my clothing and hair.
What a disappointment. By the end of the day, I peeled some of them off before I took a bath, but the wrist tattoos I decided to remove as per the instructions: soap and water. BIG MISTAKE. They dry tattoos peeled off fine, but once I used soap and water, the tattoos when wet became a gluey, sticky, smudgy, runny mess, and my skin got really red where I had to rub to abrade them off.
Utterly sad. I would definitely NOT recommend these Cre8 Ink Jet Tattoo Sheets at all.
I did find online there are some e-stores that will print temporary tattoos for you – though I wonder if they’re the same, single-use stickers? (From the online description is appears they are not.) Does anyone have any experience with this?
(And if you are wanting to purchase from Inkwear Tattoos to get the original images I used, they deliver worldwide, so you could potentially buy some sets from them and get them delivered to you instead of going the DIY route!)
xoxox
Carly
Save
Jul 3, 2010 | DIY
I guess with summer in full swing everyone’s out and about, and not so able to get projects together. I had hoped that this time we’d have even more projects to share with one another, but this time there were only 11.:-(
But in any case, I had a great time visiting all your blogs and checking out your pieces. You’re all so creative! Here are the top 3, as measured by user clicks:’
I swear, it looks JUST like ready-to-wear. What a fabulous, chic job!
My first thought was “turtles?” Then I see they’re the pendants at the bottom. Very cool.
and, for the top slot,
This is super-cute and I love the Victor/Victoria vibe. She could totally sell these and rake in the cash!
Thank you so much for sharing, and please enter any other projects you have in my next DIY roundup!
If your project has been featured above, feel free to grab the button below.
xoxo
Carly
Jul 3, 2010 | DIY, From You
from formspring.me:
hey carly! any advice on how to diy this dress? http://lookbook.nu/look/813921-Romantic-floral-dress-and-Balenciaga Thanks!
Hi there!
I’m having a lot of trouble seeing the dress up close from the photo. It looks like a simple tube dress – but could it be constructed from multiple tiers of fabric? If you are wanting to create those tiers (i.e., likely a single piece of fabric with horizontal pleats) this is an extremely time-consuming piece. You could do this one of three ways:
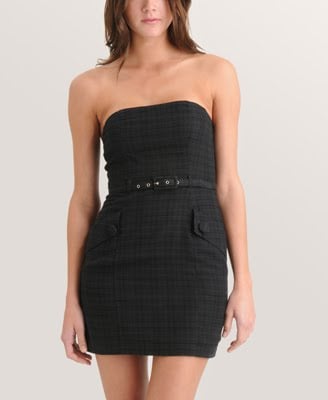
1) [USING A BASE DRESS] Take a similar, well-fitting, cheap woven tube dress, like something from Forever 21, (like this plaid dress, above) and use it as the basis for your pattern. Rub off the shape for the front piece and the shape for the back piece onto a piece of paper. Then cut your paper horizontally in to 1″ increments. Add 1″ in-between, taping in more paper. Add the proper shape of the seam allowance to the edges to allow for the under/overlap of the pleats. Do the same for front and back pieces. Trace onto floral fabric, marking the bottom of each of your original 1″ cuts. Then pleat at those marks, pressing with an iron to set the pleats. Sew fabric pieces onto your Forever 21 dress.
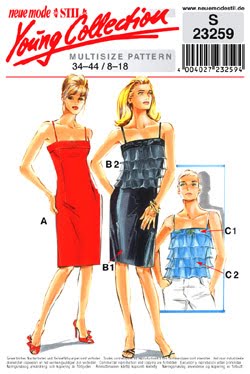
2) [FROM SCRATCH] Alter a store-bought pattern in the same way as above to the outer pieces, cutting horizontally, adding paper, fixing the seam allowances, tracing onto your outer fabric, cutting, pleating, and pressing. You would make the inner (if there is one) exactly as in the pattern, and join the outer to the inner.
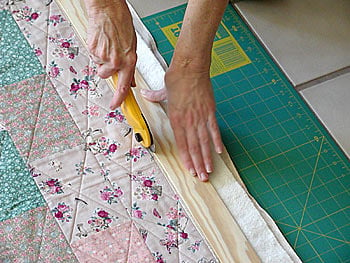
3) [NO PLEATING] Or, alternatively to not use a single piece of fabric, you could take a piece of that floral print, and cut it into 3″ horizontal strips (you’d need at least 28 strips, judging by the photo, and you’d have to adjust accordingly to how long you want your dress). Then you’d have to fold each strip in half vertically, and press that crease flat. Then you’d have to sew each piece onto your cheap Forever 21 base dress, starting at the bottom, going all the way around, and overlapping the strips vertically by 1/2″. Where they meet in the center back you’d have to leave about 1/2″ unsewn to either side of CB, trim and fold the sides of your strips under themselves, and then topstitch to the CB, and to either side of the zipper once you get to that point.
However you do it, you’re looking at hours of tedious precision work. The best fit will be accomplished by option 3).
If you just want a floral tube dress and don’t care about the tiers, you can just cut up a similar store-bought floral dress and anchor the top with elastic to keep it up. Or you could make one from scratch with a store-bought pattern.
Hope that helps!
xoxo
Carly








 , $9.99, Amazon.com.











