May 28, 2010 | DIY
 These sunglasses (a dupe of the Alexander Wang for Linda Farrow zipper sunglasses) are a bit fiddly to make, but the results are totally impressive! My tutorial was featured in Free Magazine, the official magazine of Club 18-30.
 Those of us stateside may not be familiar with Club 18-30, but for our friends across the pond it’s sort of known as Europe’s version of Club Med (except catering to a younger clientele, hence the name).
My DIY Alexander Wang Sunglasses have been featured in the Summer 2010 issue, which is available in all Club 18-30 destinations from May – October. (Available in 10 countries, including Bulgaria, Crete, Cyprus, Turkey, and Ibiza.)
Unfortunately they spelled my name wrong (there’s no U in it) – but ohwell! A feature’s a feature!
Since I submitted this in February, in the meantime Style Hurricane also DIY’ed her own version using a real zipper around the edge of the sunglasses.
My version is a lot more labor-intensive, but I was going for as exact a copy as possible.:-) Whichever way you go, now these fabulous designer-style sunnies can be yours at a fraction of the price!
Happy DIY’ing!
xoxox
Carly
Leave Comment
May 15, 2010 | DIY, Media
Wow! I’ve been waiting with baited breath for this to post….I wrote all the content for my DIY tutorial section back in January, and due to some difficulties with the cover, the online issue took longer than the anticipated February drop. (Do you see the sub-headline “CHIC STEALS: Make Your Own Catwalk Couture” on the left side of the cover??!)
Yup, there I am – middle right! And the features I contributed below:
I’m so amazed to be in the same issue as the talented Tarina Tarantino, and I love how the editorial team laid out my section!
My tutorials featured in this issue (I’ll be re-posting to my site here a little later):
Styling Tips
Definitely browse on over to Cut Out + Keep and enjoy the full issue cuz I know the images above are hard to read…and if you’re not a member of COAK, please join! It’s a heck of a lot better than Craftster’s interface, and has more tutorials, DIY’s, and inspiration than you can shake a stick at.
Thank you to all the folks (especially Cat!) at Cut Out + Keep, who made this possible! I’m so thrilled to be a part of it!
xoxox
Carly
Leave Comment
May 15, 2010 | DIY, From You
She’s referring to the above booties.
I received the following question on formspring.me:
Hi! I adore your blog; your DIYs are absolutely fabulous! Anyways, I fell in LOVE with your booties from “How to Make a Pair of Boot-Covers from a Leather Jacket.” Where did you get them?! <3 always, Kaelie
Hi Kaelie! Thank you for your kind words!
Those booties I bought from Forever 21 – in early November 2009. I haven’t seen them since on the website or in the stores, but maybe there’s Ebay? I will mention they are the most hideously uncomfortable shoes EVER – there’s no padding in the sole, so you can feel the ground as you walk on it…and the top of the shoe is cut too high and grates on my ankle bone with every step I take. (You can see it digging into my ankles in the above photo.) The toe-boxes are also made too narrow…ick. They look pretty, though!
xoxox
Carly
Leave Comment
May 14, 2010 | DIY
I’ve been on the fence regarding these boots for awhile because to me, they fall into what I call the “split personality” category: where something looks totally different from the front as it does from the back or the side. These shoes look so chic from the front – but from the side I always felt the heel was a bit too low and clunky-chunky. I just wasn’t into the shape of it – but still wanted a pair of open-front booties for the warmer months of summer.
I was planning on doing a DIY of this style by just buying a pair of boots which had the pieces anchoring the laces separated a bit, with a single piece of material as the toe-box and tongue. (All you would need to do is cut out the tongue and toe box, leaving the sides and laces intact.) But even I’m a sucker for a cheat – if there’s an easier way to do something, I’m all for it!

Enter Forever 21‘s Lace-Up Sandal Heels. As soon as I saw them, I knew they would be perfect – as the only DIY’ing that needs to be done is eyelet punching. Yay for simplicity! I bought them and then set them on my “DIY’s to Do” desk and left them there for a bit while I was too sick to really bother about making things. In the meantime, The Look 4 Less answered a reader question who was searching for an alternative to those Ann D’s with a recommend for the exact same Forever 21’s I had snagged. (Cripes, I’ve searched for over an hour on their site to find the post, but can’t. Sorry!) Well, I’ve been beat to the punch but it finally provided the kick in the pants I needed to do the DIY for these iconic shoes. Very simple (but your hands will hurt afterwards!)
You Need:
*Forever 21 Lace-Up Sandal Heels
*rotary leather punch
*a pack of small silver-tone 1/4″ eyelets (if you can get 2-part grommets, so much the better! I couldn’t find them at my local Jo-Ann’s…Jo-Ann’s = argggggh!)
*eyelet/grommet setter (I used setting pliers)
*small scissors
*pliers
How-To:
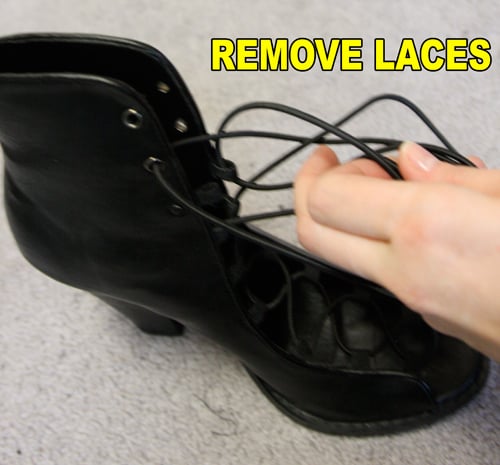
1. Remove laces from the shoes.
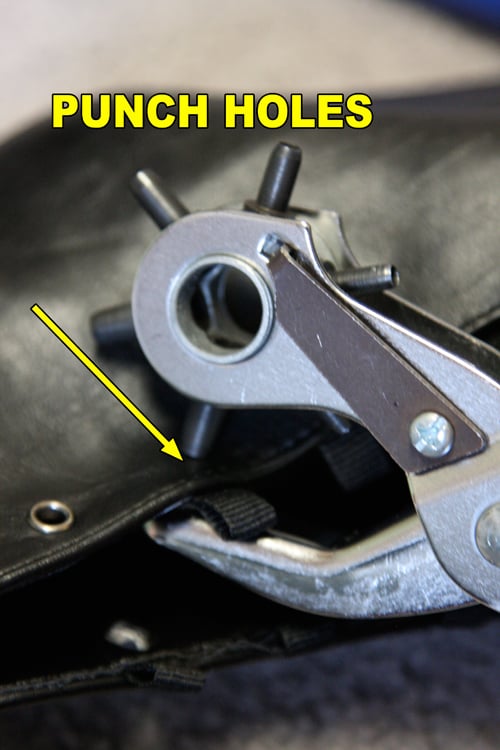
Using the rotary leather punch, punch holes in the shoe leather about 1/4″ from the edge, where each ribbon lacing anchor is located. I used the second-largest punch on the rotary.
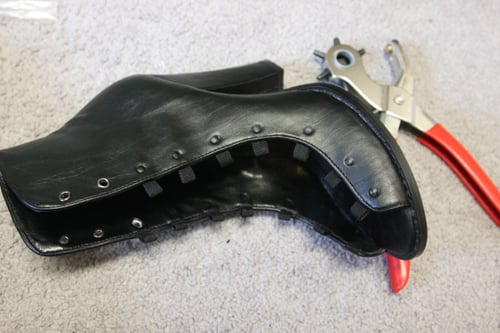
As you can see, the punch doesn’t go all the way through the leather in most cases. (I also then applied the punch from the inside of the shoe for each hole.)
2. Use the small scissors to cut out all the extraneous material that wasn’t punched out of the holes by your pliers – there’s a couple layers to go through, including the outer vinyl, inner lining vinyl, ribbon ends, glue, and in some cases, the inner buckram stiffener, and usually, the pliers can’t handle it.
3. Use the scissors like an awl, and twist them back and forth in the holes to stretch the holes a little larger.
4. Use the scissors to cut off the protruding ribbon ends – what the Forever 21 boots used as lacing anchors for their laces.
5. Set the eyelets (or grommets!) in each hole. Since the eyelet plier setter is a sucky piece of equipment, and the eyelets are equally sucky, I had to go back in with pliers and press down the backs where the eyelets split, leaving jagged metal edges. If you’re using better-quality tools and eyelets (i.e., not Dritz brand) you probably won’t have this problem.
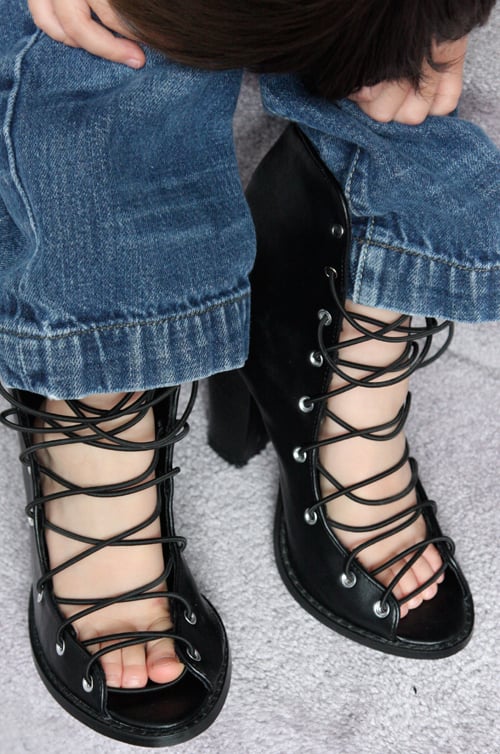
6. Thread the laces through the eyelets in a zig-zag pattern.
Wear proudly! They’re pretty darn good doppelgangers, and the heel is now a little more tapered and chic.
Love!
Not feeling very photogenic today.
And Lil Tot was so enamored with them that he wanted to pose wearing them as well.
Not sure why his pants are undone. He doesn’t seem to like pants much, considering that the few times I’ve shared his photo on this blog he’s pantless.
Appeals to all ages!
xoxoxo
Carly
P.S. And if I never have to spell “Demeulemeester” again, I will be one happy lady.;-) That, and if I could just get Lil Tot to wear pants done-up for a photo op.
Save
Leave Comment
May 9, 2010 | DIY
Like I wrote in an earlier post, I’ve had flowers on the brain. (Thus all those fabric flower patterns in that post, and in my Threadbanger roundup.) I was going to do these as a DIY tutorial for my Tuesday Threadbanger post, but then realized they weren’t really worthy of a full-fledged tutorial. I got the idea from a lovely pair of furfur flowered ballet flats I spotted online recently. (I do love furfur!) To make them was almost embarrassingly easy, but here’s the how-to if you guys are interested:
You Need: (more…)
Leave Comment
May 5, 2010 | DIY
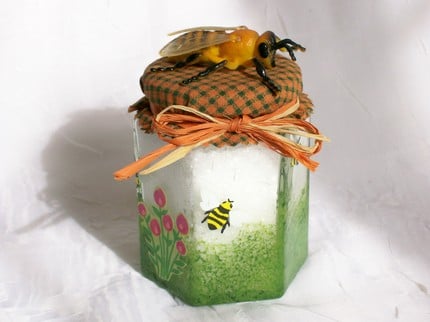
With Mother’s Day just around the corner, probably the biggest question on everyone’s mind is what to get for the mother in their lives. DIY a lovely gift for a Mom of any age – using fabric and glass, two of the best materials known to the modern gal. Here’s an internet roundup of some great projects to create flowers that last forever, and beautiful jars to display them in or use as knicknacks around the house:
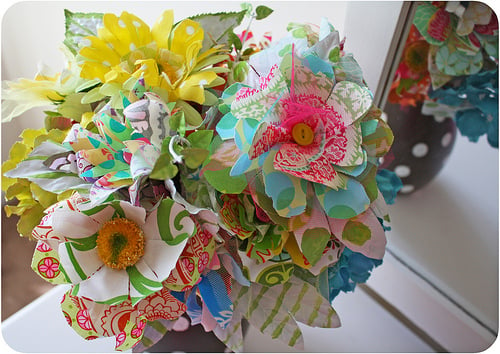
Happy Together makes a beautiful bouquet out of multilayered fabric flowers by tracing the shapes of store-bought flowers to make a pattern.

If you’d like some patterns for making fabric flowers without having to sacrifice store-bought blooms, I’ve shared a few patterns for a camellia, carnation, dahlia, and lush camellia on my site Chic Steals.

If you’re looking for rose-making how-to’s, here’s a tutorial on DuhBe for a satin rose bloom, a Rolled Fabric Rose tutorial downloadable pdf from Portobello Pixie, and a Tattered Fabric Rose Tutorial from Everyday Chaos.
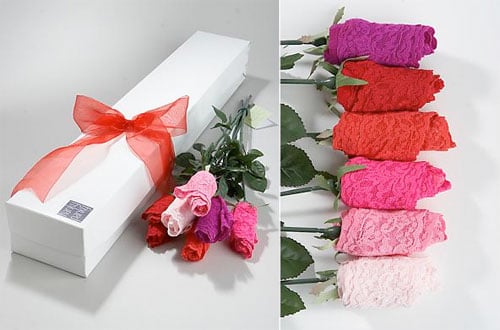
You can also buy small fabric gifts for Mom (decorative pouches, stockings, scarves, underwear * o * …) and roll them up tightly to make your own rolled rose bouquet, adding straws, wrapped wire, or takeout chopsticks for stems. (Taking a leaf from Hanky Panky, seen above.)
Now as to what to put your lovely flowers in…
And if you want to go all-out and present in a beautiful vintage-style faux blue mason jar, Bridal Buzz has the how-to for ya.

To take a break from the “must give flowers for Mother’s Day” mantra…what not think a little out of the jar box? If Mason jars are on your mind, maybe Mom would love this handcrafted terrarium that Craftzine can help you with?
The Home-Made Sun Jar from Instructables user cre8tor is another fabulous use of the jarred variety.
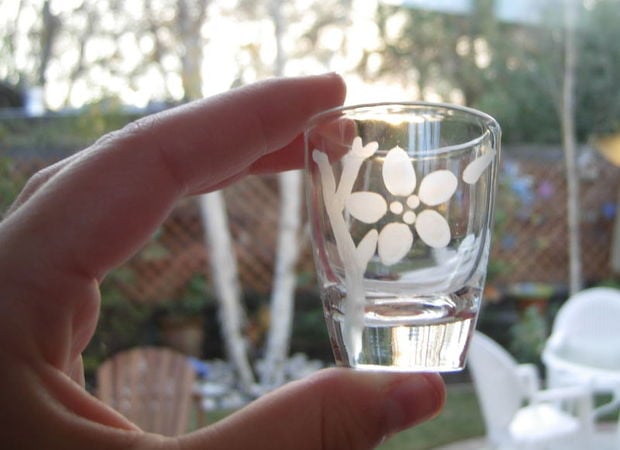
You could also make Freehand Etched Glass Votives, thanks to Instructables user Robyntheslug.

Or, you could make hand-poured candles in jars, courtesy of Centsational Girl.
Bath salts…bath fizzies..bath bombs…lotions…find every single recipe you could ever want for home-made bath & body products at Craftbits.com, and present in a beautiful jar.
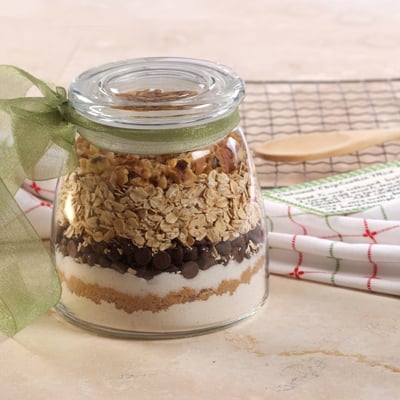
Or even a jar of a homemade cookie mix, granola, or hot cocoa might work well for a mother with a sweet tooth. (Guilty!) See RazzleDazzleRecipes for a ton of great cookie-mix-in-a-jar recipes.
And isn’t this ingenious? Cupcake in a Jar recipe, courtesy of MyCakies.Hope that’s planted some seeds for some great DIY ideas for Mom…and if your Mom isn’t the type to swoon over flowers or decorate with jars and knicknacks…well, there’s always a gift card to Amazon.com, right?
Have a Happy Mother’s Day!
xoxox
Carly
top image from stockphotopro.com
as posted on Threadbanger
Leave Comment

 Those of us stateside may not be familiar with Club 18-30, but for our friends across the pond it’s sort of known as Europe’s version of Club Med (except catering to a younger clientele, hence the name).