Apr 1, 2010 | DIY
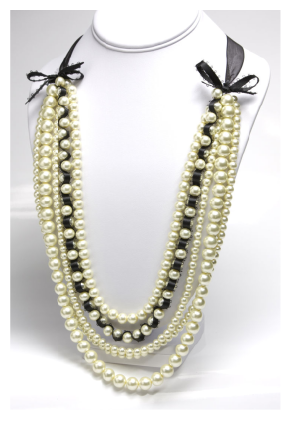
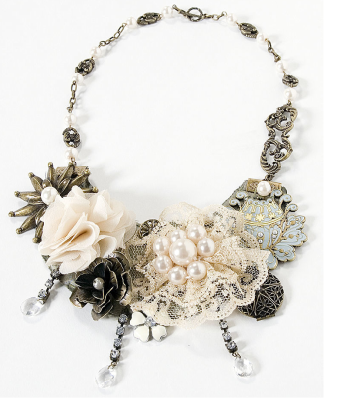
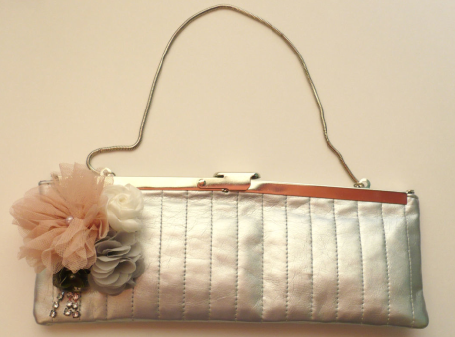
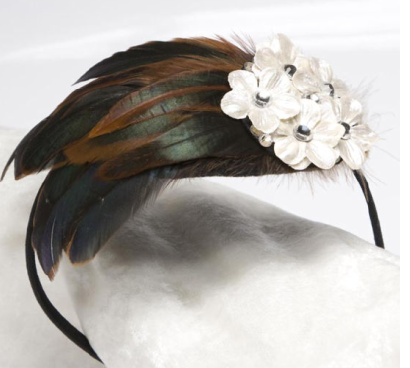 White Flowers and Feathers Fascinator
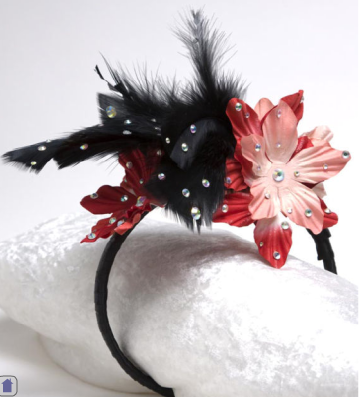 Red/Black party Style Fascinator
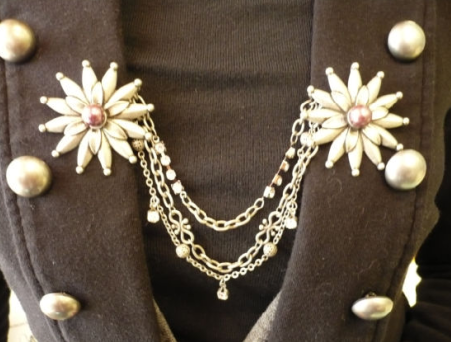 Sweater Clip
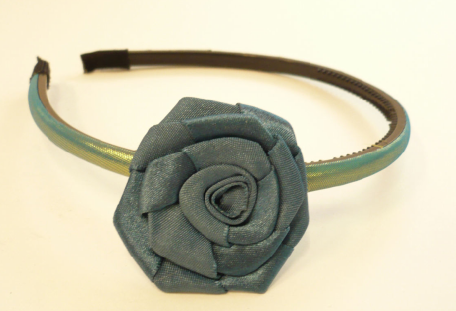 Flower Headband
For all you DIY’ers out there – click on the name of the item for the how-to instructions. Hope you enjoy!
xoxox
Carly
~If you liked this post, please share it!~
Leave Comment
Apr 1, 2010 | DIY
…Relatively healthy, I suppose.
I’ve seen the recipe for a ricotta-based faux cheesecake a couple places – probably starting with the South Beach Diet many years ago. This is my version – and I’m always surprised at how full I feel afterwards…the protein in the ricotta is truly filling and more satisfying than real cheesecake, I feel. (I’m not really a cheesecake-person, to tell the truth – the restaurant version always makes me feel somewhat sick halfway through.)
DIY Healthy Diet Faux Cheesecake (Like-A-Cheesecake) Recipe
(makes 1 serving)
Ingredients:
*2 graham cracker squares (or one long rectangle)
*1/3 cup lowfat ricotta cheese
*1 tsp vanilla extract
*1 1/2 tsp agave nectar (optional)
*1 tsp sugar-free strawberry (or other fruit) preserves (optional)
*sprig of mint
Directions:
1. Place the graham crackers in a bag and smash with a rolling pin until crumbs. Using the back of a spoon, press the crumbs into the bottom of a small dish.
2. Place the ricotta cheese in a bowl and add the vanilla extract. (You don’t need to be exact with the measurements; just mix and taste as you go.) You don’t even have to add the agave nectar if you prefer a “cheesier-tasting” cheesecake. Me, I like my desserts sweet, so I added a little agave nectar.
3. Once mixed, press ricotta cheese onto the top of the graham cracker crumbs. If you prefer a more solid cake, chill in the refrigerator about 30 minutes.
4. Drizzle fruit preserves over the top. (The sugar-free preserves tend to have more water than regular, and thus mimic a light “syrup.”) Garnish with mint and enjoy!
On another note, I am also totally addicted to these:

Okay, I know they’re toddler-snacks (and Lil Tot is technically no longer a toddler)…but I buy them just for me. Maybe I’ll share a few with Lil Tot…maybe.
They’re akin to Astronaut Ice Cream…well, Astronaut Frozen Yogurt (I know this doesn’t exist, at least for purchase by the average consumer, but bear with me). They’re ridiculously low in calories, have no fat, healthy probiotic bacteria, and they slowly melt in your mouth as you suck on them. And they don’t cost $5 (like a tiny little sliver of Astronaut Ice Cream does) – usually they’re 2 packs for $5 at my local supermarket, and a pack lasts quite awhile. They come in Mixed Berries, Strawberry, and Peach.
Yum.
Do any of you have any secret snacks that as an adult you’re technically not supposed to enjoy?
xo
Carly
Leave Comment
Mar 31, 2010 | DIY
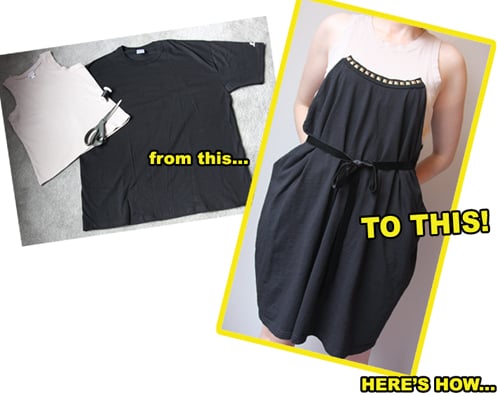
The temperature’s rising, but maybe you’ve tired of the ol’ tanktop-and-jeans ensemble. Maybe you want a go-to summer dress but still want it to be comfortable for when it gets really hot. Revamp a tanktop with the addition of an old men’s tee,** and live in soft-washed cotton comfort all summer.
**I’ve adapted this recon from the book Kakkoii Kuchuuru Rimeiku [“Cool Couture Remake”], by Hiroko Yamase [Bunka Publishing, 2009]. The book is in Japanese, and I’ve converted the sizing to Western sizing, and changed the methodology here and there. Hope you like it!
You Need:
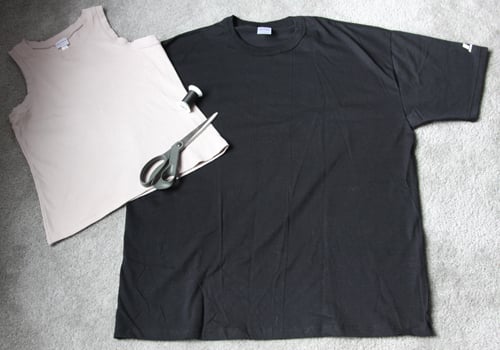
*1 tanktop that fits you well
*1 men’s t-shirt (preferably XL)
*thread matching t-shirt
*fabric scissors
and…
*marking chalk
*pins
*measuring tape

Optional:
*velvet or satin ribbon (1″ – 1.5″ wide)
*pronged studs, sew-on jewels, hotfix nailheads, or fancy trim
How To:
Prep Time
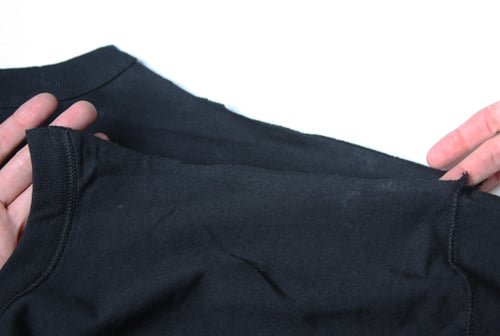
1. Wash and dry both your tanktop and t-shirt if they haven’t been washed before. Turn the t-shirt inside out and cut off the label at the back of the neck. (not pictured) Cut off the shoulder seams all the way to the sleeve seams.
Start Sewing
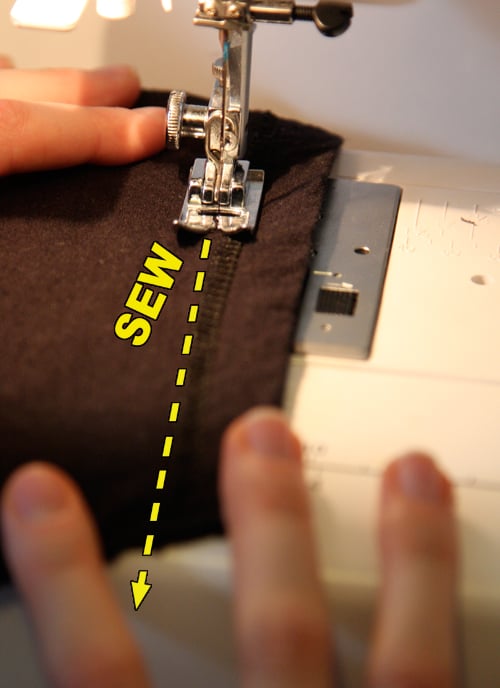
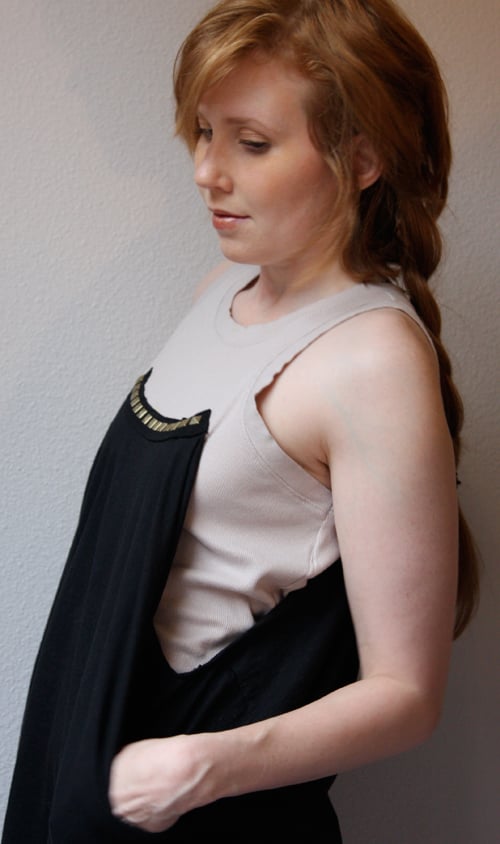
2. Sew the ends of the t-shirt’s sleeves closed, just inside the sleeve cuffs. These will become pockets.
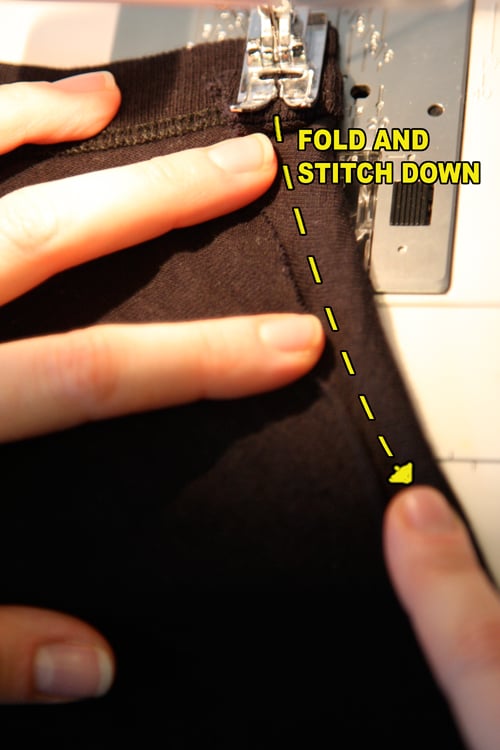
3. Fold down about 1/2″ along the slit shoulders (the raw edges) of the t-shirt, all the way around, front to back, neck ribbing to neck ribbing. Stitch down, creating a 3/8″ hem.
4. Turn the t-shirt right side out, tucking the sewn sleeves inside. Fold in half and mark the center front and center back at the neck ribbing. Do the same with the tanktop.
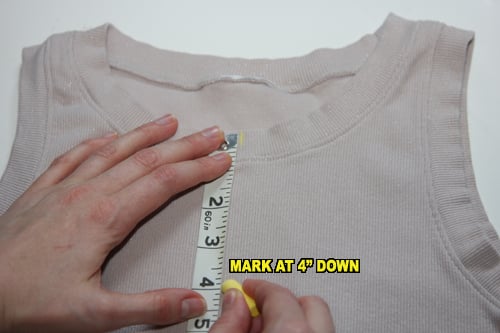
5. Measure 4″ straight down from the mark you made on both the front and the back of your tanktop. Make another mark at each point.
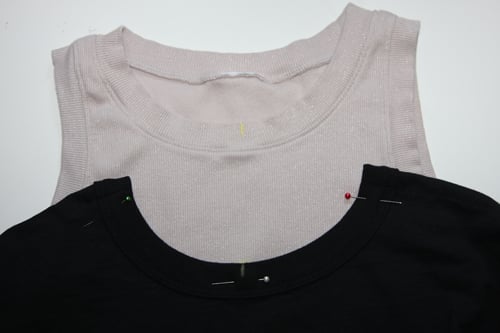
6. Place the tanktop inside the t-shirt. Line up the center front of your t-shirt on top of the mark you made on the center front of the tanktop. Pin in place.
7. Pin the neck ribbing of the t-shirt to the front of the tanktop, following the natural curve of the t-shirt’s neck. (I folded the edges of the t-shirt under about 1/2″ again, since I liked the way that looked.)
8. Repeat Step 6) and Step 7) to pin the back of the t-shirt onto the back of the tanktop.
9. Stitch the t-shirt to the tanktop, following the lines of the neck-ribbing of the t-shirt. Sew TWO lines of stitching to secure: one line at the very top of the neck-ribbing, and one line at the point where the ribbing connects to the t-shirt. Do for both front and back of your piece.
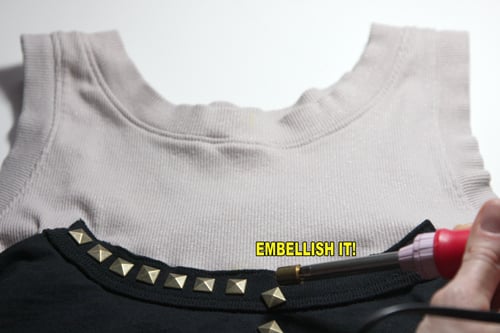
Embellish It! (Optional)
9. Use a piece of ribbon as a tie for the waist, stitching at the back to secure. (not pictured)
10. Add studs, hotfix embellishments, sew-on jewels, or fancy trim to the the tanktop neck, the t-shirt ribbing, or the hem of the garment to doll your piece up.
You’re finished!
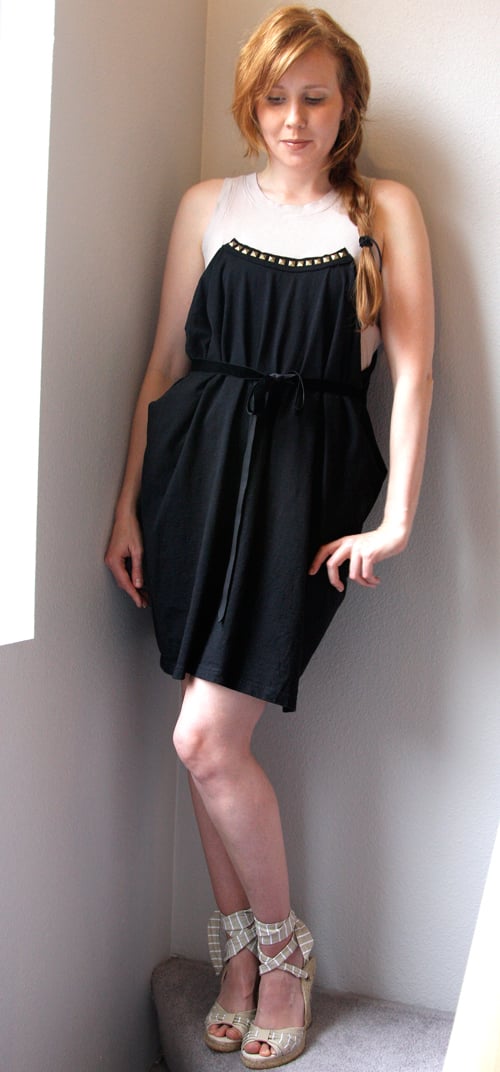
Without the belt, hands in pockets.
Belted with a velvet ribbon.
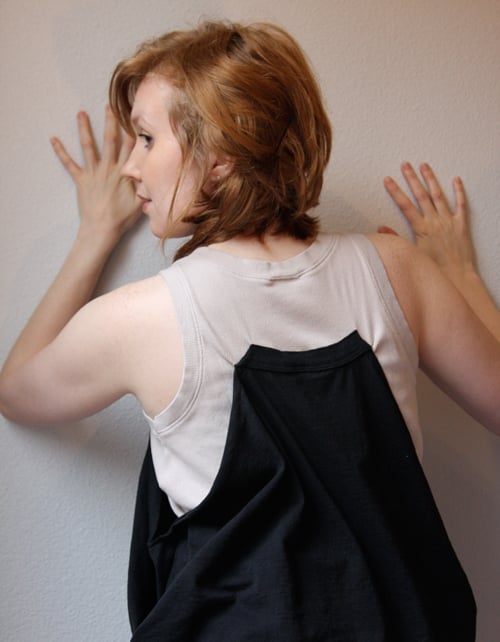
Tip: If you feel the weight of the t-shirt distorts the tank too much, sewing the sides of the tee to the tank will help eliminate the “pulling.”
Wear with some espadrille wedges and a cool pair of shades for a chic casual look as the mercury rises.
I’d love to hear your feedback everyone!
xoxox
Carly
for Threadbanger Blog Projects
Save
Leave Comment
Mar 29, 2010 | DIY
(from zippermanufacturers.com)…Buy a metal-coil non-separating black zipper from a sewing supply store…
for a whole lot less.
I’m onto you, Forever21! You thought if you waited a year and a half, no one would notice you’ve knocked off Alexander Wang’s skirt (shown above, from the Lucky Magazine August 2008 issue – taped into my “inspiration files”)
Well – haha! The ruse is up.
I’ve now snapped up the Tiered Skirt from one of your stores, and will be adding a zipper and black waistband shortly – to make my very own Alexander Wang Ruffled Skirt lookalike!
$495 vs. $29.79 (the zipper is $4.99)….who is the wiser now, hmmmmm?
xoxox
Carly
Leave Comment
Mar 22, 2010 | DIY
*Forever21 coat (similar here)
*Forever21 DIY-studded cardigan
*Target striped 3/4-length sleeve shirt (similar here)
*silver horseshoe-stamped necklace I won from Lucky Magazine
*Forever21 rhinestone two-finger ring (similar here)
*Forever21 gold chain ring (similar here)
*H&M zipper skirt
*self-made leggings
*unknown wedge-heel booties (something kinda similar here)
So I’m sure you’re all wondering why I’ve been MIA for the last couple days, and what on earth I’ve been doing. In the meantime…
Spring has finally arrived here in Portland, and the weather has been beautiful.
It’s been time to break out the ol’ lawnmower…
Run for your life!
Find leprechaun gold on St. Patrick’s Day…
Walk the dog…
I refuse to be walked. Oh, and may the Force be with you.
And watch the plum blossoms fall, like light pink snow, on the front lawn.
I, meanwhile, have been sick.
We got off the plane 2 Mondays ago, and I felt a tickle in my throat. “I’m just dehydrated,” I thought…
And guzzled tons of water Tuesday, but felt increasingly worse. “I’m just jetlagged,” I thought, and endeavored to catch up on tons of sleep, guzzled more water…
But by Thursday it was evident I had a head cold. I sprung a 101-degree fever, had a runny nose, and unbelievable body aches and pains (and it wasn’t from dragging all our luggage around!)
By Sunday last week it felt like the cold was on its way out, so Monday morning I met up with a friend I hadn’t seen in awhile, and we hung out and talked for about 3 hours, me sucking on Halls and downing honeyed green tea the whole time.
I felt an annoying tickle in my throat again, but still had sinus pressure and a runny nose from the cold that was on its way out. So I drank TONS of water, tea, and guzzled probably half a honeybear of honey.
Last Tuesday came, and I had no voice.
No voice whatsoever.
I could only speak in a raspy whisper, and in a squeak here and there. At some points I couldn’t even whisper at all – my mouth was forming the words, but it was like there was no sound passing my lips.
I haven’t had laryngitis this bad in at least 15 years, so it was a shock to say the least.
I read on the Internet (that most reliable source of information) that the best cure for laryngitis is to let the virus run its course, get plenty of rest, and not use your voice. Easier said than done when you have a 4-year-old.;-) And salt gargles, which I’ve been doing.
So, since my blogging routine is usually wait for Lil Tot to fall asleep around 8:30 PM, then sneak out of bed so as not to wake him, head for my computer, and blog for the next 4 hours, this was totally ruined by the get plenty of rest suggestion, and I’ve been sleeping 10-12 hours per day (!) since Tuesday in a desperate attempt to get my voice back.
Friday I finally got a trim, since I’m growing my hair out it’s kind of in that shapeless, can’t-do-anything-with-it stage.
It really did feel like the First Day of Spring, with the warm weather, and the sunshine. So I broke out my fave blue coat, the one for some reason complete strangers like to complement me on when I wear it.
It has a lovely, striped satin lining. To think it was only $39 on sale at F21!
(no longer available, tho you can get something at Alloy where I’ve linked above.)
So these are my showing-off-my-new-hair-and-my-newfound-finally-not-just-a-whisper-voice (more like heavy-smoker, husky-phone-sex-old-lady-voice) photos.
Useful padlock bag from Aldo that was around $40. Waaay better than a Paddington!
I also wanted to share my studded cardi that I made a little while ago. A great way to dress up a regular black boyfriend lightweight cardigan, silver studs around the edge elevate it from casual to something much, much better. (And these cardigans been all over Vivi magazine for the past couple months if you happen to have caught a glimpse of them!) Interestingly enough, I couldn’t find any for sale in the U.S. and a reasonable price. (And Forever21 hasn’t done a knockoff, something I’m a little surprised at still. Doing a quick search for a studded cardi at ShopStyle will produce a couple similar ones…but at a couple hundred dollars each. I mean, come on.)
So a quick little DIY for ya:
———————–
How To Make a Studded Cardigan
You Need:
*boyfriend cardigan (like this one from Target)
*1 (gross) packet of 7mm Square Hotfix Nailheads (silver) from i-kandi.com
*Hotfix Applicator tool
*piece of scrap cardboard
Why heatset studs instead of pronged? Because they are far, far lighter…and easier to set on a lightweight knit such as this.
Place the cardboard directly underneath the front of your sweater. (You may have to shift the sweater placement as you affix studs around the neckline.) I just placed them about 1.5″ apart along the front edges of the cardigan, and along the top edges of the pockets. (You use the large flat attachment for the applicator tool, press down lightly onto the nailhead you have already placed on your sweater, and hold for about 15 seconds. Repeat for each stud, all the way around the neckline, and on the top of the pockets.) I love the finished effect!
Pretty simple, eh? (And yes, my cardboard is from an IKEA box. I do love IKEA.;-)
————————
I didn’t realize until after I’d received my cardigan in the mail that the particular one I’d ordered had a detachable scarf with the cardigan’s pockets on it. (Don’t ask why I didn’t realize this; I’m an idiot.) I sewed the scarf down onto the cardigan and added the studs; now faced with the problem of the cardigan no longer being able to button and the back of the neck rolling absurdly because of the extra material from the scarf…surgery on this cardigan needs to be attempted soon. I just haven’t bothered with it just yet.
Here you can see the little scarf-piece I haven’t dealt with yet.
I also can’t believe I found these boots last week at the Buffalo Exchange for $15. I’ve concluded that the person who sold them to the Buffalo Exchange must have been legally insane…because you’d have to be ker-azyto willingly give up this cute little pair. I was actually looking for a pair to DIY my own lace-up Ann Demuelemeesters…and I found these instead. They are adorable, right down to the little fold-over at the top, and surprisingly comfortable. The only clue to their origin is the stamping in the footbed…which could read “F21” or “F24” depending on how you look at them. Does anyone recognize them from a Forever21?
Friday I went to bed praying that I would not sound like a 3-packs-a-day-smoker for this networking event I was aching to go to on Saturday, since I am in the market for a full-time J-O-B and refuse to work at Burger King. (apologies all who work at Burger King.)
So I am currently massively behind on everything from housework to going through my mail to answering email (only 53 new messages this morning, thank god) to posting here to formspringing. Sorry, sorry, sorry.
Will get to everything slowly as my voice finally seems to be coming back, just as slowly, unfortunately…and now Lil Tot has now caught whatever I had.
Plus…okay, another reason I’ve been reticent to take/post outfit photos…or really do anything…is that I’ve gained 7 pounds while in Hawaii.
Can you see it in my face? (I put on weight in my face first, #$%@ing genetics.)
I honestly don’t know how it happened. I thought I was being careful, but obviously too much time spent with my computer while others were frolicking on the beach, too many giving in to decadent food and dinners and full buffet breakfasts….ugh. I’m pretty annoyed with myself since I usually only swing about 3 pounds above my usual set-point throughout the given month…but this…puts me right back where I was last year, before beginning the hell that was P90X.
Funny how a slightly higher number on the scale can totally defeat your willpower to do anything, isn’t it? Nevertheless, I am glad Spring is here! (even tho my garden obviously hasn’t realized it yet LOL)
Anyway, thank you all so much for commenting during my lapse, and asking questions and giving me feedback…as well as entering my Cold Plasma Giveaway…which I’ll be announcing the winner to tomorrow!
You guys are the best.:-)
xoxoxo
Carly
Save
Leave Comment
Jan 24, 2010 | DIY
 Blame it on Rachel Zoe and that fabulous vintage fox fur hip-length vest. The F/W 2010 runways followed suit, and fur – both real & faux – abounded. Designers such as Barbara Bui, Antonio Berardi, and Christian Dior made faux fur a must-have, while the release of Spike Jonze’s “Where the Wild Things Are” in October 2009 put all things furry front & center. But why buy when you can easily DIY? This stole is a quick and easy project – very Marilyn Monroe-fabulous, and totally guilt-free. Here’s how:
You Need:
*a piece of faux fur, at least 45″ wide by 12″ tall (this Tissavel faux fur is high quality, has a plush feel and super-luxurious hand)
*piece of satin or poly acetate for the lining, same size
*matching thread
*large sew-on snap set
*brooch (optional)
*24″ of satin ribbon cut into two 12″ pieces for a ribbon-tie (optional)
TOOLS:
*box cutter or razor blade
*scissors
*pins
*sewing machine
*needle for wovens
*skewer or knitting needle
*hand-sewing needle
CUT OUT THE FABRIC PIECES: 1.Cut the faux fur. First, though, a tip about cutting any kind of fur, both real & fake: never ever use scissors, or cut from the front (fur) side. Why not? Because you’ll chop right through the fur itself, giving it a weird-looking “haircut” that will make your finished piece look anything but. (Nobody, not even a fur stole, wants to wear a fur mullet. 😉 To cut like a pro, turn the fur over so the underside is facing upward; this is also the time to make sure the nap is laying down (ie. all the fur hairs are pointing down toward the bottom of your stole). Then use the box cutter or razor blade to delicately cut out a rectangle that is at least 12″ wide and 45″ long. By making it 10-15″ longer, you can wrap your stole scrunchie-style around your neck, belt it, or even rock it halter-style vest, cinched together with a fabulous statement belt.
2. Use the box cutter or razor to round off the corners.
3. Cut the lining: The cut-fur piece will act as your template when you cut out the satin lining. First place the cut-fur piece onto the satin, fur side down against the back side of the satin. Then carefully cut out the satin lining, taking care to not accidentally trim off any of the fur.
 SEW IT TOGETHER:
4. Place fur and lining right-sides together (ie. fur side next to the shiny side of the satin), and match up the corners. Pin together. Tip: Satin is slippery when you sew it, so be sure to pin in more places than you think you will need…you can’t overpin!
Optional: Add a ribbon-tie using a 12″ piece of ribbon attached to each side of the faux fur, the end of each ribbon piece sandwiched between the lining and the fur. (The long end of the ribbon needs to sit inside the pinned stole pieces.) Pin the ends of the ribbon down to the edges.
5. Sew the fur to the lining, Starting about 3/8″ to 1/2″ in from the edge (your seam allowance), sew the fur to the lining – but not all the way around. Along the bottom, leave about 6″ unsewn.
6. Around the sewn edge, trim away the excess fur.
7. To turn the piece right side out, pull it through the 6″ gap you left unsewn (in Step 5). Optional: If you added a ribbon tie (Step 4), the ribbons will now be on the outside of your stole and serve as closure ties.
8. Finish the remaining 6″ unsewn edge by gently tucking the excess 3/8″-1/2″ faux fur and the lining fabric into the hole. Close the hole by topstitching as close to the finished edge as you can.
ADD CLOSURE & FINISH:
9. Use a skewer, pencil, or knitting needle to pick the fur hairs out of the edge seams.
10. Try on the stole and decide where you want to place the closure. Mark it with a pin.
11. Hand-sew a large snap onto your piece. (If you made a ribbon-tie, this won’t be necessary.)
Optional: Decorate the front with a large, eye-catching brooch.
You’re done!
For a “I’m headed to the opera” look, wear your stole draped glamorously around your shoulders; to look more Russian-Anastasia, scrunch up closer to your neck. Mix it up with other faux furs in gray, leopard, or even multicolored – PreFurs.com sells high quality faux fur yardage, while Cornelia James and Charly Calder both sell chic finished items – and enjoy a fashionable walk on the wild side.
And yes, you look bananas in it!
Happy DIY’ing!
-Carly J. Cais, Contributing Editor
(as contributed to FashionTribes.com)
A note about this piece: I actually started out doing a DIY for a faux-fur vest, and then discovered a tute at P.S. I Made This – which I thought was so fantastic I lost the will to do mine. So if you want to do a vest – try those instructions out – can’t go wrong with just cutting and wearing!:-)
Have fun any way you try your flirt with the faux!
Leave Comment