Who wants to learn how to do lumi photo print inkodye?? What is lumi photo print? Well, it’s a fun alternative to screenprinting that uses direct sunlight to transfer photos to fabrics – and Create and Craft has the perfect lumi photo print kit to get started. I wanted to share this neat video with all of you because although they make a wall hanging in the video, you could make anything, including photo-print bags, scarves, or even a cool graphic T-shirt sporting your favorite photography.
Who wants to get started with Lumi Photo Print? I definitely want to try it as my next project for Summer!
Hi friends! It’s been awhile since I’ve shared a DIY here, for many reasons.
Life took over for awhile.
But I’m back – with a fun and easy DIY for you all to try out! Big, bejeweled pendant chandelier earrings have been on-trend for awhile now…but unless you’re planning on whipping out that soldering torch and applying to your rhinestones…they’re a little hard to make. Enter translucent vinyl PVC as a backing – plus some strong glue – and you don’t ever need to pick up that pesky torch. Here’s how to make your own designer-style illusion jeweled chandelier-style dangle earrings:
How To: 1. Lay out the beads on a flat surface to determine placement of the rhinestones.
2. Use a generous dab of glue on the back of each rhinestone to glue it onto the transparent PVC vinyl. Space your rhinestones apart to allow for cutting them into separate pieces if you desire.
3. Once dry, use scissors to cut around the rhinestones. (I chose to cut around some clusters of rhinestones separately so I could join them with jumprings for more dangle.) Make sure to round your corners.
4. Glue the earring pad onto the back of the earrings, and allow to dry.
5. Use an awl to pierce the vinyl for each separate rhinestone cluster that you want to connect, and at the middle of the bottommost rhinestone cluster, near the edge.
6. Connect a Drop Pendant to the bottom of the earring with a large jumpring.
7. Connect all the pieces with jumprings to complete your earrings.
And that’s it! They’re surprisingly stable and will withstand some wear (though I wouldn’t recommend running obstacle courses in them).
I also made some alternate-colored ones in the trendy asymmetrical earring style.
I love how they look disconnected – almost floating – above your shoulders – utterly utterly chic with a backswept ‘do and a pretty necklace for Spring.
Connecting with people when we all have vastly differing schedules can be a big hassle… and being able to chat or share via video is a great way to connect. Skype is the affordable way to stay in touch about the things you care about – whether it’s just checking in, holding virtual meetings, or even deciding on a great outfit before a big event.
My parents are Australian, I moved to Japan when I was 11 and lived there 6 years, and I’ve also lived in rural New Jersey, Virginia Beach, Philadelphia, Tokyo, Yokohama, Honolulu, and now Portland, Oregon. All of my extended family lives in either Australia or Japan – and my friends are scattered the world over. Skype has been a necessary facet of my life for years as a way to stay connected with everyone – from my kooky friend Lenna in London, my East Coast bestie Jenn in Tennessee, my cousin Sam in Australia, and my mom in Tokyo.
Since I’ve been writing Chic Steals for 7 years now, Skype has come in super-handy in a number of ways. For a year I was producing a podcast called Creatively Chic in partnership with WebTalkRadio.net, and Skype was instrumental in allowing me to conduct interviews with people in faraway places (including Tom and Cat from the CutOutandKeep.net team in London!) with crystal-clear, recordable voice quality.
Checking in with fellow blogger Jenni of A Well-Crafted Party about an upcoming Portland Bloggers’ event
More recently as an active member of Portland Bloggers, it’s allowed me to connect with local blogger friends quickly and accurately – with bonus video. Sharing a new affordable find I scored at Goodwill? Asking a “what ideas do you have for DIY’ing this piece” with my blogging buddies? Touching base about outfits before a big blogging event so we don’t accidentally show up wearing the same thing? Skype has proven itself useful – and priceless – time and again.
What do you guys think of this sparkly cardigan? Too much?
I love that I can use it on my phone and connect with other people for a quick check-out-this-necklace-stack check-in… even if they have a different phone than I do! Skype works regardless – and it’s FREE. It’s fun, it’s quick, it’s affordable, and it’s easy – what could be more chic?
Adding embellishments to pieces (crystals, studs, trim, iron-ons etc.) is one of the easiest ways to breathe life into your clothing and accessories and give them a whole new makeover. I’ve done a number of DIYs in the past that involve different materials and techniques (like my DIY Vinyl Eyelash Applique T-Shirt, DIY Sequin Trompe L’oeil Peter Pan Collar T-Shirt, and DIY Jennifer Behr Spiked Turban for example). I’ve found a number of tools are extremely useful in adding all those bits ‘n’ bobs (they save a ton of time!) – and here are my faves:
For poking holes for studs and screw-spikes, you need an awl. Period. This will make tiny precise holes (NOT slits like scissors) and the spike screw-thread will do the enlargening itself. Much better to cause as minimal damage to the fabric as possible. The hardwood handle allows for long usage without fatigue in your hands (and if you’re embarking on a large-scale studding or spiking project, you know exactly what I’m talking about!).
TOTALLY different from regular cotton mercerized or polyester thread. Did you know? I didn’t for a long time – and I’d been sewing on buttons using completely the wrong thread for like FOREVER. It’s thicker, stronger, and more durable than the regular threads, so get this if you are sewing on any buttons or button-like embellishments.
You’ll need this as a double-security for the ends of trims that could fray when washed. If they can’t be heat-sealed with an open flame (like they have beads, sequins, or are mostly cotton) then add a daub of this on the ends to prevent fraying.
Marking chalk set – I use this SOOOO much! I can mark with a different color than for the sewing lines or matching lines when making a piece, and it stays fairly sharp and accurate. I really love this little tool.
I use this mostly for the mini-iron capabilities. Not completely necessary (in a pinch I’ll just grab my regular size iron and be really, really careful) – but this works great for larger iron-on embellishments that don’t fit the Hotfix iron tip, and for small appliques. I don’t particularly like the hotfix tip (not enough options), but the cutting tip is useful for cutting stencil vinyl.
Needed for rhinestone placement and setting. And when you’re going through a lot of stones in an intricate design, this will really cut your workflow time in half.
Multi-foot set – if you’re doing embellishments that require a sewing machine (like adding ruffles, or leather pieces, or pearl piping) — you will need a ruffler foot, piping foot, or Teflon foot to deal with these different materials and make the whole process faster. (the pack pictured is for low-shank machines)
And of course a screwdriver for tightening screw-spikes, a lighter for heat-sealing trims, and a pair of scissors for cutting.
FTC Disclosure: This post contains affiliate links, which means I make a small commission if you click and buy something through one of the links above. My full Disclosure Policy is here.
I’m trying out Marsala, PANTONE’s 2015 Color of the Year, and I have to admit, it’s not too bad. I can get into a rich, deep burgundy when paired with overall neutrals, like my favorite soft greys and blacks. Add a bit of impact with a similar lip color, dark around the eyes, and it works. It still reads Fall/Winter to me, so time will have to tell if I can incorporate this into a more Spring-y ensemble. Like an Iron Chef Fashion Challenge. Except with…kidneys.
Even if you’re not ready to jump on the Marsala bandwagon yet, I’m sure you still have dark, rich colors in your wardrobe that you want to keep looking dark and rich all year round, wash after wash. (For me it would be my beloved charcoals, blacks, and navies that I’m most concerned about.)
[Tweet “Faded clothing = definitely not in fashion. #fashiontip #clorox2”]
That’s why Clorox has developedClorox® 2 Darks & Denim, formulated with 2x the color boosting power and removes 4x more stains than are removed with pre-treating. Plus it won’t cause fading of your beloved darks.
HOW TO REMOVE DEODORANT STAINS FROM DARK CLOTHING
I don’t know about you, but I’m always getting white deodorant residue on my dark tops when I put them on – which leaves me scrubbing furiously in the morning with a pair of pantyhose to try and remove the most visible. But when it comes time to wash you want to remove every last trace of deodorant lest it start to build up on your fabrics (yuck!). You can apply liquid Clorox® 2 Darks & Denim directly to the deodorant stain and rub in. Wait 3-5 minutes (don’t let it dry on the fabric), then wash immediately in the hottest water recommended on the care label with detergent and additional Clorox® 2 Darks & Denim based on your load size.
HOW TO REMOVE OTHER TOUGH STAINS FROM DARK CLOTHING
For tough stains, like wine coffee and grass, be sure to pre-treat. First, remove the garment: do not treat clothing while wearing it. Remove all loose dirt from the fabric and blot wet stains with a clean absorbent cloth. Apply liquid Clorox® 2 Darks & Denim and rub it in. Wait several minutes – don’t let it dry – then wash with like colors.
HOW TO KEEP YOUR DARK DENIMS FROM FADING
I love me some dark denim, but sometimes the faded look is not what I’m going for. Though I wash my dark jeans much less than my light, faded jeans, when it comes time to wash I will bundle them all together to save water, and use Clorox® 2 Darks & Denim for the load. Plus I don’t dry my dark jeans in the dryer; they are all air-dried, and come out of the wash looking just the same as when they went it (especially important for brand-new jeans where the dye runs!)
Hope that gives you some pointers on how to keep your dark colors – including the controversial Marsala – just as deep as the day you got them! Do you guys have any tips for keeping your darkest darks perfect?
Do share in the comments!
xo
Carly
FTC Disclosure: I was sent an Old Navy top from Clorox to incorporate into a post. I have not been compensated in any other way. The above opinions are my own. This post contains affiliate links, which means I make a small commission if you click and buy something through one of the links above. My full Disclosure Policy is here.
Carly J. Cais I am a DIY’er, designer, sewist, maker, and marketer. Chic Creative Life is where I share what I do, and help others bring their unique style into their own lives.

 Hi friends! It’s been awhile since I’ve shared a DIY here, for many reasons.
 Enter translucent vinyl PVC as a backing – plus some strong glue – and you don’t ever need to pick up that pesky torch. Here’s how to make your own designer-style illusion jeweled chandelier-style dangle earrings:
 1. Lay out the beads on a flat surface to determine placement of the rhinestones.
 2. Use a generous dab of glue on the back of each rhinestone to glue it onto the transparent PVC vinyl. Space your rhinestones apart to allow for cutting them into separate pieces if you desire.
 4. Glue the earring pad onto the back of the earrings, and allow to dry.


 Happy DIY’ing!


 : BB Dakota. Tabbed Clutch: Lagunamoon (Japanese; old).
  I’m trying out
  I can get into a rich, deep burgundy when paired with overall neutrals, like my favorite soft greys and blacks. Add a bit of impact with a similar lip color, dark around the eyes, and it works. It still reads Fall/Winter to me, so time will have to tell if I can incorporate this into a more Spring-y ensemble. Like an Iron Chef Fashion Challenge. Except with…kidneys.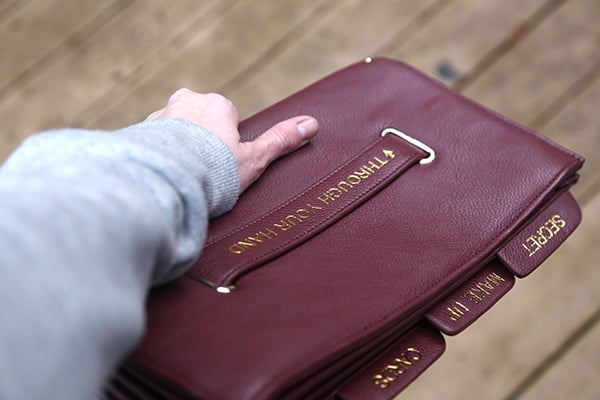


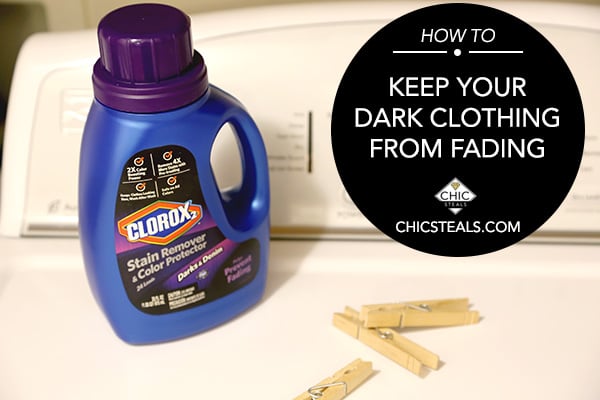 Even if you’re not ready to jump on the Marsala bandwagon yet, I’m sure you still have dark, rich colors in your wardrobe that you want to keep looking dark and rich all year round, wash after wash. (For me it would be my beloved charcoals, blacks, and navies that I’m most concerned about.)
 HOW TO REMOVE DEODORANT STAINS FROM DARK CLOTHING
 Do share in the comments!










