May 28, 2010 | DIY
 These sunglasses (a dupe of the Alexander Wang for Linda Farrow zipper sunglasses) are a bit fiddly to make, but the results are totally impressive! My tutorial was featured in Free Magazine, the official magazine of Club 18-30.
 Those of us stateside may not be familiar with Club 18-30, but for our friends across the pond it’s sort of known as Europe’s version of Club Med (except catering to a younger clientele, hence the name).
My DIY Alexander Wang Sunglasses have been featured in the Summer 2010 issue, which is available in all Club 18-30 destinations from May – October. (Available in 10 countries, including Bulgaria, Crete, Cyprus, Turkey, and Ibiza.)
Unfortunately they spelled my name wrong (there’s no U in it) – but ohwell! A feature’s a feature!
Since I submitted this in February, in the meantime Style Hurricane also DIY’ed her own version using a real zipper around the edge of the sunglasses.
My version is a lot more labor-intensive, but I was going for as exact a copy as possible.:-) Whichever way you go, now these fabulous designer-style sunnies can be yours at a fraction of the price!
Happy DIY’ing!
xoxox
Carly
Leave Comment
May 4, 2010 | DIY
 With Spring officially here and Mother’s Day just around the corner, I’ve had flowers on the mind. But not just the ones growing in my garden – handmade ones, using scraps of fabric from a number of past projects. I’ve posted before about one of my favorite flower-making books, “Ima Sugu Tsukuritai Co-saju” [“Corsages I Want to Make Right Now” Bunka Publishing, 2006].
I shared the camellia flower pattern before, so I’ve reposted it below for you guys:
My English translation is above. The book page is 8 1/8″ wide by 7 7/8″ high if you want to print it out, in order to make sure the petal pattern is sized correctly. The pattern requires the use of a round-headed stylus (also called a “cup”) in order to create the rounded, 3D-effect to the petals. Not completely necessary, but it helps create a finished, professional look to your corsage.
From last year’s Men’s Shirt to Cute Summer Shirt Dress tutorial that I wrote, I used some extra leftover fabric to make a carnation corsage.
Here is the how-to and pattern below:
Here are a couple more projects in the book…a dahlia:
And a lush camellia:

Okay…I’m all translated-out!
If you would like to check out more reference books in English for making fabric flowers, two of my favorites are Heirloom Ribbonwork , which constructs flowers out of ribbons, and Handmade Flowers from Paper and Fabric
 , which has more paper flower projects than fabric, but the projects can easily be adapted.
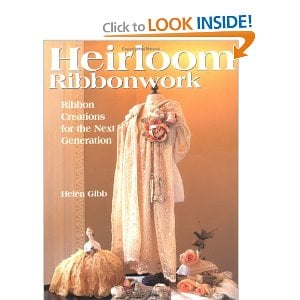

Both are incredibly inspiring and have you making different types of fabric flowers than just roses (which have how-to tutes all over the internet already)…but ribbon daffodils? velvet bouvardia? If you were patient and had a lot of time – they would make a beautiful bouquet for Mother’s Day, that lasts forever. Lovely blooms will break up any DIY monotony.
Have a flower-filled day!
xoxox
Carly
~If you liked this post, please share it!~
Leave Comment
Apr 28, 2010 | DIY
 After spotting this editorial in Lucky Magazine back in winter, I decided I wanted a foldover-style boot too!
  So chic – and it visually slims up your legs, working in both casual and more edgy ensembles. But since I always make instead of buying new unless I absolutely must, I’m not going to plonk down $199 on a boot…especially when I already have a whole bunch of shorter boots that will work perfectly as the base (see below).
 Here’s how to make your own version, using an old beat-up leather jacket: (more…)
Leave Comment
Apr 7, 2010 | DIY
Of course, now that I’ve written this all up I see that Style Hurricane has posted her own tutorial, featured in Foam Magazine. Well gosh darn golly gee now I feel silly. In any case, here’s the tutorial I’ve been working on (completely independently – really!!)…
Inspired by a Givenchy piece above (featured on Who What Wear awhile back), I made my own spiked headband. (I’m not paying $500 for the Givenchy one, at any rate! This project will cost you, at the most, $12 if you don’t already have the spikes.)
You Need: (more…)
Leave Comment
Jan 24, 2010 | DIY
 Blame it on Rachel Zoe and that fabulous vintage fox fur hip-length vest. The F/W 2010 runways followed suit, and fur – both real & faux – abounded. Designers such as Barbara Bui, Antonio Berardi, and Christian Dior made faux fur a must-have, while the release of Spike Jonze’s “Where the Wild Things Are” in October 2009 put all things furry front & center. But why buy when you can easily DIY? This stole is a quick and easy project – very Marilyn Monroe-fabulous, and totally guilt-free. Here’s how:
You Need:
*a piece of faux fur, at least 45″ wide by 12″ tall (this Tissavel faux fur is high quality, has a plush feel and super-luxurious hand)
*piece of satin or poly acetate for the lining, same size
*matching thread
*large sew-on snap set
*brooch (optional)
*24″ of satin ribbon cut into two 12″ pieces for a ribbon-tie (optional)
TOOLS:
*box cutter or razor blade
*scissors
*pins
*sewing machine
*needle for wovens
*skewer or knitting needle
*hand-sewing needle
CUT OUT THE FABRIC PIECES: 1.Cut the faux fur. First, though, a tip about cutting any kind of fur, both real & fake: never ever use scissors, or cut from the front (fur) side. Why not? Because you’ll chop right through the fur itself, giving it a weird-looking “haircut” that will make your finished piece look anything but. (Nobody, not even a fur stole, wants to wear a fur mullet. 😉 To cut like a pro, turn the fur over so the underside is facing upward; this is also the time to make sure the nap is laying down (ie. all the fur hairs are pointing down toward the bottom of your stole). Then use the box cutter or razor blade to delicately cut out a rectangle that is at least 12″ wide and 45″ long. By making it 10-15″ longer, you can wrap your stole scrunchie-style around your neck, belt it, or even rock it halter-style vest, cinched together with a fabulous statement belt.
2. Use the box cutter or razor to round off the corners.
3. Cut the lining: The cut-fur piece will act as your template when you cut out the satin lining. First place the cut-fur piece onto the satin, fur side down against the back side of the satin. Then carefully cut out the satin lining, taking care to not accidentally trim off any of the fur.
 SEW IT TOGETHER:
4. Place fur and lining right-sides together (ie. fur side next to the shiny side of the satin), and match up the corners. Pin together. Tip: Satin is slippery when you sew it, so be sure to pin in more places than you think you will need…you can’t overpin!
Optional: Add a ribbon-tie using a 12″ piece of ribbon attached to each side of the faux fur, the end of each ribbon piece sandwiched between the lining and the fur. (The long end of the ribbon needs to sit inside the pinned stole pieces.) Pin the ends of the ribbon down to the edges.
5. Sew the fur to the lining, Starting about 3/8″ to 1/2″ in from the edge (your seam allowance), sew the fur to the lining – but not all the way around. Along the bottom, leave about 6″ unsewn.
6. Around the sewn edge, trim away the excess fur.
7. To turn the piece right side out, pull it through the 6″ gap you left unsewn (in Step 5). Optional: If you added a ribbon tie (Step 4), the ribbons will now be on the outside of your stole and serve as closure ties.
8. Finish the remaining 6″ unsewn edge by gently tucking the excess 3/8″-1/2″ faux fur and the lining fabric into the hole. Close the hole by topstitching as close to the finished edge as you can.
ADD CLOSURE & FINISH:
9. Use a skewer, pencil, or knitting needle to pick the fur hairs out of the edge seams.
10. Try on the stole and decide where you want to place the closure. Mark it with a pin.
11. Hand-sew a large snap onto your piece. (If you made a ribbon-tie, this won’t be necessary.)
Optional: Decorate the front with a large, eye-catching brooch.
You’re done!
For a “I’m headed to the opera” look, wear your stole draped glamorously around your shoulders; to look more Russian-Anastasia, scrunch up closer to your neck. Mix it up with other faux furs in gray, leopard, or even multicolored – PreFurs.com sells high quality faux fur yardage, while Cornelia James and Charly Calder both sell chic finished items – and enjoy a fashionable walk on the wild side.
And yes, you look bananas in it!
Happy DIY’ing!
-Carly J. Cais, Contributing Editor
(as contributed to FashionTribes.com)
A note about this piece: I actually started out doing a DIY for a faux-fur vest, and then discovered a tute at P.S. I Made This – which I thought was so fantastic I lost the will to do mine. So if you want to do a vest – try those instructions out – can’t go wrong with just cutting and wearing!:-)
Have fun any way you try your flirt with the faux!
Leave Comment

 Those of us stateside may not be familiar with Club 18-30, but for our friends across the pond it’s sort of known as Europe’s version of Club Med (except catering to a younger clientele, hence the name).











